Embroidery patch
Introduction
Cloth patches (also known as fabric badges, cloth badges, embroidered patches, sleeve patches, uniform patches etc.) are small pieces of embroidered fabric that can be attached on cloth in various ways.
According to Wikipedia, “an embroidered patch, also known as a cloth badge, is a piece of embroidery which is created by using a fabric backing and thread. The art of making embroidered patches is an old tradition and was originally done by hand. High-speed, computerized machines have led to mass production.”
This page will include some general tips and technology for creating fabric badges. Embroidery itself is not covered here, e.g. read Stitch Era - creating embroidery patches or InkStitch - embroidery patch, that introduce the use of a specific embroidery software for creating patches.
Use of embroidery patches
There exist many uses of embroidery patches. The main one seem to be
- Branding patches carry a brand name plus logo. It typically can be found on expensive winter coats
- Skill patches can be found in many contexts, e.g. the Army, scouts, maker movements.
- Group identity patches, e.g. a Nasa mission, a police corps
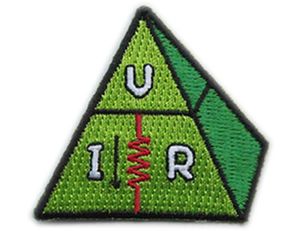
Badges can be used to document an achievement in various educational and learning contexts. Adafruit sells a variety of maker skill patches. The following pictures were made by Adafruit and found in their Skill Badges album on Flickr (retrieved August 2019].
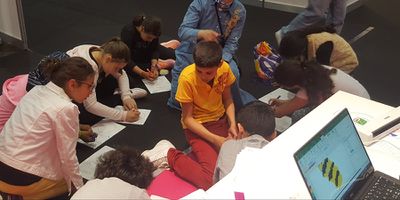
There seems to a lack of academic literature on embroidery skill badges. Even, the use of patch making in education is scarcely mentioned. Wolz et al. (2019) [1] [2] describe a computational making event where participants can create a patch. Daniel K. Schneider and collaborators organized various outreach events where participants create patches.
Sizes and forms
Sizes of patches can vary a lot, probably from 3cm to 15cm (1.2 to 6).
The typical size of a NASA mission patch seems to be 4 to 4.5 (10.16 - 11.43 cm). E.g. see the collection on Crewpatches.com which does indicate sizes. Its souvenir versions are 3 (7.62cm) but lack some details. Most versions of the well known NASA patch are about 3 (7.62cm). Recovery team patches are 5 (12.7cm), i.e. rather large.
Most patches are simply polygons, e.g. circles, rectangles or hexagrams. However, any form can be found as long as they are sewable.
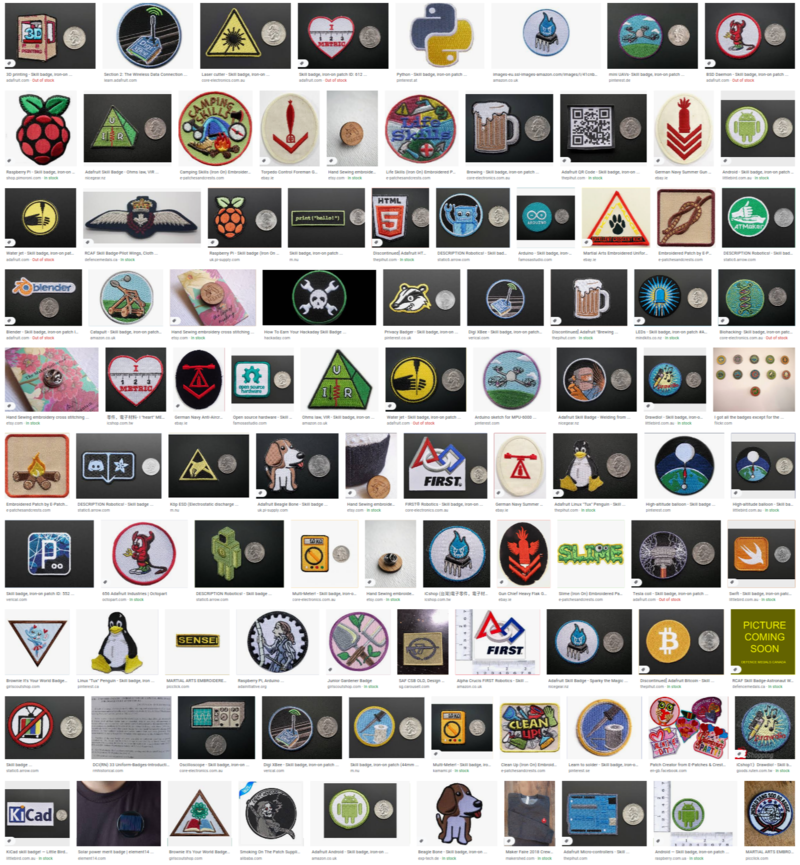
The following google image search embroidery "skill badge" -army -military on March 5 2020 gave the following results:
. The picture shows that a majority uses a simple geometric. Some adopt the form of the main drawing, e.g. a dog or a logo. A few use a geometric form plus an appendice sticking out.
Fabrics and stabilizers for patches
Choice of good and not so good fabrics
We recommend buying specialized fabrics for patch creation (in french: tissu pour écussons). So far, we identified three types of tissue:
1) Twill for badges is a good option if you plan to stitch larger badges with or without a background. Twill is a tightly cross-woven fabric. It has two different sides, one smoother than the other. You can embroider on either side, according to your taste.
- E.g. Twilly from Gunold or these from AllStitch. This tissue also can be laser cut.
2) Structured fabric that look like lock-stitch embroidery allow thread and time. E.g. STEP from Gunold. This fabric is a bit expensive, but saves a lot of time and thread. Also, prices on the market vary widely. e.g. in France 10 33x29 samples cost 55 Euros. If you need a single color then you may have to buy larger pieces.
3) Appropriate felt is also a good option. But make sure that it is fairly thick (e.g. 1.5mm), non-elastic (including when it is wet) and that it has a fairly smooth surface. Elastic felt leads to poor results, and really bad ones if you use a solvable stabilizer.
Otherwise, you can use tighly woven napkins, jeans, etc. but the result will not be as good since there will be stronger pull/push effects.
Stabilizers
As explained later, the fabric for the patch is usually not hooped but just put on top of a hooped stabilizer. Also recall, the stabilizer should not be "visible" around the edges. There are therefore two solutions
- Tear-away stabilizer
- Water-solvable stabilizer
One single layer can do if your stabilizer fabric is thick and stable, otherwise, use 2 or more layers if the stabilizer is thin.
We prefer using a self adhesive tear-away stabilizer that is hooped upside down. This way one can just put the fabric on top. After removing the patch, one then can "glue" a piece of the same stabilizer on top and restart, e.g. no re-hooping is needed. However, for high-quality 10cm badges we do use a water-soluble heavy plastic.
Patch templates for cutting
For unknown reasons, we either do 46mm, 62mm, 82x62mm, 80mm or 100mm patches. Below are some SVG files (single) or multiple rows and columns for a standard industrial laser cutter like our trotec or a Glowforge(fr). Cutting lines are red and "hairline".
You also can use another laser cutter or a simple cutting plotter, but you may have to adjust the color and the width of the cutting line.
Download: click twice until you land on the SVG page, then from the browser, "save as".
Single patches:
Series of 62mm patches. Our Trotec has a cutting area of 60 X 30cm, i.e. can handle 4 lines of patches and up to 9 columns.
Make sure that cut lines are really 0.01mm and 256 RGB red, if you use a Trotec. Sometimes, Inkscape forgets the width (no idea why ....)
Trotec 45W settings for Gunold STEP:
- Power = 30, Speed = 1.90, Hz = 1000
Glowforge settings for Gunold STEP:
- Speed = 200
- Power = 35
- Material thickness = 0.8 mm
Creating the fabric patch
A fabric patch is usually round but other forms exist. Size can vary from small (e.g. these nerd merit badges) to large, e.g. mission badges for astronauts.
Creating a fabric badge (also called embroidered patch) is not very easy and there exist several methods. Most methods require at some point the following stitch elements.
- A placement stitch outside of the border of your badge will help you positioning a precut patch before you embroider the rest
- A tackdown stitch inside the design borders will fix the patch in place
- A Cut Line inside a tiny bit in the design borders will fix the patch in place and allow you to cut of the tissue when you use the "cut in place" method explained below.
- A heavy Cover Stitch, i.e. a 3.0 to 3.5mm wide and 6 per mm dense zig-zag, is usually used to stitch a border. This is also called merrowing.
In addition to specific stitching elements you should choose a heavy and stable fabric (see above). We recommend using specialized tissue.
Creating badges uses similar tricks as creating appliqués and as with the former you could either use "pre-cut" or "trim-in-place" strategies. Therefore, you also can consult tutorials for creating these. Read our Stitch Era tutorial featuring the "trim in place" and "pre-cut" methods.
Below, we summarize several methods for creating patches.
Method 1 (one shot)
Not recommended, but fine for prototyping.
- Hoop a solid fabric using any kind of stabilizer.
- Stitch the design and remove it from the hoop
- Iron the badge if necessary
- Optional: Glue a iron-on adhesive (stabilizer) to the bottom. This will make it more stable but only can be used if the badge was fully stitched inside.
- Add some seam sealant (water-proof glue for textiles like Fray Check (Amazon US) or Prym fray check (Amazon fr)") to the borders (to prevent accidents when you cut). In french: colle anti-effilochage.
- Cut out the design
Source: How to make your own embroidered patches - cheap and easy DIY badges
Method 2 (pre-cut)
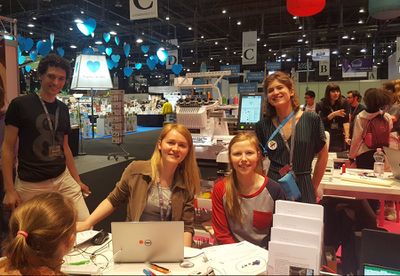
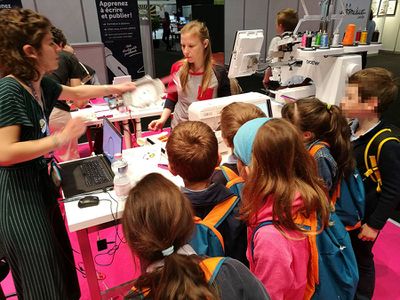
This is our favorite method and we used to create a few hundred different patches, in particular, during outreach events. These are documented in french, e.g. Broderie machine à la nuit de la science 2018 or Broderie machine au salon du livre 2018
- Cut out some fabric of the size of the badge. You can print out a paper version of the design and use it as model. We use our Trotec Speedy 100R 50Mw laser cutter with settings: power=22, speed=1.9 and Hz=1000.
- Hoop a reversed sticky stabilizer like Gunold Filmoplast (alternatively, a water soluble stabilizer or a tear away one, either strong ones or use 2 layers)
- Stitch the placement stitch (same as appliqué)
- Remove the hoop
- Place the cut-out fabric within the placement lines (or glue it)
- Put the hoop back
- Stitch an optional tackdown stitch followed by a the zig-zag border first.
- Then stitch the rest of the embroidery.
It is probably best not to stitch a background color. Otherwise you will have to manage a pull/push effect and also make sure that the overlap between border and background looks good. Instead, use specialized fabrics for batches that look good, e.g. Twilly or Step from Gunold. The zigzag border stitch should come first in order to make sure that it is correctly placed along the borders.
Source: How to make an embroidered badge and Pre-Cut Applique Tutorial
Trouble
- If the border does not stitch well, then change the size of the border zigzag
- Make sure that your needle is straight. Torn needles will create non-conformant geometry !
Method 3 (trim in place)
This method is interesting if you cannot pre-cut the shapes before (either because you don't have the machinery or because you cannot correctly compute the contours).
- Hoop some heavy stabilizer (water soluble)
- Glue a heavy fabric on top
- Stitch a tackdown stitch and and a cutout stitch. The former is a few mm inside and the latter about 0.5mm inside the top/bottom borders and almost on the left/right borders. Read Stitch Era - creating embroidery patches for an example. It is fairly difficult to find the right distances in a first try.
- Remove the hoop
- Cut out the fabric along the cutout stitch
- Put back the hoop
- Stitch the rest (background if present, then probably the border zig-zag next). The exact order depends on what you want to optimize ....
Inspiration: Trim in Place Applique Tutorial
Method 4 (trim in place reversed)
- Similar as above, but use an opposite order of design - border stitching
- Hoop some heavy stabilizer (water soluble or tear away)
- Glue a heavy fabric on top
- Stitch a tackdown and a cutout stitch
- Stitch the design (but not the border)
- Remove the hoop
- Cut the fabric along the cutout stitch
- Put the hoop back
- Stitch the border (after verifying that the dimensions are OK, if not, fix the model)
This method should not work too well since the badge could be distorted. Make sure to add appropriate pull compensation. See also the next method.
Method 5 (trim and rehoop)
This method is a sort of combination between the trim-in-place (Design is first stitched then cut along a cut line) and the cut-out method (patches are put on washable or tear-away stabilizer before stitching the border).
- Use a strong cutaway stabilizer and/or specialized stable fabric. You could stitch several copies at the same time
- Stitch a cut-out line first.
- Stitch the design next (but not the border)
- Remove the fabric and cut out the patch(es) along the cut-out line
- Hoop a washable or self-adhesive stabilizer
- Stitch cut-out lines for placement.
- Position the cut-out patches inside the cut-out line. Glue it if you use a washable stabilizer.
- Stitch the border.
Method 6
- Same as one of the above methods, but use an overlocking machine to create the border zigzag stitch.
An overlock machine, (overlocking or merrowing) wraps a thread around a fabric and also can cut.
Attaching the patch to the cloth
The easiest solution is to use a hot melt film, such as Heat N Bond and then glue it with a heat press or an iron. Gluing is done in two steps:
- Apply glue to batch
- Put cooking paper in the heat press.
- Put the patch upside down into the heat press.
- Put the foil on top of it (glue underneath, paper on top). Ideally its form should match the badge.
- Put cooking paper on top
- Heat for 2 seconds (MAX !!!) @ 200 degrees
- Remove the patch and remove the paper. The patch is now sticky with glue.
- Apply the sticky batch to the fabric
- Insert the cloth
- Put the patch with the sticky glue on top of it (glue underneath!)
- Put cooking paper on top
- Heat for 10 to 20 seconds @ 200 degrees Celsius.
The next easiest solution is use a permanent glue for textiles, e.g. UHU Textil, Super Fabric, Patex Made at home Textil-tissu, Patch Attach. Before you buy any of these, make sure to read online reviews. Some glues only sticks on some textiles !!
Gluing is not good enough for repetitive washing. You also should stitch the border if you plan to wash often. In other words, hot melt film or glue should be enough for fixing a patch on a down jacket, but not for a shirt.
Otherwise, just sew...
A final solution that works well for sweaters is to create a removable patch using just one side of a velcro. See the next section for an exploration of removable technology.
Technology for removable adhesion
So, far we did not find a perfect solution for badges that could stick to ordinary cloth and then be removed. The best solution is probably using double-sided removable fabric to fabric/skin tape (used to hold cloth in place) and the second best is removable hemming. Velco works very well on fabrics like knitted sweaters.
All of these should be tested with the fabrics to be used on in order to avoid damage.
Velcro pads
On any fabric
- Sew Velcro pads on the fabrics (works well, but is intrusive).
- An easier to use variant - Sticky Back for Fabrics - simply glues (no sewing needed). However, these will not survive repetitive washing. Also, the glue may not work with certain fabrics.
- Glue Poster hanging strips. These are a kind of velcro strips that glue to both the fabric and the patch. E.g. 3M Poster Hanging Strips
On sweaters
- Velcro pads like nerd merit badges stick well to a pullover. It comes with a small velcro dot to be put on the fabric, but the badge does stick without, but could maybe damage a delicate sweater.
Pins
- Use a simple safety pin
- Get a safety pin that can be glued to the badge
Glue
- Scotch Removable Restickable Glue Stick (formerly "post-it glue stick")
- There is a also some 3M spray (forgot it's name)
Using a non permanent glue (spray), but has to be tested for residuals on fabrics.
Double coated tape
The best solution is probably take some non-permanent tape sold under the name of Wardrobe solutions by Scotch.
Removable double coated fabric tape, e.g.
- Scotch Essentials Wardrobe Tape Strips
- Scotch Essentials Accessory tape circles
- Braza Double Sided Flash Tape
- Adribou Fashion Tape (Boydy and clothing tape)
These models should all or most stick to both fabrics and skin
Single sided fabric tape
- Scotch™ Removable Fabric Tape
This must be glued on the none sticky side to the fabric. Probably a bad solution since the sticky glue will wear out after a while.
Removable hem tapes / removable hemming tapes
- Gaudy Guru Adjustable Two Side Fabric Hem Tapes for Clothes
- Scotch Essentials Adjustable Hem Tape
- Hollywood Fashion Secrets Temporary Hem Tape
Tape not made for fabrics. There are removable double sided tapes that are not specifically made for fabrics.
- Scotch® Double Sided Removable Scrapbooking Tape
- Elmer E4005 CraftBond Double Sided Scrapbooking Tape
- 3M 238 Removable Double Sided Tape
- Scotch® Removable Mounting Squares
One variant has assymetric tack. The removable sides has low or medium tack and the other side is strong
- 3M 9425 Removable Repositionable Tape
- 3M Scotch 9415PC Removable Repositionable Tape
These probably do not work for textiles.
Removable glue not made for fabrics
'Removable adhesive gum, removable mounting, e.g.
- Scotch Removable Mounting
- Glue Dots
- Elmers reusable adhesive
- Mounting putty
Outreach activities
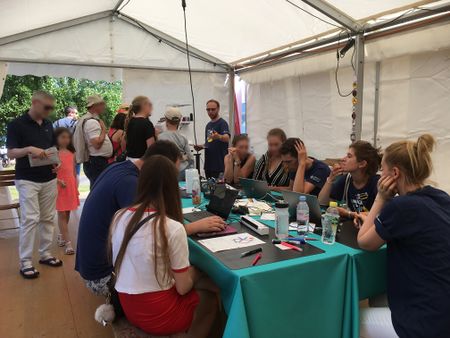
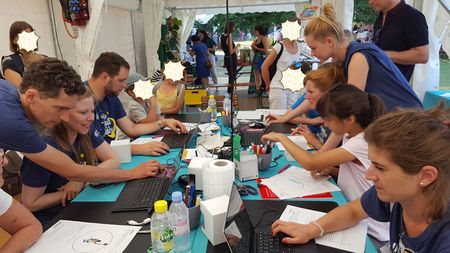
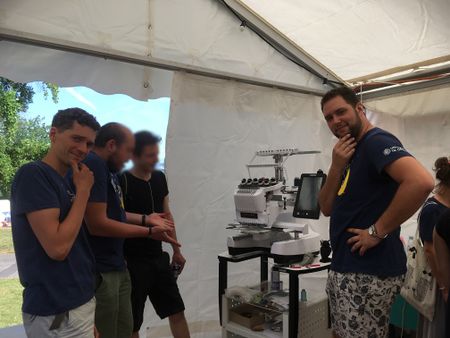
We describe various outreach activities that engage participants in creating badges in the sister wiki. for example:
- fr:Geneva Health Forum 2018 embroidery
- Broder pour changer (2018)
- fr:Broderie machine au salon du livre 2018
- fr:Broderie machine à la nuit de la science 2018
- fr:Onl'Fait: Introduction à la broderie numérique 2019
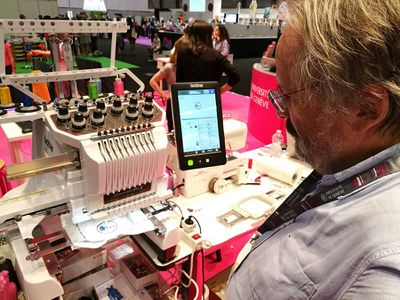
Geneva book fair 2018:
Broderie avec la Brother PR1050X
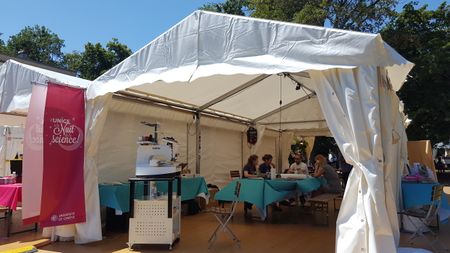
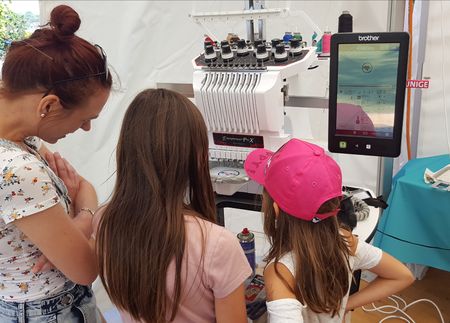
Geneva Night of Science 2018:
|
|
|

|
|
|
Links
Creating badges
- Patch it up (Tutorial at urban threads)
- How to make an embroidered badge (echidnasewing, 2017)
- Trim in Place Applique Tutorial
- Pre-Cut Applique Tutorial
- Meet the chevron (part 1), part 2 and part 3
Examples
- Mission patch
- http://www.spacepatches.nl/index.html
- http://www.collectspace.com/resources/patches_astronauts.html
- Patch collector (on Flickr)
Press articles and blog posts
- The oddly beautiful and sometimes disturbing artistic talent of the nation’s drug cops. By Christopher Ingraham, March 20, 2015. The Washington Post.
Books
Bibliography
- ↑ Wolz, U., Auschauer, M., & Mayr-Stalder, A. (2019). Programming embroidery with turtlestitch. In ACM SIGGRAPH 2019 Studio, SIGGRAPH 2019 (pp. 1–2). New York, NY, USA: Association for Computing Machinery, Inc. https://doi.org/10.1145/3306306.3328002
- ↑ Wolz, U., Auschauer, M., & Mayr-Stalder, A. (2019). Code crafting with turtlestitch. In ACM SIGGRAPH 2019 Studio, SIGGRAPH 2019 (pp. 1–2). New York, NY, USA: Association for Computing Machinery, Inc. https://doi.org/10.1145/3306306.3328009


