Stitch Era - creating embroidery from vector images
Introduction
This beginner's tutorial for the Stitch Era embroidery software explains how to go from imported vector images to embroidery without understanding much about digitizing. Under the condition that you start from a simple vector graphics file (not a *.png or *.jpg file) you will get a fairly instant reward.
- Next steps
- Stitch Era - creating embroidery from raster images. Create embroidery from simple and relatively clean raster images (e.g. *.png or *.jpg files)
- Stitch Era - adjusting stitch sections explains how to change parameters embroidery sections, e.g. stitch density, fill patterns, etc. after and auto-digitizing procedure.
- Stitch Era - vector graphics. You don't necessarily need to learn how to draw vector graphics that you then can convert to embroidery (stitch sections). However, you will be able to speed up your work and you also could reuse principles (e.g. Bezier drawing) for manipulating stitch sections as well as in other multi-media programs.
Vector graphics formats and file extensions
There exist two types of graphics file formats:
- Vector graphics are "mathematical" definitions of drawings and are in principle much easier to digitize. Vectors graphics are fully scalable, i.e. they will not loose quality if you change its size. Typical programs to create vector graphics are Inkscape (free), Illustrator and Corel Draw. Stitch Era can import SVG drawings or proprietary Corel Draw and Illustrator formats. Typical file formats are *.ai, *.svg, *.cdr, *.wmf and *.emf. Stitch Era includes its own vector graphics drawing program and it may be used in the first stage of designing an embroidery. You can use this module to fix imported vector graphics and/or to draw your own graphics objects.
- Bitmaps (also called raster graphics) define a picture, e.g. a drawing or a photograph, in terms of little dots (color pixels). Bitmaps, by definition are lossy in two ways: (1) You cannot resize a picture without loosing quality. (2) Most file formats allow to compress (reduce the size) of a picture in a way that will loose some information. Bitmap drawings that appear to be crisp are in fact not. However, most clipart found on the Internet are bitmaps, unfortunately. Digitizing bitmaps usually implies a first translation to vector graphics as you shall learn. That process is called vectorizing. You could directly digitize a cleaned up bitmap file to stitch sections, but I wasn't satisfied with the result and therefore will not introduce this in any tutorial. Typical bitmap file formats are *.png, *.jpg and *.gif. PNG and the older GIF are optimized for drawings, whereas *.jpg is optimized for photographies.
A short view of the design workflow
In this tutorial series we shall show how to create embroidery from both types of graphics formats, vector and bitmap. Basically the workflow of creating embroidery looks like this. Optional steps are in [...] (brackets)
[ bitmaps ] -> [ vector graphics ] -> stitch sections -> generated stitches
Stitch sections (also called embroidery objects) are some kind of embroidery-specific vector graphics that define surfaces (areas) and lines (path) in terms of how these are going to be stitched. This "how" is defined with many many parameters. Professionals may directly create stitch sections. Others often start from a computer graphic file. Translation from vector graphic to stitch sections is called digitizing. When it is done automatically (Stitch Era can do that) it is called auto-digitizing.
This tutorial will explain how to deal with vector graphics, in particular the open SVG Internet format for which one can free artwork on web sites like openclipart or the noun project. If you are interested in dealing with raster image files (e.g. *.jpg and *.png*) you later should go through the Stitch Era - creating embroidery from vector images tutorial.
Quality of (semi) auto-digitizing
Before you start reading the rest, let me make clear that embroidery created from images through auto-digitizing will not be professional. As you shall see, it is fairly easy to digitize a bitmap or a vector graphic. The result will be acceptable and fine enough for certain purposes. However there will we three major problems:
1) The result may not convey the message you would like it to. E.g. the embroidery may include too many details.
2) Nice embroidery doesn't follow the same visual design principles as screen or paper graphics, i.e. somehow the result just doesn't look good.
3) Most embroidery will be stiff, i.e. not very pleasant to wear. Typically, in computer graphics shapes are are put on top of each other, because it's easier to draw that way and you can't see through (unless a color is made somewhat transparent). When you produce two or more overlapping dense stitch areas, then you get stiffness. Luckily, Stitch Era offers tools to deal with this problem.
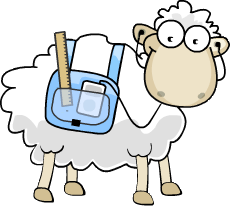
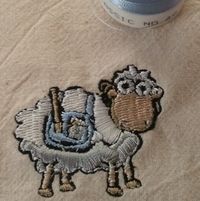
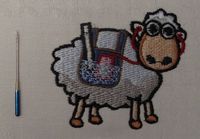
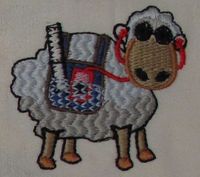
The pictures below show the difference between a simple auto-digitized embroidery as explained in this text and one that was redesigned as explained in Stitch Era - digitizing difficult images
 |
 |
 |
 |
That being said, simple auto-digitizing is the way to start and as you can see, after a day or two you already can produce designs that are nice enough to wear on your casual cloth :)
Digitizing of simple vector graphics
We found that digitizing vector graphics is much easier than digitizing bitmaps (see below). This is not a surprise of course. Vector graphics are clean mathematical descriptions of shapes (lines and fills) whereas bitmaps are just collections of pixels. Therefore, if ever you can, avoid starting with *.jpg, *.gif, *.png pictures. Digitizing photographs is another issue and much more difficult since you also will have to reduce colors, despeckle, smooth lines, etc.
Below is the rough procedure for creating embroidery stitch files from simple vector graphics. Stitch Era seems to be a fairly sophisticated embroidery suite and it can do much more. But starting with clean imported graphics files is probably the kind of stuff beginners would want to try first and in particular people who own either Illustrator or Corel Draw.
If can't find/produce a vector graphic that you would like to render as embroidery or if you have a nice bitmap (raster) image you would like to use, you can skip this section and directly jump to Digitizing_bitmaps.
So, let's look at the procedure step by step.
Prerequisites
You should install the free Inkscape program or own either Illustrator CS5 or Corel Draw. Both Illustrator or Corel Draw are rather expensive (unless you are a teacher or student).
The Inkscape (download) drawing program is free, open source and it runs on most operating systems (including Windows and MacOSX). Inkscape doesn't have the power of Illustrator, but it is a trusted and powerful standand Linux drawing program and not some kind of crippleware or adware. However since it is difficult to learn, you also should consider using a simpler program, e.g. Libre Office Draw and then export to SVG which can be easily imported into recent versions of Stitch Era.

Decide the right size
Big embroidery is more difficult stich and very big one is (almost) impossible. We suggest starting with sizes that correspond to the smaller standard hoops that come with your machine. E.g. our Brother PR1050X has 10x10cm and a 18x13cm small/medium and medium hoops. You can have the software a select a hoop for you when you use the wizard mode: Home tab New -> Embroidery wizard (complete), however we prefer doing it manually before importing a design.
To select a hoop size:
- Open the Home tab
- Click on the Hoops pulldown menu
- In the popup, select your brand (e.g. Brother) and select the size. Brand names do not really matter, but selecting a good maxium size of your embroidery is a good idea.
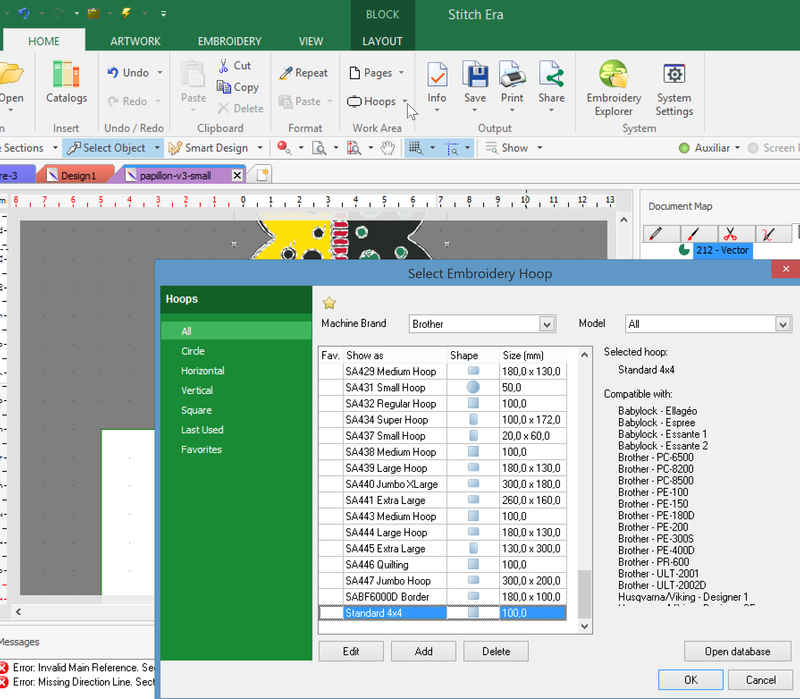
If you already imported a drawing, it may be in a bad place, i.e. not show within the hoop. to fix that:
- Select all (CTRL-A)
- Artwork / Layout tab
To Design->Center at origin
In case you need to reposition both vector graphics and embroidery sections:
- Make both Auxiliar and Embroidery visible
- Select all (CTRL-A)
- In the Block/Layout tab that you now should see: Click on
Center of Design
Get and import vector images
(1) Get a vector image
Finding clip art on the web is quite a nightmare (read Clipart for some tips). We got ours from http://openclipart.org. If you want to "play along"
- Point to this nice anchor.
- Click on "View SVG".
- Save the file using File->Save page as (normal browsers) or Right click->Save image as (IE).
Else, pick any other graphic from this repository. We suggest to start with a simple graphic, in particular if you never did any vector drawing before. Embroidery is low resolution process and it doesn't make sense to start from very complex fine-grained graphics. Also avoid any drawing that includes raster images. These cannot be imported.
Stitch Era can import the following popular formats: SVG, AI (Illustrator) and CDR (CorelDraw). DXF (Autodesk) and WMF are also supported. In older versions of Stich Era, depending on what graphics program you own, importing SVG files into Stitch Era was more difficult as explained in an older version of this article
(2) Import a supported format:
Click Artwork TAB -> Open Vector File
- Select the SVG format (if you stick to our example)
Optional: Edit the vector graphics
You now have the choice to edit this a bit if needed. In principle you better do any editing in the drawing program. Anyhow, in the example shown here, I used Stitch Era to change a few thing. Selecting the white lines was a bit tricky since I couldn't select these parts even after ungrouping. Anyhow, select the object and the LAYOUT tab, then in the "grouping" ribbon to the right, tick ungroup all. You also could ungroup in the context menu. Now open the Object Manager, select the white Bezier Curver and hit DEL.
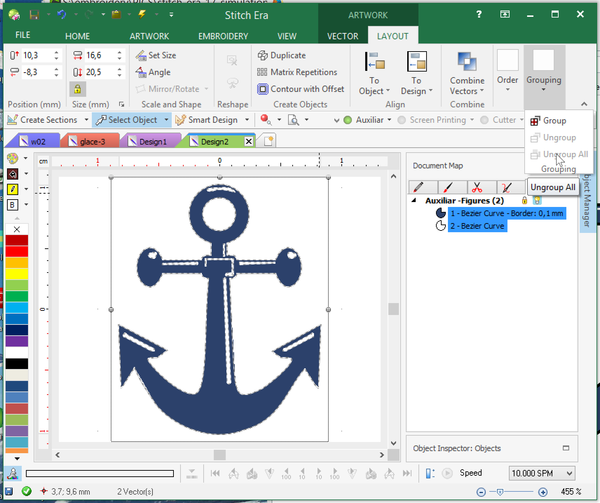
- Next, in the VECTOR tab, Select Vectors Outline and Body and the set line thickness to 0.5mm. This will add an outline to the object and make it 0.5mm thick.
- Then move on to auto-digitizing, but save the file first.
Trouble importing vector images
If the vector graphics do not import, make sure that your vector file doesn't contain any errors. Furthermore, some drawings can be too complex for Stitch Art to handle.
If you work with Inkscape, try some or all of the following in the Inkscape software:
- Replace gradient colors with simple colors (Stitch Era cannot handle these).
- Resize the graphics to a stitchable size, e.g. between 1 and 30 cm, else you won't see it. That being said, Stitch Era of course can resize and move artwork.
- Fit the document size to the picture size: Menu File->Document Properties. In the Custom size panel, open Resize page to content, then click Resize page to drawing or selection.
- Remove unused items (e.g. DEFs) File->Clean up Document.
- Optimize SVG: File -> Save as... -> Optimized SVG (the item is somewhere down the list, search for it). Before doing so, keep a copy of the old file, since this operation is very radical !
- Tick "Enable viewboxing in the save dialog. This operation will do two things: insert a correct viewBox and set width and height attributes to 100%.
- If the above optimizing does not work, use an SVG cleaning program such as: http://www.codedread.com/scour/
- Remove non-standard SVG/Inkscape XML (plain SVG): File -> Save as... -> plain SVG. Since this operation will remove layers and other Inkscape-specific information, keep a copy of the old file if necessary.
- Do not work with files that embed raster images. To check if there are images, open the SVG with a web browser and look at the source. If you see something like the following, you got it wrong and you will have to remove these elements. You always can import a raster image in addition to a drawing, as explained in the Stitch Era - creating embroidery from raster images tutorial.
<image
      y="956.82056"
      x="114.51117"
      id="image3388"
      xlink:href="data:image/png;base64,iVBORw0KGgoAAAANSUhEUgAABQAAAAPYCAYAAACFWVSPAACvc0lEQVR42uz9d5xsW1ng/3/69Ln3
      .... many more lines cut ....
Similar principles apply to work with Illustrator (AI) or Corel Draw (CRD) files.
Again: Start from simple drawings or draw your own graphics.
Convert vector graphics to stitch sections and generate stitches
Stitch sections are stitch paths (lines) or areas (shapes) that are almost directly stitchable. A stitch section defines an object in terms of how it should translate to stitches. Stich sections use many parameters including thread color (called "needle"), density, stitch types (there are many kinds), entry and exit points. We introduce stitch section manipulation in the Stitch Era - adjusting stitch sections tutorial. For now, just read on ...
(1) Convert to stitch sections
- If not already done so, select the vector object(s) first, e.g. move the cursor into the drawing area and press CTRL-A to select all of them.
- Next, select the embroidery tab and select
Art to Stitch.

In older versions, e.g. Stitch Era 11, the procedure was a bit different.
- Click on Convert (notice how the tabs change in the program). If you can't see the "Convert button", make sure you really selected the objects on the screen !
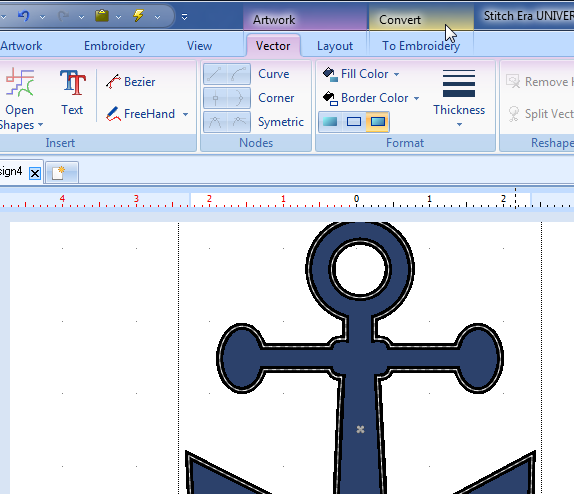
You now can choose between letting the program decide for you or vectorize fills (areas) and strokes (lines) yourself one by one. Try Art to Stitch (intelligent) first, i.e. use an auto-digitizing procedure.
- You should now see the Image to Sections popup window, as shown in the picture below made for Stitch Era 11. It is the same in Stitch Era 17.
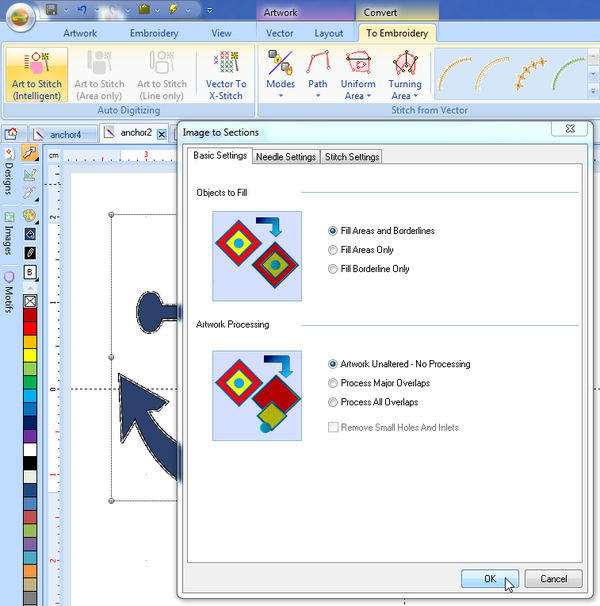
- Click on OK in the Image to Sections popup.
You can ignore all the options this time. However, for your second attempt you may change a few global parameters, e.g.
- If you got a multi-needle machine, add a "trim" in the "Stitch Settings" tab, i.e. tick
use cut after sections - Change the default pattern
- Set minimal and maximal length that will translate zigzag stitches
You now have produced so-called stitch sections, i.e. you auto-digized a vector graphic that you can send to your embroidery machine. Congratulations.
(2) Generate stitches
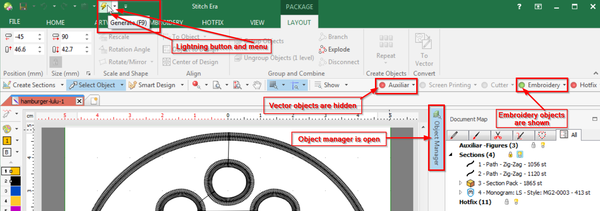
- In order to produce real stitches from stitch sections, you may have to hit F9 or press the lightning button on top of the window. If you start being intrigued by all the program's features, you also can read Stitch Era - interface features for working with a design at some point.
- After doing so, untick the little round Auxiliary button to the right in order to see the stitch areas without interference from the vector drawings. The button should show red instead of green. Make sure to turn it back on if you want to look at the vectors. Also make sure that the Embroidery button is green. Read Hiding and locking objects for more details.
Below is a picture that includes the lighing button and the auxiliar / embroidery hide/show buttons
If you are unhappy with the result, you could hit CTRL-Z and change for instance the stitch pattern (tab in the popup menu after clicking on Art to Stitch). If you are very unhappy, you will have to learn more ....
(3) Add other clipart or lettering or whatever
- Once you transformed vector graphics to "stitch graphics", you can add new vector objects and repeat the process.
- However, each time you select a vector object for digitizing, it will create a new stitch section. In other words, you could end up with the same multiple stitch sections. To avoid this, either carefully select the vectors you plan to auto-digitize, or just kill all the stitch sections (not the vector objects) and restart. More about this later. For the impatient: Untick the vectors button (top right), then hit CTRL-A to select all the stitch sections and hit DEL.
(4) (Re)generate the actual stitches if needed
- If you created new stitch objects or made other modifications to the stitch sections, you can regenerate all the stitches. Select Reprocess all in the lightning button menu on top in the quick access menu bar, or press CTRL-F9 (or FN-CTRL-F9 on some machines). CTRL-F9 reprocess everything and may kill manual modifications at the stitch level.
- You also could set "Automatic Generate" (use the pull down menu of the same lightning button), but this option eats up more resources and may lead to your computer being frozen. Anyhow if automatic generate is off, you must press F9 button again and again, i.e. each time you digitize a new drawing and/or each time you resize a stitch object or change its parameters.
Moving on
If your vector art is complex, e.g. includes objects that are stacked on top of each other then you got two solutions:
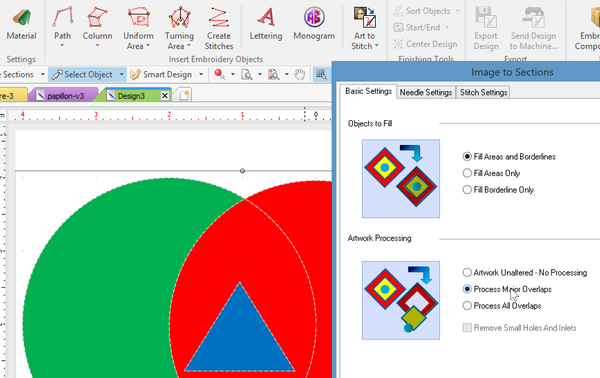
- In the Image to Sections popup, tick Process Major Overlaps
- Learn how to simplify vectors manually (recommended). This is explained below in the Digitizing of stacked vector graphics section.
Create a machine file
Once you got your stitch sections plus the generated stitches you then can export to a format that your embroidery machine can read.
Export the design to a machine file
- Save this file if not already done so. You always should keep a *.dsg file for re-editing.
- Now, create the "machine file": Either via the "File" button (top left) or the little pull-down menu next to it, select Export as Embroidery Machine Format and choose an appropriate format, e.g. *.pes for Brother machines or *.jef for Elna/Janome.
The result
Not too bad for my second digitalization / stitching (the first one was a smaller anchor without the lettering). There are some mistakes, probably because the tissue moved. I didn't iron a stabilizing tissue underneath. Also, the anchor head doesn't look as good since the bobbin underneath ran out of thread and I forgot to backtrack after changing it.
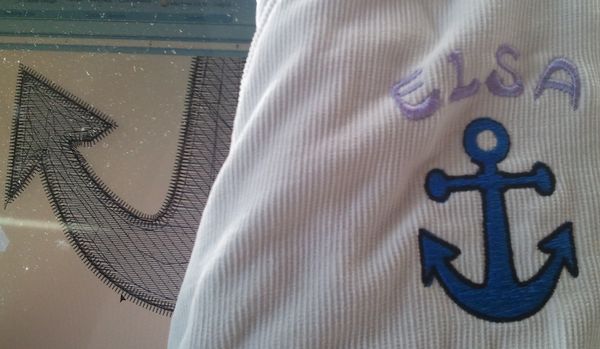
A picture showing the machine "printing" it, is in the Elna 8300 article.
Simplifying stacked vectors the easy way
Typical vector graphics not made for embroidery often uses stacked graphics, i.e. one part is drawn on top of another. In 2D computer graphics, this doesn't matter since a part doesn't have any height and graphics underneath won't shine through (unless the part on top is made transparent of course).
In embroidery stacking one object on top of another may be wanted, but if you that with more than two layers, the stitched embroidery can become very stiff. If you stitch many layers on top of each other, the needle or the machine can break .....
In this section we will present two very simple solutions.
Process Overlaps in Art to Stitch
This option only requires ticking a checkbox:
- Select your vector graphics (CTRL-A) and open the embroidery TAB.
- After clicking on Art to Stitch (Intelligent) in the Image to Sections popup window, tick Process Major Overlaps or Process All Overlaps. Major overlaps will reshape larger vectors (e.g. the green ball to the left will become a moon) but small blue triangle will be stitched overt the red ball. Selecting "all" will also create a triangle hole in the red ball.
- Done. However it would be a good idea to have the vectors slightly overlap, in particular in the "pull" direction.
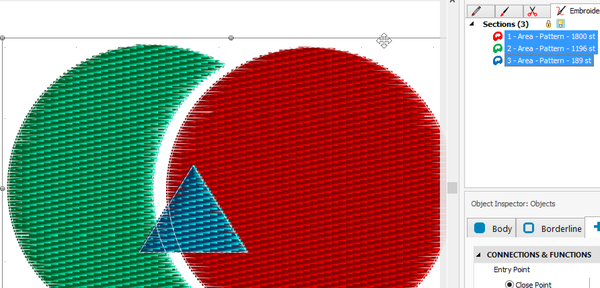
Below you can see the result of just processing major overlaps. The circle was stitched as a "moon". The red circle wholy (i.e. without hole for the triangle). Objects have been moved to show the effect.
Below is the "flat" solution, i.e. all overlaps processed.
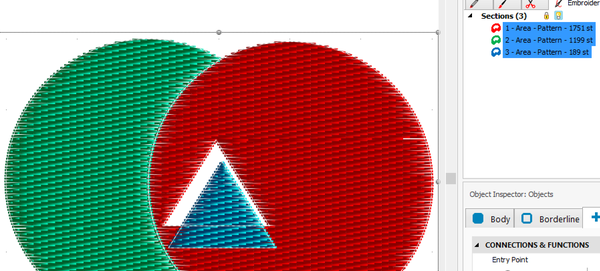
Simplify the vector drawing
A similar approach is to simplify at vector level, i.e. before you translate to stitch sections as above.
- Select all vectors
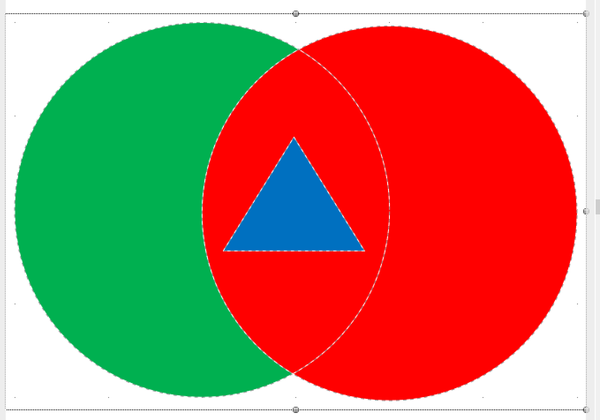
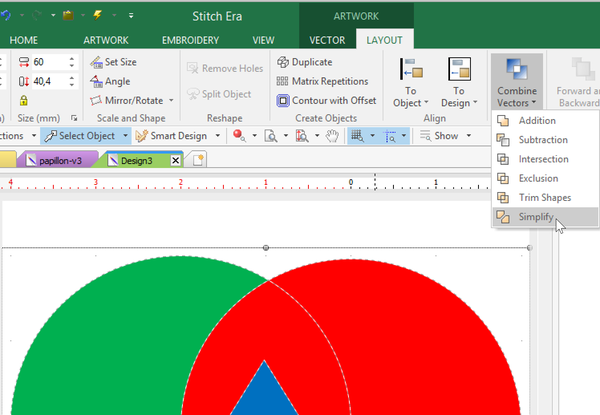
- Then open the Artwork/Layout tab
- Select
Simplifyin theCombine Vectorspull down menu.
The result looks like this, but I slightly moved the right circle and the triangle to the right in order to show how the drawing has been simplified, flattened.
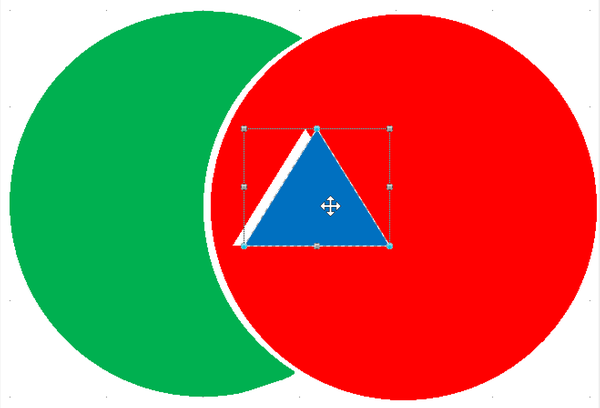
However these procedures will remove all overlaps automatically, i.e. not necessarily in the way you would like to. Sometimes, you do want to keep some overlaps and for various reasons. So let's dig a deeper into digitizing vector graphics.
Dealing with stacked vector graphics the hard way
Anyhow let's recall that graphics with several objects stacked on top of each other are not stitchable. After 3-4 dense layers, the embroidery will become bullet-proof, you may get a nest, or you could damage the needle etc. Let's now look at simple example, the Drupal logo and let's prepare it for embroidery. Drupal is a fine portalware system.
The SVG version of this logo opened in Illustrator shows that the graphic is simple and that it is drawn in a single layer. However, some objects sit on top of each other.
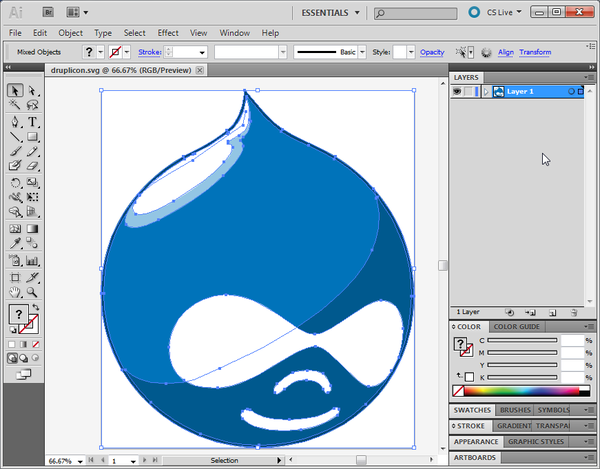
Since its difficult to see which parts are drawn on top of each other, could we tear apart different pieces. Indeed we can see a big blue tear. The light blue tear will be stitched on top. The "eyes" on top of both may not be digitized at all since white is by default the so-called background. Several problems that we now will address.
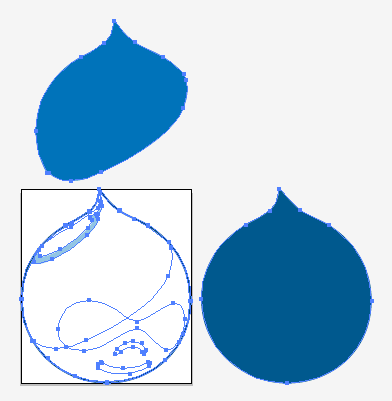
We now could modify the drawing in Illustrator, i.e. make sure that parts are not layered on top of each other. However, we shall do this in Stitch Era since it also is a vector editing tool. Adapting this graphic for embroidery requires several steps, read on:
Import vector graphics to Stitch Era
In older versions, importing SVG vector graphics was either complicated or expensive (via Illustrator).
Import (Stitch Era 17)
- Import the file through Artwork->Open Vector File
Resizing
To resize, you can drag a corner or use the Size panel on top left. In both cases, make sure that the object remains selected. After importing a graphic, it should be. We prefer using the Size ribbon panel in the Layout tool for setting the height since we want the logo to be a precise 40.5mm.
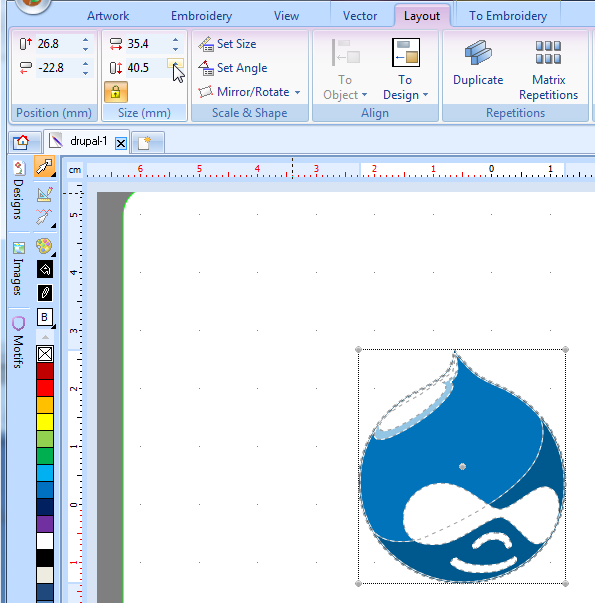
Simplify the graphics the hard way
We also can simplify one element at the time and sometimes this needs to be done in order to preserve some overstitching. This procedure is going to be a little bit tricky, and you can skip this section.
- Click on the drawing (graphic) and/or click on the Vector tab in the menu.
- Ungroup the drawing by clicking on Ungroup in the Grouping panel you should see on top right.
Now let's do some subtractive solid geometry.
- Save your file and call it for example drupal-2.dsg (things will go wrong).
- Firstly, make a copy of the large light blue area and place it somewhere outside, as shown in the picture below.
- Hold down the CTRL key and select first the very large dark blue area. You now only see this part. However you also must select the light blue area. Click where you know it will be underneath the tear. This is tricky. If you do it right you will see the light blue area again as in the picture below.
- Now click on Subtraction in the Combine Vectors pull-down menu. It does the following. It will cut the area of the light blue area from the dark blue area. After the process, the light blue area will be lost and the dark blue area will be smaller.
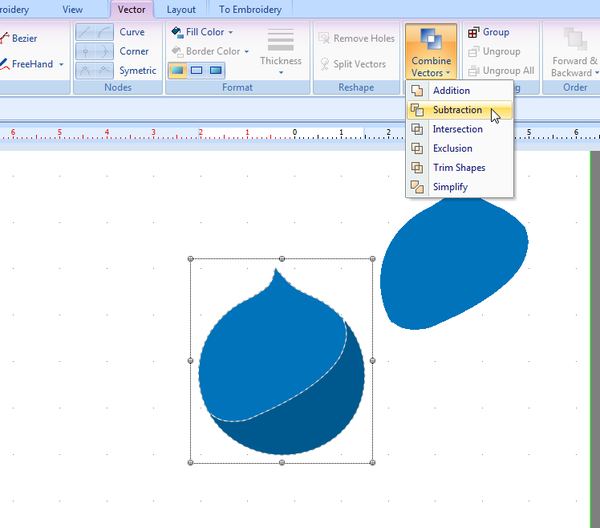
- Check: The dark blue area looks like a moon (great) and the light blue area is lost.
- Move the copy of the light blue we made earlier back in place. Use CTRL-arrows to fine tune position (not just the arrows!) or zoom in at 600%.
Now let's do the same for the white areas, unless you want to stitch these on top of the blue areas.
- Select all the white areas and make all of them yellow (select a color to the left). This way you can better see them. White on white just doesn't cut it for the kind of operations we are going to do.
- Group this area. I.e. Click on Group
- Make three copies of this group and move all three away from the graphic (doesn't matter where, just out of the way where you can retrieve them)
- Hold CTRL-key, select dark blue area then select yellow group. Combine vectors -> subtraction.
- Move a copy of yellow group back in place.
- Reorder everything. Both light and dark blue areas should be in the back. Use the Forward & Backward menu to achieve this.
- Hold CTRL-key, select light blue area then eyes and again subtract.
- Move the remaining copy of the eyes in place.
- Reorder everything if needed (blue stuff in the back)
- Move the last remaining copy of yellow stuff in place, reorder, ungroup. You are done ...
Now save the file again, e.g. call it drupal-3.dsg and dismantle the graphics if you don't trust your skills. I don't trust mine ...
- Pull the graphics apart and check if the areas really have been punched. In principle, all the three blue areas are now much smaller and don't overlap with each other or the yellow areas.
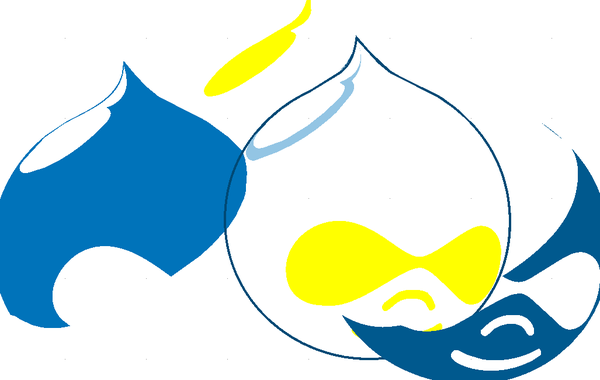
- Now reload the saved file (or backtrack with CTRL-Z)
- Make the yellow parts white again
Finally, I also applied the same procedure to the little very light blue area on top.
Clean up the vector graphics
(1) As you can see, after simplification, some fine lines and can remain here and there. If you wish, you could remove these.
- The best way to do this is to use the split vectors tool. This tool allows to draw a path (e.g. just a simple line) by inserting points. Draw a line (or another path) across the graphics you want to split. Right-click to accept. You may have to repeat the operation (sometimes the cut didn't work). Then select the separated area and kill it (hit DEL).
- You also could try removing individual vector points (only recommended if you are familiar with basic vector editing.
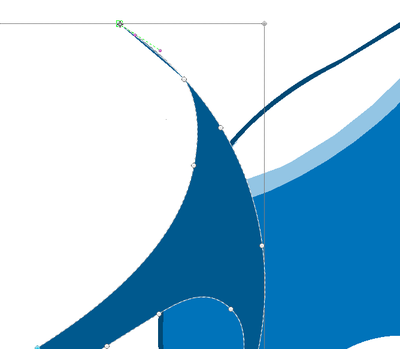
(2) Verify that you don't have any useless little vector shapes and path hanging around.
- Open the object manger (tab to the right of the workspace) and click on each of the vectors. Trash the ones that are useless (e.g. too small). You can find these, easily by clicking on each vector and then spotting the object in the work area.

(3) You also could change colors a bit. E.g. make the large outline around the tear black and turn back the yellow areas to white.
(4) Repair curves. Using the controls, you can make some minor adjustments to the various shapes. e.g. I made most of them a bit smaller and also made fine shapes a bit fatter (read more about vector editing in Stitch Era - vector graphics)
(5) Finally, you could reorder the vectors before you generate the stitches. Last vector will be translated to a stitch section that will be stitched last.
Convert to stitches
- Select all (CTRL-A)
- Click on Convert -> To Embroidery
- Select Art to Stitch (Intelligent)
In case you are unhappy with the result, there are two options. You either can go back to vector drawing or edit the stitch sections.
Going back to vector graphics
- Hide vectors (little vectors button on top right)
- Open the Object Manager (right)
- Kill all the stitch sections (CTRL-A + DEL). But really make sure that you have hidden the vectors.
- Show vectors
- Redraw and re-digitize
Edit stitch sections
- Hide vectors
- Edit stitch sections (either read Stitch Era - adjusting stitch sections or go through the "Evolution" example below)
- Click on the little lighting arrow on top (reprocess all / CTRL-F9).
- Do not convert again or you will get double layers of stitches. Of course you could (a) hide vectors and (b) kill all stitch sections, then redo the convert.
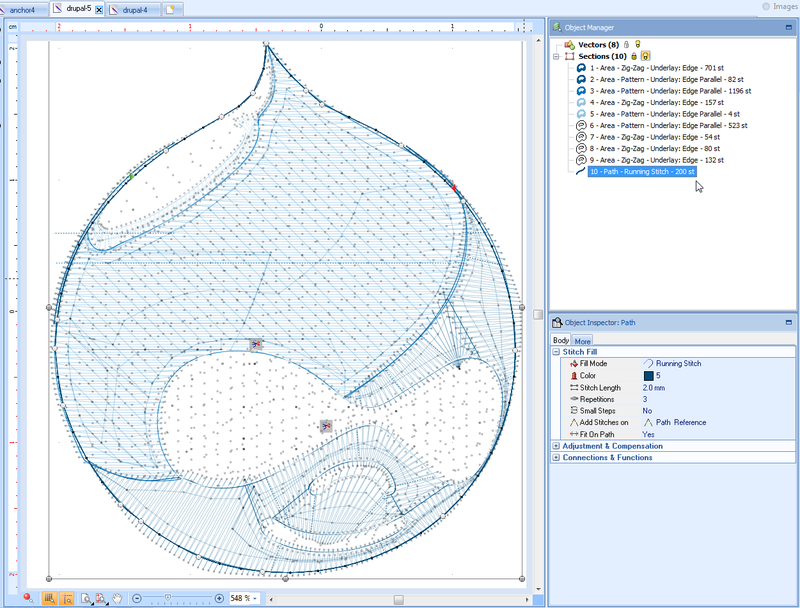
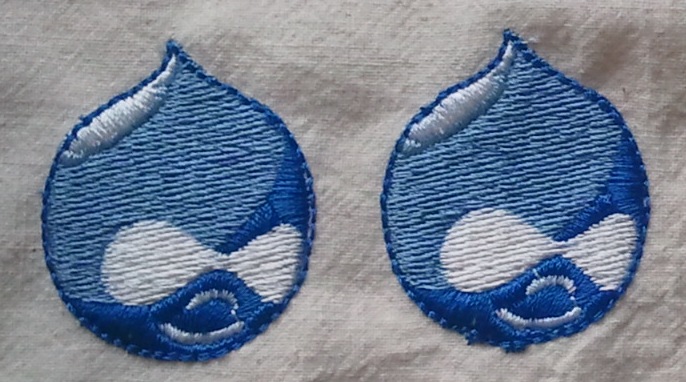
Digitizing vector graphs - evolution
Let's introduce some more little tricks with another example. In particular we shall introduce the following:
- Reorder vectors
- Telling Stitch Era what thread lines to use for a design (e.g. Madeira Rayon)
- Making small changes to stitch sections
This section was made for Stitch Era 11. Importing SVG is much easier now. The rest is similar.
Import of an SVG image
Via Corel Draw we imported the evolution steps SVG picture. We also tested import via *.emf and the result is much less convincing, although usable with a lot of extra work.
This is what we got:
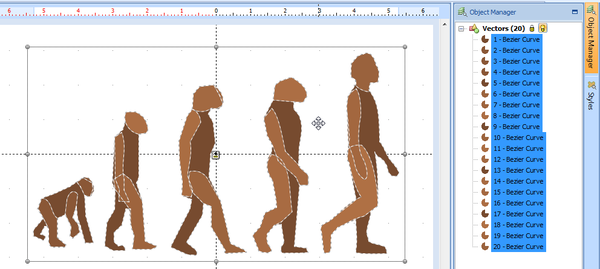
A first look at the import tells us that the vectors are not in the right order, i.e. objects that should be on top are not and we have to fix this. Stacking order can be changed in three different ways:
- With the context menu (right click on the object and select Change Order)
- Through the Order ribbon panel on top right.
- Through the Object manager. This is the preferred solution if you have to change several. By dragging down a vector you can change its order.
An other option would be to change order at the stitch section level and some people prefer that, since you always have to do some work at that other level.
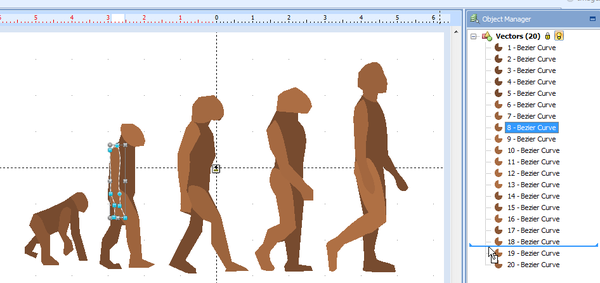
As you also can see, by looking at the Object manager for example, all vectors are fills only, i.e. they don't define borders.
Color adaptation
We decided to work with three colors only and to attribute the same colors for each figure. Of course, you could decide otherwise.
- Dark for the body
- Light for the right arm and head
- Medium for the right leg
Selecting colors is a bit of pain in stitch era since the palette in the Fill color drop down menu is really small and colors are very difficult to make out.
- Select all heads and all right arms: Hold down the CTRL key and click on each.
- To make sure that you selected everything, move the group away, then hit CTRL-Z to put it back. You then also could group the still selected objects (Grouping ribbon panel). Then move down the vector pack. But neither is really necessary if you are good at clicking.
- Change colors for selected items with the pull down Fill color menu on top.
If you want to retrieve a color through a color name you are familiar with, you look up the RGB specification in the List of colors at Wikipedia for example. E.g. copper would be (184,115,51) according to Copper (color). Once you got the three Red/Green/Blue numbers you can enter these in the Select Color panel that you get through the fill color->More colors pull-down menu of Stitch Era.
We made:
- head and right arms = copper (184, 115, 51)
- body = dark brown (101,67,33)
- right legs = coffee (150,75,0)
Of course, an embroidery machine doesn't care about colors, but sometimes it's nice to have the right colors already in the vector graphics.
If you already are familiar with vector graphics you now could improve the drawing a bit since it is rather crude. E.g. I changed the right arms as bit, i.e the upper joint and hands. We could improve more of course, but didn't
Simplifying
Since this is going to be a very large design, we can't print too many layer of stitches or there will be puckering and stiffness.
We simplify with the now familiar Combine Vectors (CSG) method:
- Select All
- Simplify.
The final result now has additional vectors, since parts like the body was cut in more than one piece:
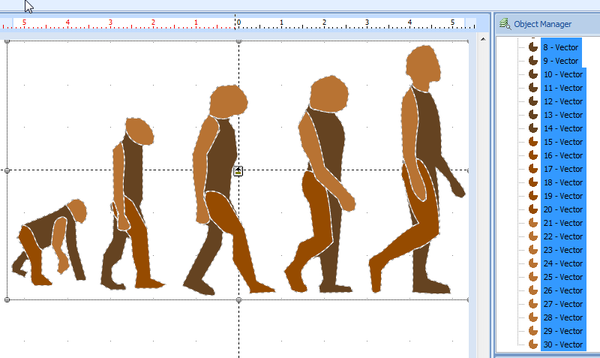
Some of these vectors of too tiny to be stitched or will not really produce a nice results and you may remove these. We killed one tiny vector (#3) and kill some nodes of vectors that had tentacles. To remove the latter, click on the vector either directly in the workspace or in the object manager, then select the tiny little node control, right-click and delete.
Digitizing
Anyhow, whether you did make some adjustments or not, the design is now read for auto-digitizing.
- Select all (CTRL-A)
- Convert to Embroidery, select Convert -> To Embroidery in the menu on top
- Select Art to Stitch (intelligent)
You now should see the Image to sections popup menu and we shall do some calibration instead of clicking on OK... Read on
Colors matching treads
- Select the Needle Settings tab in the Image to Sections popup window that you should see now.
- Tick "Assign artwork colors ...." (last item)
- You can assign colors of your vector art to "needles" representing your threads with the little pull-down menu.
If you want to know more about managing colors and thread colors, read Stitch Era - vector and thread color. It will explain how to create both vector palettes and how to use thread palettes from your thread make and line.
- Do not click on OK yet !
Change the stitch pattern
- Open the Stitch section tab
- Select your preferred pattern.
- Change densities to 4 lines/mm
I also changed the default zig zag stitch into a random 3mm auto-split stitch
If you glide your mouse over a needle item in the palette to the left (do not click!) you will see what Madeiria thread you will be asked to use later (hopefully). As you will see, the color names are not the same, but there is nothing we can do about this we believe.
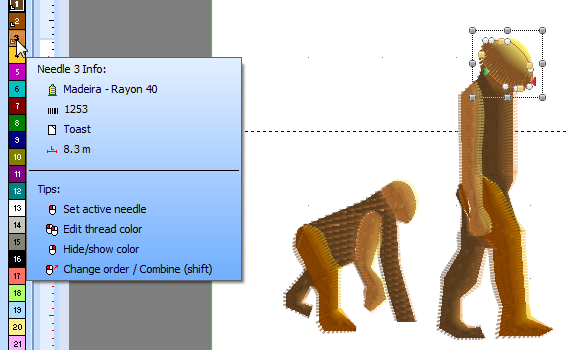
Redo digitizing
- Save the file first.
If you are unhappy with the result, open the object manager (to the right)
- Click on sections to select all. Make sure you selected the stitch sections and not the vectors !
- Hit CTRL-X
- Now restart "to embroidery" since your stitch areas should be gone ...
- For example, select each group of vectors using the SHIFT key and add borders if you rather would like to have a running stitch around each stitch section.
- You also could improve the graphics in various ways, although this is sometimes a waste of time since stitches ignore the finer details, i.e. fine tuning rather may be done at stich area level.
- In case you just want each figure as a single shape, nothing is easier than that: Select all, then combine vectors -> Addition. Finally, select each figure and Remove holes.
Anyhow, let's move on with the original design.
Tuning the stitch areas a bit
Looking at the result, we notice that some vectors were rendered as Zigzags and others as fill patterns. That's the way it works by default.
Since we believe that all heads should look the same, we make some little changes:
- Untick Vectors (top right green button), not necessary but wise ...
- Click on the sections you want to change, e.g. head of figures one and two, plus the chest of figures 3 and 5.
- Then in the object inspector, change the fill. We used
- Pattern
- Density = 4
- Name = PTM-0008
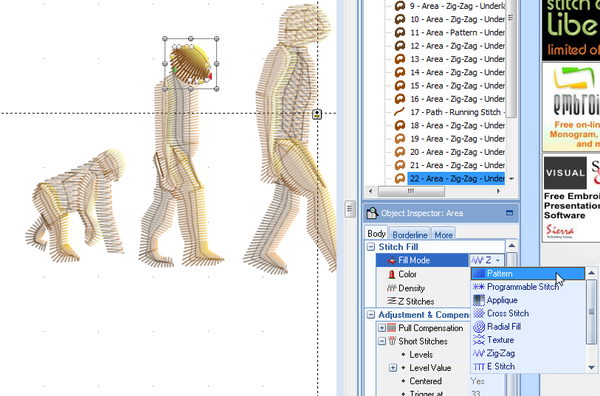
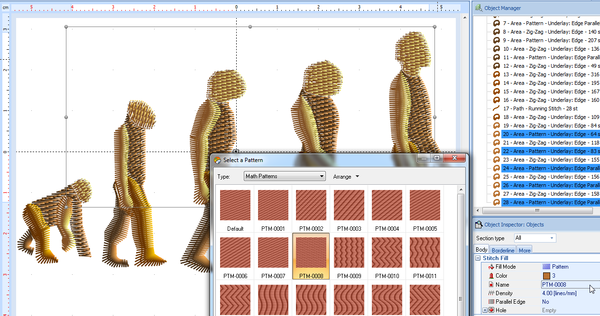
Alternatively, you also can use the Area Fill ribbon panel on top. We prefer the object inspector since it shows more information and also because you can change properties of more than one object at the time.
In the picture below, we change the pattern type of all heads to PTM-008
Result
Result shown as Truesizer picture:
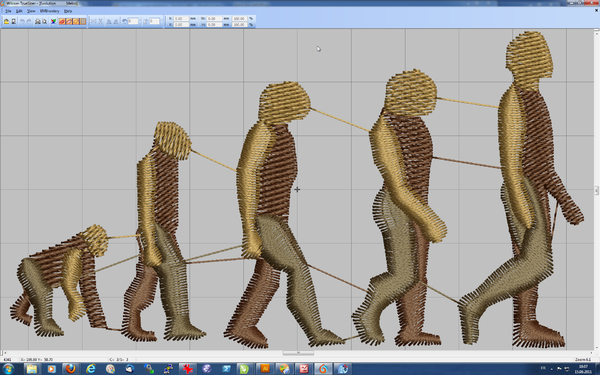
- Right leg of figure one may turn out to be ugly.
- Some Zigzag stitches are very wide
- We might actually transform each right leg into a multi-column irregular Zigzag stich for example (which I actually did before printing).
Result stitched:

The design is not exactly glorious and the color contrasts are too big since I don't own a large thread collection. The irregular Zigzag stiches used for the legs add an interesting touch, though some people might prefer cleaner patterns. Finally, it might be a good idea to add running stitches of the same color around the outside border, but that's too much work right now ...
If you want to know more about tuning stitch areas, read Stitch Era - adjusting stitch sections
Issues, tips and moving on
Since many pictures you can find on the Internet are in raster format, we recommend that you now more to the Stitch Era - creating embroidery from raster images tutorial
In order to learn more about digitizing bitmaps and vector graphics, you also should learn some more basics:
It also may be useful to have a look at Stitch Era - trouble shooting and Stitch Era - interface features for working with a design
Then, move on to:
Import from Inkscape, Illustrator and Corel Draw
In Stitch Era 17:
- Artwork -> Get from application (the file must be open in the application). This works with Illustrator or Corel Draw.
- Artwork -> Open Vector File (ai, cdr, svg, wmf, etc.)
If fonts do not show, transform fonts to objects. E.g. in Inkscape select the text, then Menu Path -> Object to Path.
In Stitch Era 11, Illustrator and Corel Draw files, but not SVG could be imported. Older versions only supported Corel Draw.
A simple test (2011)
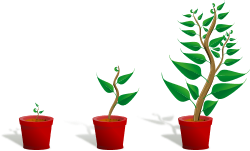
Test file used: Green plant in its pot in three different phases of growth
- Corel Draw can't handle this fairly SVG simple file. I sometimes wonder why Corel is still around ...
- Import to Illustrator. We then ungrouped (3 levels) and removed the shadows (click and DEL)
- Saved the file as *.ai
- Imported the file to Corel Draw
- Import the Corel file to Stitch Era: Get from Application -> Corel Draw
The result is lossy (e.g. color gradients are removed), but the quality of the drawing is good enough for embroidery. Of course, the result should be adapted, i.e. simplified.
| Original | Illustrator | Stitch Era |
|---|---|---|
 |
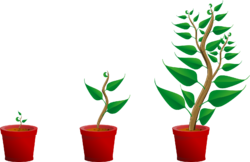 |
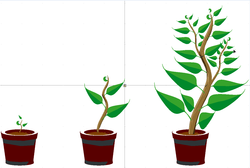 |
Now let's see what this gives with a minimal digitizing work.
- I resized the whole design to about 12 x 7.8cm (i.e. a bit smaller than the A hoop on my Elna 8300).
- I removed the grey bands on the pots
- Simplify vectors:
- Select all: CTRL-A
- In the Combine tab, Click Combine Vectors->Simplyfy
- Auto-digitizing procedure:
- CTRL-A to select all
- Convert -> To Embroidery
- Art to Stitch (Intelligent)
- Pattern density lowered to 4 lines/mm (I just prefer it a bit less dense)
Wilcom Truesizer shows the following (I am to lazy to print this myself for now). The image does not represent the full truth, i.e. some white areas that are printed first and underneath don't show at all.
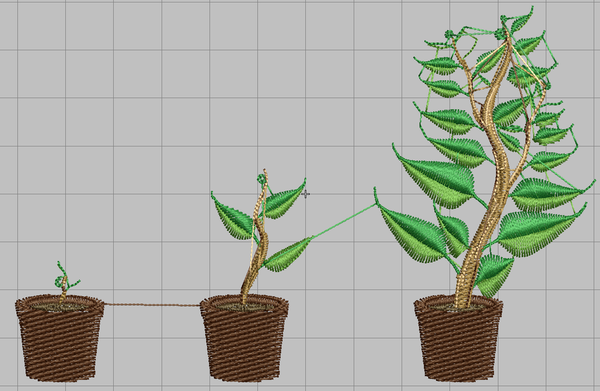
A simple test (2017)
| Original | Direct SVG import | Import via Illustrator |
|---|---|---|
 |
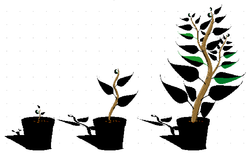 |
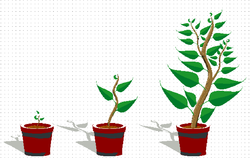 |
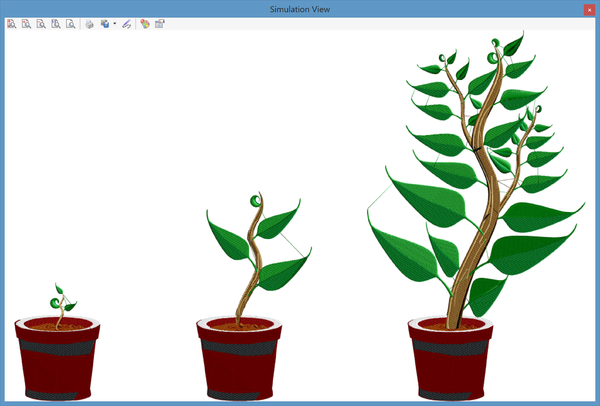
Stitch Era 17 can important standard simple SVG, but not gradient fills. After important most leaves were black. Therefore it still sometimes is recommended to import the SVG to Illustrator before importing to Stitch Era. Otherwise, you can replace the gradient fills by simple fills, i.e ungroup, select each leave, then select some kind of green.
Importing a file from Illustrator can be quite long, but the result is usually quite good. I auto-digitized (i.e. used Art-to-Stich (Intelligent) after removing the 3 shadows. Important: In the Artwork Processing Options, I ticked Process Major Overlaps, because the drawing does have some over vector objects that overlap, e.g. they grey bands on the flow pots. On the other hand, without ticking there would have been two layers of embroidery in some places which is not necessarily a bad thing but require some testing.
Filling emtpy areas with color
Unless we didn't find the feature, we found it difficult to fill imported vector patterns with color. When we wrote this, Stitch Era did't want to import illustrator files, but that now works starting version 11.10. If you don't own Corel Draw or Illustrator, or if you do not want to work with the SVG format, you might have to use lossy EMF imports that somehow produce fills with borders from lines. In order to fill such as mess:
- Select all elements that need to be filled and then combine these into a single vector: Combine Vectors -> Add
- Click on Fill holes in the reshape ribbon panel on top.
- Make sure that remaining vectors slightly overlap with each other and the already filled ones. Select each disconnected vector in the object manager and zoom in a lot. Then, add again and fill holes.
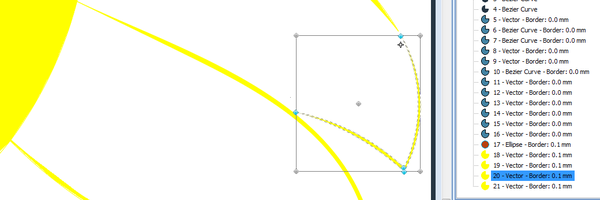
Both vector objects and stitch sections are defined by several types of nodes and at some point you will have to learn how a vector drawing program works in order to make informed edits and for that you may want to read Stitch Era - vector graphics now. Otherwise we suggest that you look into creating embroidery from raster images.