Screen capture tutorial
This is a short screen capture tutorial. It assumes that you have some basic understanding about imaging software and graphics file formats.
See also
- Screen capture and annotation software
- on-screen annotation (often more practical)
Motivation to write this was twofold. I got intrigued by the fact that on Windows I was unable to capture correctly an Adobe CS3 application, I wanted to test free programs to capture user interactions (i.e. make screencasts), and finally think a bit harder on how to post-treat screenshots. Right now, this tutorial is probably not suitable for total beginners - Daniel K. Schneider 20:18, 30 July 2007 (MEST).
Definition
“A screenshot, screen capture, or screen dump is an image taken by the computer to record the visible items displayed on the monitor or another visual output device. Usually this is a digital image taken by the host operating system or software running on the computer device, but it can also be a capture made by a camera or a device intercepting the video output of the computer.” (Wikipedia, retrieved 20:18, 30 July 2007 (MEST)).
One may make a distinction between:
- Screenshots
- Outputting the entire screen or a part of it in a common bitmap image format such as BMP, PNG, or JPEG.
- Screen dump
- The display system dumps what it is using internally upon request. Output may be rendered in a different format, e.g. PNG instead of X or Display Postscript.
- Video captures
- See screencast for details. Capture the screen over an extended period of time to form a video file.
Grabbing static pictures of applications
Grabbing static screenshots involves usually 2-3 steps:
- Prepare the state of the application you want to capture
- Either grab the whole desktop, a window or some random rectangle
- Crop the image if needed (i.e. select/save a part)
- Reduce the image size and save in other formats if needed.
Preparing the application
Since your screendumps may wind up in a wiki or presentation slides, i.e. in low resolution environments, you have to minimize the area you want to capture:
- You may just show parts of the application (e.g. remove the window bars after capture)
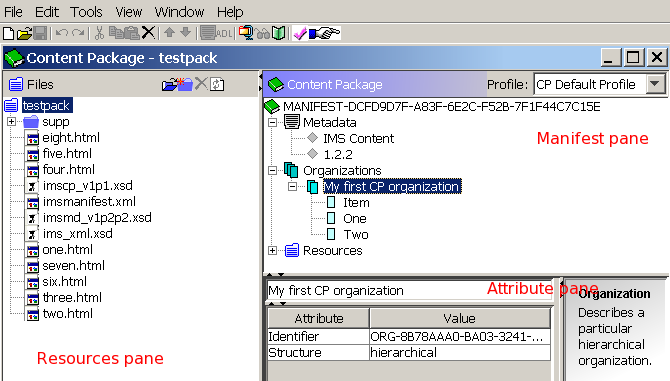
- More importantly, you should diminish the window size as much as possible (If you have a decent resolution (like 1900x1200) on your machine, you probably should try to fit the application into a quarter of the screen (but no wider than 1000px as a rule of thumb). The reader should be able to see all the menus, commands and contents you want him to see. E.g. here is an example of a screen dump of the Reload Editor Tutorial. The foot print of this picture is low and you still can what I wanted to show (670 × 381 pixel, file size: 24 KB)
Capturing overview
There are several kinds of tools:
- Small and usually free screen capturing utilities (see the software section), e.g.
- MwSnap and ScreenHunter for Windows, Gnome screenshot and ksnapshot on Linux, and SnapNDrag for Mac OS X.
- Capturing tools embedded in image manipulation (or other) programs, e.g. The GIMP image manipulation program.
There are about 4 different kinds of captures you can make:
- Capture the whole screen
- Capture a single application window
- Capture a rectangular area (usually by dragging the mouse from a corner of the area)
- Capture a fixed-sized rectangular area (you define its size beforehand)
To capture a screen there are usually three methods:
- Capture through a specialized capture application (friendly interface plus some image manipulation/saving features)
- Capture through the Operating system (Print Screen method). Not as friendly since you have to know either some "secret key presses" or commands, but it may safe your life when other capturing applications fail ...
- Some application do have built-in capturing functionality, e.g. to capture web pages there is the Firefox Pearl Crescent extension, others allow for instance saving in PDF format.
Capturing with a screen capture tool
These tools are quite self-explaining :)
You just have to find out how to tell it what you want to capture (whole desktop, window, area, etc.) and then how to save the result.
Also, each of these tools (usually per default) will disappear when you launch the capture. Some allow you to define hotkeys for various operations, but usually you don't need these.
Capturing with the Print Screen method
"Print Screen" means to make a copy of the desktop or a section through the Operating system (OS).
- On Windows XP
You can either capture the whole desktop or the active window:
- To capture the whole desktop, hit the 'Print Screen key (sometimes labeled "Prnt Scrn") which you usually can find somewhere in the top right of your keyboard. On some other keyboards, you may have to hit shift-prnt scrn".
- To capture just the active window, press ALT+Print Screen.
These operations will put the screenshot into the clipboard. Therefore after pressing the key you won't see anything, but you then can simply paste the acquired bitmap into an imaging program with either one of the two following methods:
- Acquire from Paste method (application dependant)
- In Gimp: "File->Acquire->Paste as New
- Paste into an open document, e.g. hit ctrl-v. In some applications (e.g. a wordprocessor), the important image may resized, it may be translated to an internal format or alternatively be refered to as a file).
The print screen method seems to produce best results, since it seems to have less problems capturing some tricky multi-paned windows like the Adobe CS3 desktops for which none of my screen capture tools didn't work (some tabs did not show).
Screenshots of games and media players may still fail, resulting in a blank rectangle. According to Wikipedia, the reason for this is that the graphics are bypassing the normal screen and going to a high-speed graphics processor. Workaround: Open Display Properties -> Parameters -> Advanced, Click the Troubleshoot Tab, and Move the Hardware Acceleration Slider to "None" (Don't forget to put it back).
- On Gnome, e.g. Ubuntu Linux
You can either capture the whole desktop or an active window
- Hit the Print Screen key to capture the whole screen (also works on double monitor twin-view setup).
- Alternatively, hit ALT-Print Screen to capture the active window.
This tool will produce *.png image and a preview/popup menu will allow to save it somewhere. Btw this applications is also available under Applications->Accessories->Take Screenshot.
Finally, each X-based Unix system (Linux, Solaris) has a command line tool called xwd (read the man page).
- On Mac OS X
- Pressing Command-Shift-3 takes a screenshot of the entire screen
- Pressing Command-Shift-4 takes a screenshot of a chosen area. You must hold the mouse button and drag it over the area you want to capture.
These images are saved to the desktop, but if you hold down the control key with the rest of the keyboard shortcut, the pictures are copied to the clipboard instead. (Wikipedia, not tested).
Getting the mouse pointer with Autohotkey (Win XP)
With most (free) programs you don't get the mouse pointer included and you have to search around a bit for a program. The only good solution I found was autohotkey and capture script written by Sean. It does work to my entire satisfaction, but to install this you need some technical reading skills (Autohotkey has a good help). E.g. I use this for my Flash tutorials.
- Step 1- Install Autohotkey
- Autohotkey
- Click on the exe installer on Windows
- Step 1b - You may have to install GDL+ if it is not in the windows\system32 directory (A library from Microsoft)
- Platform SDK Redistributable: GDI+ (search for "Microsoft GDI Plus LIbrary" if the links changes and do not take from random places found on the web ...)
- Note: The script will run without this, but you only can produce bmp files.
- Step 2 - Download the capture script
- The screen capture script is here.
- Then, dezip the script somewhere where you can find it (e.g. c:\bin\) or the desktop
- Step 3 - Edit this script, you may rename it e.g. to catch.ahk
To capture windows or the whole screen into the clipboard, make the following changes:
Replace this line:
CaptureScreen()
by all these lines:
#w::
CaptureScreen(1,True,0)
return

#k::
CaptureScreen(1,True,0)
return

#a::
CaptureScreen(0,True,0)
return

#c::
CaptureScreen(2,True,0)
return
This will do the following:
- WINDOWS KEY + w will capture the active window (I use this most of the time). WINDOWS KEY+k does the same
- WINDOWS_KEY + a will capture all the whole screen
- WINDOWS_KEY + c will capture a client area
Of course, you can change that, but you need to read the help..
- Launch the script
- Click on the script
- This will put it in the launch pad (right-click on it will give you other extra tools)
- Use it
- Hit WINDOWS+k, WINDOWS+w, etc.
- This will capture the selected application (that's the way I launch the script and put it on the clipboard from which you can paste into Gimp, photoshop etc. On top of the script, the authors explains what e.g.
CaptureScreen(1,True,0)
means. There are other options ....
- Drawing the cursor
An alternative solution you can use is to paste a bitmap image of a cursor on top of the drawing. Since you probably also crop and resize the image, this is not too much trouble. However the cursor will not exactly look the same. On the other hand you can place more than one cursor over the picture, and make it bigger to make sure that people will see it. Of course, this solution is useless when you want to demo different cursors like the dozens you get with Adobe Flash.
Here is png cursor you can use: ![]() , but it's better idea to grab the original SVG version from Openclipart computer/icons/flat-theme/action.
, but it's better idea to grab the original SVG version from Openclipart computer/icons/flat-theme/action.
Using screen capturing software
Many software types can capture elements of the screen, e.g. web browsers, image manipulation programs, screen annotation software, screen casting software and more. See the software section below for some tips.
- IrfanView is one of the only Windows programs that correctly can capture everything, e.g. Adobe CS4 Mouse cursors. So this is the most easy method that works. In addition you then can clip/reduce the picture fairly quickly and translate to any format. GIMP (which I otherwise like) cannot ....
Post treatment
Reducing image size and bitmap formats
(Disclaimer: I am not much of an image expert).
Frequently, screen capturing programs save per default in the lossless PNG format. PNG is efficient for graphics, but heavy if the caputred area includes bitmaps. You may set PNG to a maximal compression rate (9), but the difference gained may not be very important. A PNG image can be 5-10 times as big as a JPEG image.
- Screendumps that include bitmaps (include things like desktop background)
If you save screendumps that contain bitmaps, you should save in JPEG format (*.jpg). A lossful compression quality of 70 should be ok.
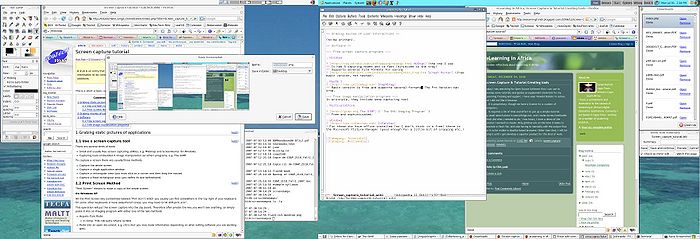
Here is a 700px-wide thumbnail of Daniel K. Schneider's desktop I made when I started writing this article. Click on it to get a bigger version:

- From left to right: GIMP, Firefox, the capture popup, a terminal, Xemacs (Wiki mode) and Firefox again ....
- I use Ubuntu as my desktop OS and as you can see I got some nice screen real-estate (3500px wide, which is essential for writing wiki articles at my age).
Here are the sizes of some bitmap files I made for my desktop and that should be self-explaining:
The original capture of my two monitors (3500x1200 pixels)
1621618  desktop-dks.png
 596814  desktop-dks.jpg
1600991  desktop-dks-max-compression.png
Reduced versions (you can inspect the 1760x600 jpg version I used above). As you can see the quality of this imported 181K file is just barely good enough for reading text.
 181255  desktop-dks-1760x600.jpg
 625596  desktop-dks-1760x600.png
 304380  desktop-dks-1000x341.png
- Screendumps that include text, graphics and a little bitmap.
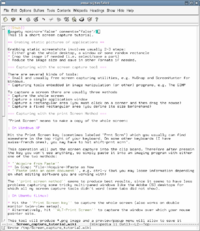
If an applications only contains text, PNG produces much better results than JPEG, even if compressed at quality of 70%. E.g. here is comparison from taking a picture of a text editor I use to write my EduTech Wiki articles:
170233  screenshot-emacs.jpg
 45217  screenshot-emacs.png
For applications that contain text plus a little bit of bitmaps, PNG is also better. E.g. here is comparison for a screendump I used in the Flash CS3 desktop tutorial.
 110734 flash-cs3-desktop.jpg
  74826 flash-cs3-desktop.png
- Summary
- Make your application as small as possible on the screen before you capture it.
- Try out several image reduction ratios. Your imaging tool may have a preview mode, so you don't need to save various versions. In this case, set the view to a 100% in order to get an idea of what the end user will have to look at.
- Try out several image formats if you are not sure whether to choose from PNG or JPG. Btw don't use GIF, PNG is better.
- If you want to teach functionalities of an application, try not to include large bitmaps if file size is an issue.
Screendumps for MediaWikis
You should learn image syntax, e.g. read the Wikipedia Extended image syntax article.
Images that are not essential for the understanding of a text, should be served as thumbnails. E.g.
- To display a thumbnail with a line break (text does not float around):
[[image:desktop-dks-1760x600.jpg|thumb|700px|none|~~~'s Linux Desktop]]
- To display a thumbnail on the right with text floating around
[[image:screenshot-emacs.png|thumb|200px|right|PNG Screendump of an text application ]]
Annotations
(just a short summary for now ...)
- Annotations with overlay text and graphics
There are two basic layout techniques:
- Overlay text inside. This eats less space, but can be confusing and mask details.
- Write text outside the captured area (to do so, increase the canvas size) and draw lines/arrows between these annotations and the concerned area.
There are probably three technical solutions:
- Use a special-purpose screenshot annotation tool. Most of these also can take screenshots. See software below or for example the articles in Wikipedia
- Overlay text with an imaging program (such as GIMP). This can't be reedited, so make sure to keep at least the original screenshot. Think hard about font size and color.
- Make your annotations with a drawing program like Inkscape, Adobe Acrobat, a presentation software, or similar and then reexport to some bitmap format if needed. In this case, make sure to safe keep the vector graphics format for re-editing. This represents more work than using a screenshot annotation tool, but you can keep the source format and reedit.
- Interactive text
Make an interactive program, i.e. the user can click on certain areas and then the application will show extra information. To make this understandable (affordable), you may have to draw boxes on top of the screenshot. There are several technologies, e.g.
- HTML image maps
- Flash
- SVG
- SMIL
- Presentation software
- screencasting software
- Educational multimedia authoring systems, such as Authorware
- etc.
Batch processing
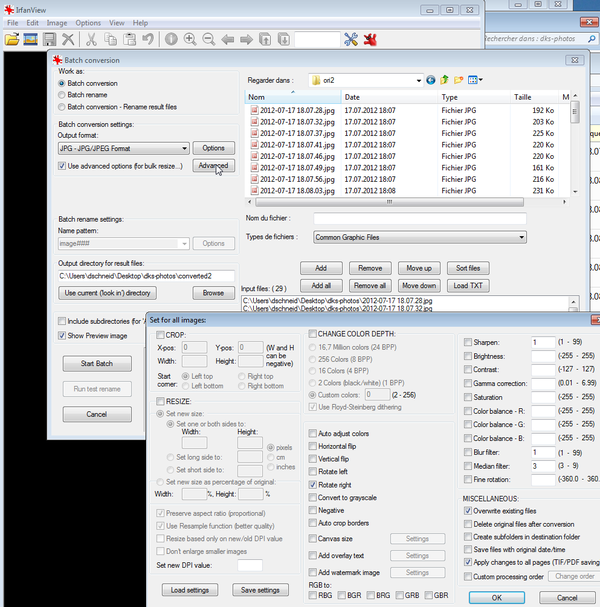
For simple batch processing like rotating or clipping a series of pictures, we recommend IrfanView. It is best to define a different output directory and to keep the originals.
Educational use
See multimedia presentation, textbook etc. This tutorial will remain mostly technical.
Software
Links
Overviews Screenshots
- Screenshot (Wikipedia)
Screen shot tutorials
- Alan's Tips: Capturing a Web image
- Drew's Windows Screen Capture Tutorial
- How To Capture a Screen Shot of your Desktop or the Active Window in Windows by Sue Chastain, About.com.
- How to Take a Screenshot in Linux (Ubuntu)
Capture screens from DVDs
- How to make a Screen Capture - Tutorial. By Elisabeth. How to get a screen cap from a DVD using Cyberlink PowerDVD for the capping and IrfanView to convert the files.


