Felix 1.0 3D printer
<pageby comments="false"/>
Introduction
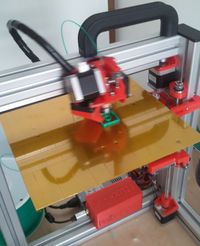
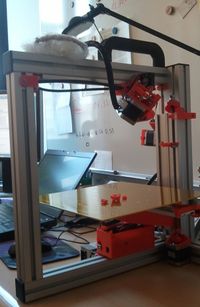
Felix is a low cost 3D Printer, available as kit. It is the IMHO the most practical printer for schools, since it can be easily carried around and since it has a very stable frame.
In the future, this page will be split into several pages as contents grow. I got the assembled Felix today and just started playing a bit
- Daniel K. Schneider 19:06, 18 June 2012 (CEST).
Where and what
Getting it
The kit is sold through the felixprinter web site. It costs about 900 € (excluding VAT and shipping costs).
Software
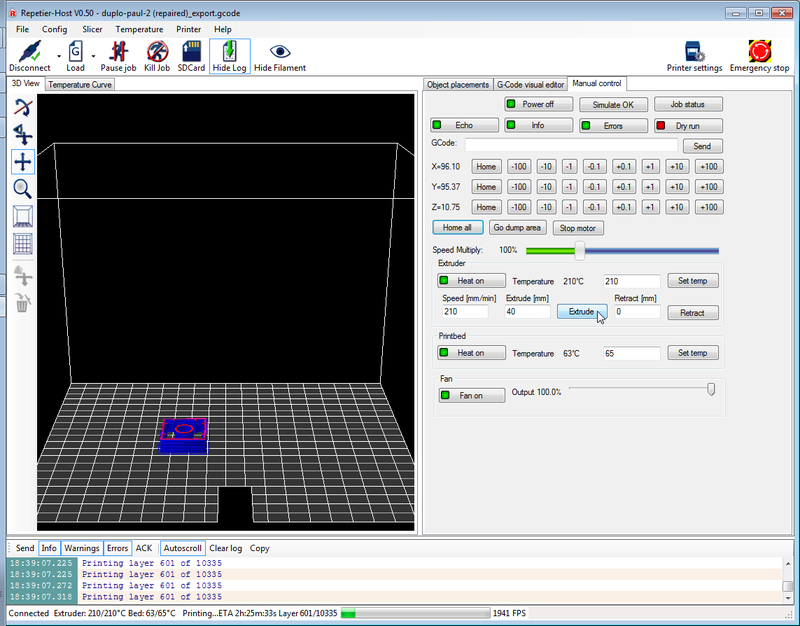
- The open source Repetier-Host program will pilot the printer through a USB host cable. It will interface with three different slicer programs, i.e. skeinforge SFACT (a skeinforge modification) or Slic3r. A distribution with a pre-configured SFACT/skeinforge and slic3r is available from Felix (for registered forum users)
Materials
- 1.75mm PLA rolls
- ABS can be printed, but I did not try.
Support
- Felix forums (Registration required for posting and download)
First impressions
After unpacking, installing and configuring the controlling/slicer software (about 15 minutes), I was able to print a Duplo piece with a bicycle glyph on top without changing any default settings. That is quite remarkable, although I do have experience with two other printers, the RapMan (bought 2 1/2 years ago) and the fabbster (bought recently).
The second print (also using default settings) was an easy-to-print model on a difficult to print Lego block. Also came out rather nicely.
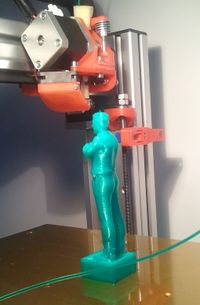
The third print (again using default settings) was 3D character of a serious game made by a co-worker and that I put on top of a DUPLO block. The model wasn't specifically made for a 3D printer (had some serious overhangs), but came out fairly ok. The horizontal overhangs did not print very well, but that is expected without using any support structures...
The 4th to 6th print was the same DUPLO with some text on top. I changed the SFACT/Skeinforge Speed settings, i.e. put scalers to 1.15 (more flow). Note that SFACT doesn't work like the normal Skeinforge !
Assembly
Procedure
Assembly of the current model requires some soldering skills as in most other 3D printing kits. Assembling the structure seems to be very easy. Assembly seems to take about 5 to 12 hours depending on your DYI skills. The next version will be easier to assemble according to Guillaume Feliksdal, its creator.
Since we didn't do any assembly, we can't provide any help. The assembly manual seems to be detailed enough.
Fully assembled
For now, Felix doesn't offer fully assembled models, but may do so in the future. However, I exceptionally managed to order a fully assembled and tested version. The printer fell off a truck or something and arrived broken. Of course, a fully assembled printer is more fragile, but it was IMHO well packaged in a sturdy box and the Post Office admitted mishandling.
The repaired version arrived via UPS and with different packaging and it worked like a charm out of the box. No calibration was needed, only the software had to installed and configured.
Tips
Heating up
- Heat first both printbed and hotend
- Fan on (100%). Do not forget this, cooling is needed or the filament won't stick
- Before printing, it's a good idea to extrude some 40mm of filament at 200mm/s. If that doesn't work (not yet tested), then reverse extrude at high speed (200 to 1000mm/s), cut the filament and reinsert.
Adjustment of the platform
- Make very sure that the nozzle is close to the platform in any location (you can test this by inserting 2-3 sheets of paper) and also that it doesn't run into the platform.
- Use the three screws: tighten = lower, loosen = raise.
- Make sure that there is no grease on the platform, e.g. use alcohol for cleaning.
Preventing and removing clogging of the extruder
After printing, immediately retract the filament. If you can't (e.g. when you print unsupervised) make sure that the control software let's the printer cool down. IMHO, leaving the heat on with filament inside will have it turn to glass after a while.
If the extruder is clogged, you can try the following in this order:
(1) Light clogging
- Heat up (maybe more than usual), then extrude filament. Help it by gently pushing down. If this does not work, then try the next item.
- Use a very fine long needle that you can insert from the bottom though the nozzle. Textile needles won't do. You will have to buy ones that are longer and finer. I got "SERIN acupuncture needles".
(2) Heavy clogging
There can be two causes IMHO:
- Dirt clogs inside
- Broken filament, so that the new one can't push it down properly
- Remove the hot-end. Unscrew the M8 bolt and slide it out. You may have to wiggle and search for the right position. Be careful because the wires attached to the nozzle can break.
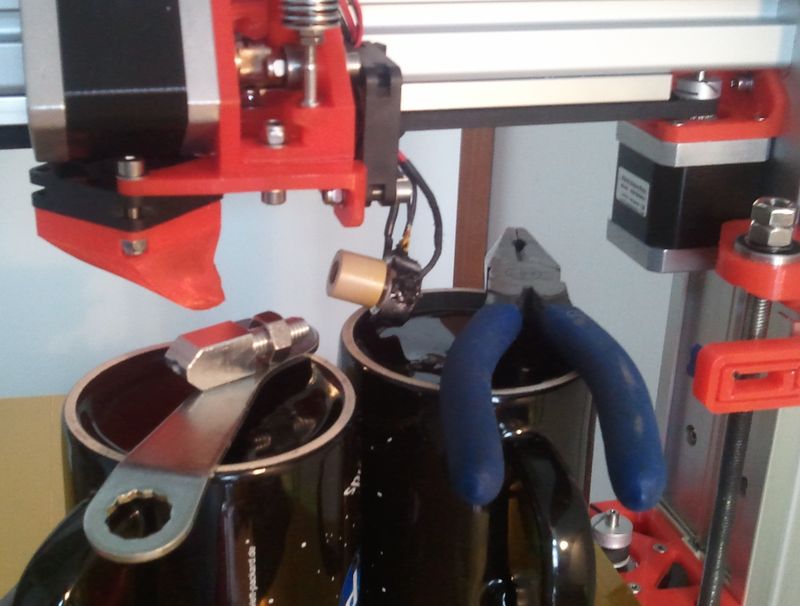
- Now disassemble the upper part. As in picture below, use pliers to hold the beige part and turn the aluminum part with other pliers (or better) with a hex key that fits.
Now you should see what is wrong. It may be just some filament that sticks out from the nozzle and that you can remove with pliers after heating the nozzle.
- You may have to remove the beige isolation (peek) part from the nozzle and drill it with a 2mm drill (not tested). But as said above, you also can try to heat the nozzle and use the needle again to clear a passage.
- If the upper aluminum part has clogged walls: Use a 2mm drill.
- If you feel that the nozzle itself is still clogged, use 0.35mm drill and carefully (slowly and gently) drill into the clogged plastic of the nozzle end (not the metal !). This may be dangerous for the nozzle.
Finally, reassemble, then extrude half a meter of plastic. This will help removing remaining impurities (turn the fan off)
... first start by reading the forum
SFACT/Skeinforge settings
SFACT/Skeinforge is the recommended slicer program. SFACT is based on skeinforge and basically allows to create configurations with less parameters. Generally speaking, Skeinforge, although it requires some waiting, seems to produce better results than Slic3r, however, so far we didn't test Slic3r. In our experience, it also turns out that some slicers can do some things better than others. In addition, Slic3r seems to be much easier to understand than Skeinforge, and SFACT/skeinforge is easier to understand than "normal" Skeinforge. Your choice.
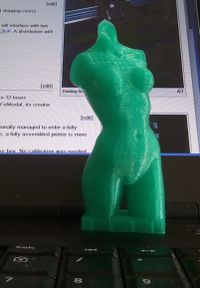
If you use the included SFACT/skeinforge distribution, the default settings are ok for first prints. The print to the right was a small version of Pink Panther Woman by Pedro Januário (thingiverse) on top of a Lego. The bottom of the Lego piece is difficult to print and it came out better than with my other 3D printers. The woman on top is fairly easy to print, but some printers have trouble with the neck and the chest...
Unlock write permissions in the config directory
- Change permissions of the c:/Program Files (x86)/Repetier-Host/sfact_profiles/profiles/ directory for writing (advanced Windows settings). This way you can create other profiles in Skeinforge.
However, only do that if you do understand what skeinforge does. Also, I suggest to keep the "normal" profile as reference. Alternatively, you also could leave the directory in some other place and change the settings...
Temperature
Temperature is not set in SFACT/Skeinforge, but in the RepetierHost software.
- The default temperature of 210 seems to be ok for transparent PLA
- Some orange non-transparent PLA needed less, e.g. 205 !!. 210 will create problems with walls and bridges.
Fatter prints
Default skeinforge settings could be made a bit fatter for some objects like DUPLO blocks.
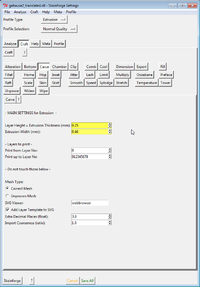
- Menu Slicer->Skeinforge configuration
In Skeinforge:
- Press the Craft button
- Press the Speed button
- Set the all flow scaler values a bit higher, e.g. 1.1 or 1.2
- Set the extrusion width bigger than 0.38mm (this parameter controls the spacing, and you could imagine setting it a tiny bit lower !)
Less fill
I then suggest to reduce the fill ratio if you want to gain some speed, e.g. 15% instead of 30% and to use a honey comb pattern.
- Press the Fill button
- Infill solidity = 0.15
- Use grid hexagonal
However, for small mechanical pieces do the opposite, e.g. infill solidity = 1
More about SFACT and skeinforge
For now, see:
- SFACT slicer
- Skeinforge for RapMan (outdated, not appropriate for the Felix, but you get the idea ....)
- The official Skeinforge wiki
I will post some settings in 2-3 weeks from now ...
Links
- FELIXPrinters (home page)
- Felix support forum
