Felix 1.0 3D printer: Difference between revisions
(→Slic3r) |
|||
| Line 171: | Line 171: | ||
====Slic3r==== | ====Slic3r==== | ||
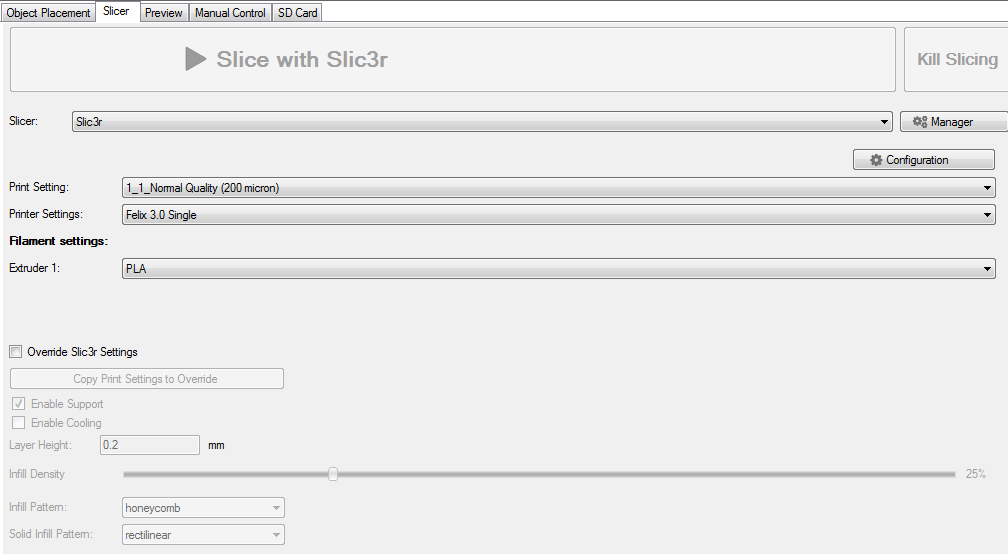
[[File:Slic3r.png|none|Slic3r Slicer]] | |||
Slic3r is an alternative slicer that holds the following set of configurations: | Slic3r is an alternative slicer that holds the following set of configurations: | ||
*''Print'' and ''Printer Settings'' allow you to select between single and dual head printing and control the quality of printing for each of the two modes. | *''Print'' and ''Printer Settings'' allow you to select between single and dual head printing and control the quality of printing for each of the two modes. | ||
Revision as of 11:31, 26 January 2016
<pageby comments="false"/>
Introduction
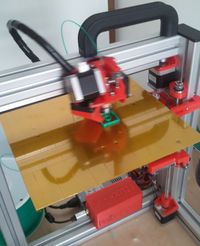
Felix is a low cost 3D Printer, available either as kit or fully assembled and tested. It is IMHO the most practical printer for schools, since it can be easily carried around, is light-weight and has a very stable frame. In addition, it prints as well as any other PLA printer in any price range.
See also:
- Felix 2.0 3D printer (printer we got in oct. 2013).
- Felix Pro 1 3D printer (printer we got in dec. 2015)
This article describes the Felix 1.0 3D printer we bought in 2012. As of aug. 2015, there is a Felix 3.1 with better performance, however we don't own one. However, both the Felix 1.0 and the Felix 2.0 are still working fine.
- Daniel K. Schneider 19:06, 18 June 2012 (CEST), updated Aug 2015.
Where and what
Getting it
The kit or the assembled printers are sold through the felixprinter web site.
Software
- The open source Repetier-Host program will pilot the printer through a USB host cable. It will interface with three different slicer programs, i.e. skeinforge SFACT (a skeinforge modification) or Slic3r. A distribution with a pre-configured SFACT/skeinforge and slic3r is available from Felix (for registered forum users)
Materials
- 1.75mm PLA rolls
- ABS can be printed on an acrylic plate or by dropping some Acetone on the print bed.
Support
- Felix forums (Registration required for posting and download)
First impressions
After unpacking, installing and configuring the controlling/slicer software (about 15 minutes), I was able to print a Duplo piece with a bicycle glyph on top without changing any default settings. That is quite remarkable, although I do have experience with two other printers, the RapMan (bought 2 1/2 years ago) and the fabbster (bought recently).
The second print (also using default settings) was an easy-to-print model on a difficult to print Lego block. Also came out rather nicely.
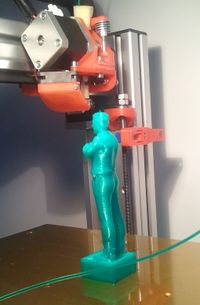
The third print (again using default settings) was 3D character of a serious game made by a co-worker and that I put on top of a DUPLO block. The model wasn't specifically made for a 3D printer (had some serious overhangs), but came out fairly ok. The horizontal overhangs did not print very well, but that is expected without using any support structures...
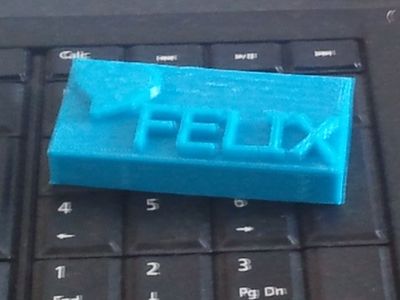
The 4th to 6th print was the same DUPLO with some text on top. I changed the SFACT/Skeinforge Speed settings, i.e. put scalers to 1.15 (more flow). Note that SFACT doesn't work like the normal Skeinforge !
Impressions after a few weeks
The printer still works fine. On the mechanical side:
- It is really important to calibrate the platform. It must be even and be close to the nozzle.
- Regular, safe filament intake is very important for unsupervised printing. I am very happy with my intellectually easy chemistry stand solution...
- Extruder arm tension must be right. Before printing, test extrusion should show constant flow.
On the software side:
- I do have issues with SFACT (the default slicer for the more ambitious). For instance I don't know how to print bridges over pillars, e.g. the kind you get in larger DUPLO pieces. Filament will bond laterally and to the nibbles underneath and create a messy first layer. Printing with a higher layer solution helps, but then the overall quality won't be as good. I do have the same issue with the fabbster.
- Other types of objects slice and print very well.
Student designed example
I decided to teach a optional digital design and fabrication class every 2 years. Last edition was in fall 2011 and students could do a 3D printing project, other options were embroidery, vinyl cutting and music. One student did a Reuleaux triangle kit (see Wikipedia). I had to adapt the design somewhat. The triangle can't be printed and the Wankel piece floor led to lateral bonding, so I punched some holes in it ...

Lego-compatible castle
Larger structures can print fine:
- if the the platform is calibrated as it should: nozzle must be close in all locations
- if the first layer is printed very slowly (that is actually true for most objects, but if you have to restart for a small object it doesn't matter much ....)
- if the filament spooler is reliable and the filament roll has no tangles. This happened to me in the middle of the print below, I had to cut the filament since it somehow got stuck underneath. Fortunately I was there when the roll started to put up resistance. Otherwise, the Felix can IMHO be trusted for longer unsupervised printing. I went away for three hours when I printed the castle below...
- Download lugo stronghold from thingiverse
- (low quality) You Tube video showing the printing process around 2/3 of the print time
Reliability
As far as filament printers go, the Felix seems to very reliable. For example, I can print 4 pieces of my castle kit at the same time (a corner tower, corners and a well with stairs). That print lasted for about a day. I have the printer in my office and go home in the evening and don't mind leaving it alone. Though I actually do not recommend 24h prints since the pieces seem to warp away from the print bed more easily after a few hours it seems. I can't explain why. 4 individual pieces are not bigger than a lonely one.
Have a look at the log file:
19:02:15.783 : <Skeinforge> Cost
19:02:15.783 : <Skeinforge> Machine time cost is 15.54$.
19:02:15.783 : <Skeinforge> Material cost is 5.78$.
19:02:15.783 : <Skeinforge> Total cost is 21.32$.
19:02:15.783 : <Skeinforge>
19:02:15.783 : <Skeinforge> Extent
19:02:15.783 : <Skeinforge> X axis extrusion starts at 60 mm and ends at 199 mm, for a width of 138 mm.
19:02:15.783 : <Skeinforge> Y axis extrusion starts at 50 mm and ends at 189 mm, for a depth of 138 mm.
19:02:15.783 : <Skeinforge> Z axis extrusion starts at 0 mm and ends at 107 mm, for a height of 107 mm.
19:02:15.783 : <Skeinforge> Build time is 15 hours 32 minutes 17 seconds.
19:02:15.783 : <Skeinforge> Distance extruded is 3506306.8 mm.
19:02:15.783 : <Skeinforge> Distance traveled is 3794698.6 mm.
19:02:15.783 : <Skeinforge> Extruder speed is 1.0
19:02:15.783 : <Skeinforge> Extruder was extruding 92.4 percent of the time.
19:02:15.783 : <Skeinforge> Extruder was toggled 44180 times.
19:02:15.783 : <Skeinforge> Operating flow rate is 6.1 mm3/s.
19:02:15.783 : <Skeinforge> Feed rate average is 67.8 mm/s, (4070.3 mm/min).
19:02:15.783 : <Skeinforge>
19:02:15.783 : <Skeinforge> Filament
19:02:15.783 : <Skeinforge> Cross section area is 0.077 mm2.
19:02:15.783 : <Skeinforge> Extrusion diameter is 0.31 mm.
19:02:15.783 : <Skeinforge> Extrusion fill density ratio is 0.81
19:02:15.783 : <Skeinforge>
19:02:15.783 : <Skeinforge> Material
19:02:15.783 : <Skeinforge> Mass extruded is 289.2 grams.
19:02:15.783 : <Skeinforge> Volume extruded is 268.9 cc.
19:02:15.783 : <Skeinforge>
19:02:15.783 : <Skeinforge> Meta
19:02:15.783 : <Skeinforge> Text has 941794 lines and a size of 42490.0 KB.
19:02:15.783 : <Skeinforge> Version is 18.12.11

19:02:15.783 : <Skeinforge> Profile
19:02:15.783 : <Skeinforge> LEGO-3 (normal)
19:02:15.783 : <Skeinforge>
19:02:15.783 : <Skeinforge> Slice
19:02:15.783 : <Skeinforge> Layer thickness is 0.25 mm.
19:02:15.783 : <Skeinforge> Perimeter width is 0.38 mm.
19:02:15.783 : <Skeinforge>
19:02:22.538 : <Skeinforge> The exported file is saved as C:\dks\rapman\felix\repetier\composition_export.gcode
19:02:22.538 : <Skeinforge> It took 27 minutes 41 seconds to export the file.

.... one day later

18:12:31.826 : Printjob finished at 05.10.2012 18:12
18:12:31.826 : printing time:22h:25m:49s
18:12:31.826 : lines send:693569
Assembly
Procedure
Assembly of the current model requires some soldering skills as in most other 3D printing kits. Assembling the structure seems to be very easy. Assembly seems to take about 5 to 12 hours depending on your DYI skills. The next version will be easier to assemble according to Guillaume Feliksdal, its creator.
Since we didn't do any assembly, we can't provide any help. The assembly manual seems to be detailed enough.
Fully assembled
When I bought mine, Felix did not officially offer fully assembled models, but does now. However, I exceptionally managed to order a fully assembled and tested version. The printer fell off a truck or something and arrived broken. Of course, a fully assembled printer is more fragile, but it was IMHO well packaged in a sturdy box and the Post Office admitted mishandling.
The repaired version arrived via UPS and with different (custom foam) packaging and it worked like a charm out of the box. No calibration was needed, only the software had to installed and configured. Therefore, if you can afford, it strongly suggest buying an assembled version. It's only few hundred Euros extra. However, if you are DYI/modder person, you rather should assemble it. That way you better understand how it works :)
Tips
Basic settings
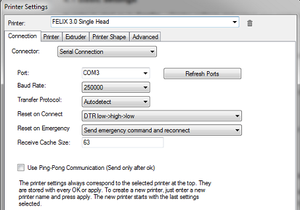
In order to start go to Config-->Printer settings and select your printer type, that is single or dual head and press Refresh Ports. Finally choose the COM-port that belongs to your printer and leave the default commands.
If you cannot find any port:
- Check the USB connection
- Check if drivers are installed correctly. Normally the drivers are installed automatically. If this is not the case you can download the drivers from here.
Import Stl file
Repertier-Host allows you to import the files : g-code (.gcode, .gco, .g) or 3D (.stl, .obj). In order to import a file, press Load and select the desired file from your computer.
Slicers
The slicers prepare your CAD STL-file for printing. It basically cuts your 3D object in layers and determines the paths to be followed in order to print the object. There are three slicing programs that we will present respectively:
CuraEngine
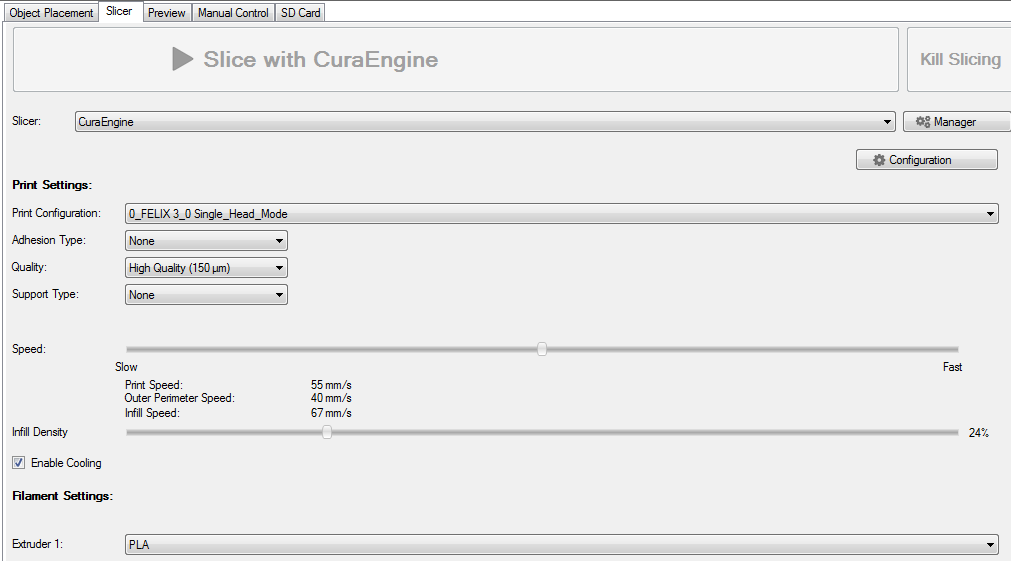
Select Slicer from the right top menu and then CuraEngine from the Slicer options. You now have the following series of options :
- Print Configuration where you can choose between one or two extruders
- Adhesion Type that is normally none but you can also set it to raft if you want extra adhesion or to brim if your object is to small or has a limited contact area with the plate
- Quality where you can choose between different layer heights
- Support Type that allow you to choose between support types of the printing object and no support. The two available supports are touching bed support where the support is generated outside of the object and everywhere support where the support is generated outside and inside of the object.
- Speed that influences the quality. For example when speed is too fast it results to poor quality.
- Infill Density that controls the range of filling density
- Enable Cooling is a checkbox automatically checked that ensures that the extruded filament is actively cooled.
- Filament Settings which allows you to select the filament type to be used.
Slic3r
Slic3r is an alternative slicer that holds the following set of configurations:
- Print and Printer Settings allow you to select between single and dual head printing and control the quality of printing for each of the two modes.
- Filament Settings allow you as previous said to select the filament type.
- Override Slic3r Settings allows you to override some settings of the selected print settings. By selecting the Copy Print Settings to Override box the new settings will replace the previous ones. Firstly Enable Support, enables the generation of support if needed. Secondly, Enable Cooling, enables cooling the extruded filament. Thirdly, Layer Height allows you to control the height of the printed layer. Fourthly Infill Density, allows you to set the percentage of infill of the object, while Infill pattern the pattern of the infill. Finally Solid Infill Pattern concerns the infill for the bottom and top of the object.
SFACT
This slicer is used for single extrusion. It is considered as very reliable but slow. SFACT has the following slicing profiles:
- Profiles 1_1 to 3_4 are ideal for everyday use
- Profiles 4_1 to 4_5 are used in order to print parts of your printer
- Profiles 5_1 to 5_2 are normally used for specific cases
- Profiles 6_1 and further are helpful for testing purposes
For this slicer further configuration is included. By clicking the configure button you will have access to a series of settings. Explanations for each setting are available by pressing the question mark next to the settings name. We will briefly discuss the options for fill, temperature and dimension.
Fill This plugin defines the inner fill of your object and it includes the following options:
- According to the Felix documentation diaphragm “can be used with a sparse infill to give the object water tightness, horizontal compartments, and/or a higher shear strength”. [1]
- Main fill settings concern the distance between the infill lines and the distance between the infill and the edges.
- Extra shells can be used in order to make the object heavier and stronger.
- Start New layer from controls where each layer starts from.
- Surrounding Angle defines the angle that the surrounding layers around the infill are expanded.
- Grid determines how the infill grid will be created.
- Infill angles defines the infill direction of the base and the other layers that follow, the number of rotated layers and the degree the infill direction of odd layers is rotated compared to the base layer.
- Infill pattern defines the form of the infill. The options are line, circular, hexagonal or rectangular.
Temperature
- Cooling rate is responsible for the cooling rate of the extruder while Heating Rate is responsible for the heating rate.
- Base Temperature and Interface Temperature define respectively the raft base and interface temperature.
- Object First Layer Infill Temperature defines the infill temperature of the first layer while Object First Layer Perimeter Temperature is responsible for the temperature of the first layers edges and Object Next Layers Temperature defines the next layers temperature.
- Support Layers Temperature and Supported Layers Temperaturedefines the support and supported layers temperature.
The temperature settings depend on the type of the polymer used. A guide for appropriate temperatures for each material is provided here.
Dimension
- When Absolute Extrusion Distance is selected the extrusion distance output will be the total extrusion distance to this particular gcode line while when Relative Extrusion Distance is selected the extrusion distance output will be the extrusion distance from the last gcode line.
- Extruder Retraction Speed defines the feed rate of the extruder’s retraction.
- Filament Diameter defines the filament diameter.
- Filament Packing Density as implied defines the filament packing density.
- Maximum E Value before Reset defines the maximum value before the firmware is reset with the “G92E0” command line.
- Minimum Travelmove after Retraction defines the minimum distance between the end of one thread and the beginning of another in order to trigger the retraction.
- Retract Within Island allows to activate retraction even when the next thread is within the same island.
- Retraction Distance defines the amount of retraced filament whenever an extruder stop is commanded.
- When thread restarts Restart Extra Distance allows to define the restart extra distance.
Heating up and printing
(1a) Prepare the printer and the model
- The Felix is driven by Repetier Host software that must be configured according to instructions. Connect the USB cable.
- Ensure that the platform is calibrated right (see also below). The nozzle must be very close to the platform in all areas, but not touch !
- Make sure that there is no grease on the platform. Clean with alcohol or some other appropriate liquid
- Heat the platform (since this takes most time)
- Slice your model next (leave the printer cold if the model is very complex, else also heat the hot end)
- Then heat hot end and also turn the fan on (100%). Do not forget this, both a hot bed and the cooling fan is needed or the filament won't stick.
(1b) Check filament extrusion
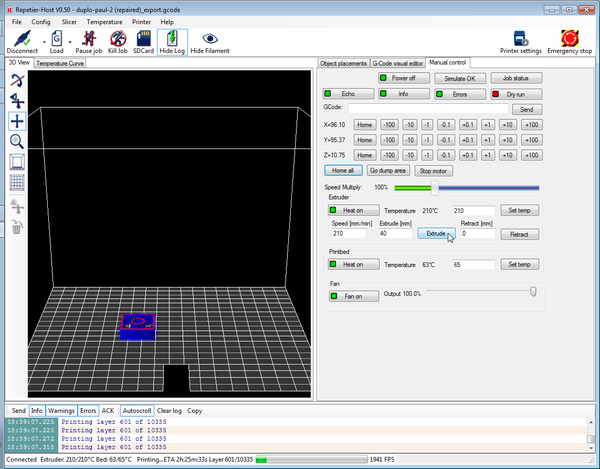
- Before printing, lower the z-axis by 20, then extrude some 60mm of filament at 150mm/s. Repeat with 200mm or so. If extrusion isn't a nice constant flow, then you could reverse extrude at high speed (500 mm/s), cut the filament, reinsert and restart (extrude again at least 300mm). .
- If filament still doesn't flow consistently, try adjusting the extruder arm: You either must tighten or loosen and you will have to figure this out by trial and error. In my case, my first prints used too low tension, so start by tightening maybe.
- Make sure that no filament hangs around the nozzle, it could mess up your first layer.
- You also may try changing the temperature, warmer is easier flow, however print quality will be lower. I also found that it helps to extrude at much higher temperatures (240) before printing, and then going back to normal.
- Worst case scenario is a dust on the filament, some clogging inside or both. The nozzle really should have clean inside walls. Also, there may be some hardened piece of plastic that just sits before the nozzle (e.g. in the 2mm "space"). As we said, extruding before printing can help unclog, else see the extruder clogging issue below ...
(2) Print
- Then print. Again, make sure that filament intake works well. Using a good filament holder is essential for non or semi-supervised printing.
- An IMHO good (but expensive) solution I came up with can be found here, i.e. I use a retort stand.
(3) After printing
- After printing, you could immediately remove the filament with reverse extrusion. Alternatively, extrude some filament so that the hot-end is full with plastic.
Bits of filament that will stay in a hot extruder may clog later. You then can leave the temperature on while you let cool down the platform for removing the printed piece. But don't wait for too long before printing a new piece. Else reverse extrude.
- For unsupervised prints, make sure that in Repetier Host the printer is configured "heat off" after printing.
- Reverse extrude a high speed (300). You may have to pull the filament a bit. Also make sure to remove broken piece(s) that could remain between the plastic intake and the hot end. Such pieces actually may get stuck in the upper part of the extruder (it happened to me once and that is how I learned how to disassemble the hot end). You may as well check the x-axis pulley and belt once in a while. Filament also can be stuck there.
- Let the platform cool down a bit before removing pieces. They will come off easily and won't be warped. Tearing away is tempting (and I do it often), but there is some punishment for that, e.g. Kapton tape needs to be replaced more quickly.
Changing filament while it prints
There are two methods:
(1) Pause the printer with the repetier host software
- Pause by clicking on the "Pause job" icon on top in the "Manual control" tab. Then wait until it stops.
- Then move the nozzle up and away (anywhere into an empty space)
- Retract and reinsert as usual
- Make sure to extract quite a lot of plastic. I'd say at least 200mm in order to have the right pressure. If the nozzle starts in some uneven space, then filament may not come out out and you'd have to restart again, this time loosing some print area.
- Finally, Unpause: The extruder should restart exactly where it left. There is no need for you to reposition the extruder.
(2) Exchange while it prints
This can be done fairly easily unless you are printing an area where the extruder retracts a lot (in that case you certainly should try the first solution).
So, if you see that you are near the end of your roll or that the plastic gets stuck in the roll and needs to be cut (crossovers, happended to me) :
- Make a clear orthogonal cut for both (filament in the extruder) and filament on the roll. In other words the ends must be flat, so that the new can push down the old one.
- Then just insert the new end after the one that will be spent
- Gently help by pushing down gently (!). Make sure not inhibit retractions of the extruder....
Btw. These methods can be used to print objects with more colors, e.g. a yellow duck on top of a green hill.
Adjustment of the platform and the extruder arm
- Platform adjustment
- Make very sure that the nozzle is close to the platform in any location (you can test this by inserting 2-3 sheets of paper underneath the nozzle after raising the nozzle by 0.1mm before moving it around). In no area should the nozzle run into the platform. This is absolutely mission critical. If your platform is horizontal, then the nozzle should almost touch the platform in its home position. Almost really means almost (i.e. "1 sheet of paper" distance and no more)
- Use the three screws: tighten = lower, loosen = raise.
Click on the following thumbnails (twice) to see what happens if the nozzle distance is either bad or ok. Prints shows the start of a Lego castle (to the left a floor design I later modified because larger rectangles (to the right) print a bit faster and are less prone to errors).
- Platform surface
- Make sure that there is no grease on the platform (e.g. from finger prints), e.g. use alcohol for cleaning. Someone (ref?) also reported that you could buy some glass, e.g. a picture frame in a DYI store and clip it to the platform. Adherence should be better, but heating will be slower.
- Also, never forget to fully heat the platform. PLA will not stick well to a colder platform. ABS is even worse though maybe printing it very hotly (260 degrees) could help (not tested yet).
- Printing with ABS. One solution might be to add another surface on top (and adjust z-height of course). E.g. you could use some acrylic sheet. I'll try that with a spare rapman print bed I still own. For small objects no heating would be required. For larger object more heat than 65 degrees is needed.
- Extruder arm
- When you extrude filament, plastic should come out consistently. If it doesn't, the nozzle may be dirty inside or the extruder arm tension may be too low or too high. Of course, also check the temperature.
- Adjust the little M4 bolt (if filament is inside, hold the screw with pliers, else it will turn). Rather try make it more tense for starters ...
Preventing and removing clogging of the extruder
Prevention
- Make sure that the hotend is correctly aligned. It took me some time to figure out why at some filament had trouble coming out. The M4 nut can become loose if you didn't fix it correctly and bad alignment with the rest of the extruder means trouble.
- Make sure that you filament is ok. Clogging is usually due to filament that is too thick or way too thin in certain places. In principle, tolerance should be +/- 0.0.5mm. I have seen +/- 0.3mm and that will not do !!
- When printing models like Legos, turn down retraction. Filament going up and down can become really bad after a while
- Speed up (if you print very slowly) or/and heat up....
Remove filament after printing
After printing, immediately retract the filament. If you can't (e.g. when you print unsupervised) make sure that the control software let's the printer cool down. IMHO, leaving the heat on with filament inside will have it turn to glass after a while.
If the extruder is clogged, you can try the following in this order:
(1) Light clogging
- Heat up (maybe more than usual), then extrude filament. Help it by gently pushing down. If this does not work, then try the next item.
- Reverse extrude, then wait some time. There may be a some bits of filament just before the nozzle and that can be pushed down when warmer. Extrude filament at about 150mm and gently help with pushing. If this doesn't help, see the next item.
- Use a very fine long needle that you can insert from the bottom though the nozzle. Textile needles won't do. You will have to buy ones that are longer and finer. I got "SERIN acupuncture" needles. Move the platform down (at least 100mm) and do this while the nozzle is hot.
(2) Heavy clogging
There can be two causes IMHO:
- Dirt clogs inside the hot end
- There could be just some stuck broken filament, so that the new one can't push it down properly
Procedure for cleaning the extruder:
- Remove the hot-end. Unscrew the M8 bolt and slide it out. You may have to wiggle and search for the right position. Be careful because the wires attached to the nozzle can break.
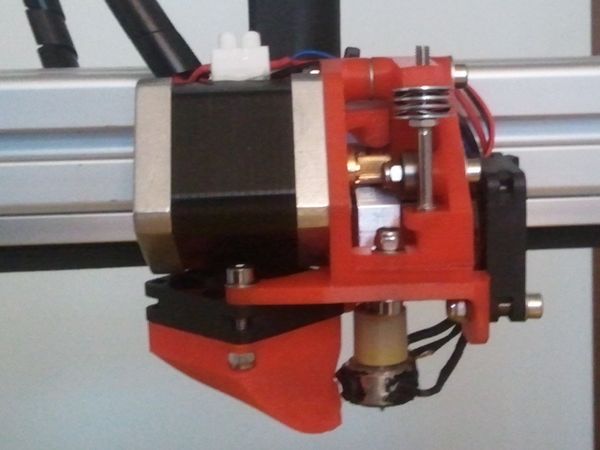
- Now disassemble the upper part. As suggested indirectly in picture below, use pliers to hold the beige part and turn the aluminum part with other pliers (or better) with a hex key that fits.
Now you should see what is wrong. It may be just some filament that sticks out from the nozzle and that you can remove with pliers after heating the nozzle.
- You may have to remove the beige isolation (peek) part from the nozzle and drill it with a 2mm drill (not tested). But as said above, you first should try heating the nozzle and then use the needle again to clear a passage.
- If the upper aluminum part has clogged walls: Use a 2mm drill (not tested).
- If you feel that the nozzle itself is still clogged, use 0.35mm drill and carefully (slowly and gently) drill into the clogged plastic of the nozzle end (not the metal !). This may be dangerous for the nozzle.
Finally, reassemble, then extrude half a meter of plastic. This will help removing remaining impurities (turn the fan off)
... also read this thread in the Felix Forum
Filaments, temperature and fan
Polymers
The Felixprinter can print various types of polymers, but it's main "calling" is a PLA printer. ABS extrudes nicely at 245 degrees (I tested that) but it would not stick well to the default platform (see below for ABS printing)
As explained in the PLA article, various kinds of PLA need different temperature settings. In addition, you may have to change temperature according to the type of object you will produce. Typical PLA used for 3D printing extrudes at 210 degrees, but you can go lower or higher a bit.
Finally, filament must be regular and have only tiny variations in size. Some filament rolls are very uneven: In some non-translucent filament rolls (red PLA) I found spots that measured up to 2.1mm instead of 1.75. That type of roll only can be used for small and unambitious parts. Some rolls are regular but systematically off, e.g. I had 2.7mm filament that was delivered as 3mm. On the Felix, this situation can be handled by tightening the extruder arm.
Temperature
- Raise the temperature if
- filament doesn't flow well enough after changing to another plastic (i.e. first check if there is a problem with extruder arm tension)
- you print heavy simple block structures
- If you think that the nozzle may run into cold "towers" and rip the model off the platform. See also the fan settings.
- If you print structures with little filling which causes the nozzle to be "out of contact", i.e. filament will not be "pulled down" enough.
- Lower the temperature if
- Flow is a bit messy (too much filament at given times, walls unstable)
- If you have negative angles (object expanding upwards) and/or overhangs over a large space, e.g. a roof that has no support structures. For printing roofs with filling underneath I rather would raise the temperature...
- If you print small delicate pieces like a "hand on a Lego"
If you print very small precise structures, you always should try to print as low as possible, e.g. you can try 190 (as opposed to 210), but filament flow may be hampered.
There is also an interaction between filament temperature and fan strength. On full fan strength you can print a bit warmer. Speed is another factor that will interfere. Very low speed and very high speed (feed rate) seems to be more difficult to extrude.
Typcial temperature settings for PLA filament (but I am not sure about this):
- Transparent blue or green PLA (from Felixprinter, wide rolls): 210 (I am pretty sure about this)
- Black PLA (from Felixprinter, wide roll): 205, maybe even a bit lower. Black PLA likes stringing IMHO. (I am not sure about this)
- Orange and red (non transparent PLA from Felixprinter, narrow roll): 207, except if you print fine parts and very little filling: 210 or even 215. If you encounter the problem that filament stops coming out, e.g. when printing small towers or large roofs over small filling, then (after checking extruder arm tension of course) you may go as high as 215, although print quality (overhangs) will suffer.
Fan
- The fan usually should be on. However if you print small towers on a small basis, you may reduce fan volume. Reason: If the print head bumps into some hardened (not so well extruded plastic) bit, it may rip the piece off the platform. If the PLA is still warm it may pass through. Same strategy can be used for printing large roofs that have many pillars underneath.
Another strategies for dealing with uneven bits that stick out:
- Print objects that tend to be ripped off with a raft that sticks
- Change fill type: Hexagonal is prettier but more difficult than lines
- Better than both "fan off" and "making it stick" strategies is to print slowly. Although you can't define regions other than 1st layers and roofs in the slicer software, you just can manually slow down printing to 25% or 50% or your "normal" speed.
Filament quality
Finally, if you have problems with no filament coming out (after test extruding), then you just may be unlucky, i.e. your roll may have very irregular parts. If it's much wider than 1.75mm (I did encounter 2.1mm on non-translucent PLA rolls) then it most likely will get stuck. If it is much lower, then the extruder may loose grip. If you own faulty PLA, only use it for small prints !
Fills
Printing with small layers and using little fill (e.g. 15%) can be problematic. Typically you would print these at high speed, since it doesn't matter if there are imperfections. However, if filament is misaligned - typically within towers that have a small width - you may run into "clogging" problems: Filament stops coming out and then the whole print will be messed up ...
Solutions:
- Change the fill pattern. Simple lines may be easier.
- Use no fill and instead use thicker walls. That's a solution for small sculptures.
- Use more fill
- Reduce speed (start with that !)
Transporting the felix
One of the good reasons for buying a Felixprinter is easy transport. If you use a car, apply the same principle as with a child. Attach it on a rear seat with a seat belt...
I suggest, however, one modification to the design. Replace the screw that holds up the extruder arm with a longer one. The default short one can slip out and then you will have find all the washers again. In the plastic box delivered with the printer I found a screw that fits, although there is only space for a single bolt as you can see in the picture below (ok with me)...
SFACT/Skeinforge settings for PLA
SFACT/Skeinforge is the recommended slicer program. SFACT is based on skeinforge and basically allows to create configurations with less parameters. Generally speaking, Skeinforge, although it requires some waiting, seems to produce better results than Slic3r, however, so far we didn't test Slic3r. In our experience, it also turns out that some slicers can do some things better than others. In addition, Slic3r seems to be much easier to understand than Skeinforge, and SFACT/skeinforge is easier to understand than "normal" Skeinforge. Your choice.
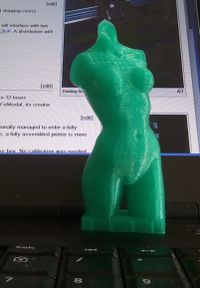
If you use the included SFACT/skeinforge distribution, the default settings are ok for first prints. The print to the right was a small version of Pink Panther Woman by Pedro Januário (thingiverse) on top of a Lego. The bottom of the Lego piece is difficult to print and it came out better than with my other 3D printers. The woman on top is fairly easy to print, but some printers have trouble with the neck and the chest...
Unlock write permissions in the config directory
- Change permissions of the c:/Program Files (x86)/Repetier-Host/sfact_profiles/profiles/ directory for writing (advanced Windows settings). This way you can create other profiles in Skeinforge.
- However, only do that if you do understand what SFACT/skeinforge does. Also, I suggest to keep the all the included profile as reference, create new ones for your own designs and start from the one that fits best. Alternatively, you also could leave the directory in some other place and change the settings...
Temperature
Temperature is not set in SFACT/Skeinforge, but in the RepetierHost software.
- The default temperature of 210 seems to be ok for transparent PLA
- Some orange non-transparent PLA needed less, e.g. 205 !!. 210 will create problems with walls and bridges.
- Again: make damn sure that the nozzle is very close to the platform (1 or 2 sheets of paper)! Colder PLA will do even worse than warmer one if the distance is too big.
High quality prints
- Instead of printing the whole model with finer layers which can turn out to be difficult in addition to taking a lot of time, I suggest to use SKIN.
- The Skeinforge Skin wiki entry explains what happens. You can work with 1/2 and 1/3 layers both horizontally and vertically. It does (partly) what you could do with the netfabb slicer.
- Also read What the hell is SKIN? (SFACT FAQ)
Fatter prints
Default skeinforge settings could be made a bit fatter for some objects like DUPLO blocks.
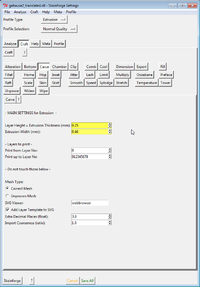
- Menu Slicer->Skeinforge configuration
In Skeinforge:
- Press the Craft button
- Press the Speed button
- Set the all flow scaler values a bit higher, e.g. 1.1 or 1.2
- Set the extrusion width bigger than 0.38mm (this parameter controls the spacing, and you could imagine setting it a tiny bit lower !)
Less fill
I then suggest to reduce the fill ratio if you want to gain some speed, e.g. 15% instead of 30% and to use a honey comb pattern.
- Press the Fill button
- Infill solidity = 0.15
- Use grid hexagonal for a more solid print. However, I noticed that this pattern can lead to irregular bits that stick up and then may cause the nozzle to rip off the model
For small mechanical pieces do the opposite, e.g. infill solidity = 1
More about SFACT and skeinforge
For now, see:
- SFACT slicer
- Skeinforge for RapMan (outdated, not appropriate for the Felix, but you get the idea ....)
- The official Skeinforge wiki
I will post some settings in 2-3 weeks from now ...
Printing with ABS
The Felixprinter in its current setup is designed for PLA printing. More precisely, while the extruder can handle ABS without problems, the print bed (platform) is not made for ABS IMHO, since the print will not stick enough. ABS needs to bond with either something like a scratched acrylic plate or a strongly heated platform. Fight warping is the main issue one has to face as with any other 3D printer.
However, objects with a small footprint can be printed fairly easily:
Add an acrylic plate on top of the print bed
Put an acrylic plate on top of the platform. I used a 8mm print bed spare part from my RapMan and attached it with 2 clips. I believe that an acrylic plate could be found in any good DYI store, also check with people/websites who do laser cutting (e.g. fab labs), e.g. check out the the supplier list from Fablab Amsterdam.
- Such plate should be sanded or otherwise roughened up (I just used a kitchen knife in the small print area I used).
- Then adjust the switching vane for the Z-axis. Raise the platform with Repetier Host until the bed is really close. Unscrew the vane, then move it until the green LED goes out
Switching back to PLA printing
- Adjust the z-axis first (switching vane).
- Extrude PLA at 220 degrees for a while, i.e. until the color and the flow are somewhat ok. Then go down to 210 and 205 and repeat. Extrude at least 500mm since bits of ABS can stick here and there in the extruder .
ABS setting in Repetier host
- Typical ABS temperature is 245 (that's what I used)
- No fan. Turn it off if it starts again after launching the print job. I believe that three things can happen when you leave the fan on. There will be less bonding (in particular in the crucial first two layers) and if the plastic is cold, new one added on top will increase warping since ABS warps in the direction of the warmer layer (cold is longer). Finally: if cold ABS imperfections stick out (up), there is a chance that the nozzle will rip the object way. So: if you leave the fan on for the first layers (raft plus 1st real layer), all your chances will be gone ....".
- Unheated platform, but I did not try if one heats it (you could)
- In addition you could close the window and heat your room. However, I don't think that ABS fumes are good for your lungs. The best ABS printers use a heated chamber in addition to a strongly heated print bed, so you also could build one of these ...
I suggest to print with a somewhat dense and fat raft as explained below, unless your object has a flat bottom, but I don't know what parameters you should then use for the first layer.
- Configure an SFACT profile for ABS:
- Select your favorite PLA profile first
- Menu Profile -> Profile ..... (then add yours)
SFACT profile
You must make changes in serveral places. Create a new profile, don't mess up a PLA profile that works.
SFACT Raft settings
- SFACT Select Craft / Changes to raft settings (highly provisional - Daniel K. Schneider 17:35, 6 September 2012 (CEST))
Interface Layers: 0 - 1
- 0 has the advantage that the object then can sit on the fatter base. You could use 1 (a single interface layer) with objects that are smaller than 2-3 cm on the base since then you can get them off more easily, but I found that using a dense single layered raft does just a fine.
Interface Feed Rate Multiplayer: 1
Interface Flow Rate Multiplayer: 2 - 4
- I use 4 since I can't teach SFACT to add more lines, i.e. the object on top will peel away
Interface Nozzle Lift over Interface Layer Thickness (ratio): 0
- Else the nozzle is too far
Base Layers (integer): 1
Base Flow Rate Multiplier (ratio): 2.0 or 2.5 or 3 (try, I use 3)
Base Infill Density (ratio): 0.7
Base Layer Thickness of Layer Thickness: 1
- This is not typical, but else the nozzle is too far
Base Nozzle Lift over Base Layer Thickness (ratio): 0
- as above, nozzle must be close
SFACT Speed section changes
- Printing slower should help prevent warping, since the plastic can cool down in a more uniform way (IMHO)
Main Feed Rate: 60
Perimeter Feed Rate: 30
Object Layer Main Feed Rate: 25
First Layer Main flow Rate Multiplier (ratio): 1.2
First Layer Perimeter Flow Rate Multiplier (ratio): 1.2
Bridge Flow Rate: 1
Bride Feed Rate: 1
- However, these settings depends very much on your object and the quality you want to achieve. E.g. if you print an object that has long and high walls, you might try to slow down speed and maybe turn on the fan so that each layer could cool down quickly (just an idea, not tested).
SFACT Fill section changes
Extra Shells on Base (shells): 2
- This helps to get the first layer right (well, the 2nd attempt)
To try out
- Despite the above settings the first layer - i.e. DUPLO nibbles - doesn't stick very well, i.e. only the 3rd layer has about the right shape. Also, I need to figure out how to move the 1st layer still closer to the raft or interface layer. Maybe I should reduce print speed too, but then I hate waiting for too long...
- SFACT Dimension settings: I believe that something should be changed there too, since ABS does not extrude in the same way as PLA. Maybe also reduce extrusion width in Carve ?
- Differentiated temperatures for raft and model would be nice to have. I.e. use Skeinforge instead of SFACT. More complicated, but skeinforge has more options and also more recent code.
- Heat the platform. After waiting a while, the Acrylic sheet should heat too. Maybe this could prevent that the 1st print layer peals (warps) away from the raft. Also to be tried with flat bottom objects using no raft.
First ABS printing results
For the first print, I attempted a rather too large DUPLO. Longer than 3cm walls have tendency to warp upwards. The result is mixed. The shape is there, too much filling on the bridge (the flat top), and one corner severely warped (not shown, in the back)
For the second print, I used an easier 2x2 DUPLO with a Vigeland sculpture on top. I also adjusted some SFACT settings. In particular I had to make sure that the first layer was closer to the raft by entering "wrong" parameters. The result is satisfactory, but not as good as my PLA versions. Sorry for the bad picture quality...
Provisional conclusion: Printing ABS is as easy as with any other 3D printer I know of, if an acrylic plate is used and the fan is off. Only smaller objects can be printed without a strongly heated platform. Small here means: a small base layer and shorter than 3cm walls. A 6cm long wall may or may not print. Of course, larger objects can be printed, but they need structural changes in the design like holes in the walls. Also, flat objects like paperclips should do fine. Warping starts when several layers are piled on top. Btw: A heated print bed only will guarantee that the bottom of your larger model will print out fine. Warping may start again after a few dozen or hundred layers and for that only a heated chamber could help.
Oh, a final comment: I don't like printing with ABS very much since (a) it stinks and (b) results are IMHO not as precise as the ones done with PLA. I just took this up as little challenge since some types of models should be printed in ABS like stuff that is in contact with heat (e.g. tea) or smaller pieces that must be very sturdy. Also, ABS printing without fan allows to print objects with "towers" and tricky bridges where little things can stick out. Cold PLA may cause the model to be ripped off more easily than warm ABS...
Links
- FELIXPrinters (home page)
- Felix user manual
- Felix support forum
