Flash CS3 shape tweening tutorial
This article or section is currently under construction
In principle, someone is working on it and there should be a better version in a not so distant future.
If you want to modify this page, please discuss it with the person working on it (see the "history")
<pageby nominor="false" comments="false"/>
Overview
- Shape tweening means that you transform an object from one state into an other. This is usally called morphing
- This article is part of some other Flash tutorials.
- Learning goals
- Learn about basic Flash 9 (CS3) frame-by-frame animation, also called "movies".
- Prerequisites
- Flash CS3 desktop tutorial
- Flash layers tutorial
- Flash drawing tutorial
- Flash frame-by-frame animation tutorial or Flash motion tweening tutorial
- Moving on
- The Flash article has a list of other tutorials.
- Quality
- This text should technical people get going and may not be good enough for self-learning beginners. It can be used as handout in a "hands-on" class. That is what Daniel K. Schneider made it for...
- Level
- It aims at beginners. More advanced features and tricks are not explained here.
- Materials (*.fla file you can play with)
- http://tecfa.unige.ch/guides/flash/ex/shape-tweening-intro/
- The executive summary
Introductory example
- The principle
You can transform any form into any other form.
Shape tweens work on so-called editable objects, e.g. it will not work with symbols or grouped objects. You may shape tween:
- Drawing objects (drawings made in object mode)
- Shapes (drawing made in merge mode)
Also, as in motion tweening, the object to be shaped must be in a separate layer.
- Step 1 - Draw an object
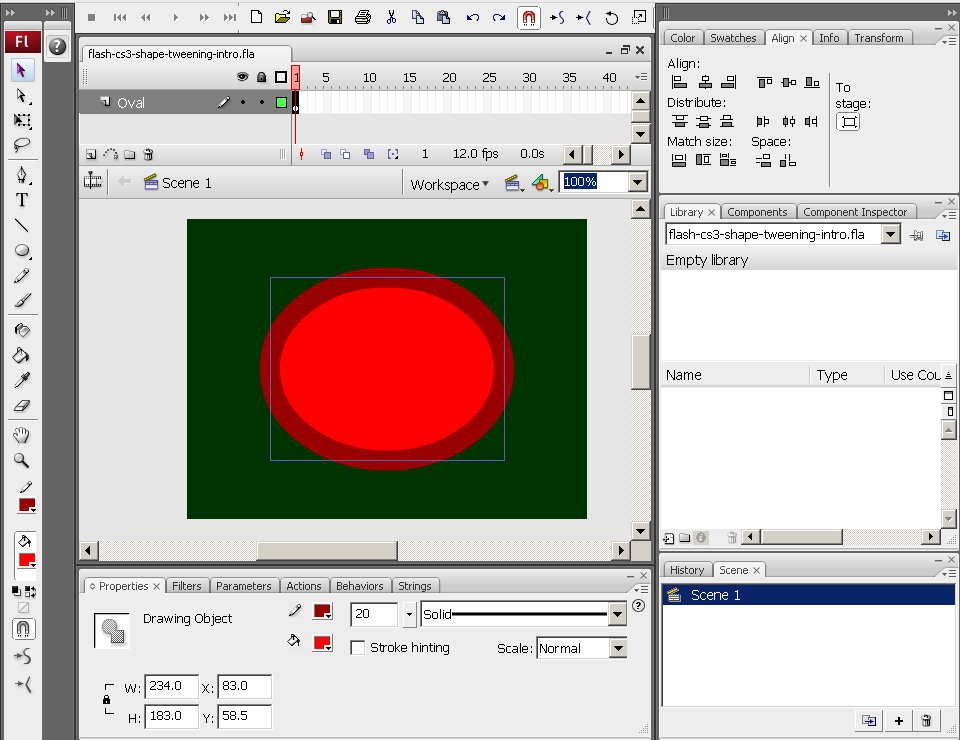
- We draw an oval with a think border with the Oval tool and also set the background.
- Then we center the oval in the stage. To do so, use the Align panel (Window->Align, or hit Crtl-K)
- Check to stage and click on the Align icons until you get it right :)
You should have something like this:
- Step 2 - Insert a new blank keyframe
- Right-click on frame 10 and Insert Blank Keyframe. (not "Insert Frame" or "Insert Keyframe")
This will insert an empty new Keyframe
- Step 3 - Add a new object to the new keyframe
In this frame, draw a new object, i.e. we inserted a Polystar, also in object mode.
- Select the Polystart tool (It sits below the rectangle tool and you must hold down the mouse to get at it)
- Then, in the properties panel, select from the Options pull-down menu: Star and Number of sides = 9
- Then, draw it
- Step 4 - Change its shape and align it with the oval and the stage
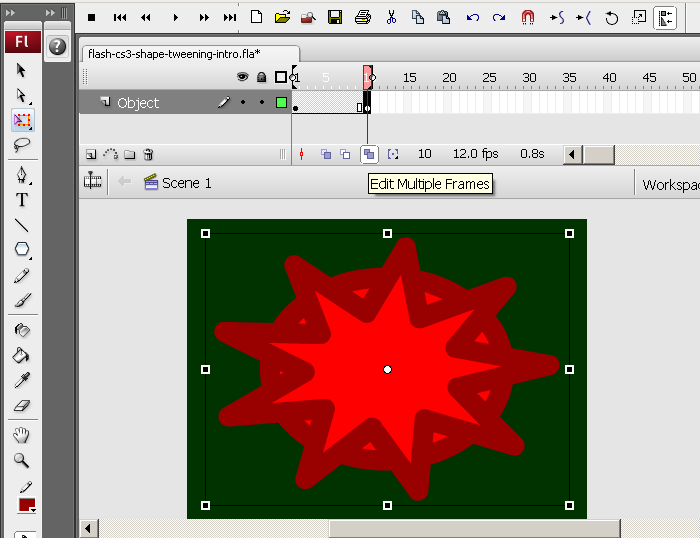
Then make it a bit "oval" and adjust it more or less to the size of the oval
- Either click on the Free Transform Tool or Right-click on the polystar; Select Free Transform
- Drag out one side
- To see the oval you can click on the "Edit multiple frames" icon in the Timeline control bar.
- Then make again sure that it is centered by using the Align panel
You should have something like this:
- Step 5 - Change colors of the polystar
- Untick the "Edit multiple frames" icon !!
- Then you can change the colors of the stroke and the fill
- Step 6 - Morph
- Click on an empty frame between the two keyframes
- In the properties panel below select Tween: Shape
- Alternatively: Just right-click on an emtpy frame and select Create Shape Tween
- Test
- Move around the playhead
- Menu Control->Test Movie
Done :)
You can admire the result
Links
Example materials
Example files used (including *.fla source) can be found here:
- Click on either an *.html or *.swf file to see.
- Get just the *.fla file if you want to make modifications. The standard copyright of this wiki applies.

