Flash CS3 shape tweening tutorial: Difference between revisions
m (using an external editor) |
m (using an external editor) |
||
| Line 103: | Line 103: | ||
* Now you will have a "Live Trace button" on the control panel on top | * Now you will have a "Live Trace button" on the control panel on top | ||
* Next to it is a little pulldown menu from wich you can select various options, for a portrait you may choose "Color 16" | * Next to it is a little pulldown menu from wich you can select various options, for a portrait you may choose "Color 16" | ||
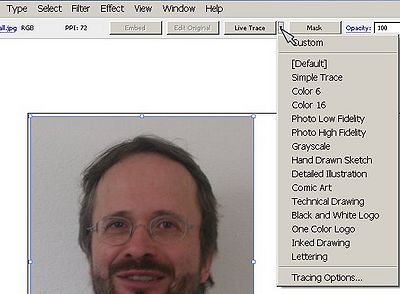
[[image:illustrator-cs3-live-trace.jpg| | [[image:illustrator-cs3-live-trace.jpg|thumb|400px|none|Live tracing with IllustratorCS3]] | ||
Once you hit the trace button, the controls on top will change and you can play with all sorts tracing methods and parameters | Once you hit the trace button, the controls on top will change and you can play with all sorts tracing methods and parameters | ||
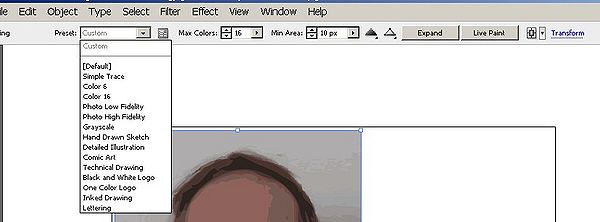
[[image:illustrator-cs3-live-trace2.jpg| | [[image:illustrator-cs3-live-trace2.jpg|thumb|600px|none|Live tracing controls with IllustratorCS3]] | ||
== Links == | == Links == | ||
Revision as of 18:50, 30 August 2007
This article or section is currently under construction
In principle, someone is working on it and there should be a better version in a not so distant future.
If you want to modify this page, please discuss it with the person working on it (see the "history")
<pageby nominor="false" comments="false"/>
Overview
- Shape tweening means that you transform an object from one state into an other. This is usally called morphing
- This article is part of some other Flash tutorials.
- Learning goals
- Learn about basic Flash 9 (CS3) frame-by-frame animation, also called "movies".
- Prerequisites
- Flash CS3 desktop tutorial
- Flash layers tutorial
- Flash drawing tutorial
- Flash frame-by-frame animation tutorial or Flash motion tweening tutorial
- Moving on
- The Flash article has a list of other tutorials.
- Quality
- This text should technical people get going and may not be good enough for self-learning beginners. It can be used as handout in a "hands-on" class. That is what Daniel K. Schneider made it for...
- Level
- It aims at beginners. More advanced features and tricks are not explained here.
- Materials (*.fla file you can play with)
- http://tecfa.unige.ch/guides/flash/ex/shape-tweening-intro/
- The executive summary
Introductory example
- The principle
You can transform any form into any other form.
Shape tweens work on so-called editable objects, e.g. it will not work with symbols or grouped objects. You may shape tween:
- Drawing objects (drawings made in object mode)
- Shapes (drawing made in merge mode)
Also, as in motion tweening, the object to be shaped must be in a separate layer.
- Step 1 - Draw an object
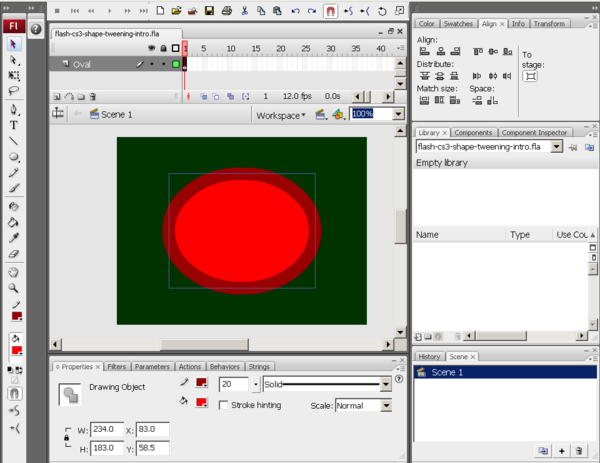
- We draw an oval with a think border with the Oval tool and also set the background.
- Then we center the oval in the stage. To do so, use the Align panel (Window->Align, or hit Crtl-K)
- Check to stage and click on the Align icons until you get it right :)
You should have something like this:
- Step 2 - Insert a new blank keyframe
- Right-click on frame 10 and Insert Blank Keyframe. (not "Insert Frame" or "Insert Keyframe")
This will insert an empty new Keyframe
- Step 3 - Add a new object to the new keyframe
In this frame, draw a new object, i.e. we inserted a Polystar, also in object mode.
- Select the Polystart tool (It sits below the rectangle tool and you must hold down the mouse to get at it)
- Then, in the properties panel, select from the Options pull-down menu: Star and Number of sides = 9
- Then, draw it
- Step 4 - Change its shape and align it with the oval and the stage
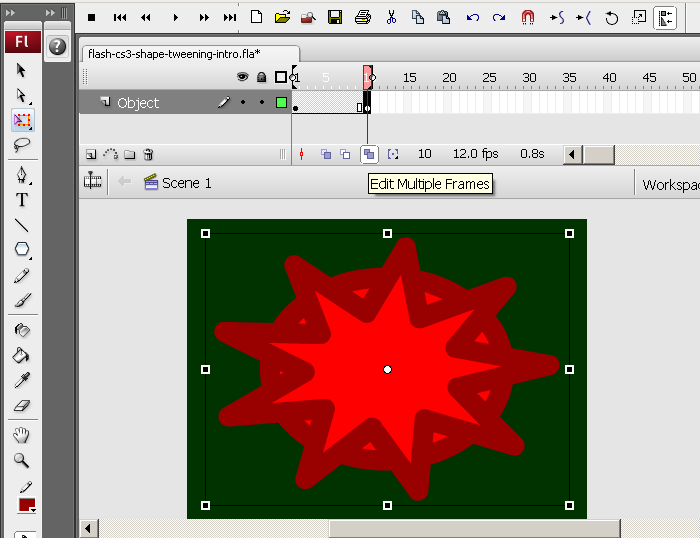
Then make it a bit "oval" and adjust it more or less to the size of the oval
- Either click on the Free Transform Tool or Right-click on the polystar; Select Free Transform
- Drag out one side
- To see the oval you can click on the "Edit multiple frames" icon in the Timeline control bar.
- Then make again sure that it is centered by using the Align panel
You should have something like this:
- Step 5 - Change colors of the polystar
- Untick the "Edit multiple frames" icon !!
- Then you can change the colors of the stroke and the fill
- Step 6 - Morph
- Click on an empty frame between the two keyframes
- In the properties panel below select Tween: Shape
- Alternatively: Just right-click on an emtpy frame and select Create Shape Tween
- Test
- Move around the playhead
- Menu Control->Test Movie
Done :)
You can admire the result
Morphing a picture
You can not morph bitmaps (e.g. photographs). So have to find a way to turn faces into vector graphics.
The free Inkscape editor can do this:
- File->New ; Select the bitmap file (e.g. a *.jpg)
- Select it
- Path -> Trace Bitmap item (or Shift-Alt B)
Illustrator also can:
- Open the picture
- Select it
- Now you will have a "Live Trace button" on the control panel on top
- Next to it is a little pulldown menu from wich you can select various options, for a portrait you may choose "Color 16"
Once you hit the trace button, the controls on top will change and you can play with all sorts tracing methods and parameters
Links
Example materials
Example files used (including *.fla source) can be found here:
- Click on either an *.html or *.swf file to see.
- Get just the *.fla file if you want to make modifications. The standard copyright of this wiki applies.


