InkStitch - fills with programmable stitches: Difference between revisions
| (3 intermediate revisions by one other user not shown) | |||
| Line 142: | Line 142: | ||
You can easily create diagonals and cross-stitches. For both you got the option to connect the ends, which we recommend. | You can easily create diagonals and cross-stitches. For both you got the option to connect the ends, which we recommend. | ||
First of all, draw a circle with stroke (0,1 to 0,2 mm) but no fill. | |||
[[File:eggbot-intro.png|thumb|none|800px|Creating a cross stitch with connected endings]] | [[File:eggbot-intro.png|thumb|none|800px|Creating a cross stitch with connected endings]] | ||
| Line 153: | Line 155: | ||
[[File:pentagram-6.svg|none|400px|thumb|Hatch fills create with eggbot]] | [[File:pentagram-6.svg|none|400px|thumb|Hatch fills create with eggbot]] | ||
As of July 2018 (Inkscape 0.92.3 and InkStitch 1.13), some of the parameter combinations stitch very well, others less, others make Inkscape crash on my Linux machine (but not on one of my Windows laptops). Always | As of July 2018 (Inkscape 0.92.3 and InkStitch 1.13), some of the parameter combinations stitch very well, others less, others make Inkscape crash on my Linux machine (but not on one of my Windows laptops). | ||
'''Advice:''' Always use '''connected hatches'''. As you can see in the simulation below, unconnected hatches create weird jump stitches. | |||
[[File:pentagram-6b.svg|none|400px|thumb|Hatch fills create with eggbot - Stitch plan with some weird jump stitches]] | [[File:pentagram-6b.svg|none|400px|thumb|Hatch fills create with eggbot - Stitch plan with some weird jump stitches]] | ||
| Line 195: | Line 199: | ||
Step 5: Open in Inkscape | Step 5: Open in Inkscape | ||
* If necessary, clean up (see step 4 above) | * If necessary, clean up. Delete all unwanted pattern elements that float outside of the outline (see step 4 above) | ||
* E.g. you could combine the fill shapes into one (CTRL-K) after ungrouping everything. Then you could intersect the outline with the combined fill shapes (Path->Intersection). But keep a copy of the outline since it will go away. | |||
* Using cut path (outline below, pattern on top) is another solution, but it does not seem to work correctly. | We tried some automated stuff, but none works. | ||
* E.g. you could combine the fill shapes into one (CTRL-K) after ungrouping everything. Then you could intersect the outline with the combined fill shapes (Path->Intersection). But keep a copy of the outline since it will go away. The problem is that the patterns are modified, e.g lines become polygones. | |||
* Using cut path (outline below, pattern on top) is another solution, but it does not seem to work correctly, i.e. more than half pattern elements are lost. | |||
== Streaks == | == Streaks == | ||
Latest revision as of 10:01, 20 July 2020
Introduction
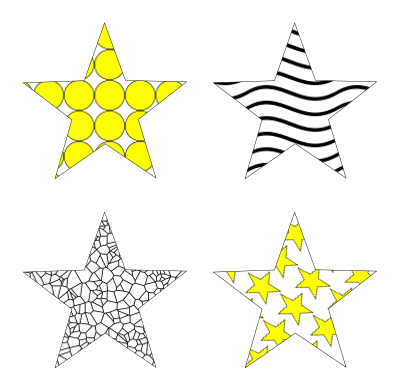
Ink/Stitch, as of summer 2018, provides support for four Embroidery stitch types: Lines, satin columns, tatami fills and manual stitches. Some embroidery software suites offer the possibility to fill in polygons with so-called programmable or speciality stitches, e.g. radial fills, hatches, little objects etc.
Ink/Stitch does not plan to includes these in the near future. However, some InkScape extension allow to do non standard fills. However, as we first shall explain, the standard default pattern fill does not work, since it cannot be translated to paths (unless there is a way we could not identify).
Using InkScape Patterns - does not work
According to avmjong Bah's Inkscape manual, Any object or set of objects can be turned into a Pattern and used in the fill of an object. The Pattern can be shifted, rotated, and stretched as necessary. Inkscape includes a set of Patterns accessible through the Fill and Stroke dialog. One either can use built-in patterns or use your own ones.
Unfortunately, there is no way to translate a fill with pattern to paths since the pattern is considered a color. And, of course, Ink/stitch cannot handle colors as paths. The only workaround we can envision (but we will have to test this) is to export to illustrator or creating a bitmap that we can then could trace.
Traceback (most recent call last):
  File "inkstitch.py", line 20, in <module>
    if script_name.endswith('.py'):
  File "inkscape-0.92.2/share/extensions/inkex.py", line 283, in affect
  File "lib/extensions/embroider.py", line 84, in effect
  File "lib/stitch_plan/stitch_plan.py", line 28, in patches_to_stitch_plan
  File "lib/stitch_plan/stitch_plan.py", line 168, in color
  File "lib/threads/color.py", line 17, in __init__
ValueError: Invalid color: 'url(#pattern5514)'
Other extensions, e.g. Generate from path -> Voronoi pattern are also using patterns as colors and cannot be used either.
However, this can be achieved manually as we shall explain below.
Using tiled clones and path division
Instead of using pattern fills to fill a shape with patterns, we can multiply a pattern manually and then subtract it from the shape. The procedure is a bit tedious and requires some planning if you don't want to redo operations. However, it seems to be fairly simple. Basically one creates a pattern shape larger than the shape that should be filled and then use this shape to cut out a same shape from the pattern.shape. Glance a at the figures below.
Notice: If path division does not work, then just create the pattern and manually remove the pieces that are outside of the shape. That only takes 2-3 minutes ....
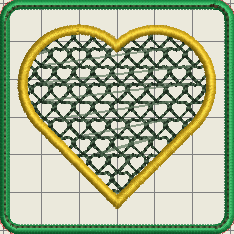
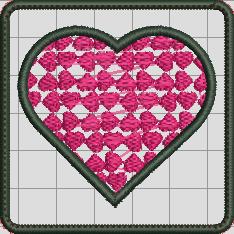
Let us fill a heart with little hearts.
Step 1: Create the big heart shape
- We just imported this heart from the noun project (this is public domain)
- Change dimensions to 5cm width
- Remove the fill and create a 2.5mm border
- Save the "file as" version 1 to continue (you will need to retrieve the shape after step 3). Alternatively, create a new "art layer" and make a copy there.4
- Note: If you import another object, make sure that it is a polygon, i.e. something with a border and a fill.
Step 2: Create a an area with small hearts that are all connected.
- Create a little heart, remove the fill and make the border dotted. We use the same object and make a 0.5 width heart. In order to have a sufficiently large pattern to subtract from the heart, we cloned it 11 X 11 times.
- Select the little heart or any other pattern. CTRL-K groups of objects, operations will be faster.
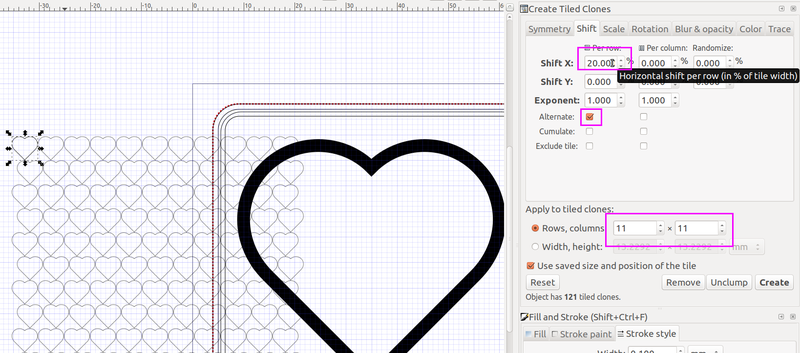
- Edit -> Clone -> Create Tiled Clones.
- Set 12 rows, 12 columns
- In the Shift tab, create alternate X shifts of 10mm, that is 20%.
- Alternatively we could have shifted 2.5cm plus some shifting in the Y direction.
- "Save file" as version 2
- Create a single path from all these
- Unlink the clones: Select the original and Menu Edit->Clone->Unlink
- Select all the clones and combine (CTRL-K), i.e. make a single path. This may take some time to work, in particular if you create tiles from grouped objects. In the latter case, you also may have to remove the empty groups.
- Remove the original heart in position 1,1. In the object manager (Object->Objects) you only should see "use" objects
- You now should have a path for the pattern and another to be filled
Step 3: Fill the big heart with the little ones.
- Move the tiles underneath the heart
- Select both the tiles and the big heart (in any order) and
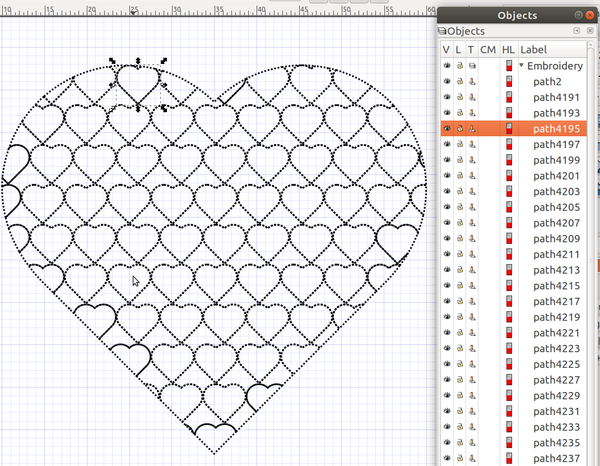
Path -> Division - You now will see a big rather black heart. In other cases, you will not see anything.
- Select all the objects (if not already done so) and set stroke style to small and dotted
- "Save file as" version 3
- Combine these (again),
CTRL-K. Depending on your patterns this may not be a good idea, since InkStitch may not know how to route overlapping patterns. If this is the case, then don't combine.
Step 4: Add the big heart again and make it satin
- Open the first file version and copy / paste in place the big heart.
- Make sure that you are happy with the border width.
- Path-> Stroke to Path
- Remove Fill
- Add a small stroke, e.g. 0.2 mm
- Make it satin, i.e. add direction lines to the rails or make the points even (read InkStitch - from satin columns to fills with satin borders) if you don't understand this. In particular, make sure that both rails have the same direction, cut both rails if necessary (I had to).
Step 5: Parametrize
- A satin stitch with underlay for the big heart
- A bean stitch for the fill pattern.
- Define a color for each object.
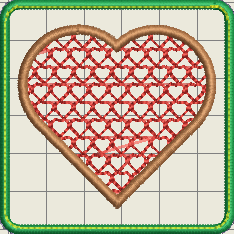
Interestingly, the jump stitches look different according to file format
To improve:
- Do something about the big jump stitches. On a multi-needle machine, one simple could keep each little heart apart, then add trims.
Alternative tiles
- You can play with various parameters in the
Clone -> Create Clonefunction.
e.g. you could use fills instead of lines and also rotate the shapes.
- Warning the little heats had overlapping nodes, something that Ink/Stitch really does not like. Use the
Ink/Stitch -> Troubleshoot Objectsfunction and fix one by one. In our case, pressing CTRL-L was good enough. Do not use CTRL-L for all the objects together !
GCode tools
Gcode tools allow to create drawings that are popular with many CNC machines, and 3D printers in particular. The result is not particularly interesting, we believe for now.
Step by step:
- Select a shape
- Remove the fill (unless you plan to stitch two layers
- Gcodetools -> Area or Fill Area or Area Artifacts
- Parametrize
- Break à part the result
- Verify each path and kill the tiny ones.
Eggbot
Eggbot tools have been developed for so-called Egg-bots, machines can draw and engrave on egg-like shapes.
This extension needs to installed.
- Get it from EggBot's github site
- Follow the instructions
Hatching
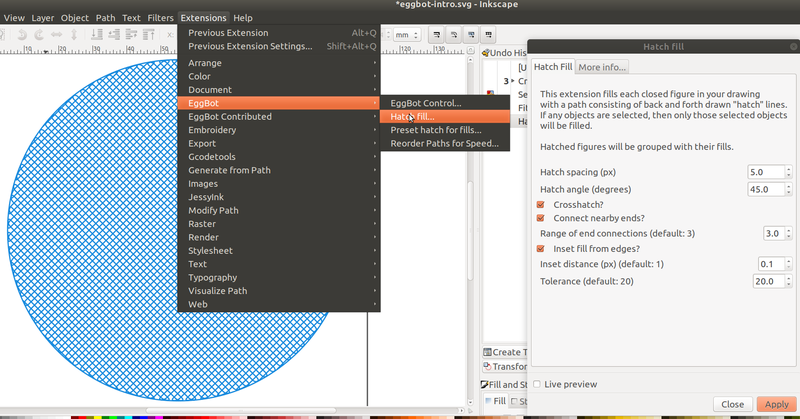
You can easily create diagonals and cross-stitches. For both you got the option to connect the ends, which we recommend.
First of all, draw a circle with stroke (0,1 to 0,2 mm) but no fill.
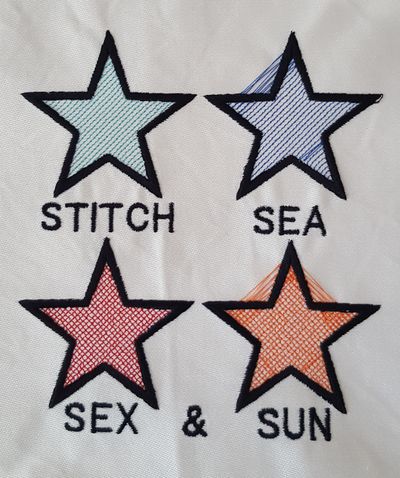
Below are two different combinations of hatching
- Top left: connected hatches
- Top right: unconnected hatches
- Lower left: connected cross-stitch hatches
- lower right: unconnected cross-stitch hatches
As of July 2018 (Inkscape 0.92.3 and InkStitch 1.13), some of the parameter combinations stitch very well, others less, others make Inkscape crash on my Linux machine (but not on one of my Windows laptops).
Advice: Always use connected hatches. As you can see in the simulation below, unconnected hatches create weird jump stitches.
Here is a quick result:
To improve:
- lettering
- satin stiches should have some rungs to optimize corners, and another lighter underlay.
Other example:
Use Illustrator
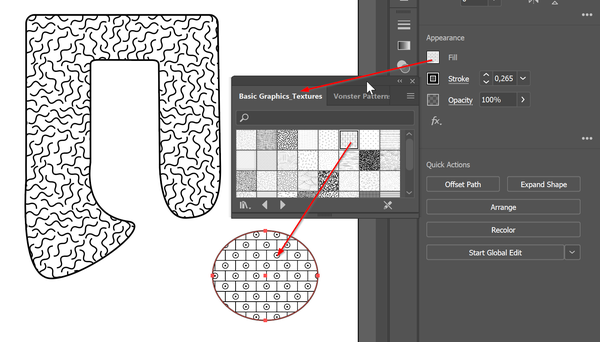
In Illustrator one can fill a shape with patterns
Step 1: fill with a pattern
- Select the Form
- Appearance -> Fill
- Select a pattern fill
Step 2 (optional):
- Edit the pattern
Step 3: translate pattern to fill (currently cannot be done in Inkscape)
- Select the Object
- Object -> Expand. Tick the fill and untick the Stroke
This will translate the bits of the fill into shapes (path)
Step 4: Cleanup
- In fact, now a whole rectangle surrounding the shape is filled with the little shapes, although they are not visible.
- Except selecting and deleting these ,I don't know how to fix that (see the Inkscape solution below).
Then export ("save file as") to SVG using the standard simple default options.
Step 5: Open in Inkscape
- If necessary, clean up. Delete all unwanted pattern elements that float outside of the outline (see step 4 above)
We tried some automated stuff, but none works.
- E.g. you could combine the fill shapes into one (CTRL-K) after ungrouping everything. Then you could intersect the outline with the combined fill shapes (Path->Intersection). But keep a copy of the outline since it will go away. The problem is that the patterns are modified, e.g lines become polygones.
- Using cut path (outline below, pattern on top) is another solution, but it does not seem to work correctly, i.e. more than half pattern elements are lost.
Streaks
The Streaks extension allows to fill rectangles with random streaks. We suggest, however, not using dots...
- Download both the *.inx and *.py files and copy to the extensions folder
- The extension will appear in Extensions -> Examples
