InkStitch - from satin columns to fills with satin borders

Introduction
In this tutorial we will combine some techniques seen so far:
- Starting with an icon found on the Noun Project
- Creating a design with satin stitches
- Transforming the satin design to a larger one that has satin borders.
A mostly satin Snake
Let us demonstrate the procedure again with another example.
- Download Snake from Albert Sonico. (Again either cite the author or become a member of the Noun Project)
- If you got the public version, remove the text
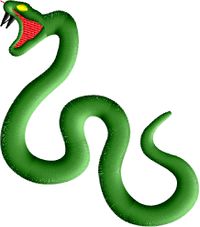
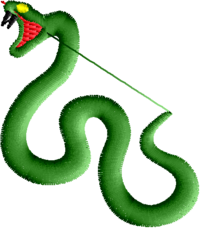
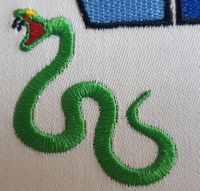
Ultimately we would like to achieve the following embroidery
- The black body and the head, turned green, stitched with satin stitches
- Red mouth
- Yellow eye
- Black or white teeth
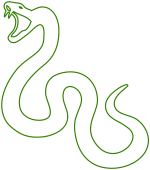
In principle a large snake should be stitched with fill stitches and the border should be made into satin stitches. We may explain how to do this in the future.
Adapt the drawing
- Open the file in Inkscape
- Open the XML editor.
This object has two path: a black snake, a snake outline.
Remove the outline
- Select the snake and ungroup (CTRL-SHIFT-G)
- Kill the outline path ("path4"). Yes kill the outline not the body, since it is not really an outline made from simple strokes.
- Add a stroke
- Remove the fill
- Ajust document size
This first transformed file is to the right.
Break apart the snake
- Select the snake outline and Path -> Break apart
Draw bigger eyes and teeth
Bigger eyes
- Select the eye and kill it. Now draw a bigger eye
- Draw a line for the upper part of the eye
- Duplicate and rotate this new part
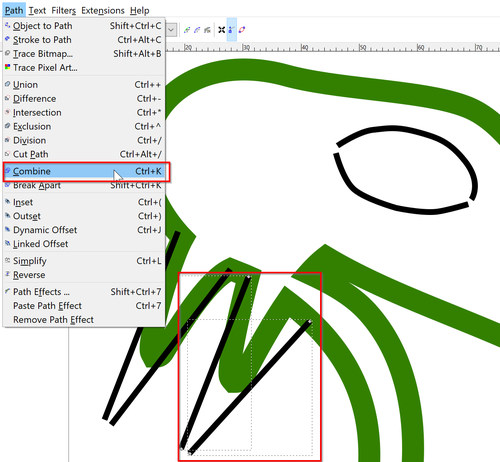
- Select the two and Menu Path->Combine or
CTRL-K
Alternatively you could have left the eye and made it bigger, cutting points to the left and right, etc.
Kill the nose
- Select and DEL
Create new teeth
- Draw new teeth with four strokes.
- Combine two and two with CTRL-K
Adapt the snake head
Remove the old teeth
- Edit path tool (F2)
- Select all teeth node (you can get most with rectangle selection) and kill (hit DEL)
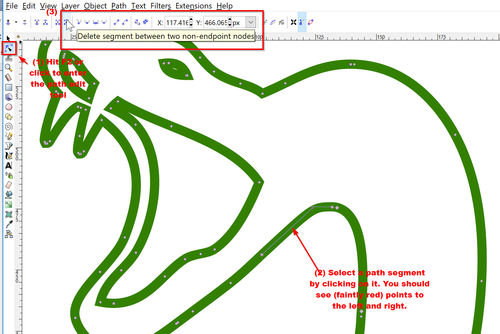
Remove the body from the head with surgery
- Hit
F2(Edit path tool) - Select two segments before the head and kill them
- Break apart the snake again (to separate head and body)
Fill the mouth with red
- Use the paint bucket to create a red inside of the mouth
- Remove the stroke and keep the fill (in red)
Complete the head and the body
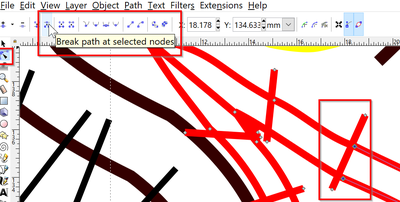
- Cut the mouth outline (in green) to the right: Break path at selected nodes
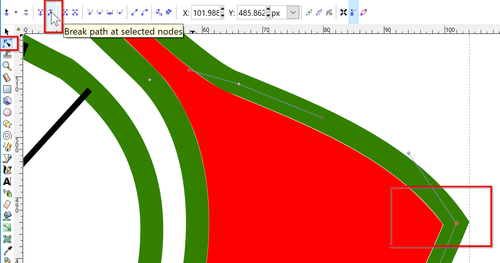
- Now merge this new line with the outer head outline: select the two and combine the (CTRL-K)
Now do the same for the body
- Cut the tail tip
- Merge the two lines as a single path.
Optimize bit
- Select both head and body
- Make the strokes a bit smaller, i.e. 5mm
- Hit CTRL-L
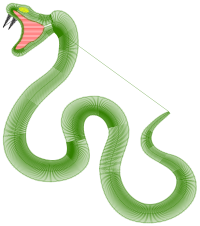
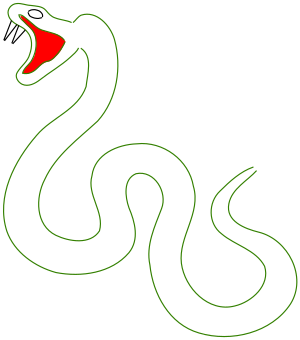
The intermediate result is below:
Add satin stitches
Adjust the drawing for embroidery
Configure Inkscape
- Set display units to mm (if not already done so)
- I also suggest removing any scaling in the document properties
Adapt size
Decide how big the embroidery should be. Since we do satin stitches here, the drawing should shrink. Else the design will be fragile and we would have to create double columns. In principle, a satin stitch should be no larger than 5-6mm.
- CTRL-A
- Set height to no more than 100mm in the menu bar. I'd rather suggest shrinking it even more.
- Adjust stroke with, again to something that you still can see well, e.g. 0.5 mm
- Put drawing in position 0 / 0
- Adjust document size to drawing size + 1mm on each side.
save the file as optimized SVG
This may not be needed, but after all these transformations it is better to clean up a bit:
- File -> Save as
- In the "Save as type" pull-down menu, select Optimized SVG
- Close Inkscape and open the file again.
.... this is good voodoo.
(Optional) Try to create satin stitches for the body
- Reverse the path of one of the two segments (likely this is needed, see above)
- Select the body
- Open Extensions -> Ink/Stitch -> English -> Params
- Select the satin column tab and tick the checkbox.
- Also add underlays of your choice (at the very least a center-walk underlay)
- Optionally, add a TRIM after.
The result will be expected, i.e. an error message
- error: satin column: object path826 has two paths with an unequal number of points (27 and 29)
Now you have two options:
- (1) You could add or delete nodes in one sub-path to make them equal
- (2) You just can add rungs as described above. We will just do that.
Fix colors, sizes, direction lines and parametrize
- Make the eyes yellow
- Make sure that the mouth is bigger than the surrounding lines of the head. The head's satin stitches should eat into the fill pattern of the mouth.
- Firstly make sure that all sub-path run in a parallel direction. Read above how to see directions and how to fix them.
- Select all "satin" paths or one by one and parametrize.
- Make sure that each one has some kind of underlay.
Add rungs to both body and head
- Place rungs like in the SVG pictures below
- Make sure that rungs and lines look like railway.
- Also pay attention to the fact that rung cannnot overlap three lines. It can overlap four lines, i.e.
Result
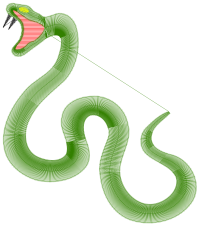
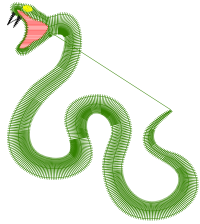
Below you will find three versions (you can download the SVG)
We modified the head of V4 a bit, i.e. made the joining of the head and the body near the mouth. There are two version you might choose from
- A 10cm V5 version with 10mm satin stitches. Do not use that on cloth because the long stitches are fragile
- A 5cm V6 version with 5mm satin stitches
The result of V5 looks OK, except for the teeth. There are some resolution limitations in embroidery and I might have done something with simple lines.
A larger snake
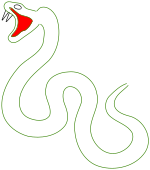
In the prior example, the snake body was made with satin stitches that are too long by conventional wisdom we believe. Reducing the design (that is very easy) would solve the problem.
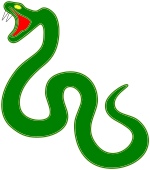
However, here we shall show how to create a bigger snake, using both fills and satin stitches. We re-start from snake version 3 (see above and the picture to the right).
Create a single fill for the snake body
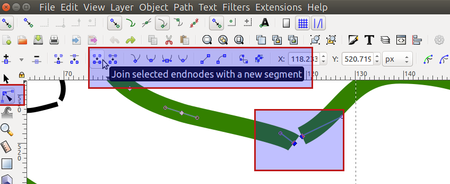
- Join the head with the body.
- Select the Edit nodes tool (F2)
- Select two end nodes (hold down the ctrl key)
- Merge with a segment.
- Smooth a bit, e.g. click on "Make selected nodes smooth" and use the controls to adjust.
- Fill the body with the paint bucket.
- Name paths if you like (Inkscape easily will delete path names, but I find more practical to name things)
- Merge the teeth (select two lines and hit CTRL-K)
- Create two layers: one for the fills and the other for the strokes that should stitch as zigzag.
 |
 |
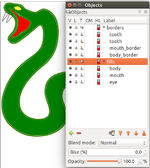 |
You now should have version 1 of the big snake. It has two body objects: One that is just a new fill and another that has a stroke but no fill. Same for the mouth.
Create satin paths
(1) Hide the fills layer.
(2) Select the body object with the stroke
- Remove any fill if there is
- Make the stroke 3mm
(3) Now transform the stroke to a path
- Keep the same path selected
- Menu
Path -> Stroke to Path - Menu Object -> Fill and Stroke (CTRL-SHIFT-F)
- Remove the Fill
- Add a stroke
- Make the stroke 0.5mm (or smaller, the size does not matter here since the two lines define a boundary)
(4) Align directions of the two subpath if needed
- Select the Edit Path tool (F2)
- Select the inner segment and Path -> Reverse
- Rename the path to "Satin border"
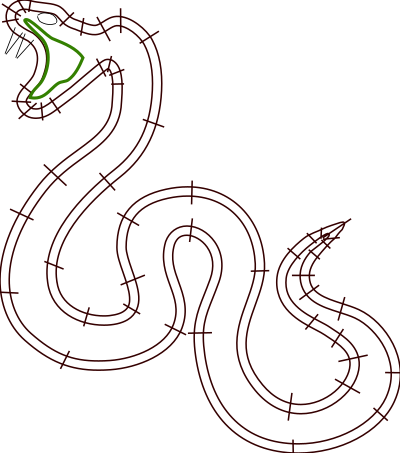
(5) Add rungs
- Keep the object selected
- Keep the Edit Path tool active
- Hit P
- Hold the SHIFT key and add rungs (click - click)
Test:
Now do the same for the outline of the mouth, but use more narrow satin lines, e.g. 2mm.
- Stroke to path, remove fill, add stroke
- Reverse direction of the inner path
- Parametrize
I also had to make a cut into the 2 sub-path because the starting points were not in the same area. To do so, select two points that are opposite, then use "Break path at selected location".
Clean up
Parametrize the fills for the body and the mouth
- Choose any color you like
- In the parameters,
Parametrize the teeth and eye
Select eye and the two teeth and fix the satin parameters. We suggest making these dense
- Extensions -> Ink/Stitch -> English -> Params
- Satin Column TAB
- Set spacing to 0.25mm
- Select at least a one underlay
Fix the head
- There are some overlaps or gaps (Use the Edit Path tool to fix this)
Result
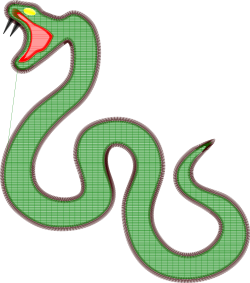
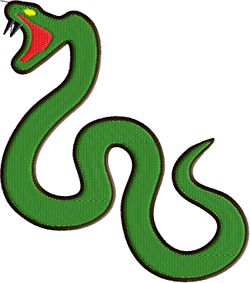
We did not yet stitch this yet, but the design should work. Maybe there should a bit more overlap to compensate for pull.
 |
 |
Copyright modification
Contents of this page including pictures and SVG files are also available under the GNU Free Documentation License and the Attribution 4.0 International (CC BY 4.0) license.
The Inkstitch project can use any element (text fragments, SVG files, pictures) for the project's official docs without giving attribution (just copy and paste).
