Felix Pro 1 3D printer: Difference between revisions
m (→Links) |
m (→Introduction) |
||
| (79 intermediate revisions by the same user not shown) | |||
| Line 5: | Line 5: | ||
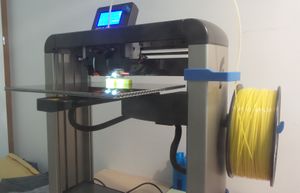
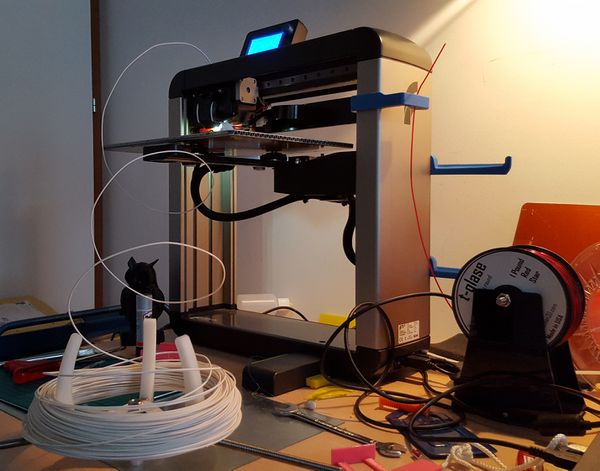
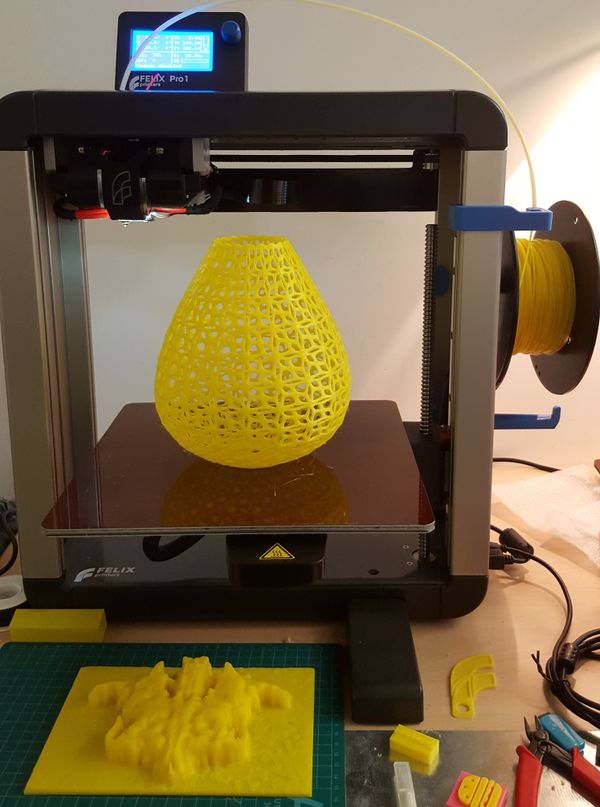
The Felix Pro 1 is a 3D printer made by [http://www.felixprinters.com/ FELIXprinters] and that started shipping in December 2015. It features auto-calibration of the print bed, a dual head, etc. and strong, reliable steel extruders. This article is both a (fairly) subjective review and a tutorial on some aspects, i.e. I write down stuff I learned from trying out certain prints and certain materials and I notice things I found pleasant or less pleasant. This piece is evolving and may be split up in the future. There is information you can trust and other you should not since it takes time to somewhat master a printer. | The Felix Pro 1 is a 3D printer made by [http://www.felixprinters.com/ FELIXprinters] and that started shipping in December 2015. It features auto-calibration of the print bed, a dual head, etc. and strong, reliable steel extruders. This article is both a (fairly) subjective review and a tutorial on some aspects, i.e. I write down stuff I learned from trying out certain prints and certain materials and I notice things I found pleasant or less pleasant. This piece is evolving and may be split up in the future. There is information you can trust and other you should not since it takes time to somewhat master a printer. | ||
We | We got a Felix Pro in Dec 2015. I '''believe it to be a very good buy''' (better than the heavy backbreaking US models that are popular in trade mags). I cannot offer a precise opinion with respect to print quality. That being said, I am now sure that this printer is (a) reliable and (b) easier to use than any other printer I have seen and/or used so far. | ||
- [[User:Daniel K. Schneider|Daniel K. Schneider]] 17 Dec 2015 - 29 Jan 2016. | |||
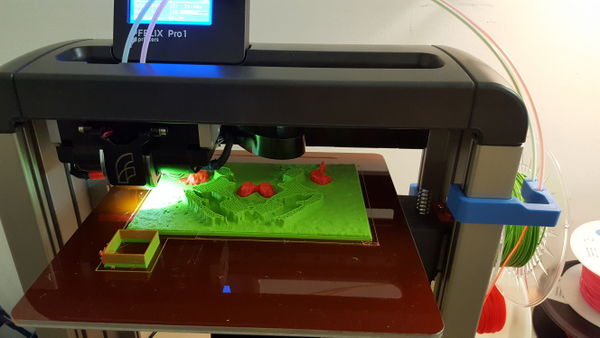
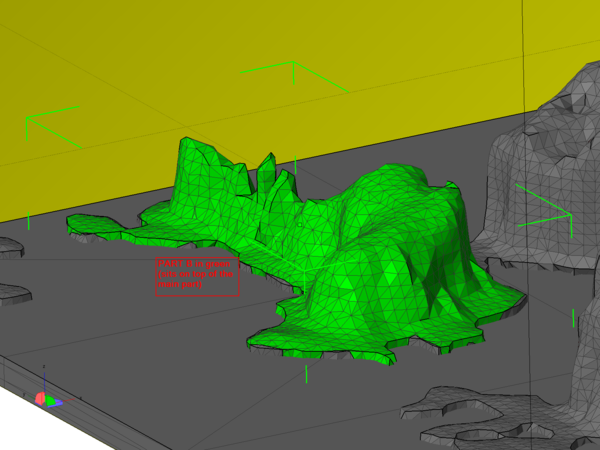
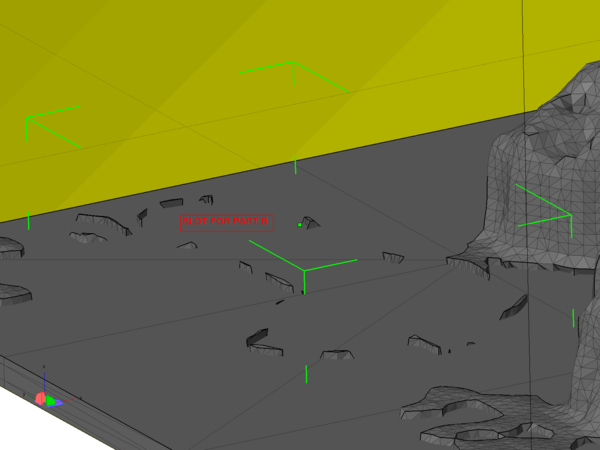
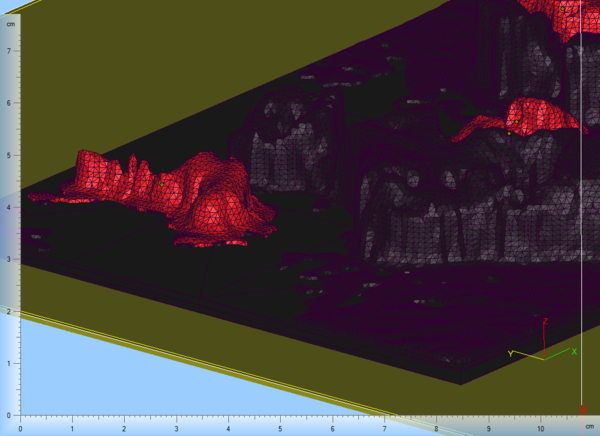
'''Update''': Jan 2019. I upgraded the Pro 1 to a Pro 2. Print quality seems to be better. I did manage to rip off the extruders while printing large DEM models with lots of peaks and the machine went on printing for hours since it was an overnight print. After that I had a Z-sensor problem that is due to distorted geometries. Instead of repairing, I upgraded... | |||
See also: | See also: | ||
| Line 16: | Line 15: | ||
* [[Felix 1.0 3D printer]] (bought in 2012 and still working) | * [[Felix 1.0 3D printer]] (bought in 2012 and still working) | ||
* [[Felix 2.0 3D printer]] (bought in 2013 and still working) | * [[Felix 2.0 3D printer]] (bought in 2013 and still working) | ||
* [[Felix TEC-4.1 3D printer]] (bought in nov 2018) | |||
* [[Felix Pro 2 3D printer]] (upgrade of this machine in 2018) | |||
== Technical specifications == | == Technical specifications == | ||
| Line 22: | Line 23: | ||
: Minimum layer height: 0.05 mm, | : Minimum layer height: 0.05 mm, | ||
: "Normal layer" height: 0.15 mm, | : "Normal layer" height: 0.15 mm, | ||
: Maximum layer height: 0.25 mm | : Maximum layer height: 0.25 mm recommended with a 0.35mm nozzle. | ||
; Extruder / nozzles | ; Extruder / nozzles | ||
: Dual detachable full metal hotends (one is retractable) | : Dual detachable full metal hotends (one is retractable) | ||
: 0.35mm | : 0.35mm (0.5mm option) | ||
: Max 275 C | : Max 275 C | ||
; Print volume | ; Print volume | ||
: | : 237x 244 x 235 mm | ||
; Print bed | ; Print bed | ||
| Line 41: | Line 42: | ||
; Software | ; Software | ||
: In principle, one could use any controller/slicer software. | : In principle, one could use any controller/slicer software. As of May 2016 there are profiles for the following slicers: Felixbuilder (commercial, included), Repetierhost (Slic3R and Cura), KiSSlicer (simple and commercial Pro version), Simplify3D (commercial). Felixbuilder and Repetierhost are distributed through Felix. KiSSlicer and Simplify3D profiles are available from Felix. | ||
; Connectivity | ; Connectivity | ||
| Line 58: | Line 59: | ||
It is '''crucial''' to: | It is '''crucial''' to: | ||
* install Arduino USB drivers (if the connection doesn't work). If you do not get them from Felix, take them directly from [https://www.arduino.cc/en/Guide/ArduinoDue#toc8 Arduino] | * install Arduino USB drivers (if the connection doesn't work). If you do not get them from Felix, take them directly from [https://www.arduino.cc/en/Guide/ArduinoDue#toc8 Arduino] | ||
=== Felix Builder software (optional) === | |||
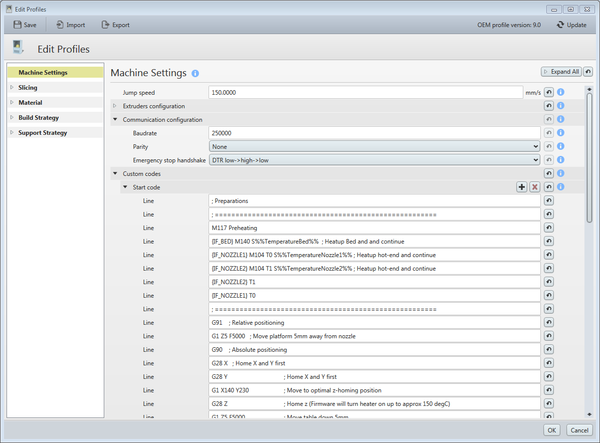
* As of Dec 2015, if one downloaded the ''Felix Builder'' software from the Felix Site (as opposed to installing the one on the include SD card), one had to update the software. Without doing this the auto-calibration '''would not work''' and the print bed will be scratched. This problem may be fixed by now, check the '''start code''' as shown just below. If it's empty, then update the software: | * As of Dec 2015, if one downloaded the ''Felix Builder'' software from the Felix Site (as opposed to installing the one on the include SD card), one had to update the software. Without doing this the auto-calibration '''would not work''' and the print bed will be scratched. This problem may be fixed by now, check the '''start code''' as shown just below. If it's empty, then update the software: | ||
For configuration, use '' | For configuration, use ''manager.exe'', available in the control panel. Direct access is: | ||
C:\Program Files (x86)\Materialise\BuildProcessorSystem\Manager.exe | C:\Program Files (x86)\Materialise\BuildProcessorSystem\Manager.exe | ||
Then, update: | Then, update: | ||
| Line 73: | Line 76: | ||
Calibration is done through software. Either by running calibration g-code or by including the calibration g-code in the startup code for each print. | Calibration is done through software. Either by running calibration g-code or by including the calibration g-code in the startup code for each print. | ||
There is no manual printer calibration to be done, '''except making sure that the correct Felix Builder software is installed.''' Alternatively, you also can modify the startup code of another control/slicer software or just the run the calibration g-code. But it does need to be done. | There is no manual printer calibration to be done, '''except making sure that the correct Felix Builder software is installed.''' Alternatively (and better), you also can modify the startup code of another control/slicer software, e.g. Simplify3D, or just the run the calibration g-code. But it does need to be done once in a while and definitely the first time you use the machine. | ||
At least in OEM version 10.0, special '''startup''' gcode will probe the print bed in three (or more locations), i.e. the hot-end is pressed down until it touches the bed and a sensor will capture this event. This can cause two little motors underneath the print bed to level (left-right and back/forth). The procedure also will tell the printer its Z position and adjust it. | At least in OEM version 10.0, special '''startup''' gcode will probe the print bed in three (or more locations), i.e. the hot-end is pressed down until it touches the bed and a sensor will capture this event. This can cause two little motors underneath the print bed to level (left-right and back/forth). The procedure also will tell the printer its Z position and adjust it. | ||
| Line 150: | Line 153: | ||
=== Firmware upgrades === | === Firmware upgrades === | ||
Upgrading the firmware (on Feb 9 2016) went well. I just followed the instructions. | Upgrading the firmware (on Feb 9 2016 and again on April 2016) went well. I just followed the instructions. They involved: | ||
* Extract a zip file | * Extract a zip file | ||
* Execute a shell script that will send the upgrade to the printer | * Execute a shell script that will send the upgrade to the printer | ||
| Line 158: | Line 161: | ||
After that, I ran the calibration files again. | After that, I ran the calibration files again. | ||
Important: Firmware can make changes that affect the control software (FelixBuilder) and the other way round. In particular, make sure that the baud rate in the machine settings (Edit Profiles) is correct. E.g. 115200 baud rate for 0.98.2 | Important: | ||
* Firmware can make changes that affect the control software (FelixBuilder) and the other way round. In particular, make sure that the baud rate in the machine settings (Edit Profiles) is correct. E.g. 115200 baud rate for version 0.98.2 | |||
* You also may have to change the startup code in your various slicer programs ! E.g. see this from sli3R: | |||
<source lang="bash"> | |||
G90 ; Absolute positioning | |||
; Compatibility for firmwares before version 0.92.8 | |||
; % --------------------- | |||
G28 X ; Home x and y | |||
G28 Y ; Home x and y | |||
G1 X130 Y240 ; Move to optimal home position for z-homing | |||
; % --------------------- | |||
G28 Z ; this homes x and y also | |||
</source> | |||
=== Fixing Z-height === | === Fixing Z-height === | ||
| Line 165: | Line 181: | ||
Other alternatives to fix non-adherence (also in combination). | Other alternatives to fix non-adherence (also in combination). | ||
* "fatten" the first or the 1st and 2nd layer, e.g. 120% layer | * "fatten" the first or the 1st and 2nd layer, e.g. 120% up to 150% layer height and extrusion rate to 120%. (See below) | ||
* turn the fan off for the first layer | * turn the fan off for the first layer | ||
* Increase temperature by 10 C | * Increase default temperature by 10 C (or more), e.g. I print the first PLA layers at 210 | ||
* Use glue | * Use glue | ||
* Use a raft | * Use a raft | ||
; | ; (1) Playtime - testing the distance manually | ||
Try moving the print bed | Try moving the print bed from the controlling software, then figure out the right amount of distance to move. 1/10 or 1/20 of a mm should be about right. | ||
In the manual control window of FelixBuilder, you can send g-code (from other control/slicer software too btw.). Try the following, it will not hurt. | In the manual control window of FelixBuilder, you can send g-code (from other control/slicer software too btw.). Try the following, it will not hurt if you do it in the right order. | ||
G91 | G91 | ||
G1 Z10 F5000 | G1 Z10 F5000 | ||
G1 Z-5 F5000 | G1 Z-5 F5000 | ||
G1 Z-5 F5000 | G1 Z-5 F5000 | ||
G1 Z-.1 F3000 | G1 Z-.1 F3000 | ||
G-code explanation (there is more on the web). | G-code explanation (there is more on the web). | ||
| Line 189: | Line 205: | ||
:: Z-5 - means up 5mm in the Z-axis. | :: Z-5 - means up 5mm in the Z-axis. | ||
:: F5000 - speedy. | :: F5000 - speedy. | ||
: G1 Z-.1 F3000 - move the platform up by 0.1mm (don't use a zero, e.g. ''0.1'' doesn't seem to work) | : G1 Z-.1 F3000 - move the platform up by 0.1mm, i.e. a lot (don't use a zero, e.g. ''0.1'' doesn't seem to work) | ||
; Changing the start code | ; (2) Changing the start code in the Felix Builder software | ||
* Get the start code | * Get the start code | ||
| Line 197: | Line 213: | ||
* At the end of the code, insert something like a 20th of a mm (0.05mm), do not insert the leading "0" ! | * At the end of the code, insert something like a 20th of a mm (0.05mm), do not insert the leading "0" ! | ||
G1 Z-.05 F3000 | G1 Z-.05 F3000 | ||
If this is not enough, try: | |||
G1 Z-.1 F3000 | |||
This will move up the platform by 0.1mm (which is quite a lot). '''Do not blame me if your print bed will get scratched, I am not an expert'''. Also, remember that you did change the start code ! | This will move up the platform by 0.1mm (which is quite a lot). '''Do not blame me if your print bed will get scratched, I am not an expert'''. Also, remember that you did change the start code ! | ||
; (3) Changing the start code in Repetierhost / CuraEngine | |||
* Select slicer "CuraEngine" and press <code>configuration</code> button in the Slicer TAB | |||
Within Cura: | |||
* Select G-codes TAB | |||
* Select Start G-Code | |||
Add at the end: | |||
G1 Z-.05 F3000 | |||
=== Getting the first layer done for 0.15 mm prints === | === Getting the first layer done for 0.15 mm prints === | ||
| Line 209: | Line 237: | ||
His rationale is the following: {{quotation|With the first layer you need to compensate for small errors in the print bed and in the calibration height. I measured the bed to have up to 0,04mm waves. Let's presume the calibration adds another 0,01mm error. If you would print a 0,15mm layer, the error is 33% of the layer thickness ((0,04+0,01)/0,15). At 0,225mm the error is 22% ((0,04+0,01)/0,225). Then, if you compensate flow to 120%, there is enough pressure on the first layer for good adhesion over the entire bed surface.}} | His rationale is the following: {{quotation|With the first layer you need to compensate for small errors in the print bed and in the calibration height. I measured the bed to have up to 0,04mm waves. Let's presume the calibration adds another 0,01mm error. If you would print a 0,15mm layer, the error is 33% of the layer thickness ((0,04+0,01)/0,15). At 0,225mm the error is 22% ((0,04+0,01)/0,225). Then, if you compensate flow to 120%, there is enough pressure on the first layer for good adhesion over the entire bed surface.}} | ||
=== Maintaining a good platform === | |||
* Some polymers stick very well to the platform (e.g. most TPEs) and removing parts can tear the Kapton (PVC) away and thus create air bulbs that will make subsequent printing hazardous. | |||
I suggest: | |||
* Buying at least two platforms: One to be used for quality PLA prints, the other with glue and sticky polymers. | |||
* Finding a way to remove the print without damaging the tape, e.g. use water when you print with glue, alcohol for TPE's, let it cool down for PLA etc. | |||
=== Changing the nozzle === | |||
Instead of using the 0.35mm nozzle you also can buy a 0.5mm one. The latter has two advantages: | |||
* Composite materials (e.g. wood or stone) and PET print much better | |||
* Prints are faster (more volume per extruded line) | |||
When you change the nozzle make sure to grab the heater and only the heater, Place the open Wrench 12 around the body of the hot-end to be able to hold it firmly. Use a closed Wrench 7 to remove the tip of the hot-end. Do '''not''' hold the the hot-end above. | |||
After not reading the [http://shop.felixprinters.com/downloads/instruction_manuals/How%20To%20-%20Replace%20a%20hot-end%20nozzle%20Pro%201%20-%20V2.pdf manual] I managed to kill a hot-end, i.e. instead of removing the nozzle I twisted the tube and it broke off. | |||
=== Inserting and removing filament === | |||
A few tips: | |||
* Our right extruder seems to have a little flaw when inserting filament that is cut horizontally (I disassembled the extruder but could not find any flow). Make a diagonal cut. | |||
* One can leave PLA filament in the hotend after printing. We suggest removing TPE and other more difficult plastics, because they can become a bit stuck | |||
* Use ABS to "clean" the hotend (before trying accupuncture needles and/or drills). After printing with PLA and before inserting a limp TPE, use ABS to "clean. | |||
== First impressions == | == First impressions == | ||
| Line 247: | Line 299: | ||
== Support of filaments == | == Support of filaments == | ||
So far, I didn't have time to try out various polymers, except for the | So far, I didn't have time to try out all the various polymers, except for the ones below, i.e. PLA, a low cost limp TPE, a high-end TPE, Nylon and T-glase. Clearly, the printer is optimized for PLA printing but it prints well a number of others. Printing composites (wood, stone), TPEs and T-glase is better done with a larger 0.5mm Nozzle that one can order from Felix Printers. | ||
It also prints ABS (smaller pieces) but that needs some glue (So far we only tried one little piece). | It also prints ABS (smaller pieces) but that needs some glue (So far we only tried one little piece). | ||
For more information about filaments for 3D printing, read [[3D printer filament]] | For more information about filaments for 3D printing, including general tips, read [[3D printer filament]] | ||
=== PLA === | === PLA === | ||
| Line 258: | Line 310: | ||
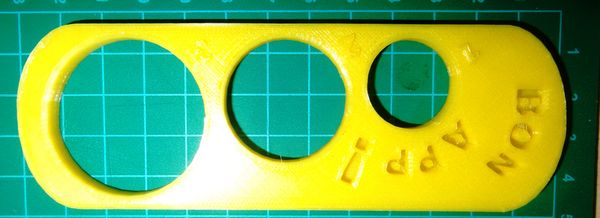
The following was printed with medium settings (sorry of the bad picture quality) | The following was printed with medium settings (sorry of the bad picture quality) | ||
[[File:spaghetti-portion-measurer.jpg|600px|none|thumb|600px|Spaghetti portion measurer printed on Felix Pro1 with medium settings]] | [[File:spaghetti-portion-measurer.jpg|600px|none|thumb|600px|Spaghetti portion measurer printed on Felix Pro1 with medium settings]] | ||
When printing objects with a small footprint, consider: | |||
* Printing at least the first layer with '''high temperatures''', i.e. 210 degs. or more. '''Nobody''' should make you believe that you must print between 180 and 190. The next layers also could be printed a high temperatures in order to avoid the print head banging into any hardened imperfection but this strategy is not too good for precision work. | |||
* Using extra layer height (150%) and extra extrusion (125-150%) for the first layer and/or moving up the platform a bit. This can compensate for an uneven platform or damaged PVC (bubbles and scratches). Quoting [http://www.felixprinters.com/forum/viewtopic.php?f=9&t=1839&p=8645&hilit=layer#p8645 Venkel] (12/2015): {{quotation|With the first layer you need to compensate for small errors in the print bed and in the calibration height. I measured the bed to have up to 0,04mm waves. Let's presume the calibration adds another 0,01mm error. If you would print a 0,15mm layer, the error is 33% of the layer thickness ((0,04+0,01)/0,15). At 0,225mm the error is 22% ((0,04+0,01)/0,225). Then, if you compensate flow to 120%, there is enough pressure on the first layer for good adhesion over the entire bed surface.}} | |||
* Slowing down '''a lot''' speed for the first layer, e.g. 15 to 20% of your "normal speed". Also consider slowing down second layer speed (unfortunately some slicers cannot do this, but you can do this manually). | |||
* Use a raft or similar construct to keep the piece in place. | |||
I do have difficulties printing with 0.1 layers. Maybe the print beds are not level enough. Printing a really fat first layer does help though. | |||
Tip: | Tip: | ||
| Line 264: | Line 324: | ||
=== Ninja Flex === | === Ninja Flex === | ||
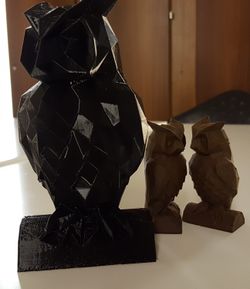
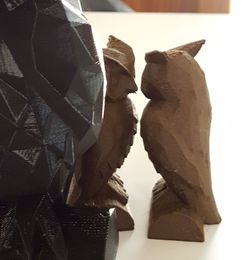
[[file:ninja-flex-owls.jpg|thumb|300px|right|2 owls printed with Ninja Flex]] | [[file:ninja-flex-owls.jpg|thumb|300px|right|2 owls printed with Ninja Flex]] | ||
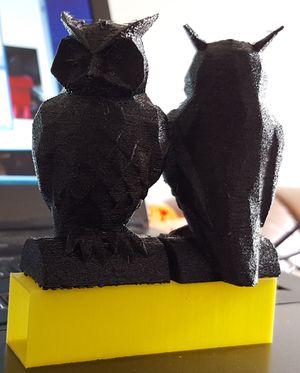
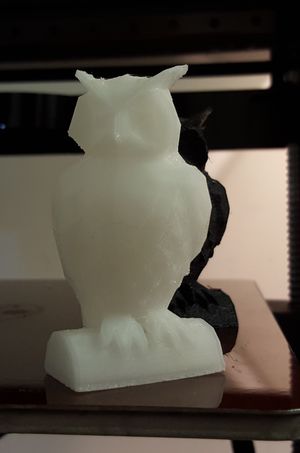
[http://www.ninjaflex3d.com/support/using-ninjaflex/technical-specifications/ NinjaFlex] is as of Feb 2016 the best ''known'' Thermoplastic Elastomer (TPE). It is fairly easy to use, but also fairly expensive. So far, I didn't manage to print nice smooth surfaces, although bigger layers (up to 0.3mm) higher extrusion rates and lower speed produce acceptable results as in the owls to the right. Both were printed with 0.3mm layers and slowly. One has 5% infill and the other 40%. | [http://www.ninjaflex3d.com/support/using-ninjaflex/technical-specifications/ NinjaFlex] is as of Feb 2016 the best ''known'' Thermoplastic Elastomer (TPE). It is fairly easy to use, but also fairly expensive. So far, I didn't manage to print nice smooth surfaces, although bigger layers (up to 0.3mm) higher extrusion rates and lower speed produce acceptable results as in the owls to the right. Both were printed with 0.3mm layers and slowly. One has 5% infill and the other 40%. One was printed with and the other without support. | ||
Properties of Ninja Flex | Properties of Ninja Flex | ||
* Highly elastic (up to 800%), in printed parts maybe 200-300% | * Highly elastic (up to 800%), in printed parts maybe 200-300% | ||
* The objects produced are fairly strong. However, if you want | * The objects produced are fairly strong. However, if you want parts to be ultra-flexible you'd have to use little infill (maybe 20%) and these are not as strong. | ||
* It is difficult to obtain a smooth texture (or even a half-smooth one, holes can appear). | * It is difficult to obtain a smooth texture (or even a half-smooth one, holes can appear). | ||
* Little warping (compared to Arnitel) | * Little warping (compared to Arnitel) | ||
* The filament is limp and we suggest making sure that the hotend tube is empty before inserting (e.g. extrude some ABS or Nylon before). | * The filament is limp and we suggest making sure that the hotend tube is empty before inserting (e.g. extrude some ABS or Nylon before). | ||
* It is suggested to use 0.5mm nozzles for flexible filaments (like composite ones) | * It is suggested to use 0.5mm nozzles for flexible filaments (like composite ones). One can compensate by using larger layers and increased flow rate. | ||
* Bigger, bulky parts are easy to print with NinjaFlex, smaller parts are a bit of a challenge as you can see below. | * Bigger, bulky parts are easy to print with NinjaFlex, smaller parts are a bit of a challenge as you can see below. | ||
* On some days Nija Flex will not print, e.g. not come out of the extruder. Try another day or else "clean" the extruder with ABS. | |||
This filament should be fairly safe in terms of toxic fumes (less than ABS). It is not bio-degradable. | This filament should be fairly safe in terms of toxic fumes (less than ABS). It is not bio-degradable. | ||
| Line 324: | Line 385: | ||
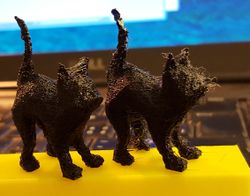
Since the third print didn't go too well I decided to print something that is more difficult in principle. Two [http://www.thingiverse.com/thing:683053 low-poly cats] reduced to 3cm length. The result was OK, but the contours still could be a bit more smooth. | Since the third print didn't go too well I decided to print something that is more difficult in principle. Two [http://www.thingiverse.com/thing:683053 low-poly cats] reduced to 3cm length. The result was OK, but the contours still could be a bit more smooth. | ||
'''Recommended settings''' | '''Recommended settings for a 0.35mm nozzle''' | ||
Although Ninja Flex is not very precise, it will stick to the print bed and therefore tiny objects can be printed easily. The challenge is to find a good compromise between print speed, temperature, extrusion rate and fill. | Although Ninja Flex is not very precise, it will stick to the print bed and therefore tiny objects can be printed easily. The challenge is to find a good compromise between print speed, temperature, extrusion rate and fill. | ||
| Line 330: | Line 391: | ||
* 0.2mm layers or bigger. 3mm is best (!) | * 0.2mm layers or bigger. 3mm is best (!) | ||
* 4 contours (as opposed to the typical 3), in particular if you work with little infill. | * 4 contours (as opposed to the typical 3), in particular if you work with little infill. | ||
* Temperature: 220 C | * Temperature: 220 - 230 C (Try 230 first !) | ||
* Bed temperature: 40C | * Bed temperature: 50C or less. I use 40C. | ||
* Extrusion factor: 110 to 120%. This will help to compensate the somewhat irregular flow, but may add other distortion ... | * Extrusion width (the width you expect to print): 0.4 | ||
* Extrusion factor (multiplier): 110 to 120%. This will help to compensate the somewhat irregular flow, but may add other distortion ... | |||
* First layer: Fatter, e.g. 150% layer height and 150% extrusion (depends also on the state of your platform) | * First layer: Fatter, e.g. 150% layer height and 150% extrusion (depends also on the state of your platform) | ||
* Base speed: 20mm/s (first 2 layers: 25%, contours: 100%, up-layer 100%, down-layer: 100%, infill: 100%). Many people seem to argue that constant speed is better (It makes sense, but I don't know for sure). | * Base speed: 20mm/s - 1200mm/min(first 2 layers: 25% of that, contours: 100%, up-layer 100%, down-layer: 100%, infill: 100%). Many people seem to argue that constant speed is better (It makes sense, but I don't know for sure). You can printer faster with warmer temperatures. E.g. for the typical owl, 50 mm/s base speed at >230C also can do. | ||
* Fan: on | * Fan: on | ||
* Infill: can be anything (tested 5%, 20%, 40% and 80%). For low infill rates use low speed | * Infill: can be anything (tested 5%, 20%, 40% and 80%). For low infill rates use low speed and increase thickness (extrusion width) | ||
* Contour: Before infill | * Contour: Before infill | ||
* Contour offset: 90% (not sure here, less than 100% means more tight if I understand right) | * Contour offset: 90% (not sure here, less than 100% means more tight if I understand right) | ||
* Retraction: 1mm | * Retraction: 1mm | ||
[[File:ninja-flex-5mm-owl.jpg|250px|right|thumb|Owl printed with NinjaFlex and a 0.5mm nozzle (better quality). Printing the 15cm black owl took 15 hours (20% infill and 10-15 mm/s)]] | |||
'''Recommended settings for a 0.5mm nozzle''' | |||
Results with a 0.5mm nozzle are better than with a 0.35 mm nozzle. I.e. you can more easily see the layers but the the result is nevertheless much smoother. Make sure that your slicer will adapt to the 0.5 nozzles, e.g. adjusts extrusion width. | |||
* 0.35mm layers | |||
* 3 or 4 contours, depending on infill | |||
* Temperature 220 to 230 C (220 for small structures, 230 for bigger ones and printing faster) | |||
* Bed temperature: 50C | |||
* Extrusion factor 120% | |||
* 30mm/s base speed, more for simple objects like Owls. | |||
* First layer thickness: 120% to 150% and/or some z-correction. 150% is certainly too much, but better be safe :) | |||
* First layer extrusion: 150% (very important if you set layer thickness to 150%). Otherwise, lower a bit. | |||
* First layer speed: 15 to 30% (keep it very slow and fat if getting a good contour is important). | |||
* Contours: 10-15mm/s (e.g. 30 to 50% of Base speed) | |||
* Infill speed: 50%. But one also could try going faster. If so, maybe make it fatter. | |||
* Infill rate: Anything for smaller structures. 20% for large empty structures (else the filament will drop down and not bond). | |||
* Fan on (100%) and open the window in the winter ... | |||
* Retraction: 1 mm (more would be better, but maybe could lead to congestion) | |||
'''Other tips''' | '''Other tips''' | ||
* | |||
* Polyutherane sticks too well to a PVC platform. In order to remove a piece without damaging the tape, pour some alcohol around the edges than peel it gently away and let the alcohol flow in. The piece will come off very easily like that. | |||
* Using the TPE to support itself is probably the best option since it easily can be cut away with small scissors. Since the surface is already fairly ugly, some additional irregularity won't matter that much. Otherwise, ABS or HIPS seems to be a good choice (not tested) | * Using the TPE to support itself is probably the best option since it easily can be cut away with small scissors. Since the surface is already fairly ugly, some additional irregularity won't matter that much. Otherwise, ABS or HIPS seems to be a good choice (not tested) | ||
* About stringing and retraction: Taking retraction away to reduce stringing will take pressure away from the nozzle (it will not pull the filament back as some folks believe). There is a trade-off. If pressure becomes too low, this weak filament may not flow well enough in a 0.35mm nozzle. Therefore, I don't use much retraction, but I do have to test much higher retraction under various conditions when I have time. Strings also can act as horizontal support. | * About stringing and retraction: Taking retraction away to reduce stringing will take pressure away from the nozzle (it will not pull the filament back as some folks believe). There is a trade-off. If pressure becomes too low, this weak filament may not flow well enough in a 0.35mm nozzle. Therefore, I don't use much retraction, but I do have to test much higher retraction under various conditions when I have time. Strings also can act as horizontal support. | ||
* The second and third print (same settings) should improve, since the extruder will be "cleaner" inside. | |||
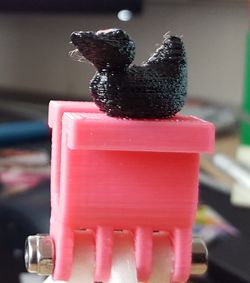
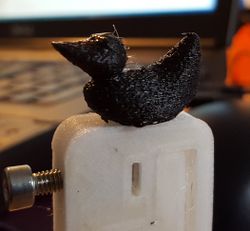
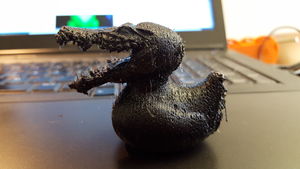
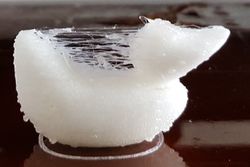
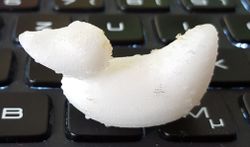
The Duckator below was printed as suggested by the model's STL position. The backs of its head and tail (i.e. where the support connected) were really ugly and I used a blow torch to even out. | The Duckator below was printed as suggested by the model's STL position. The backs of its head and tail (i.e. where the support connected) were really ugly and I used a blow torch to even out. | ||
| Line 359: | Line 443: | ||
=== 3-D Prima TPE === | === 3-D Prima TPE === | ||
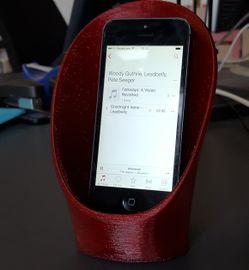
Low cost TPE ( | Low cost TPE (http://www.3dprima.com/en/filaments-for-3d-printers/flexible-175mm/ 3-Prima]) - less than half price of Ninja Flex - prints also well. The stringing you can see in the picture below is due to my slicer settings. Since the filament is very weak, retraction probably leads to congestion, so I turned it off. | ||
[[File:notebook-stand-tpe.jpg|none|thumbnail|600px|Notebook stand with TPE]] | [[File:notebook-stand-tpe.jpg|none|thumbnail|600px|Notebook stand with TPE]] | ||
Settings: | Settings: | ||
* Temperature: 220 | * Temperature: 220 - 230 (be aware that hotter means both better flow and worse solidity while printing, you will have to compromise) | ||
* Bed temperature: 50 | * Bed temperature: 50 | ||
* Speed (for simple objects) 45mm/s | * Speed (for simple objects) 45mm/s or much less, i.e. 15 mm/s for quality contours with a 0.5mm nozzle. Slowing down more than that (e.g. 5mm/s) entails a risk that extrusion will be erratic. You will have to compromise between good flow and precision. | ||
* First layer: 150% extrusion and 150% layer thickness. | |||
* First layer: as slow as possible in order to get the contours right, e.g. 5mm/second but if you can rise the print bed a bit and make a much fatter first layer, then you can go a bit faster. | |||
To do: | To do: | ||
| Line 371: | Line 457: | ||
Tips: | Tips: | ||
* Extrude some ABS before printing if the extruder seems to clogged with bits of PLA that the limp TEP cannot push (actually I did not need this on the Pro, but have to do it on our Felix 2.0) | * Extrude some ABS before printing if the extruder seems to be clogged with bits of PLA that the limp TEP cannot push (actually I did not need this on the Pro, but have to do it on our Felix 2.0) | ||
* I do recommend retracting TPE filament right after printing. Otherwise you will have to pull quite a lot in order to get it out of the extruder. | * I do recommend retracting TPE filament right after printing. Otherwise you will have to pull quite a lot in order to get it out of the extruder. Or else, try using ABS to push it down. | ||
* Speed and retraction (both low) are important parameters to play with. | * Speed and retraction (both low) are important parameters to play with. | ||
* I have the impression that this filament ingests water, i.e. doesn't extrude as well after a year or more being in the open. Therefore you probably must compensate by working with higher temperatures, avoid small infill, print a bit faster, etc. | |||
=== T-Glase === | === T-Glase === | ||
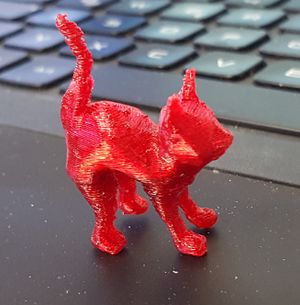
[[File:cat-t-glase.jpg|thumbnail|300px|right|My second print with t-glase, printed too fast, fan off mostly, 0.2 resolution]] | [[File:cat-t-glase.jpg|thumbnail|300px|right|My second print with t-glase, printed too fast, fan off mostly, 0.2 resolution]] | ||
This pretty co-polymer [[3D printer filament|filament]] is made by Taulman from PET(G). It is somewhat translucid, has a rather good surface finish, and it shimmers. Prettier than translucid PLA. It seems to have low shrinkage and | This pretty co-polymer [[3D printer filament|filament]] is made by Taulman from PET(G). It is somewhat translucid, has a rather good surface finish, and it shimmers. Prettier than translucid PLA. It seems to have low shrinkage and little warping or splitting while printing. It sticks to acrylic, glass, and Kapton. T-glase (aka "Tought Glass") can be used as replacement for ABS and it's stronger but more brittle. Unlike ABS, bonding between layers is very good (i.e. makes cups watertight). Finally, it does not produce fumes when printing. This [http://foodrising.org/Taulman-T-glase-3D-Printing-Filament-of-Choice.html article] by Mike Adams (March 11, 2015,) makes a good case for t-glase: It's solid, safe for (cold) food, watertight, both rigid and flexible, etc. | ||
[[File:t-glase-broken-lego.jpg|thumbnail|300px|right|Slightly too fat broken t-glase lego-compatible after forcing it down with a lot of | [[File:t-glase-broken-lego.jpg|thumbnail|300px|right|Slightly too fat broken t-glase lego-compatible after forcing it down with a lot of pressure]] | ||
On the negative side, it bends at 78 degrees C. T-glase seems to be fairly strong. However, if forced it will break (rather than bend). Now the story: | On the negative side, it bends at 78 degrees C. T-glase seems to be fairly strong. However, if forced it will break (rather than bend). Now the story: | ||
'''First | '''First prints''' | ||
My very first print failed. I.e. the feet of a little cat did not stick. My second print finished well, but it was printed too fast and without fan (for most of it). The 3rd print worked much better, but the result wasn't great. I made a copy of the ABS profile, then altered the settings to lower speed (about 25 ms for contours), temperature at 240C, bed temperature at 45 C, fan was on, raft and resolution was 0.15. The result was really ugly. | |||
[[File:t-glase-lego1.jpg|thumbnail|right|300px|T-glase Lego-compatible, left=ABS-like, right=slower, fatter]] | [[File:t-glase-lego1.jpg|thumbnail|right|300px|T-glase Lego-compatible, left=ABS-like, right=slower, fatter]] | ||
[[File:t-glase-lego2.jpg|thumbnail|right|300px|T-glase Lego-compatible, left=ABS-like, right=slower, fatter]] | [[File:t-glase-lego2.jpg|thumbnail|right|300px|T-glase Lego-compatible, left=ABS-like, right=slower, fatter]] | ||
| Line 406: | Line 481: | ||
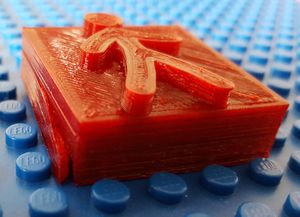
* Brick 1 (fairly ugly result) using 0.2mm layers, a raft, 45 C bed temperature and typical ABS settings | * Brick 1 (fairly ugly result) using 0.2mm layers, a raft, 45 C bed temperature and typical ABS settings | ||
* Brick 2 using 0.2 layers, 120% extra extrusion, 70 bed temperature, no raft, base speed = 30 mm/s (contours 50% of that, first two layers at 25%), 30% infill. | * Brick 2 using 0.2 layers, 120% extra extrusion, 70 bed temperature, no raft, base speed = 30 mm/s (contours 50% of that, first two layers at 25%), 30% infill. | ||
The second one came out ''much'' better. Too much filament on the roof (you can see the nozzle "digging in", but otherwise, rather good quality. I still believe that 120% extra extrusion is fine, but I should reduce upskin extrusion factor a bit (I believe it was at 100%). | The second one came out ''much'' better. Too much filament on the roof (you can see the nozzle "digging in", but otherwise, rather good quality. I still believe that 120% extra extrusion is fine, but I should reduce upskin/downskin extrusion factor a bit (I believe it was at a 100% of the 120% global settings). | ||
'''Recommended settings (for now, this can change)''' | '''Recommended settings (for now, this can change)''' | ||
| Line 413: | Line 488: | ||
* 250 C temperature | * 250 C temperature | ||
* fan on (at least for smaller structures, otherwise I don't know) | * fan on (at least for smaller structures, otherwise I don't know) | ||
* 70 C bed temperature | * 70 C bed temperature (but the manufacturer recommends 45 !) | ||
* Consider using a raft if you print things that can easily detach or warp (same as PLA) | * Consider using a raft if you print things that can easily detach or warp (same as PLA) or glue. | ||
* '''Slow speed''': 30mm/s base speed, 25% of that for the first two layers, 50% for the contours | * '''Slow speed''': 30mm/s base speed, 25% of that for the first two layers, 50% for the contours. You can try faster speeds, sometimes it does work (probably depends on the state of the extrusion tube and the nature of the object being printer). | ||
* 20 to 30% infill (not sure about this) | * 20 to 30% infill (not sure about this) | ||
* Extra extrusion (in the materials settings) = | * Extra extrusion (in the materials settings) = 110% to 133%. 133% will produce objects that are a bit larger than planned, e.g. Legos parametrized with correct values will barely fit. Use less extra extrusion if you print something flat like a paper clip. In principle, the Felix Pro can print up to 0.28mm layers but 0.3mm did work out fine with extra extrusion. | ||
* Contour offset = 95% (changed, to test) | * Contour offset = 95% (changed, to test) | ||
* Extra extrusion in a build style: 100% for contours, 100% for roofs ( | * Extra extrusion in a build style: 100% for contours, 100% for roofs and floors (this can be lower for larger objects), 100% for the rest. | ||
Slow speed seems to be the most critical success factor. | |||
To do: | To do: | ||
| Line 435: | Line 512: | ||
Conclusion (as of Feb 19 2016): Overnight prints (> 12h) can be trusted to succeed for simple objects with our recommended range of settings (fat layers, some extra extrusion, slow speed). It's probably good to use a resistance-free spooler underneath the filament cleaner intake (as shown below in the "laybrick" section). | Conclusion (as of Feb 19 2016): Overnight prints (> 12h) can be trusted to succeed for simple objects with our recommended range of settings (fat layers, some extra extrusion, slow speed). It's probably good to use a resistance-free spooler underneath the filament cleaner intake (as shown below in the "laybrick" section). | ||
We also | We also printed the same object 33% wider (so it could fit a Galaxy S6) with 0.3mm layers, only 20% of infill, an slightly higher speed (changed in the Build style, in particular for the fill). I worked nicely, although the slicer could optimize the esthetic quality of walls by putting the joins in different places. Maybe I also should use a negative value for contour overlap. | ||
[[File:wood-owls.jpg|thumb|250px|right|Wood owls hiding behind a Ninja Flex mom]] | |||
=== Wood === | |||
I tried Wood from Felix printers, using a 0.5mm nozzle. This plastic has tendency to warp and we recommend glue (or another means) to make it stick better | |||
Provisional settings: | |||
* Extrusion temperature: 195C | |||
* Temperature print bed: 55C | |||
* Filament flow: 120% | |||
* Print speed: 80% of typical PLA speed, e.g. this means 40% in FelixBuilder | |||
* Retraction distance: 1.5 mm | |||
* First layer: 150% extrusion and thickness | |||
* Layer height: 0.35mm (but less also can do) | |||
To try out: | |||
* Cooling loops or using a tower next to the object. | |||
With these settings, one can see layers like in the good old days. I don't mind since printing takes less time. | |||
Do not forget to change the machine settings to 0.5mm (and then change it back if you switch the hotend). I use the second nozzle for 0.5 mm printing, but so far did not manage to configure repetier-host (at some point switches back to nozzle 1). I therefore use FelixBuilder. | |||
I also add a z-correction for the first layer in the start-up g-code (see above). | |||
=== Laybrick === | === Laybrick === | ||
| Line 447: | Line 548: | ||
Laybrick filament does not come spooled on a roll which is hassle since you cannot let a print unsupervised. I found an old horizontal spooler from the Felix 1.0 days that can help a bit. Re-spooling the filament, e.g. on an empty PLA roll, does not seem to work since the filament can and did break when I tried that. It probably could be done, if one does it a very gentle way without applying any sort of torsion. | Laybrick filament does not come spooled on a roll which is hassle since you cannot let a print unsupervised. I found an old horizontal spooler from the Felix 1.0 days that can help a bit. Re-spooling the filament, e.g. on an empty PLA roll, does not seem to work since the filament can and did break when I tried that. It probably could be done, if one does it a very gentle way without applying any sort of torsion. | ||
'''Print settings''' | '''Print settings 0.35mm''' | ||
In FelixBuilder, I made copy of the default PLA settings | In FelixBuilder, I made copy of the default PLA settings | ||
| Line 477: | Line 578: | ||
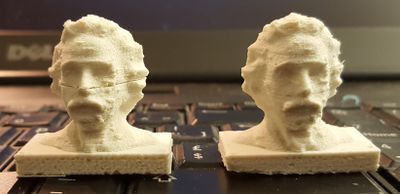
After the first prints, I decided to print a sculpture. This time I had trouble getting the filament stick to the platform. It probably was due to too low speed for the first layer. The result are two Einsteins. The one to the left was printed with 190 C, 0.2mm layers, 40mm/s base speed and "normal build settings", e.g. contours at 50% and first layer at 22%. The left one also suffers from filament getting stuck. The right one was printed with the same settings, but at 200 C. | After the first prints, I decided to print a sculpture. This time I had trouble getting the filament stick to the platform. It probably was due to too low speed for the first layer. The result are two Einsteins. The one to the left was printed with 190 C, 0.2mm layers, 40mm/s base speed and "normal build settings", e.g. contours at 50% and first layer at 22%. The left one also suffers from filament getting stuck. The right one was printed with the same settings, but at 200 C. | ||
In sum, I believe that the key for being able to print this material is | |||
* Make sure that enough plastic comes out. Not fast and not too slow. Not too fine. | * Make sure that enough plastic comes out. Not fast and not too slow. Not too fine. | ||
* Use a larger nozzle (if one will come out) and/or print large layers. | * Use a larger nozzle (if one will come out) and/or print large layers. | ||
| Line 485: | Line 586: | ||
To do: | To do: | ||
* Print with 0.25 and 0.3mm layers | * Print with 0.25 and 0.3mm layers | ||
* Use a 0.5mm nozzle (strongly suggested) | |||
* Print a large sculpture. | * Print a large sculpture. | ||
* Augment extrusion factor to 125% | * Augment extrusion factor to 125% | ||
| Line 571: | Line 673: | ||
=== Large surfaces === | === Large surfaces === | ||
If found it amazing that printing large surfaces has become hassle free. On the Felix 2.0 I did encounter lateral warping of the first layer and had to turn of the fan in order to get first critical 3 layers printed. I also had to make sure that the bed was well calibrated. This is no more the case. The only problem I encountered (with a different print of a large 3D molecule) was that Felix Builder put the object too much to the right and I had to fix that. | If found it amazing that printing large surfaces has become hassle free. On the Felix 2.0 I did encounter lateral warping of the first layer and had to turn of the fan in order to get first critical 3 layers printed. I also had to make sure that the bed was well calibrated. This is no more the case. The only problem I encountered (with a different print of a large 3D molecule) was that Felix Builder put the object too much to the right and I had to fix that. Also, make sure to attempt prints like this with a print bed that isn't damaged from forceful removing of prints (bubbles, scratches, etc.) | ||
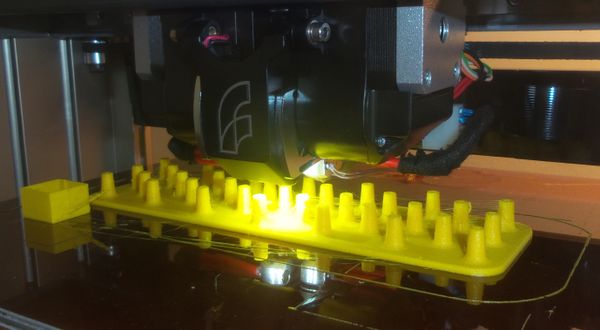
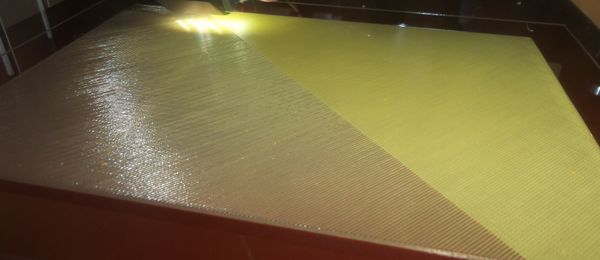
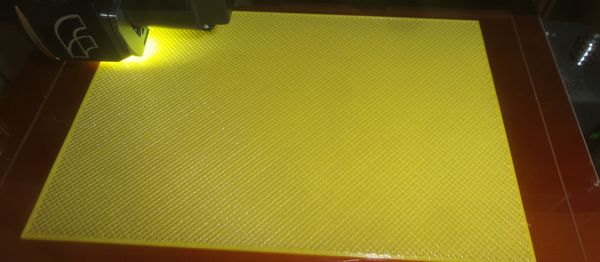
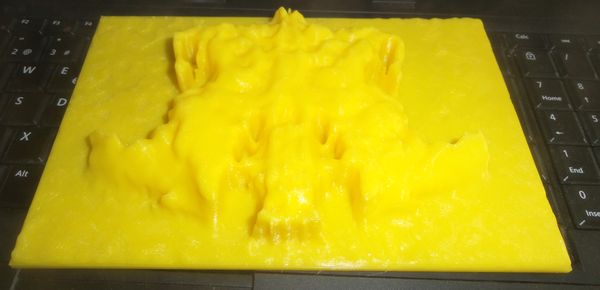
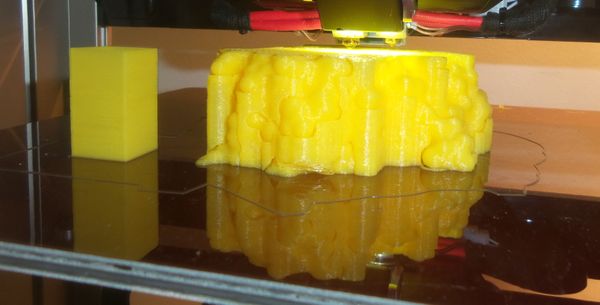
The following picture shows the first layers and the final result of a 3D Rorschach picture. As you can see in the first picture, large flat surfaces really print well (with PLA that is). The whole print, flat bottom and 3D landscape on top, took about 8 hours. | The following picture shows the first layers and the final result of a 3D Rorschach picture. As you can see in the first picture, large flat surfaces really print well (with PLA that is). The whole print, flat bottom and 3D landscape on top, took about 8 hours. | ||
| Line 581: | Line 683: | ||
=== Reliability === | === Reliability === | ||
During the first month, I only had two print aborts (not counting the ones due to mismanipulation or computer failures) despite the debatable quality of the filament spooler. One of the two could be easily explained. I scheduled a 2-day print for a large molecule. As some point during the first night, the print head got blocked by an "atom" that detached itself and folded upwards. This caused the next layer to be displaced and I had to abort the print myself in the morning. The other, a 3D landscape with 2 colors, could not. | |||
All 8-10 hour prints went fine. For example, below is a smaller molecule (envelope) with support in progress. | All 8-10 hour prints went fine. For example, below is a smaller molecule (envelope) with support in progress. | ||
| Line 593: | Line 695: | ||
[[File:lamp-shade-felix-pro.jpg|thumbnail|600px|none|"Lamp shade" aka Hollow structure (origin of the model unknown)]] | [[File:lamp-shade-felix-pro.jpg|thumbnail|600px|none|"Lamp shade" aka Hollow structure (origin of the model unknown)]] | ||
Finally, I also had the problem that small | Finally, I also had the problem that small pieces detached (got ripped away). One solution (as with any other printer) is to used a raft (called "extra adhesion" in Felix Builder's support strategy). A second one is to make it stick better. For example: lower the nozzle, rise the temperature of the first layer and of the print bed, slow down, and finally print a larger first layer. | ||
=== Cases with vertical insets === | === Cases with vertical insets === | ||
| Line 629: | Line 731: | ||
/|\ | /|\ | ||
/_|_\ | /_|_\ | ||
=== First layers composed of small objects === | |||
If the objects build up (e.g. like the sticks above) then printing is not reliable. I.e. I do not suggest using over night prints. Otherwise, if the objects "join" into something bigger and more solid (e.g. Lego pieces or animals with feet), then you can expect a finished print sometimes later. | |||
I any case, the first layer remains mission critical. It really must be "complete", it must stick and it also should be precise (see printing tips for PLA, e.g., print hot, thick and slowly). If you cannot achieve this, then do not print delicate objects. | |||
== Trouble == | |||
=== Z sensor triggered === | |||
After a year of using the printer I experienced Z sensor triggered messages. These are annoying because the printer will not home correctly. Firstly you should just head before calibrating. If the message is still there after removing and re-inserting the hotends then you have to act. | |||
* Also read [https://www.felixprinters.com/downloads/1.%20Pro%20Series/1.%20FELIX%20Pro%201/3.%20Troubleshooting/How%20To%20-%20Fix%20z-sensor%20triggered%20-%20V4.pdf this] | |||
Things to do: | |||
* Firstly scratch the contacts, i.e. make them shiny. On the hotend there are two spots and there is the sensor, | |||
[[File:Felix-z-sensor-fixing-2.png|500px|thumb|none|Felix Z.sensor fixing - Scratch the contacts]] | |||
* Measure the distance in the flexure and make sure the it is between 4.55 and 4.60mm. Less maybe will not hurt, but larger is bad. | |||
[[File:Felix-z-sensor-fixing-1.png|500px|thumb|none|Felix Z.sensor fixing - Adjust the distance in the flexure]] | |||
Apparently the Felix Pro 2 has less sensitive sensors. | |||
== Dual head printing == | == Dual head printing == | ||
| Line 669: | Line 793: | ||
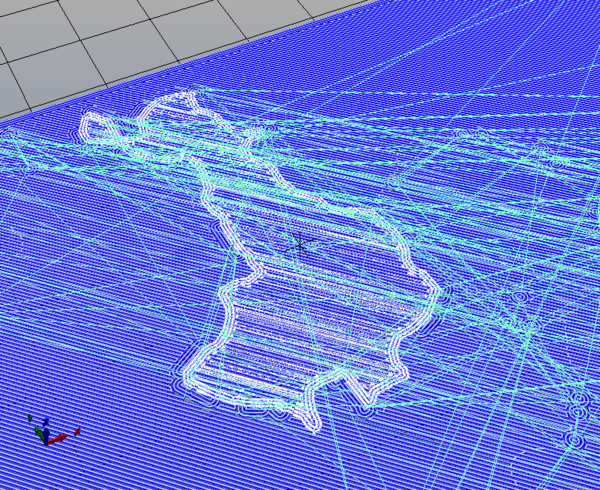
[[File:rorschach-bad-slicing3.png|thumbnail|600px|Funky slicing, layers 14,15,16, i.e. where they touch in the gcode |none]] | [[File:rorschach-bad-slicing3.png|thumbnail|600px|Funky slicing, layers 14,15,16, i.e. where they touch in the gcode |none]] | ||
This print aborted in the middle of the night, probably due to some computer problem (its screen was locked in the morning) and I redesigned a better piece without overlapping parts that sliced and printed just fine. This actually makes me remember an old gripe with control software (since my "Rapman days"). Why can't someone design a system that allows continuing a print where it stopped ? At least display the line of g-code and then provide a functionality to manually restart printing at this line using the g-code file was generated | This print aborted in the middle of the night, probably due to some computer problem (its screen was locked in the morning) and I redesigned a better piece without overlapping parts that sliced and printed just fine. | ||
This actually makes me remember an old gripe with control software (since my "Rapman days"). Why can't someone design a system that allows continuing a print where it stopped ? At least display the line of g-code and then provide a functionality to manually restart printing at this line using the g-code file that was generated and used for the aborted print. With the Felix Pro one could image an even much cooler feature. Using the "touch" sensor, it could detect where to restart. | |||
=== Printing support structures with a different plastic === | === Printing support structures with a different plastic === | ||
| Line 677: | Line 803: | ||
== Felix Builder software == | == Felix Builder software == | ||
Felix Builder is | Felix Builder is an officially supported [[Slicers and user interfaces for 3D printers|slicer and control software]]. It allows importing, repairing and positioning objects, slicing, and managing a print queue, etc. Felix Builder is made in partnership with [http://software.materialise.com/build-processor Materialise], i.e. it is a version of its [http://software.materialise.com/build-processor Build processor], as explained [http://software.materialise.com/felix-builder here]. | ||
See below for the open source officially supported control and slicer software, i.e. RepetierHost + CuraEngine / Sli3r. If you copy the start code, most other open source control/slicer software also should do. I prefer using repetierHost. However the version I have doesn't handle printing with the second extruder only (or I didn't figure out how to ... | |||
Since (sometimes in 2016) FelixPrinters also support Simplify3D, a slicer that has a very good reputation. If you can afford it, I recommend rather using Simply3D than FelixBuilder. | |||
Since Felix Builder was new, we described it here in more details... | |||
=== Overall impression and description === | === Overall impression and description === | ||
| Line 790: | Line 922: | ||
'''Alternatives''' | '''Alternatives''' | ||
Of course, one can use an other control software and slicer. Just make sure to include some of the start-up g-code shown above (i.e. Z-positioning). Print bed calibration is not necessary, i.e. it can be done once in while. I did not test this, since it probably would take time to do it. | Of course, one can use an other control software and slicer. Just make sure to include some of the start-up g-code shown above (i.e. Z-positioning). Print bed calibration is not necessary, i.e. it can be done once in while. I did not test this, since it probably would take time to do it. As of 2016, there is also Repetierhost configuration for this machine. It may be more suitable for most needs, however I cannot take the time to compare slicing quality to be sure. | ||
=== Most important desiderata === | === Most important desiderata === | ||
| Line 798: | Line 930: | ||
* Better handling of wall quality (wall-infill distance, placement of joints) | * Better handling of wall quality (wall-infill distance, placement of joints) | ||
* G-code pre-visualization (precise one !) | * G-code pre-visualization (precise one !) | ||
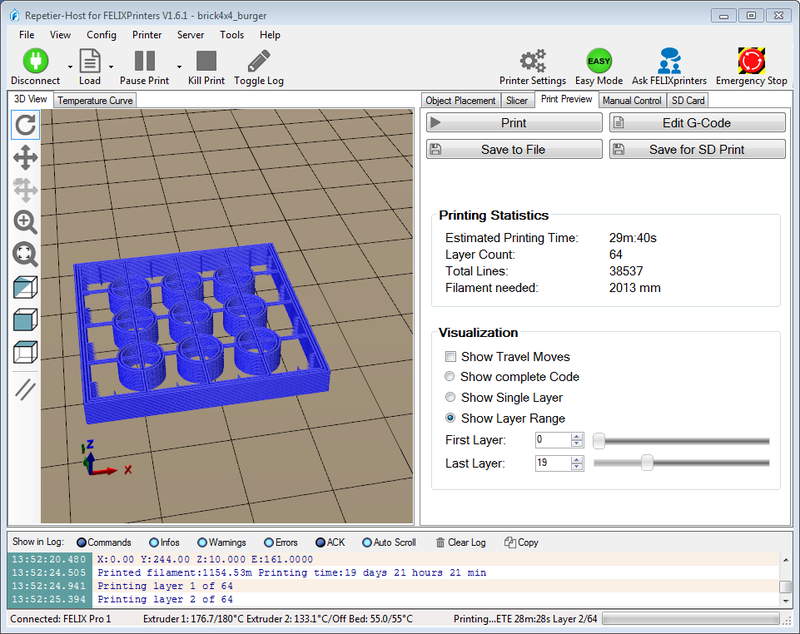
== Repetierhost for FelixPrinter == | |||
The control software used for the Felix 1, 2 and series is also available for the Felix Pro since Feb 2016 (?). | |||
I '''much''' prefer its interface and functionality over the one from Felix Builder (however, this does not include the slicing quality) and for four reasons: | |||
* There is only one window for both slicing and controlling (with tabs) | |||
* Start-up code is not "per printer" but per slicing profile, i.e. you could lower the nozzle a bit for prints that have a tricky first layer. | |||
* There is a preview of generated g-code | |||
* After a print abort, one can reconnect without rebooting the machine .... | |||
This version only includes two slicers: Sli3r and Cura engine. | |||
[[file:Repetier-Host for FELIXPrinters V1.6.png|800px|thumb|none|Screenshot of Repetierhost configured for Felix Printers]] | |||
Default settings for both slicers should be tuned a bit IMHO, in particular | |||
* speed of first layer (always too fast) | |||
* Z-calibration in the start-up code | |||
* height and extrusion width of the first layer should be fatter. | |||
Negative: | |||
* Neither Slic3R or Cura allow defining speed for the 2nd layer. It's almost as critical as the first. | |||
* Terminology is different in each slicer program. I wish they could agree at least on the words for simple items ... | |||
=== Slic3R === | |||
Slic3R seems to include more parameters than CuraEngine, i.e. a bit more suitable for my needs. | |||
Modifications I made so far for printing Lego-likes (PLA) | |||
* Lower the print head for 0.05mm (see above, near top) | |||
* Untick "Detect thin walls" | |||
* Tick "Avoid crossing parameters" | |||
* PLA temp = 195 | |||
* First layer speed = 15% | |||
* Skirt: down to 2 loops | |||
When printing single head with a raft and/or support | |||
* Make sure to disable double head printing: ''Multiple extruders'' -> set everything to 1 | |||
Problems: Slice3R does have deficiencies, e.g. | |||
* There is no way to lower speed for the second layer which is almost as critical as the first one. Workaround: Manually lower speed in the controller (repetier host or Felix console) | |||
* When using raft, the first layer is printed at full speed. Workaround: Manually lower speed | |||
* With a 0.1 resolution, the slicer seems to make mistakes (I got broken perimeter lines of the first layer for [http://www.thingiverse.com/thing:922323 this]). Workaround: Use another slicer, e.g. Felix Builder | |||
== Simplify3D == | |||
So far, this is the best slicer I have used with the Felix Pro. Felix Pro profiles are OK, except that temperatures for PLA are set too low for the first layer (185C) and speed for the first layer is much too high... | |||
== Links == | == Links == | ||
Latest revision as of 10:55, 17 December 2020
Introduction
The Felix Pro 1 is a 3D printer made by FELIXprinters and that started shipping in December 2015. It features auto-calibration of the print bed, a dual head, etc. and strong, reliable steel extruders. This article is both a (fairly) subjective review and a tutorial on some aspects, i.e. I write down stuff I learned from trying out certain prints and certain materials and I notice things I found pleasant or less pleasant. This piece is evolving and may be split up in the future. There is information you can trust and other you should not since it takes time to somewhat master a printer.
We got a Felix Pro in Dec 2015. I believe it to be a very good buy (better than the heavy backbreaking US models that are popular in trade mags). I cannot offer a precise opinion with respect to print quality. That being said, I am now sure that this printer is (a) reliable and (b) easier to use than any other printer I have seen and/or used so far. - Daniel K. Schneider 17 Dec 2015 - 29 Jan 2016.
Update: Jan 2019. I upgraded the Pro 1 to a Pro 2. Print quality seems to be better. I did manage to rip off the extruders while printing large DEM models with lots of peaks and the machine went on printing for hours since it was an overnight print. After that I had a Z-sensor problem that is due to distorted geometries. Instead of repairing, I upgraded...
See also:
- RapMan (our first 3D printer assembled in Jan 2010, not used any more, but no modern printer will beat its look)
- Fabbster 3D printer (given away)
- Felix 1.0 3D printer (bought in 2012 and still working)
- Felix 2.0 3D printer (bought in 2013 and still working)
- Felix TEC-4.1 3D printer (bought in nov 2018)
- Felix Pro 2 3D printer (upgrade of this machine in 2018)
Technical specifications
- Layer resolution
- Minimum layer height: 0.05 mm,
- "Normal layer" height: 0.15 mm,
- Maximum layer height: 0.25 mm recommended with a 0.35mm nozzle.
- Extruder / nozzles
- Dual detachable full metal hotends (one is retractable)
- 0.35mm (0.5mm option)
- Max 275 C
- Print volume
- 237x 244 x 235 mm
- Print bed
- heated, up to 105 C
- Detachable (simple and quick !)
- Automatic calibration (!)
- Print materials
- Many (PLA, TPE, ABS, PVA, Wood, Glass, PET(G)
- Software
- In principle, one could use any controller/slicer software. As of May 2016 there are profiles for the following slicers: Felixbuilder (commercial, included), Repetierhost (Slic3R and Cura), KiSSlicer (simple and commercial Pro version), Simplify3D (commercial). Felixbuilder and Repetierhost are distributed through Felix. KiSSlicer and Simplify3D profiles are available from Felix.
- Connectivity
- USB Cable
- SD Card
- WiFi (in the future)
Unpacking, assembly, configuration, calibration
Assembly
I takes about 5 minutes to unpack and assemble the printer.
PC Configuration
It is crucial to:
- install Arduino USB drivers (if the connection doesn't work). If you do not get them from Felix, take them directly from Arduino
Felix Builder software (optional)
- As of Dec 2015, if one downloaded the Felix Builder software from the Felix Site (as opposed to installing the one on the include SD card), one had to update the software. Without doing this the auto-calibration would not work and the print bed will be scratched. This problem may be fixed by now, check the start code as shown just below. If it's empty, then update the software:
For configuration, use manager.exe, available in the control panel. Direct access is:
C:\Program Files (x86)\Materialise\BuildProcessorSystem\Manager.exe
Then, update:
Configure Printer -> Edit Profiles -> Update (button)
Adding programs to the task bar
I suggest adding at least these the three major programs to the task bar if you print often. That are Manager.exe (Job Control), SubmitJob.exe (g-code submission) and Magics.exe (Felix Builder)
Calibration
Calibration is done through software. Either by running calibration g-code or by including the calibration g-code in the startup code for each print.
There is no manual printer calibration to be done, except making sure that the correct Felix Builder software is installed. Alternatively (and better), you also can modify the startup code of another control/slicer software, e.g. Simplify3D, or just the run the calibration g-code. But it does need to be done once in a while and definitely the first time you use the machine.
At least in OEM version 10.0, special startup gcode will probe the print bed in three (or more locations), i.e. the hot-end is pressed down until it touches the bed and a sensor will capture this event. This can cause two little motors underneath the print bed to level (left-right and back/forth). The procedure also will tell the printer its Z position and adjust it.
If you do not run this calibration routine, it is very likely that the hotend is too low and it could scratch the print bed. There may be other strategies, i.e. you could adjust the bed through the LCD or through a control program. However, you still have to make sure that the generated gcode from Felix Builder does not defeat this. Frankly, I didn't have time to look into this.
Below, the gcode that was used in Felix Builder by 12/2016. Note that this gcode seems to trigger special firmware, e.g. G28 Z will turn the heater on to about 150 degs, G32 will trigger the leveling routine.
; Preparations
; ======================================================
M117 Preheating
{IF_BED} M140 S%%TemperatureBed%%  ; Heatup Bed and and continue
{IF_NOZZLE1} M104 T0 S%%TemperatureNozzle1%% ; Heatup hot-end and continue
{IF_NOZZLE2} M104 T1 S%%TemperatureNozzle2%% ; Heatup hot-end and continue
{IF_NOZZLE2} T1
{IF_NOZZLE1} T0
; ======================================================
G91    ; Relative positioning
G1 Z5 F5000   ; Move platform 5mm away from nozzle
G90    ; Absolute positioning
G28 X   ; Home X and Y first
G28 Y         ; Home X and Y first
G1 X140 Y230      ; Move to optimal z-homing position
G28 Z         ; Home z (Firmware will turn heater on up to approx 150 degC)
G1 Z5 F5000      ; Move table down 5mm
G32         ; Do automatic leveling routine
G1 X140 Y235      ; Move to home position again
G28 Z         ; Home z
; Purge Nozzles
; ======================================================
{IF_BED} M190 S%%TemperatureBed%%      ; Heatup Bed and and wait
{IF_NOZZLE1} ; Purge left extruder by drawing 2 lines
{IF_NOZZLE1}    T0            ; Make sure first extruder is selected
{IF_NOZZLE1}    M109 S%%TemperatureNozzle1%%   ; Heatup hot-end and wait
{IF_NOZZLE1}    M117 Purge left extruder
{IF_NOZZLE1}    G92 E0               ; reset extruder
{IF_NOZZLE1}    G1 Z1.0 F3000            ; move z down little to prevent scratching of surface
{IF_NOZZLE1}    G1 X20.0 Y244.90 Z0.3 F3000.0      ; move to start-line position
{IF_NOZZLE1}    G1 X200.0 Y244.90 Z0.3 F1500.0 E15      ; draw 1st line
{IF_NOZZLE1}    G1 X200.0 Y244.6 Z0.3 F3000.0      ; move to side a little
{IF_NOZZLE1}    G1 X20.0 Y244.6 Z0.3 F1500.0 E30      ; draw 2nd line
{IF_NOZZLE1}    G1 E28.5 F3000            ; retract filament 1.5mm
{IF_NOZZLE1}    G92 E0               ; reset extruder
{IF_NOZZLE1}    ; done purging left extruder
{IF_NOZZLE2}    ; Purge extruder 1 by drawing 2 lines
{IF_NOZZLE2}    T1
{IF_NOZZLE2}    M109 S%%TemperatureNozzle2%%      ; Heatup hot-end and wait
{IF_NOZZLE2}    M117 Purge right extruder
{IF_NOZZLE2}    G92 E0               ; reset extruder
{IF_NOZZLE2}    G1 X200.0 Y244.3 Z0.3 F1500.0 E15      ; draw 1st line
{IF_NOZZLE2}    G1 X200.0 Y244 Z0.3 F3000.0      ; move to side a little
{IF_NOZZLE2}    G1 X20.0 Y244 Z0.3 F1500.0 E30      ; draw 2nd line
{IF_NOZZLE2}    G1 E28.5 F3000            ; retract filament 1.5mm
{IF_NOZZLE2}    G92 E0               ; reset extruder
{IF_NOZZLE2}    ; done purging right extruder
{IF_NOZZLE1}     ; M104 T0 S0 ; only turn off when nozzle 1 is active.
{IF_NOZZLE2}     ;M104 T1 S0 ; only turn off when nozzle 2 is active.
{IF_NOZZLE2}     T0 ; make sure startup ends with first nozzle if the first nozzle is used.
M117 FELIXprinting...
This code can be changed in the machine settings (first item in the "Edit profiles" Window.
Calibration warning
In sum, watch out for two things: Print bed must be positioned right, calibration routine should be run either separately or in the start code.
It is crucial that the platform is snapped in right. Usually I do that right, but it did happen. If the full calibration routine is run, then there isn't much harm if one peg is not properly inserted. If not then you may hear scratching noises ...
Depending on the FelixBuilder version, the start code doesn't do a full calibration, for example the OEM version 11.0 (early Feb 2016) does not. It just checks and adjust the z-height. A badly positioned platform, e.g. tilting to the left will have the nozzle come too close or far in some places.
Therefore I suggest, after checking if the platform is well inserted, to run the calibration code if it is not in the startup g-code.
Firmware upgrades
Upgrading the firmware (on Feb 9 2016 and again on April 2016) went well. I just followed the instructions. They involved:
- Extract a zip file
- Execute a shell script that will send the upgrade to the printer
- Change a parameter in the settings
- Store in the Eprom.
After that, I ran the calibration files again.
Important:
- Firmware can make changes that affect the control software (FelixBuilder) and the other way round. In particular, make sure that the baud rate in the machine settings (Edit Profiles) is correct. E.g. 115200 baud rate for version 0.98.2
- You also may have to change the startup code in your various slicer programs ! E.g. see this from sli3R:
G90 			; Absolute positioning
; Compatibility for firmwares before version 0.92.8
; % ---------------------
G28 X			; Home x and y
G28 Y			; Home x and y
G1 X130 Y240	; Move to optimal home position for z-homing
; % ---------------------

G28 Z ; this homes x and y also
Fixing Z-height
For printing small objects with small 0.15 layers, the z-distance after probing may be a little bit too high and the filament may not stick. This happened to small Lego-compatible pieces. If you have the impression that the platform should be a little closer to the nozzles for all building styles, then you could edit the start code.
Other alternatives to fix non-adherence (also in combination).
- "fatten" the first or the 1st and 2nd layer, e.g. 120% up to 150% layer height and extrusion rate to 120%. (See below)
- turn the fan off for the first layer
- Increase default temperature by 10 C (or more), e.g. I print the first PLA layers at 210
- Use glue
- Use a raft
- (1) Playtime - testing the distance manually
Try moving the print bed from the controlling software, then figure out the right amount of distance to move. 1/10 or 1/20 of a mm should be about right.
In the manual control window of FelixBuilder, you can send g-code (from other control/slicer software too btw.). Try the following, it will not hurt if you do it in the right order.
G91
G1 Z10 F5000
G1 Z-5 F5000
G1 Z-5 F5000
G1 Z-.1 F3000
G-code explanation (there is more on the web).
- G91 - set the printer to relative positioning
- G1 - means moving the motor
- Z10 - means means down 10mm
- Z-5 - means up 5mm in the Z-axis.
- F5000 - speedy.
- G1 Z-.1 F3000 - move the platform up by 0.1mm, i.e. a lot (don't use a zero, e.g. 0.1 doesn't seem to work)
- (2) Changing the start code in the Felix Builder software
- Get the start code
Edit profiles -> Machine Settings -> Custom Code -> Start code
- At the end of the code, insert something like a 20th of a mm (0.05mm), do not insert the leading "0" !
G1 Z-.05 F3000
If this is not enough, try:
G1 Z-.1 F3000
This will move up the platform by 0.1mm (which is quite a lot). Do not blame me if your print bed will get scratched, I am not an expert. Also, remember that you did change the start code !
- (3) Changing the start code in Repetierhost / CuraEngine
- Select slicer "CuraEngine" and press
configurationbutton in the Slicer TAB
Within Cura:
- Select G-codes TAB
- Select Start G-Code
Add at the end:
G1 Z-.05 F3000
Getting the first layer done for 0.15 mm prints
When printing 0.2mm layers there shouldn't be any problems (except for filament that will warp or others that need glue to stick). However, after (ab)using the plaform for a while there will be irregularities, e.g. scratches or bubbles in the PVC. The aluminum below also many not be completely even. To compensate for this, Venkel, in a Felix Printer Forum post, suggests the following settings for 0.15mm layers:
- First layer 150% thickness and 120% extrusion (general extrusion = 100%)
- 1mm retraction.
- First layer 190°C, rest 180°C.
His rationale is the following: “With the first layer you need to compensate for small errors in the print bed and in the calibration height. I measured the bed to have up to 0,04mm waves. Let's presume the calibration adds another 0,01mm error. If you would print a 0,15mm layer, the error is 33% of the layer thickness ((0,04+0,01)/0,15). At 0,225mm the error is 22% ((0,04+0,01)/0,225). Then, if you compensate flow to 120%, there is enough pressure on the first layer for good adhesion over the entire bed surface.”
Maintaining a good platform
- Some polymers stick very well to the platform (e.g. most TPEs) and removing parts can tear the Kapton (PVC) away and thus create air bulbs that will make subsequent printing hazardous.
I suggest:
- Buying at least two platforms: One to be used for quality PLA prints, the other with glue and sticky polymers.
- Finding a way to remove the print without damaging the tape, e.g. use water when you print with glue, alcohol for TPE's, let it cool down for PLA etc.
Changing the nozzle
Instead of using the 0.35mm nozzle you also can buy a 0.5mm one. The latter has two advantages:
- Composite materials (e.g. wood or stone) and PET print much better
- Prints are faster (more volume per extruded line)
When you change the nozzle make sure to grab the heater and only the heater, Place the open Wrench 12 around the body of the hot-end to be able to hold it firmly. Use a closed Wrench 7 to remove the tip of the hot-end. Do not hold the the hot-end above. After not reading the manual I managed to kill a hot-end, i.e. instead of removing the nozzle I twisted the tube and it broke off.
Inserting and removing filament
A few tips:
- Our right extruder seems to have a little flaw when inserting filament that is cut horizontally (I disassembled the extruder but could not find any flow). Make a diagonal cut.
- One can leave PLA filament in the hotend after printing. We suggest removing TPE and other more difficult plastics, because they can become a bit stuck
- Use ABS to "clean" the hotend (before trying accupuncture needles and/or drills). After printing with PLA and before inserting a limp TPE, use ABS to "clean.
First impressions
Overall: Worth the investment (I would buy it again as of 15:39, 3 February 2016 (CET))
Positive impression
If the correct gcode prequel is installed in your slicer program (Felix Builder by default), then printing has become much easier than before. Auto-calibration of the print bed before each print is a real blessing. That means that this printer can be used by real beginners without any help (provided that they are capable of installing the right drivers) and selecting printable objects.
It's the first of my printers that can print large flat surfaces without any problem. It's also the first one that doesn't require pre-heating and prior filament extraction. The removable print bed is a really nice feature. One now can force prints off the print bed without being afraid to damage the geometry.
As far as I can tell, the two nozzle system is well designed and I didn't have the usual "other nozzle rips off the part problem" yet.
To be improved
- The filament holder should let the spool turn more smoothly. IMHO there is too much resistance. Actually I find the strength of the extruder quite amazing, i.e. so far I didn't find much evidence that resistance from the spooling can prevent sufficient extrusion of plastic. A new version of the printer rather should seek a solution that puts the wheel on top. Of course, one always can use a home made solution, e.g. for the Felix 2.0 I am using a chemistry stand.
- Carrying this model is not as easy as the Felix 1-2-3 series, but still much easier than most other designs (Makerbots, Ultimakers, Prusa i3, Delta, ...)
- The pause/stop item is hidden underneath the SD card menu item. I wouldn't have looked there because before the print, it's where the file names appear. There should be an obvious easy to see pause/restart and stop/shutdown button on to of the hierarchy I think.
- Documentation of the menu items of the console is missing (or did I miss some PDF ?). Some items are mysterious to me, e.g. what does General -> max. inactive do ? How could I lower the distance between the nozzle and the bed just a tiny bit before a tricky print ?
- I am not sure that menu, item names and organization of the console is really optimal. All operations that are frequently used should be grouped (so far only some are there). (... to be detailed ...)
Print flaws - An open question
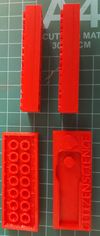
So far, most our objects came out fine, but as we wrote elsewhere in this page, we didn't print any benchmark pieces so far. As an exception, the Lego compatible pieces to the right have a flaw. They show some missing filament at the level of the first roof in one of the corners. This happened in all six pieces printed of a same batch. I suspect that after printing the roof, there is not enough filament in the tube of the nozzle and I wonder how the result would look with different slicer settings (including different in-fill policies (wall first), temperature, speed, etc.). I didn't have time to explore this...
Since there is only one officially available slicer, it is difficult to evaluate if certain print flaws are related to the printer, its debatable filament spooler, the slicing quality, or the slicer settings. I suspect some interaction between the spooling, the slicing algorithm and the slicer settings.
I also had one print abort during a night. Impossible to find out why, maybe there was a filament problem and the printer just aborted the print after a while or maybe some electricity problem ?. It would be nice to receive some sort of trace (both in the console interface and the controlling software if a computer is connected)
Support of filaments
So far, I didn't have time to try out all the various polymers, except for the ones below, i.e. PLA, a low cost limp TPE, a high-end TPE, Nylon and T-glase. Clearly, the printer is optimized for PLA printing but it prints well a number of others. Printing composites (wood, stone), TPEs and T-glase is better done with a larger 0.5mm Nozzle that one can order from Felix Printers.
It also prints ABS (smaller pieces) but that needs some glue (So far we only tried one little piece).
For more information about filaments for 3D printing, including general tips, read 3D printer filament
PLA
Different types of PLA print very well (but that was expected). I printed from 180 to 215 degrees C and at various speed and resolution.
The following was printed with medium settings (sorry of the bad picture quality)
When printing objects with a small footprint, consider:
- Printing at least the first layer with high temperatures, i.e. 210 degs. or more. Nobody should make you believe that you must print between 180 and 190. The next layers also could be printed a high temperatures in order to avoid the print head banging into any hardened imperfection but this strategy is not too good for precision work.
- Using extra layer height (150%) and extra extrusion (125-150%) for the first layer and/or moving up the platform a bit. This can compensate for an uneven platform or damaged PVC (bubbles and scratches). Quoting Venkel (12/2015): “With the first layer you need to compensate for small errors in the print bed and in the calibration height. I measured the bed to have up to 0,04mm waves. Let's presume the calibration adds another 0,01mm error. If you would print a 0,15mm layer, the error is 33% of the layer thickness ((0,04+0,01)/0,15). At 0,225mm the error is 22% ((0,04+0,01)/0,225). Then, if you compensate flow to 120%, there is enough pressure on the first layer for good adhesion over the entire bed surface.”
- Slowing down a lot speed for the first layer, e.g. 15 to 20% of your "normal speed". Also consider slowing down second layer speed (unfortunately some slicers cannot do this, but you can do this manually).
- Use a raft or similar construct to keep the piece in place.
I do have difficulties printing with 0.1 layers. Maybe the print beds are not level enough. Printing a really fat first layer does help though.
Tip:
- From the control panel on the printer under Quick Settings', you can change speed and flow rate.
Ninja Flex
NinjaFlex is as of Feb 2016 the best known Thermoplastic Elastomer (TPE). It is fairly easy to use, but also fairly expensive. So far, I didn't manage to print nice smooth surfaces, although bigger layers (up to 0.3mm) higher extrusion rates and lower speed produce acceptable results as in the owls to the right. Both were printed with 0.3mm layers and slowly. One has 5% infill and the other 40%. One was printed with and the other without support.
Properties of Ninja Flex
- Highly elastic (up to 800%), in printed parts maybe 200-300%
- The objects produced are fairly strong. However, if you want parts to be ultra-flexible you'd have to use little infill (maybe 20%) and these are not as strong.
- It is difficult to obtain a smooth texture (or even a half-smooth one, holes can appear).
- Little warping (compared to Arnitel)
- The filament is limp and we suggest making sure that the hotend tube is empty before inserting (e.g. extrude some ABS or Nylon before).
- It is suggested to use 0.5mm nozzles for flexible filaments (like composite ones). One can compensate by using larger layers and increased flow rate.
- Bigger, bulky parts are easy to print with NinjaFlex, smaller parts are a bit of a challenge as you can see below.
- On some days Nija Flex will not print, e.g. not come out of the extruder. Try another day or else "clean" the extruder with ABS.
This filament should be fairly safe in terms of toxic fumes (less than ABS). It is not bio-degradable.
Configuration for my first print, a little Duck:
This configuration was based on 03_FLEX FELIXprinters (PolyUrethane)
- 0.2mm layers
- Temperature: 235 C (recommended: 225-235). I also noticed that some people print with much lower temperatures. Recommendation for the very similar Felix Flex filament is 185 C !
- Bed temperature: 40C (or less, this plastic sticks too well to PVC !)
- Extrusion factor: 110%
- Base speed: 30mm/s, first 2 layers: 25%, contours: 50%, top layer 80% (recommended: 10-20mm, bottom layer: 80%, infill speed: 120% (recommended: 15mm/s – 35mm/s)
- Fan: on
- Infill: 20%, contour: Before infill
- Retraction: 0.75
The result is not so good. Many holes. The flow of plastic is not regular enough, but difficult to know why. Probably a speed problem. The rubber-like plastic may offer too much resistance to the small 0.35mm nozzle. Therefore, we can try going slower and also push some more filament through.
Second print, the same little duck (constant flow settings)
Changes made with respect to the first print:
- Temperature: 230 C
- Base speed: 20mm/s
- First 2 layers: 25%
- All the others: 100%
- Retraction: 1mm
Settings for the 2nd print gave slightly better results. The contour is now more even.
Third print, a holder
- 0.25mm layers
- 4 contours (as opposed to the typical 3)
- Temperature: 230 C first, then lowered to 225 C
- Bed temperature: 40C
- Extrusion factor: 110%
- Base speed: 20mm/s (first 2 layers: 25%, contours: 100%, up-layer 100%, down-layer: 100%, infill: 100%)
- Fan: on
- Infill: 20%
- Contour: Before infill
- Retraction: 1mm
This third print produced a piece that turned out to be too flexible. The larger walls turn out to be OK, the small parts are not, i.e. they got some "holes". These parts are still strong enough to be functional, but the result is just too ugly. Probably these parts should have been printed with even lower speed. One also can notice a lot of strings. This is normal, since we used little retraction. A correct amount of retraction probably would lead to even bigger holes (to try out)
Since the third print didn't go too well I decided to print something that is more difficult in principle. Two low-poly cats reduced to 3cm length. The result was OK, but the contours still could be a bit more smooth.
Recommended settings for a 0.35mm nozzle
Although Ninja Flex is not very precise, it will stick to the print bed and therefore tiny objects can be printed easily. The challenge is to find a good compromise between print speed, temperature, extrusion rate and fill.
- 0.2mm layers or bigger. 3mm is best (!)
- 4 contours (as opposed to the typical 3), in particular if you work with little infill.
- Temperature: 220 - 230 C (Try 230 first !)
- Bed temperature: 50C or less. I use 40C.
- Extrusion width (the width you expect to print): 0.4
- Extrusion factor (multiplier): 110 to 120%. This will help to compensate the somewhat irregular flow, but may add other distortion ...
- First layer: Fatter, e.g. 150% layer height and 150% extrusion (depends also on the state of your platform)
- Base speed: 20mm/s - 1200mm/min(first 2 layers: 25% of that, contours: 100%, up-layer 100%, down-layer: 100%, infill: 100%). Many people seem to argue that constant speed is better (It makes sense, but I don't know for sure). You can printer faster with warmer temperatures. E.g. for the typical owl, 50 mm/s base speed at >230C also can do.
- Fan: on
- Infill: can be anything (tested 5%, 20%, 40% and 80%). For low infill rates use low speed and increase thickness (extrusion width)
- Contour: Before infill
- Contour offset: 90% (not sure here, less than 100% means more tight if I understand right)
- Retraction: 1mm
Recommended settings for a 0.5mm nozzle
Results with a 0.5mm nozzle are better than with a 0.35 mm nozzle. I.e. you can more easily see the layers but the the result is nevertheless much smoother. Make sure that your slicer will adapt to the 0.5 nozzles, e.g. adjusts extrusion width.
- 0.35mm layers
- 3 or 4 contours, depending on infill
- Temperature 220 to 230 C (220 for small structures, 230 for bigger ones and printing faster)
- Bed temperature: 50C
- Extrusion factor 120%
- 30mm/s base speed, more for simple objects like Owls.
- First layer thickness: 120% to 150% and/or some z-correction. 150% is certainly too much, but better be safe :)
- First layer extrusion: 150% (very important if you set layer thickness to 150%). Otherwise, lower a bit.
- First layer speed: 15 to 30% (keep it very slow and fat if getting a good contour is important).
- Contours: 10-15mm/s (e.g. 30 to 50% of Base speed)
- Infill speed: 50%. But one also could try going faster. If so, maybe make it fatter.
- Infill rate: Anything for smaller structures. 20% for large empty structures (else the filament will drop down and not bond).
- Fan on (100%) and open the window in the winter ...
- Retraction: 1 mm (more would be better, but maybe could lead to congestion)
Other tips
- Polyutherane sticks too well to a PVC platform. In order to remove a piece without damaging the tape, pour some alcohol around the edges than peel it gently away and let the alcohol flow in. The piece will come off very easily like that.
- Using the TPE to support itself is probably the best option since it easily can be cut away with small scissors. Since the surface is already fairly ugly, some additional irregularity won't matter that much. Otherwise, ABS or HIPS seems to be a good choice (not tested)
- About stringing and retraction: Taking retraction away to reduce stringing will take pressure away from the nozzle (it will not pull the filament back as some folks believe). There is a trade-off. If pressure becomes too low, this weak filament may not flow well enough in a 0.35mm nozzle. Therefore, I don't use much retraction, but I do have to test much higher retraction under various conditions when I have time. Strings also can act as horizontal support.
- The second and third print (same settings) should improve, since the extruder will be "cleaner" inside.
The Duckator below was printed as suggested by the model's STL position. The backs of its head and tail (i.e. where the support connected) were really ugly and I used a blow torch to even out.
Duckator in the cocoon(Model: Thingverse
Alternatives
- Any other filament that is made of PolyUrethane. These brands should behave in a very similar way. However, some may not feed as easily or may be irregular. I do think however, that one should try others, since the price of Ninja Flex is too high. There is no reason that the best known is also the best. Personally, I didn't notice any difference between the yellow "no name" from Prima 3D below and Ninja Flex, but I didn't do any strength tests.
- Other flexible plastics, like Taulman's flexible Nylon.
3-D Prima TPE
Low cost TPE (http://www.3dprima.com/en/filaments-for-3d-printers/flexible-175mm/ 3-Prima]) - less than half price of Ninja Flex - prints also well. The stringing you can see in the picture below is due to my slicer settings. Since the filament is very weak, retraction probably leads to congestion, so I turned it off.
Settings:
- Temperature: 220 - 230 (be aware that hotter means both better flow and worse solidity while printing, you will have to compromise)
- Bed temperature: 50
- Speed (for simple objects) 45mm/s or much less, i.e. 15 mm/s for quality contours with a 0.5mm nozzle. Slowing down more than that (e.g. 5mm/s) entails a risk that extrusion will be erratic. You will have to compromise between good flow and precision.
- First layer: 150% extrusion and 150% layer thickness.
- First layer: as slow as possible in order to get the contours right, e.g. 5mm/second but if you can rise the print bed a bit and make a much fatter first layer, then you can go a bit faster.
To do:
- Print the same objects as above with Ninja Flex.
Tips:
- Extrude some ABS before printing if the extruder seems to be clogged with bits of PLA that the limp TEP cannot push (actually I did not need this on the Pro, but have to do it on our Felix 2.0)
- I do recommend retracting TPE filament right after printing. Otherwise you will have to pull quite a lot in order to get it out of the extruder. Or else, try using ABS to push it down.
- Speed and retraction (both low) are important parameters to play with.
- I have the impression that this filament ingests water, i.e. doesn't extrude as well after a year or more being in the open. Therefore you probably must compensate by working with higher temperatures, avoid small infill, print a bit faster, etc.
T-Glase
This pretty co-polymer filament is made by Taulman from PET(G). It is somewhat translucid, has a rather good surface finish, and it shimmers. Prettier than translucid PLA. It seems to have low shrinkage and little warping or splitting while printing. It sticks to acrylic, glass, and Kapton. T-glase (aka "Tought Glass") can be used as replacement for ABS and it's stronger but more brittle. Unlike ABS, bonding between layers is very good (i.e. makes cups watertight). Finally, it does not produce fumes when printing. This article by Mike Adams (March 11, 2015,) makes a good case for t-glase: It's solid, safe for (cold) food, watertight, both rigid and flexible, etc.
On the negative side, it bends at 78 degrees C. T-glase seems to be fairly strong. However, if forced it will break (rather than bend). Now the story:
First prints
My very first print failed. I.e. the feet of a little cat did not stick. My second print finished well, but it was printed too fast and without fan (for most of it). The 3rd print worked much better, but the result wasn't great. I made a copy of the ABS profile, then altered the settings to lower speed (about 25 ms for contours), temperature at 240C, bed temperature at 45 C, fan was on, raft and resolution was 0.15. The result was really ugly.
I read that on should increase layer thickness to a minimum of 70% but preferably 80-90% of the nozzle setting, according to a post at Taulman. Also read this. I read in several places that one should use at least a 0.5mm nozzle. Not true, since I managed to print.
4th attempt: Printing Lego bricks
I compared the same brick with very different settings.
- Brick 1 (fairly ugly result) using 0.2mm layers, a raft, 45 C bed temperature and typical ABS settings
- Brick 2 using 0.2 layers, 120% extra extrusion, 70 bed temperature, no raft, base speed = 30 mm/s (contours 50% of that, first two layers at 25%), 30% infill.
The second one came out much better. Too much filament on the roof (you can see the nozzle "digging in", but otherwise, rather good quality. I still believe that 120% extra extrusion is fine, but I should reduce upskin/downskin extrusion factor a bit (I believe it was at a 100% of the 120% global settings).
Recommended settings (for now, this can change)
- 0.25 to 0.3mm layers
- 250 C temperature
- fan on (at least for smaller structures, otherwise I don't know)
- 70 C bed temperature (but the manufacturer recommends 45 !)
- Consider using a raft if you print things that can easily detach or warp (same as PLA) or glue.
- Slow speed: 30mm/s base speed, 25% of that for the first two layers, 50% for the contours. You can try faster speeds, sometimes it does work (probably depends on the state of the extrusion tube and the nature of the object being printer).
- 20 to 30% infill (not sure about this)
- Extra extrusion (in the materials settings) = 110% to 133%. 133% will produce objects that are a bit larger than planned, e.g. Legos parametrized with correct values will barely fit. Use less extra extrusion if you print something flat like a paper clip. In principle, the Felix Pro can print up to 0.28mm layers but 0.3mm did work out fine with extra extrusion.
- Contour offset = 95% (changed, to test)
- Extra extrusion in a build style: 100% for contours, 100% for roofs and floors (this can be lower for larger objects), 100% for the rest.
Slow speed seems to be the most critical success factor.
To do:
- Retraction values according to Taulman = .5mm/.1mm nozzle or for a .5mm nozzle = 2.5mm. That means 1.75 mm for a 0.35mm nozzle. Indeed, I noticed a bit too much stringing with the ABS default values.
Reliability
We tried a long, but easy overnight print, megaphone for smartphone w/ flat bottom using our recommended settings or similar. The object was there in the next morning and pretty well done.
Conclusion (as of Feb 19 2016): Overnight prints (> 12h) can be trusted to succeed for simple objects with our recommended range of settings (fat layers, some extra extrusion, slow speed). It's probably good to use a resistance-free spooler underneath the filament cleaner intake (as shown below in the "laybrick" section).
We also printed the same object 33% wider (so it could fit a Galaxy S6) with 0.3mm layers, only 20% of infill, an slightly higher speed (changed in the Build style, in particular for the fill). I worked nicely, although the slicer could optimize the esthetic quality of walls by putting the joins in different places. Maybe I also should use a negative value for contour overlap.
Wood
I tried Wood from Felix printers, using a 0.5mm nozzle. This plastic has tendency to warp and we recommend glue (or another means) to make it stick better
Provisional settings:
- Extrusion temperature: 195C
- Temperature print bed: 55C
- Filament flow: 120%
- Print speed: 80% of typical PLA speed, e.g. this means 40% in FelixBuilder
- Retraction distance: 1.5 mm
- First layer: 150% extrusion and thickness
- Layer height: 0.35mm (but less also can do)
To try out:
- Cooling loops or using a tower next to the object.
With these settings, one can see layers like in the good old days. I don't mind since printing takes less time.
Do not forget to change the machine settings to 0.5mm (and then change it back if you switch the hotend). I use the second nozzle for 0.5 mm printing, but so far did not manage to configure repetier-host (at some point switches back to nozzle 1). I therefore use FelixBuilder.
I also add a z-correction for the first layer in the start-up g-code (see above).
Laybrick
The Felix Pro 1 can print laybrick, but I don't have any opinion yet on the best way to print. A lot depends also on the kind of object. Sculptures, landscapes, and simple (!) buildings probably should do well but need different settings.
Since extrusion can be a bit erratic, the first layer may not stick too very well to the print bed, i.e. on my first print, the cooling tower got ripped away. It's probably a good idea to run the printbed calibration routine first if it's not included in the start code and also to start with a warmer temperature and a reinforced first layer. Also, since laybrick produces fairly brittle objects, it's not a good idea to print something with small walls (e.g. Lego bricks) that you then will use to play with.
Laybrick filament does not come spooled on a roll which is hassle since you cannot let a print unsupervised. I found an old horizontal spooler from the Felix 1.0 days that can help a bit. Re-spooling the filament, e.g. on an empty PLA roll, does not seem to work since the filament can and did break when I tried that. It probably could be done, if one does it a very gentle way without applying any sort of torsion.
Print settings 0.35mm
In FelixBuilder, I made copy of the default PLA settings
- Heated bed = 55 C (have to check this)
- Fan on
- Temperature: between 170 and 220. At 170 to 180, the texture was very uneven (lots of "holes"). Probably the filament was not coming out very well from the 0.35mm hotend. At 195, the results were fairly good. In theory, lower temperatures should produce a smoother surface. In practice the opposite happens, but then I did not yet try to print at 220. (more to come here).
- Speed: Slow, e.g. 40mm/s base speed, that means 20mm/s for contours (or even slower than than)
- Layer height: 0.2mm
- Infill: dense, e.g. 50% for small objects, 25% for others
- Slow down also layer 2 and 3.
Other tips:
- If your object contains fragile walls or feed, do not remove it from the print bed before it is hardened, e.g. wait for 2-4 hours !
- To remove it without breaking it you may need to use some alcohol (100%).
- Since the filament is fragile, make sure that the hotend is not too clogged with old sticky plastic. If necessary, extrude other plastic first and remove the filament cleanly.
My first prints:
- The first one failed (cooling tower got ripped away)
- The second one (tiny duck to the left) was printed at 180 C, a bit fast and shows problems, in particular in the overhang
- The third one (tiny duck in the middle) was printed at 190 C at the bottom and 170 at the top. I definitely liked the 190 better.
- The forth one (Lego brick to the right) was printed at 190 C but when I removed it from the print bed immediately after printing it came apart at a layer position where I had to insert new filament (avoid running of of plastic)
Second series:
After the first prints, I decided to print a sculpture. This time I had trouble getting the filament stick to the platform. It probably was due to too low speed for the first layer. The result are two Einsteins. The one to the left was printed with 190 C, 0.2mm layers, 40mm/s base speed and "normal build settings", e.g. contours at 50% and first layer at 22%. The left one also suffers from filament getting stuck. The right one was printed with the same settings, but at 200 C.
In sum, I believe that the key for being able to print this material is
- Make sure that enough plastic comes out. Not fast and not too slow. Not too fine.
- Use a larger nozzle (if one will come out) and/or print large layers.
- Don't print small pieces or pieces with lots of little details.
- Use a lot of infill (unless you plan to save money) and add maybe 1-2 wall layers (e.g. 4 instead of 3). The problem seems to me that this filament doesn't bond too well, i.e. it needs neighbours. E.g. cups with strongly filled walls should print well but a cooling tower does not.
To do:
- Print with 0.25 and 0.3mm layers
- Use a 0.5mm nozzle (strongly suggested)
- Print a large sculpture.
- Augment extrusion factor to 125%
Bridge nylon
Bridge nylon is produced by Taulman. It is not as strong as his other variants, but easier to print and cheaper. This Nylon sticks very well to the PVC (Kapton) print bed.
Printer settings for the first print based on official instructions. I modified the default ABS style and use the Single Head Normal Detail print strategy.
- Fan off in the beginning, then at 50% (fan off recommended by Taulman unless the part is very small)
- Temperature = 260C, 255 towards the end
- Infill = 20%
- Print speed = 60mm/s (Taulman: 80% of ABS speeds)
- Retraction = 2mm (Taulman: 1mm/.1mm nozzle or for a .5mm nozzle = 5mm)
- Print bed temperature: 45 C (Taulman: Hot = Glass heated to 45C with coat of PVA)
The result is OK for a first print. There is stringing, maybe 3.5mm retraction is really needed. Some spots look "burned". IMHO some PLA residues left inside the tube or around the nozzle. It's probably a good idea to clean the outside of the nozzle once in a while. For a second print of the little duck I used 255 C and retraction of 3mm and the result was better.
Recommended settings for small objects with small towers:
- Fan = 50%
- Temperature = 255C
- Bed temperature = 45C
- Retraction = 3mm (that's a lot, yes)
- Base print speed = 60mm/s (then use normal build style settings, i.e. real speed settings will be lower for most types of areas)
- Infill = 20% (but higher is probably better)
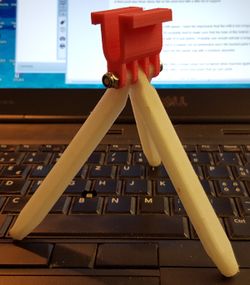
Printing useful objects
The point of using Nylon (and even Bridge) is to create pieces that are sturdy, like this iphone tripod. A first version was done in PLA, but one of the feet broke. So, a third print with Bridge Nylon was printed with the three sticks flat on the print bed with a little bit of support.
- Settings as above
Recommended settings for larger and solid objects:
- Fan OFF
- Print bed temperature = 65 C
- Otherwise like above.
- Infill: Anything from 5-60% (for higher infill, maybe reduce the extrusion factor a bit). Little or no infill works better since there is less chance that filament full of water will sputter and leave undesired bits and pieces (e.g. see the owl above that came out OK)
Bridge Nylon sticks very well to PVC. However it does have a tendency to warp (less than ABS), so it is critical to print the first layer well: Clean printbed, slow temperatures, a cooling tower, etc. Otherwise, if only a small edge is a bit detached, it will warp. I had to abort printing the upper larger piece of the Felix 2.o extruder because of warping.
Other ideas / stuff to try out:
- More infill and somewhat lower infill speed. I have the impression that the infill is too irregular and doesn't bond very well. However, more infill can also increase warping.
- Since the filament is a bit soft, it's probably best to make sure that the tube of the hotend is empty before inserting the Bridge filament.
- Also expect fumes if you printed with PLA just before. Probably one should extrude a longer bit of Nylon before printing.
- Burning the strings away with a torch is maybe not recommended since the burned parts turn brown.
- After printing the nylon, put it back into the plastic bag with a moisture absorber.
Problems, Questions, Tips
Bits that stick out (probably deposited after a longer jump) turn brownish when touched again by the hotend. To reduce this: make sure to reduce stringing, augment fill, add an auxiliary structure (cooling tower), Avoid long jumps that go over parts, or increase hopping (Z-retraction)
Nylon will quickly absorb water, i.e. in 18 hours it already is full of it. Therefore, it is suggested that you dry the Nylon before each print. Read this. Bridge Nylon is probably a bit less sensitive. I could hear some "sputtering" even with the newly acquired roll. Nylon with water inside creates uglier prints and may not bond well between layers. Some people put the Nylon in the oven for a few hours at about 80 C. Try first with a smaller piece ! You also can print larger layers and use a higher extrusion rate to increase adherence if there is a problem, but I found nylon to be solid and it doesn't seem to delaminate like ABS.
Taulman Bridge can warp for larger parts. To reduce warping, use the usual tricks that also work for ABS.
- Change the design of the object, e.g. dig some horizontal holes
- Add some cylinders to the corners (to hold it down). But you'd have to cut them away after the print.
- Use less infill (e.g. 20% or less) and reduce wall size
- Use a warm room and print a lowest possible temperatures
- Print slowly
- Use larger layers
- Use a very strong glue (I did not try that yet). Anyhow, it then may stick to the bed, but delaminate and be no stronger than dense PLA.
- Print upwards, as much as possible, even if you need support to do so.
If the object sticks to the platform (that is decided after the 1st layers and then again after 10 or 20 layers in larger objects) then it may be difficult to remove it from the platform without damaging the PVC, i.e creating air bubbles. I believe that heat could help and next time I will use a heat gun.
Bridge Nylon can and does warp, it the first layer isn't perfect. The object also can warp after removing of the print bed. I don't know how this could be prevented. Again, maybe heating it up with a hot air gun ?
Printing objects that need support is fairly difficult I find. The problem is that support structures can create "bits" that stick our here and there. These will prevent filament to flow regularly, sometimes the nylon will be burnt and one can wind up win an object that has ugly and damaged walls. This happens in particular for slopes, roofs print more or less OK. Adding some extra distance between support structures and the walls maybe could help. Also decrease density a bit.
Print quality and print reliability
So far, I didn't have time to print any sort of benchmarks or play with high-resolution settings. Therefore, prints I produced are good. However, I really don't like the filament spooler. In addition to creating too much resistance, wider (13cm) rolls don't fit, and there is no space to have two "higher", e.g. 25cm rolls.
Stability of the printer seems to be good. So far, I did not try to open the top and bottom parts to see what is inside. I didn't check either whether everything looks really tight. Even if a printer is well designed, it might have been badly assembled. Probably there are "Monday models", but I don't think that I got one of these.
Large surfaces
If found it amazing that printing large surfaces has become hassle free. On the Felix 2.0 I did encounter lateral warping of the first layer and had to turn of the fan in order to get first critical 3 layers printed. I also had to make sure that the bed was well calibrated. This is no more the case. The only problem I encountered (with a different print of a large 3D molecule) was that Felix Builder put the object too much to the right and I had to fix that. Also, make sure to attempt prints like this with a print bed that isn't damaged from forceful removing of prints (bubbles, scratches, etc.)
The following picture shows the first layers and the final result of a 3D Rorschach picture. As you can see in the first picture, large flat surfaces really print well (with PLA that is). The whole print, flat bottom and 3D landscape on top, took about 8 hours.
Reliability
During the first month, I only had two print aborts (not counting the ones due to mismanipulation or computer failures) despite the debatable quality of the filament spooler. One of the two could be easily explained. I scheduled a 2-day print for a large molecule. As some point during the first night, the print head got blocked by an "atom" that detached itself and folded upwards. This caused the next layer to be displaced and I had to abort the print myself in the morning. The other, a 3D landscape with 2 colors, could not.
All 8-10 hour prints went fine. For example, below is a smaller molecule (envelope) with support in progress.
The following lamp shade was printed in 21 hours, using "normal" settings (medium speed and 0.2mm layers). Such an object is fairly easy to print. However, due to the bad ("flat") overhangs at the bottom, things could go wrong in the first few hours of printing. According to Felix Builder and netfabb Pro, the model has 468512 triangles and a volume of 86609 mm3. The area volume is 1400cm3, i.e. more than a liter.
Printing a second one with a different type of PLA and somewhat different settings also went fine. I launched it on Friday and collected it the next Monday and it took about day, but I forgot to check.
Finally, I also had the problem that small pieces detached (got ripped away). One solution (as with any other printer) is to used a raft (called "extra adhesion" in Felix Builder's support strategy). A second one is to make it stick better. For example: lower the nozzle, rise the temperature of the first layer and of the print bed, slow down, and finally print a larger first layer.
Cases with vertical insets
The following pictures shows a Raspberry PI case. Print settings were "medium". Sorry, I forgot, but probably 0.2 layers and medium speed. Maybe 0.15 layers. As you can see the difficult petal didn't print very nicely. The small lettering has some extra stuff inside that could be removed. The walls include some holes, probably due to not so good plastic flow using the default not good spooler (soon to be replaced ...). I also noted (not juste on this printer) that PLA with lots of pigments doesn't print as nicely as more traditional PLA with less pigments.
Overall, the result is good and should better with slower speed and smaller layers. The PI did fit inside. One also could use support (but spaced out).
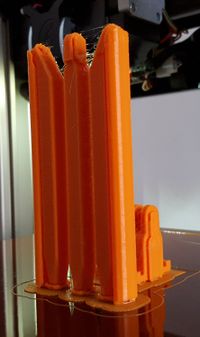
Small sticks
No miracles there. As before, these must be printed in a special way, e.g.:
- Raft
- several at the same time (or a "cooling" tower")
- Slower speed (or strong support)
- Cold temperatures probably.
Otherwise, there is a chance that the printhead will displace one of these. Actually in the picture to the right, you can see that the middle one doesn't look right on top. There is a tradeoff for over night prints. Warm means that you guarantee flow, but at some point some extra filament that comes out may just be enough for the nozzle to touch a bit and make the stick fall.
Printer settings:
- Raft + Support
- Medium speed/quality
- 0.2 layers
You also can see see some stringing. I usually print at night in my office and in order to make sure that prints finish, I don't want too much retraction and I printer at warmer temperatures, e.g. at 195-200 for PLA. This PLA has a lot of pigments and doesn't print a nicely as "old-style" semi-transparent one. On the Felix 2, I printed most PLA at 215, but then I don't know if the temperature sensor gave correct results.
I really wish that someone could write a program that adds some smart support for the sticks. E.g. some like
  /|\
 /_|_\
First layers composed of small objects
If the objects build up (e.g. like the sticks above) then printing is not reliable. I.e. I do not suggest using over night prints. Otherwise, if the objects "join" into something bigger and more solid (e.g. Lego pieces or animals with feet), then you can expect a finished print sometimes later.
I any case, the first layer remains mission critical. It really must be "complete", it must stick and it also should be precise (see printing tips for PLA, e.g., print hot, thick and slowly). If you cannot achieve this, then do not print delicate objects.
Trouble
Z sensor triggered
After a year of using the printer I experienced Z sensor triggered messages. These are annoying because the printer will not home correctly. Firstly you should just head before calibrating. If the message is still there after removing and re-inserting the hotends then you have to act.
- Also read this
Things to do:
- Firstly scratch the contacts, i.e. make them shiny. On the hotend there are two spots and there is the sensor,
- Measure the distance in the flexure and make sure the it is between 4.55 and 4.60mm. Less maybe will not hurt, but larger is bad.
Apparently the Felix Pro 2 has less sensitive sensors.
Dual head printing
Printing with 2 colors - different layers
We did not test that a lot so far. Printing one layer on top of an other worked fine with a simple object, a 4x4 Lego with a hamburger on top.
If we understood right, in order to print an object with two different colors, one has to load and re-position two or more different parts. So far, we use the following method:
- Use Netfabb (or any other tool to correctly position the 2 (or more parts)
- Z=0,
- x and y should be somewhat positive, e.g. + 50mm (else see next item)
- Import the two files into Felix builder and choose placement: as is at the bottom of the screen
- You then can select all parts and re-position in x and y direction if necessary
It would be nice if in Felix Builder, one could "tag" regions of a same part with different colors and then pass this information to the slicer.
The above print used two layers of colors which is a fairly easy task.
Printing with 2 colors - concurrent layers
We also printed two colors that sit "aside", e.g. one part of the object in green and three parts in red. That type of print takes extra time since the printer will let the other extruder cool down to 140 degrees (to prevent clogging). The Felix Pro has a superior design with respect to other printers I have seen. The nozzle on the right is a tiny bit lower (as it should be) but will retract (turning its tip backwards) when not in use.
We also recommend printing the auxiliary structure, i.e. the little square. Before printing a layer the nozzle will do turns on this one get rid of extra filament or also make sure that fialement coms out. (Edit profiles-> Build strategy. Select a strategy, then open Auxiliary Structure and tick)
Slicing quality
I cannot tell yet, but I have the impression that the slicer could do a better job optimizing somewhat messy constructs, in particular ones that have several overlapping parts. The picture below shows a bad layer where 3 parts overlap with the one below. In principle, the slicer should optimize this and not print two (or more parts) in the same place. At least it should give a warning and advise the user to redesign the object. Best would be both, i.e. a warning and an option to slice either one of the overlapping areas and ignore the other.
This print aborted in the middle of the night, probably due to some computer problem (its screen was locked in the morning) and I redesigned a better piece without overlapping parts that sliced and printed just fine.
This actually makes me remember an old gripe with control software (since my "Rapman days"). Why can't someone design a system that allows continuing a print where it stopped ? At least display the line of g-code and then provide a functionality to manually restart printing at this line using the g-code file that was generated and used for the aborted print. With the Felix Pro one could image an even much cooler feature. Using the "touch" sensor, it could detect where to restart.
Printing support structures with a different plastic
(not tried so far)
Felix Builder software
Felix Builder is an officially supported slicer and control software. It allows importing, repairing and positioning objects, slicing, and managing a print queue, etc. Felix Builder is made in partnership with Materialise, i.e. it is a version of its Build processor, as explained here.
See below for the open source officially supported control and slicer software, i.e. RepetierHost + CuraEngine / Sli3r. If you copy the start code, most other open source control/slicer software also should do. I prefer using repetierHost. However the version I have doesn't handle printing with the second extruder only (or I didn't figure out how to ...
Since (sometimes in 2016) FelixPrinters also support Simplify3D, a slicer that has a very good reputation. If you can afford it, I recommend rather using Simply3D than FelixBuilder.
Since Felix Builder was new, we described it here in more details...
Overall impression and description
Menu items are a bit confusing and some software components cannot be found in the initial Felix Builder window without loading and submitting a part. I.e. to see all software components, you either have to load a part or else locate these other programs in your computer.
For configuration use manger.exe, available in the control panel. Direct access is:
- C:\Program Files (x86)\Materialise\BuildProcessorSystem\Manager.exe
For quick submitting a gcode file to the printer, use SubmitJob
- C:\Program Files (x86)\Materialise\BuildProcessorSystem\SubmitJob.exe
Anyhow, once you understand the above and after 2-3 prints, the software is fairly easy to use. Again, do not forget to update. Auto-calibration does work through a routine that has the nozzle tap on the print platform in various places and then firmware will react to that.
I cannot judge the quality of the slicer yet. I found that it had fairly few configuration options, but maybe they are enough. There are four different types of settings that can be configured:
- Slicing (layer thickness and border accuracy)
- Material(about 30 parameters for print speed modification, temperature, fan, filament size, etc.)
- Build strategy (default print speed, fill, upskins, downskins, etc.)
- Support strategy
Positive points
- Overall, the system is easy to use, iff you understand how to launch control software (see above).
- Slicing is fast
- Positioning is easy
- Changing slicer options and creating profiles is easy (once you found where)
- Slicing quality seems to be good, except for overlapping parts (I used for dual-head 2-color printing) and generation of support structures for sticks.
Trouble
In case of trouble, util.exe, a command line utility may be useful. It allows to manage queues. E.g. below we can see something that went wrong, the queue includes a job that it cannot identify. After that the GUI refused to display the print queue (i.e. the
C:\Program Files (x86)\Materialise\BuildProcessorSystem>Util.exe status -verbose

Build Processor System Configuration Utility, Version 1.6.29.0, Copyright © Materialise N.V. 2010-2015

1. Queue "FELIX Pro 1.0" at "Office DKS" is None:
    b8857040-90e4-473c-9713-71999699da78 | Unnamed              Processed, Printed, Comple... ProcessLocally, KeepInQu..
.
    dc5471cc-0bf3-4201-8a01-6c09614e9ec8 | My_FELIX Pro 1.0_Job_16_02_17_21_13... Processed, Print... KeepInQueue
You then can try something like:
C:\Program Files (x86)\Materialise\BuildProcessorSystem>Util.exe remove -job b8857040-90e4-473c-9713-71999699da78 -queue "FELIX Pro 1.0"

Build Processor System Configuration Utility, Version 1.6.29.0, Copyright © Materialise N.V. 2010-2015

The job was successfully removed.

C:\Program Files (x86)\Materialise\BuildProcessorSystem>
If you decide to reinstall the system for one or another reason, make sure to deinstall first. Use the installer program for that. But firstly, you can export your profiles and then reimport (I did not try so far). After deinstalling, make sure that all programs are gone. Then, if your removed the system because something is wrong like it won't find your printer or cannot remove hidden print jobs, remove all files in the System and Personal Appdata folders.
Felixprinter default styles
Of course one cannot define universally suitable styles.
Things I immediately changed:
- Contour before infill. IMHO a better strategy when printing most smaller objects. For bigger ones I don't know if it makes a difference, i.e. safer prints and more regular contours. On the other hand, infill probably should come before contour when printing steep overhangs.
- 4 roofs (as opposed to the usual 3)
- Created variants with heavy infill for printing PLA objects that have to be solid.
- Creating slow build strategies. Most objects I print require less speed. Also first layers usually should be printed very slowly.
Sometimes I use double 1st layer or make it fatter.
When printing over night, I usually lower the speed on the printer console. Better chance to see a printed project when I arrive in the office. The Felixprinter while much more reliable is still a filament printer. A bit of extra filament can "grow" and have something displaced.
When printing with 2 colors it is crucial to print the extra auxiliary structure (by default it is on, but it's a bit a waste of plastic and time).
To be improved (as of Jan 2016)
Some of these issues may have been fixed...
The FelixBuilder software requires several improvements:
Usability
- Emergency stop button is hidden too far away.
- There is no g-code previsualization. Workaround: Print g-code to a file, then open in some other tool, e.g. Repetierhost
- Z-coordinates when translating should not use the Z-center but the bottom. Otherwise, it's a bit painful to stack objects. Alternatively, the software should allow importing objects with optional x,y and z coordinates. As of now, importing puts the object somewhat in the middle of the platform and all objects are lowered to z of bottom =0
- After printing with two extruders, it will heat the second head again even if only a single head is used for printing. Workaround if you forgot to turn off the second extruder: Set the temperature to zero / disable extruder in the control panel on the printer. In other words, turning off the second extruder should a be visible option when launching a print job. Now, it's a click away and is easily forgotten.
- A simple wall thickness calibration routine is missing for those who need it. E.g. Some people would like to make very sure that wall thickness is exactly what they planned.
- Part settings (assigning parts to nozzles) are forgotten when printing the same object again.
Interaction with the printer
- The following problem is fixed now it seems (Feb 2016, but I have to double check): When the printer is printing from a file sent from Felix Builder, one cannot change a parameter (e.g. temperature). I often want to play with temperature and the fan during a single print. Workaround: Use the console on the printer. More globally speaking, I do not understand how the control software and the printer interact while something is printing.
- The software uses some server-client setup that requires a restart (boot) of the machine if you power off the printer (emergency stop) or put the PC in hibernation. One ought be able to reconnect to the printer without rebooting the PC.
- ETA or print completion stops working after pausing/restarting the printer
- After some abort (e.g. electricity failure), it is not possible to restart the print.
- When printing from the SD card, it is not possible to connect from the computer. If I remember right, the printer will reboot (or something similar and kill the print). I have to check this again ...
In sum, I believe that the control software doesn't interact with the printer as it should. It doesn't seem to get/digest much feedback, i.e. the control software doesn't seem to know what the printer is doing (it is not showing it)
Calibration and styles
- An imported object is not really centred. Huge models need to be manually pushed to the left (about -20 on the x-axis)
- There could be more styles (build strategy profiles). Some of these probably should be linked (through naming conventions) to particular plastics.
Interaction with the PC
- I cannot save a gcode file to a network drive, i.e. the same directory from which I loaded the STL files. Workaround, save to a local (e.g. "C:\") drive, then move.
- Access to the path '\\tecfahome\schneide\3dprinting\STL\rorschach\tile3\tile03' is denied..
Missing features
- One cannot define slicer options for regions (the commercial Netfabb slicer did have this option). E.g. it would be nice to be able to say that the printer should print small delicate surfaces very slowly and bigger ones very fast and with a lower resolution.
- I didn't see a setting to define how far the fill can bang into the walls. This is quite a crucial one ...
- I didn't see a setting to have the joints displaced (e.g. evenly distributed around a wall)
Open questions
- I wonder if it's a good idea to separate build strategy from slicing and materials. Experience will tell. For now I am not sure that this was useful since I often find myself creating specific build strategies for specific polymers.
Alternatives
Of course, one can use an other control software and slicer. Just make sure to include some of the start-up g-code shown above (i.e. Z-positioning). Print bed calibration is not necessary, i.e. it can be done once in while. I did not test this, since it probably would take time to do it. As of 2016, there is also Repetierhost configuration for this machine. It may be more suitable for most needs, however I cannot take the time to compare slicing quality to be sure.
Most important desiderata
- Support for regions, i.e. one ought to be able to change flow, speed and temperature with respect to the sizes of regions, layer height, etc.
- Better interaction with the printer, e.g. be able to visually track progress, sending mails when there is a problem, .....
- Better handling of wall quality (wall-infill distance, placement of joints)
- G-code pre-visualization (precise one !)
Repetierhost for FelixPrinter
The control software used for the Felix 1, 2 and series is also available for the Felix Pro since Feb 2016 (?).
I much prefer its interface and functionality over the one from Felix Builder (however, this does not include the slicing quality) and for four reasons:
- There is only one window for both slicing and controlling (with tabs)
- Start-up code is not "per printer" but per slicing profile, i.e. you could lower the nozzle a bit for prints that have a tricky first layer.
- There is a preview of generated g-code
- After a print abort, one can reconnect without rebooting the machine ....
This version only includes two slicers: Sli3r and Cura engine.
Default settings for both slicers should be tuned a bit IMHO, in particular
- speed of first layer (always too fast)
- Z-calibration in the start-up code
- height and extrusion width of the first layer should be fatter.
Negative:
- Neither Slic3R or Cura allow defining speed for the 2nd layer. It's almost as critical as the first.
- Terminology is different in each slicer program. I wish they could agree at least on the words for simple items ...
Slic3R
Slic3R seems to include more parameters than CuraEngine, i.e. a bit more suitable for my needs.
Modifications I made so far for printing Lego-likes (PLA)
- Lower the print head for 0.05mm (see above, near top)
- Untick "Detect thin walls"
- Tick "Avoid crossing parameters"
- PLA temp = 195
- First layer speed = 15%
- Skirt: down to 2 loops
When printing single head with a raft and/or support
- Make sure to disable double head printing: Multiple extruders -> set everything to 1
Problems: Slice3R does have deficiencies, e.g.
- There is no way to lower speed for the second layer which is almost as critical as the first one. Workaround: Manually lower speed in the controller (repetier host or Felix console)
- When using raft, the first layer is printed at full speed. Workaround: Manually lower speed
- With a 0.1 resolution, the slicer seems to make mistakes (I got broken perimeter lines of the first layer for this). Workaround: Use another slicer, e.g. Felix Builder
Simplify3D
So far, this is the best slicer I have used with the Felix Pro. Felix Pro profiles are OK, except that temperatures for PLA are set too low for the first layer (185C) and speed for the first layer is much too high...
Links
- Felixprinters Company home page
- Felix printer Forum
- Category:Felix 3D printer (includes all Felix related articles plus some links)
