Flash CS3 shape tweening tutorial

Overview
Shape tweening means transforming an object from one state into an other. This is usually called morphing. If you use CS4 and later, see the Flash shape tweening tutorial
- Learning goals
- Learn how to create basic Flash 9 (CS3) morphing, i.e. shape tweening.
- Learn how to use shape hints
- Learn how to use shape tweens within embedded movie clips
- Prerequisites
- Flash CS3 desktop tutorial
- Flash layers tutorial
- Flash drawing tutorial
- Flash object transform tutorial
- Flash frame-by-frame animation tutorial or Flash motion tweening tutorial
- Moving on
- The Flash article has a list of other tutorials.
- Quality
- This text should technical people get going and may not be good enough for self-learning beginners. It can be used as handout in a "hands-on" class. That is what Daniel K. Schneider made it for...
- Level
- It aims at beginners. More advanced features and tricks are not explained here.
- Materials (*.fla file you can play with)
- http://tecfa.unige.ch/guides/flash/ex/shape-tweening-intro/
- Alternatives
- Flash shape tweening tutorial (CS4, CS5, CS6)
Introductory example
- The principle
You can transform any form (shape) into any other form. Shape tweens work on so-called editable objects, e.g. it will not work with symbols or grouped objects. You may shape tween:
- Drawing objects (drawings made in object mode)
- Shapes (drawings made in merge mode)
Also, as in motion tweening, the object(s) to be shaped must be in a separate layer.
- Step 1 - Draw an object
- We draw an oval with a thick border with the Oval tool and also set the background.
- Then we center the oval in the stage. To do so, use the Align panel (Window->Align, or hit Crtl-K)
- Check to stage and click on the Align icons until you get it right :)
You should have something like this:

- Step 2 - Insert a new blank keyframe
- Right-click on frame 10 and Insert Blank Keyframe or hit F7 (not "Insert Frame" / "Insert Keyframe" (F6))
This will insert an empty new Keyframe
- Step 3 - Add a new object to the new keyframe
In this frame, draw a new object, i.e. we inserted a Polystar, also in object mode.
- Select the Polystar tool (It sits below the rectangle tool and you must hold down the mouse to get at it)
- Then, in the properties panel, select from the Options pull-down menu: Star and Number of sides = 9
- Then, draw it
- Step 4 - Change its shape and align it with the oval and the stage
Then make it a bit "oval" and adjust it more or less to the size of the oval
- Either click on the Free Transform Tool or Right-click on the polystar; Select Free Transform
- Drag out one sides if needed
- To see the oval you can click on the "Edit multiple frames" icon in the Timeline control bar.
- Then make again sure that it is centered by using the Align panel
You should have something like this:

- Step 5 - Change colors of the polystar
- Untick the "Edit multiple frames" icon !!
- Then you can change the colors of the stroke and the fill
- Step 6 - Morph
- Click on an empty frame between the two keyframes
- In the properties panel below select Tween: Shape
- Alternatively: Just right-click on an empty frame and select Create Shape Tween
- Step 7 - Repeat the other way round
- Insert a new empty keyframe
- Copy the picture from frame 1 (select it and hit CTRL-C in frame 1)
- Paste it to the empty keyframe
- Center it to the stage (or align it with the other objects)
- Add the shape tween.
- Test;
- Move around the playhead
- Menu Control->Test Movie
- If the animation is too fast, reduce the frame rate in the properties panel or better drag out the keyframes to the right.
Done :)
- Result and source
- You can admire the result
- Source: flash-cs3-shape-tweening-intro.fla
- Directory: http://tecfa.unige.ch/guides/flash/ex/shape-tweening-intro/
Notice: If CS3 refuses to create a shape tween, you probably work with a symbol (e.g. a movie clip or a graphic symbol) or another non-editable object. Forget it, it won't work !. To extract the graphics from a symbol instance: Right-click->Break apart or double click on the symbol or symbol instance to enter symbol editing mode, then copy paste the graphics you need.
Morphing traced bitmaps
To morph images there are two kinds of solutions:
- Break images apart (right-click on the picture). This turns it into a shape. You then can make a copy of it and manipulate all sorts of things (e.g. size, colors, e.g. with the lasso tool and the magic wand).
- Trace images, i.e. turn them into vector graphics.
See the Flash bitmap tracing tutorial for some ugly examples or portrait morphing.
Morphing a simple shape into a monster
In this animation I made three keyframes
- Something like a tear in the first
- Tear decomposing at the bottom
- The bottom will decompose into the beginning of a monster
You can admire the result (files flash-cs3-shape-tweening-tear.*)
Anyhow, the idea is that for some shape transformations, you should learn how to to transform shapes. See the Flash object transform tutorial
- Some design tips
- You should consider doing a shape transform in several steps, i.e. use several shape tweens in a row (for the same shape)
- For smooth shape tweening, working with objects without borders (strokes) is usually a better choice. (set the stroke color to none, e.g. the white rectangle with a red diagonal bar). Also, unbreak graphics until the whole thing becomes a shape. You always can make it graphic again by "union" it (Modify->Combine Objects->Union).
- You can put several shape tweens in different layers. E.g. I added a "background" shape tween to the above animation. It's a simple rectangle with 2 different color gradients.
- Results and source
- Admire the result. It's absolutely dreadful (Ok it was done in 5 minutes ....)
- flash-cs3-shape-tweening-tear2.fla
- Source directory: http://tecfa.unige.ch/guides/flash/ex/shape-tweening-intro/
Shape hints - where should shapes go
In order to create some slightly better shape animations you can give Flash hints where a shape should go. “Shape hints identify points that should correspond in starting and ending shape. For example, if you are tweening a drawing of a face as it changes expression, you can use a shape hint to mark each eye. Then, instead of the face becoming an amorphous tangle while the shape change takes place, each eye remains recognizable and changes separately during the shift.” ([1], retr. nov 2008)
- Select the first keyframe
- Create one or more shape hints (Modify->Shape->Add shape hint) or hit CTRL-SHIFT-h.
- You will see some little letters that appearing
- Then, drag these onto borders of the shapes in a keyframe until they "snap", i.e. to points (places) of a shape outline that you want to "move" gracefully to another place in the next keyframe.
- Repeat this in the next keyframe of this shape tween. Drag the shape hints to places on the border where the initial points should go.
Notice: If the shape hints disappear, hit CTRL-ALT-H.
Example - shape hints for letters and webdings
- Look first at the live Shape hints example.


The shapes have been made with the the text tool. Since characters are not shapes, you will have to break apart a text (right-click menu). The heart and the forbidden sign was mad with the webdings font. Read webdings and wingdings in order to learn about these very special fonts.
Source: shape-tweening-intro/flash-cs3-shape-hints.fla
Bad example
Let's now look at a bad example. To do shape hinting right, each morphed shape should be in a different layer if I understand right and they should be attached to borders. In the following example they sit on the shape and do nothing at all. (Yes I know I should fix this, but did not have time)
Below are three screen captures for keyframe 1, keyframe 2 and keyframe 3 of an animation that starts with a tear on top. It then separates into 2 tears. In the third keyframe one becomes a hill and the other one morphs into a tree. It almost looks good, as you can see
- Shape hints in Flash CS3
-
 No shape hint in first keyframe
 -
 Unused shape hint in middle keyframe
 -
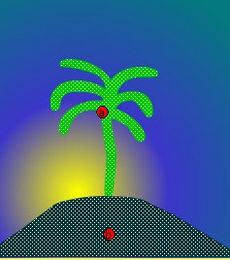 Unused shape hint in last keyframe


Results and source:
- Admire the result. It's absolutely dreadful (Ok it was done in 5 minutes ....)
- flash-cs3-shape-tweening-hints.fla
- Source directory: http://tecfa.unige.ch/guides/flash/ex/shape-tweening-intro/
- Remember how to view all shape hints
Shape hints will disappear from view when edit something.
- Select the layer(s) within which you have shape hints and select View->Show Shape Hints or hit CTRL-ALT-h
- Notice: To add new shape hints, press CTRL-SHIFT-h.
- Alternative example
- Control shape changes with shape hints (Adobe Flash 10 manual).
In the Flash bitmap tracing tutorial we tried shape hints for a portrait morphing. A 2-color portrait was morphed into another. Some objects were given shape hints.
- Fla file: flash-cs3-shape-picture-morphing2.fla
- Directory: http://tecfa.unige.ch/guides/flash/ex/shape-tweening-intro/
Shape tweens of motion tween elements
A simple motion animation with 2 shape changing objects
To use a shape tweened object in a motion tween animation, you simply can save a shape tween as *.swf (Flash) and then import as movie. But you also can draw everything in the same *.fla file using embedded movie clips.
- Step 1 - Draw the object
- anything (but preferably without strokes since shape tweens don't render these very well) ...
- Step 2 - Turn into movie symbol
- Select the object
- Right-click->Convert to Symbol
- Select Movie clip !
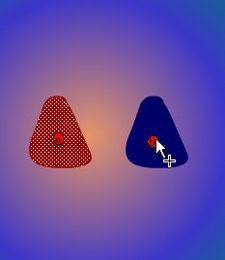
Repeat this for the other objects you want to animate, e.g. create a blue circle that represents a planet.

- Step 3 - Edit the movie clip symbols
- Double-click on the instance of the symbol in the stage (or the movie clip in the library)
- Do shape tweens. Make sure that you really are in symbol edit mode. E.g. in the screen capture below you can see in the Edit bar that we are editing "Planet" (a movie) and not "Scene 1".

Click on scene 1 (or whatever your scene is called) to get back to the normal stage (alternatively use the pull-down menus to the right).
- The planet was made with a simple gradient transform. In the first keyframe there is some green on the upper left and in the second keyframe it is on the lower right.
- The star simply changes color from yellow to orange and then from orange back to yellow.
- Step 4 - Create a motion animation for each of the shape tween movie clips
- Tip: if you want to move an object around an ellipse, draw a real ellipse then cut of tiny bit with the eraser. It then becomes a motion guide line.
The picture below shows the kind of time line in you should get in the main scene.

- Final Tips
- Make sure at which level you are editing (scene or embedded movie clip) !
- Use a different layer for each motion animation. In each layer just put one symbol. Then add (if you want) a motion guide layer to each of these layers... otherwise you met get really unexpected results (E.g. if you see a "tween" in your library something went wrong).
- Results
- You can admire the result
- Get files flash-cs3-shape-tweening-in-motion.* from:
- Source: flash-cs3-shape-tweening-in-motion.fla
- Directory: http://tecfa.unige.ch/guides/flash/ex/shape-tweening-intro/
A simple doubly embedded motion animation with 2 shape changing objects
Of course a planet should turn around the star. Therefore we should embed the planet motion animation with the star motion animation, e.g. something like this motion-in-motion animation
- Source
- Get files flash-cs3-shape-tweening-in-motion2.* from:
- Source: flash-cs3-shape-tweening-in-motion2.fla
- Directory: http://tecfa.unige.ch/guides/flash/ex/shape-tweening-intro/
Links
Example materials
Example files used (including *.fla source) can be found here:
- Click on either an *.html or *.swf file to see.
- Get just the *.fla file if you want to make modifications. The standard copyright of this wiki applies.
Adobe documentation
- Control shape changes with shape hints (Adobe Flash C3 Help). There is a nice example morphing "1" into "2".