Stitch Era - digitizing complex vector images: Difference between revisions
mNo edit summary |
mNo edit summary |
||
| Line 6: | Line 6: | ||
== Introduction == | == Introduction == | ||
This is a beginner's tutorial for the [[Stitch Era embroidery software]]. It explains how to go from imported more difficult bitmaps and vector images to embroidery. If you are new to Stitch Era, read [[Stitch Era - simple digitizing]] first. | This is a beginner's tutorial for the [[Stitch Era embroidery software]]. It explains how to go from imported more difficult bitmaps and vector images to embroidery. If you are new to Stitch Era, read [[Stitch Era - simple digitizing]] '''and''' [[Stitch Era - vector graphics]] first. You will need both, in particular some knowledge about vector drawing. | ||
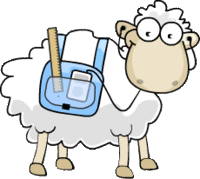
[[image:lams-dolly-lrg.gif|thumb|right|200px|LAMS (Learning Activity Management System)mascot, original GIF file]] | [[image:lams-dolly-lrg.gif|thumb|right|200px|LAMS (Learning Activity Management System)mascot, original GIF file]] | ||
| Line 100: | Line 100: | ||
We finally added red cables for the iPod. | We finally added red cables for the iPod. | ||
''' | '''Cleaning up other vectors | ||
* A lot of (pretty quick and dirty) cleaning was done for the black outline. We probably would have been more efficient just redrawing it. | * A lot of (pretty quick and dirty) cleaning was done for the black outline. We probably would have been more efficient just redrawing it. | ||
* We also simplified some light grey backgrounds of the sheep fills and joined some of these areas. Often, we also did an add vector operation or simply killed a smaller section and then reshaped a larger one. | * We also simplified some light grey backgrounds of the sheep fills and joined some of these areas. Often, we also did an add vector operation or simply killed a smaller section and then reshaped a larger one. | ||
The final result looks like this. Vectors are order according to stitch order. First ones should be embroidered first. | The final result looks like this. Vectors are order according to stitch order. First ones should be embroidered first. | ||
[[image:stitch-era-lams-cleaned-vectors.png| | [[image:stitch-era-lams-cleaned-vectors.png|thumb|800px|none|Cleaned vectors]] | ||
=== Digizing === | |||
The cleaned up vector drawing was then auto-digitized with the idea to reconfig stitch sections manually. | |||
* CTRL-A to select all | |||
* Convert to Embroidery | |||
* Art to Stitch (Intelligent) | |||
Parameters used: | |||
* Density = 4 lines / mm | |||
* Pattern type = PTM-0159 (looks messy like a sheep) | |||
* Running Stitch length = 1.5mm | |||
A first result looks like this: | |||
[[image:stitch-era-lams-digitized-1.png|thumb|800px|none|Digitized LAMS logo - take one]] | |||
Revision as of 22:07, 13 June 2011
This article or section is currently under construction
In principle, someone is working on it and there should be a better version in a not so distant future.
If you want to modify this page, please discuss it with the person working on it (see the "history")
<pageby nominor="false" comments="false"/>
Introduction
This is a beginner's tutorial for the Stitch Era embroidery software. It explains how to go from imported more difficult bitmaps and vector images to embroidery. If you are new to Stitch Era, read Stitch Era - simple digitizing and Stitch Era - vector graphics first. You will need both, in particular some knowledge about vector drawing.
Introductory example
We shall try to improve our digitzed LAMS logo a bit. The stitched result should not respect the finer details of the bitmap logo, but rather represent its sprit, i.e. convey somehow the idea of an sheep that uses some tools for learning...
Bringing out bitmap colors
Preliminary steps
- Load the bitmap
- Keep its size, since making it bigger won't help the process in our opinion
Before we vectorize the initial picture we transformed its colors:
- Max saturation: to bring out colors
- Max constrast: to distinguish colors
- Darken a bit: to see the result :)
Transform to vector
Preliminary steps
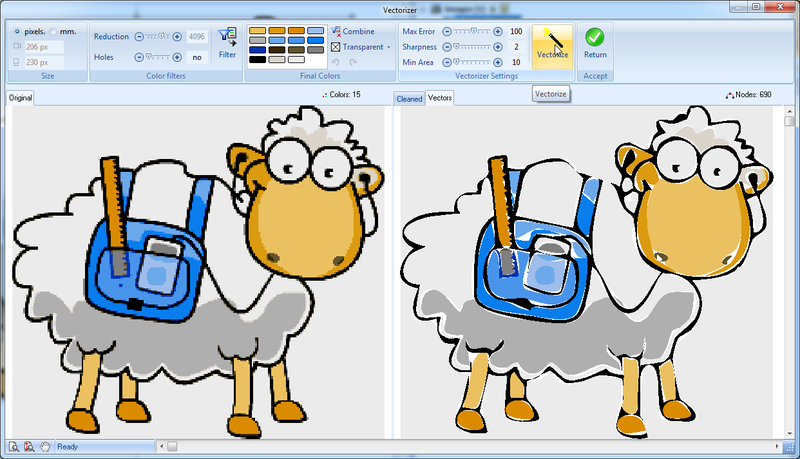
- Open the Vectorizer tool, i.e. click on the Layout Tab -> Convert to Vector
The "mangled" bitmap doesn't need any color reduction in the vectorizer panel as you shall see.
- Click on Filter
- Set Transparent to "no color".
We now have 15 colors and can vectorize
Vectorizer settings:
- Sharpness and min area = minimum since we don't want to loose an information at this point
- Max error to 100, i.e. a compromise that will smooth some curves, i.e. create less control points, but not too few.
Simplifying vectors
The result could be translated more or less as is to embroidery, but we would like to create something that is a bit more professional.
The vectorized sheep now includes about 60 vectors that need cleaning up. To do so we have to do the following:
- Remove large light-grey areas around the sheep (easy: click and kill)
- Enlarge the vector image to the right size.
- Kill small useless vectors that are too small to be stitched
- Kill vectors that are badly rendered and redraw these with the vector drawing tool
- Fill holes
- Join vectors that should go together, e.g. the black outline.
- Reshape some vectors, e.g. increase the size of some "fill objects".
Below is a picture of the vectorized sheep after removing the background grey areas.
Enlarge
- Select all: CTRL-A
- Then enlarge and position. If you need a precise size, e.g. 6cm in with, use the Layout tool.
Getting rid of small vectors and ugly vectors and fill holes
To do so, you mave have to zoom in first. Since we have 1900x1200 laptop, we used 400% for our 60mm X 54mm sheep.
- Click on each vector object that you want to remove and press CTRL-X (or DEL)
- Some are so small that they are difficult to select without zooming lot. After removing the easy ones, we clicked on each remaining vector in the object manager and if it was too small we hit CTRL-X (kill).
- When you notice a hole, you also can kill it. In the Reshape ribbon panel on top, click on remove holes. Verify the result and hit CTRL-Z if needed in order to backtrack.
After this operation we are down to 35 vectors, but the most difficult part remains. The problem is the big black vector that includes most of the outline, plus the bag, plus the ipod cable, plus the ruler. In order to restitute these as indidival objects to be reshaped or killed we now must do vector surgery.
- Select the black outline
- Select Split vectors in the Reshape Panel.
- Zoom in as much as you can, as shown in the screen capture below
- Then (and this is very tricky) draw a path that will completely section one section from another.
Redrawing the bag and stuff
We then selected the (now separated) bag area and made it red. We now have two options. Either kill it and redraw or repair. We chose to kill it (not yet) and redraw everything. We took the additional decision to get rid of some details since they won't stitch well probably.
- The bag could be drawn with either the freehand or the Bezier tool (read Stitch Era - vector graphics).
- We used the bezier tool (since we didn't have a drawing tablet),
- Settings: vectors only outline, thickness = 1 mm, curve and normal node
- Some nodes were then transformed to Corner nodes
- We added two little lines and then added these to the bag outline with the combine vectors tool.
The iPod outline was made with the Closed shape tool, i.e. the rounded rectangle, and rotated a bit (select the object and hold down the CTRL key). We also added a filled grey circle.
We replaced the blue backgrounds and also added a light blue rectangle on top of the iPod. We will make this "transparent" later.
We finally added red cables for the iPod.
Cleaning up other vectors
- A lot of (pretty quick and dirty) cleaning was done for the black outline. We probably would have been more efficient just redrawing it.
- We also simplified some light grey backgrounds of the sheep fills and joined some of these areas. Often, we also did an add vector operation or simply killed a smaller section and then reshaped a larger one.
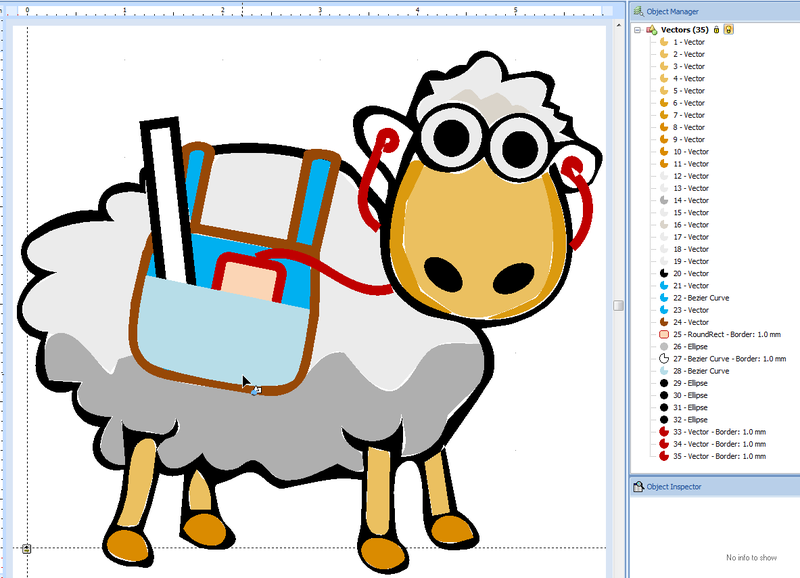
The final result looks like this. Vectors are order according to stitch order. First ones should be embroidered first.
Digizing
The cleaned up vector drawing was then auto-digitized with the idea to reconfig stitch sections manually.
- CTRL-A to select all
- Convert to Embroidery
- Art to Stitch (Intelligent)
Parameters used:
- Density = 4 lines / mm
- Pattern type = PTM-0159 (looks messy like a sheep)
- Running Stitch length = 1.5mm
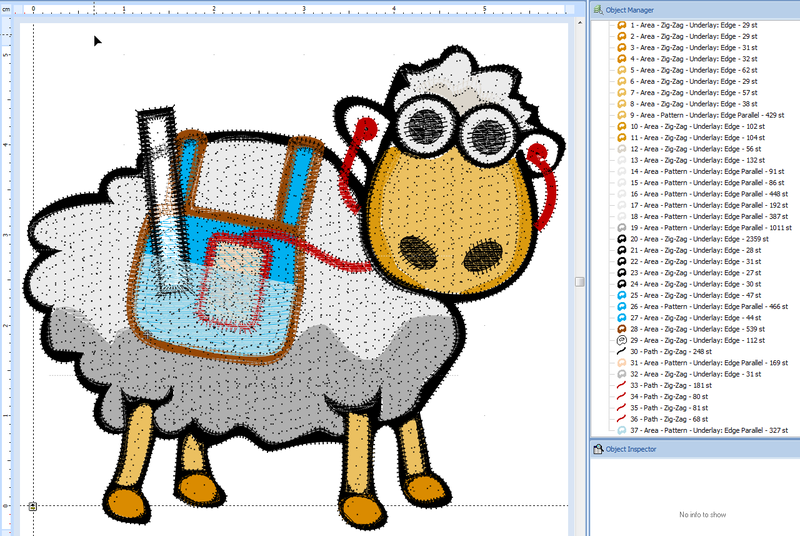
A first result looks like this:


