Post processing of 3D polymer prints
This article or section is currently under construction
In principle, someone is working on it and there should be a better version in a not so distant future.
If you want to modify this page, please discuss it with the person working on it (see the "history")
Introduction
This articles describes how to clean up and otherwise post-process 3D prints made with a 3D printer like the RapMan that prints polymers like ABS or PLA.
Getting the print of the raft
RepRap printers like the RapMan require the use of a raft for polymers like ABS. To get it off from the print bed, use a flat kitchen knife.
To remove the object from the raft, first try to pull it off, then use the same knife like you would peel a carot.
Only when this doesn't work, cut of file off remaining strands from the interface layer.
Removing small imperfections
Prints always have imperfections, e.g. small parts that stick out and that you will have to remove.
Remove filament that sticks out with a small and sharp knife. A little Swiss Army "keyring" knife that you can buy for about 10 Euros will do nicely.
Then, to remove other imperfections, use the files that you bought for assembling the printer.
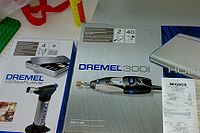
As alternative or in addition, get yourself a cheap multi rotation-tool with a set of accessories. A Dremel "multi tool" for carving, grinding, cleaning, sanding, etc. cost about 50 Euros or less at discount princes. Typical accessories are:
- Carving tools (to carve holes that you can't print)
- Grinding/sanding tools, to remove imperfections or irregular bottom layers. Although for the latter, I'd rather use a file.
- Cleaning/polishing tools, to remove small imperfections (see also the use of fire or acetone)
After some processing, the object will have ugly spots (plastic is whitish instead of colorful), and you will have to bring the color back, read on ....
Using fire
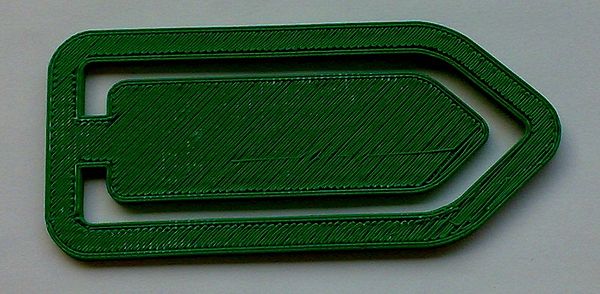
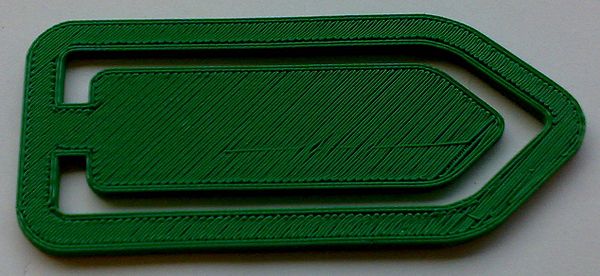
I found that holding it over the kitchen gas will bring back color. Do not use a candle. Take a glove or hold it with a plyer and move it quickly back and forth fairly close to the flame. Now be careful: ABS will start bending and becoming soft very fast, i.e. it will bend towards the heat source and alter its form. To prevent this for 2D objects like a paper clip, flip the object over (180 degrees to the other side).
Using a small torch
Using your kitchen stove is not really practical since the flames are too wide, i.e. when heating up a part you likely will burn another. So I got myself a little mini-torch for about 50 Euros, i.e. a Dremel gas torch ([url=http://www.amazon.co.uk/Dremel-Hobby-VersaTip-Gas-Torch/dp/B002LARRQW]amazon uk link[/url]). It's small and easy to fill from a cigarette lighter gaz container.
Disclaimer: Tested with ABS and PLA, don't blame me if you burn your office down.
Quickly pass over all the "white" areas, don't go to close or the plastic will inflame. Flip over 2D objects. I did not try to meld plastic or to smooth out a whole surface. Purpose was to (a) burn the "white away" and (b) other little things that stick out. With PLA this torch seems to even more useful. Torching an object doesn't make it stink (PLA is made out of corn starch) and it's therefore fairly easy to burn of things that stick out or to make a flat bottom.
Open the windows or do it outside. I don't think that fumes are so healthy.
Note: You see here the bottom of the object (you can see the front side here. There are other imperfections, but they are rather due to bad calibration (should have made somewhat fatter lines which I did in other paperclips)
Warnings:
- ABS can burn easily and fumes are not healthy.
- PLA will melt down fast and you can damage your object.
Use Acetone
Acetone is a much safer way to bring brilliance to an object. A liter of Acetone costs about 7 Euros and you can find it in any do-it-yourself shop.
Marcus Wolschon suggested to use Acetone (retrieved 21:34, 11 March 2010 (UTC)): “As someone on HAR2001 suggested I tried out acetone to clean a printed object and get rid of the obvious self-printed look. I´m quite surprised. The surface melts from itentifiable, connected strands into a single smooth and glossy surface. When I press down on the un-etched version I hear slight creaks as the infilll gives way. Nothing of that in the etched version. Of cause, safety precautions are required. Use a well ventilated room and a mask rated for vapours and gas.”
In the picture below, you can see a (flash-enhanced) shiny door stopper made with ABS.
Apply the Acetone with a little brush. Do this outside or on the window shelf, since fumes are not so healthy. Do not apply too much or the object will become "whiteish".
Warning:
- Do not inhale
- I don't know if some residues might present a danger if you take the object in your mouth.
- Acetone is highly inflammable, don't flame torch it afterwards.
Bending
With a blow torch you can heat objects that are not to thick and then bend them. Keep the heat source fairly far away and heat ABS plastic to maybe about 60 degrees. You then you can adjust somewhat its shape. Not tried, but putting it into an oven may also do the trick.
Warping: Objects will warp towards the heat source.
Warning: PLA will melt fast, be careful not to destroy your 30-hour print.
Painting
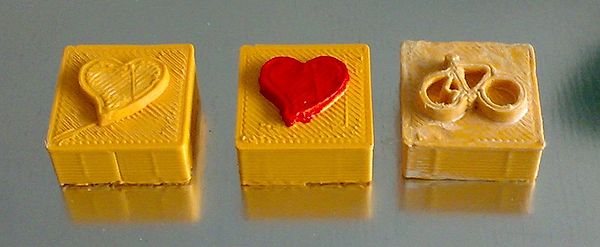
Acrylic paint (or some at least) will stick fairly well to ABS and PLA (others not tested).
I bought so-called "Hobby Paint" from a do-it-yourself store.
- Six 50ml child-safe paint cans costed 25 CHF (about 16 Euros)
This paint is ok, but doesn't stick strongly, i.e. it comes off when you scratch it with a finger nail)


