Flash arranging objects tutorial
This article or section is currently under construction
In principle, someone is working on it and there should be a better version in a not so distant future.
If you want to modify this page, please discuss it with the person working on it (see the "history")
Overview
This is part of the Flash tutorials.
- Learning goals
- Learn to align, stack, combine, break objects
- Prerequisites
- Flash CS3 desktop tutorial
- Flash layers tutorial (first part)
- Flash drawing tutorial (at least some of it)
- Quality and level
- This text should technical people get going. It's probably not good enough for beginners, but may be used as handout in "hands-on" class. That is what Daniel K. Schneider made it for...
- It aims at beginners. More advanced features and tricks are not explained here.
- Summary
Snapping
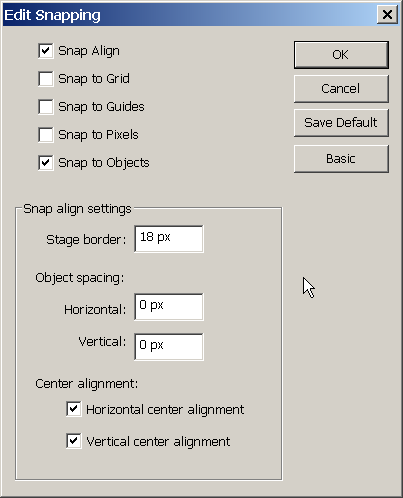
You can tune the desktop to various snapping modes
- Menu View->Snapping or right-click on the workspace
- Then turn on/off snapping modes or better click on Edit snapping
I usually just have these one:
- Snap align
- Snap to objects
- Snap to objects
It will snap an object you move against the dotted lines that will appear. Move slowly...
- Snap to Grid
Works when you turn on the Grid with menu View->Grid
Aligning objects
To align objects on the stage you got three solutions:
- Use the align panel (Open it with Window->Align or CTRL-K and dock it next to the Colors panel
- Use menu Modify->Align
- Use the shortcuts (see Flash CS3 keyboard shortcuts)
With the align panel, you can align, distribute or resize a series of selected objects.
There are two fundamental modes:
- Align/distribute against the stage.
- Align an object against the first one you selected, or distribute among the first two selected
The align panel ("to stage" is unticked)
To see what each icon does, move your mouse cursor over it.
These icons represent two things:
- The line against which alignment or distribution will be made (left, right, middle, top, bottom, etc.)
- Dark rectangle is the first reference rectangle
- White rectangle is second, or last plus all the other selected
Match size will change the size (either width, height or both) to the bigger one that is selected (??).
Aligning objects in several frames
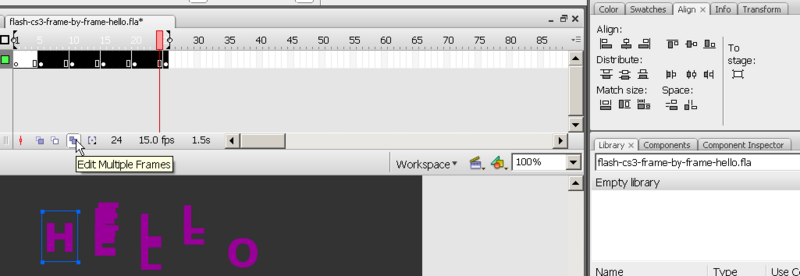
You also may align objects in several frames. For example, to align letters in all frames: Click on the Edit multiple frames button in the bar below the timeline.
- Then, you can select the frames you want to edit together by moving the "[" "]" sliders on top of the timeline
- Then select letter-by-letter groups, then use the align pane (Window->Align), but untick To stage.
This tool is quite dangerous, since it's hard to control what happens in each frame. Make sure to save your file before you engage in this ! Also, when you are done, untick the "Edit multiple frames button.
Stacking
When you draw a new object it is drawn on top of the others.
You can move forward or backwards any select object(s) with the right-click menu.


