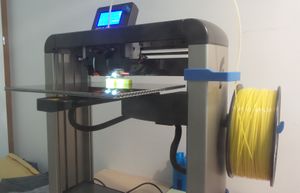
Felix Pro 2 3D printer
Introduction
The Felix Pro 2 is a 3D printer made by FELIXprinters and that started shipping in December 201?. It features auto-calibration of the print bed, a dual head, etc. and strong, reliable steel extruders. Our machine was upgraded from the Pro 1 to a Pro 2. Print quality seems to be better.
See also:
- RapMan (our first 3D printer assembled in Jan 2010, not used any more, but no modern printer will beat its look)
- Fabbster 3D printer (given away)
- Felix 1.0 3D printer (bought in 2012 and still working)
- Felix 2.0 3D printer (bought in 2013 and still working)
- Felix Pro 2 3D printer (bought in 2015)
- Felix TEC-4.1 3D printer (bought in nov 2018)
This article will only include new information with respect to Felix TEC-4.1 3D printer, e.g. filament settings and things to do with the extruder or slicers
Ultimaker Cura Slicer
We do not recommend using the Cura slicer installed within RepèetierHost (both the one that is distributed by Felix and the original one), since it is a very old 3.x version.
As of dec 2020, use Cura 4.8. A Felix Pro 2 profile is already included.
Clearning the drive gear
- Extruder jammin" could mean that are is some debris in the extruder, i.e. the drive gear
Disassembling is a lot of work, try the following first:
- Open flap in front
- Take out hot-end
- Look from the bottom into the extruder, you will see the toothed drive_gear.
- Use a tweezer to clean out the teeth. It takes a little time, but saves you the hassle of disassembly.
Printing with a 0.7 mm nozzle
- More extrusions, more heat, disable filament detection
Printing with PETG
- Layer size = 0.7
- Extrusion = 100%
- PETG can roughly be printed between 230-260 degrees and , try 240-250 with a 0.7mm nozzle
- Take retraction away if you print fast
- Remove filament detection, i.e. send the following g-code in the startup script:
M602 S0 P1 - Add banging floors into the wall (e.g. 50%)
- Infill 20% hexadecimal or some other that works well with higher speed.
Cura settings for printing Duplo compatible blocks
Surprisingly, printing lego and duplo compatible blocks is quite a challenge, in particular with respect to overhangs not completing and nozzle getting stuck. (for à 0.7mm nozzle)
- Quality
- line Width = 0.7
- Inner line width = 0.7
- initial layer width : 100%
- Shell
- Wall line count = 2
- bottom layers = 1
- Print thin walls = ticked (no necessary for duplo, but for Lego compatibles
- Material
- Printing temperature : 210
- printing temperature initial layer : 210
- initial printing temperature : 210
- final printing temperature : 210
- Speed
- Print Speed = 40 (vitesse par défaut)
Initial layer speed= 10 (important !!!)- Wall speeds = 30
- Initial layer travel speed = 20
- skirt/brim speed = 10
- Infill
- "Infill before walls" = no
- Material
- Flow = 100
- Wall flow = 100 (can be a bit less, e.g. 95)
- Cooling
- Fan at 50% or 0%. Better, turn the fan on for most parts and then off for larger flat sections. A comprise would be fan at 50% all the time.
- Support
- Aucun
- Build Plate Adhesion
- 4 lignes de skirt à 0 distance (pas utiliser brim dans cura).
