Felix 1.0 3D printer
<pageby comments="false"/>
Introduction
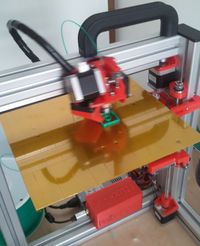
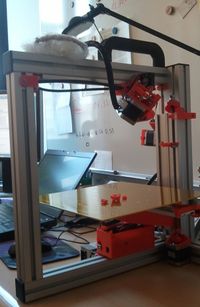
Felix is a low cost 3D Printer, available as kit.
It is the IMHO the most practical printer for schools, since it can be easily carried around and since it has a very stable frame - Daniel K. Schneider 17:01, 18 June 2012 (CEST).
In the future, this page will be split into several pages as contents grow. I got the assembled Felix today and just started playing a bit - Daniel K. Schneider 19:06, 18 June 2012 (CEST).
Where and what
Getting it The kit is sold through the felixprinter and costs about 900 € (excluding VAT and shipping costs).
Software
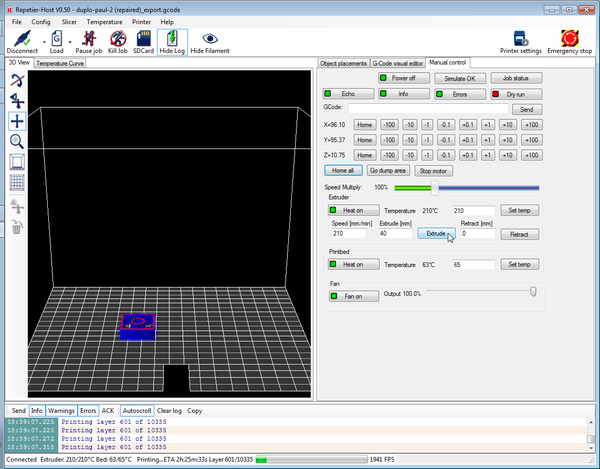
- The open souce Repetier-Host program will pilot the printer through a USB host cable. It will interface with two different [Slicers and user interfaces for 3D printers slicer] programs, i.e. skinforge or Slic3r. A distribution with a pre-configured skeinforge is available from Felix (for registered forum users)
Materials
- 1.75mm PLA rolls
Support
- Felix forums (Registration required for posting and download)
First impressions
After unpacking, installing and configuring the controlling/slicer software (about 15 minutes), I was able to print a Duplo piece with a bicycle glyph on top without changing any default settings. That is quite remarkable, although I do have experience with two other printers, the RapMan (bought 2 1/2 years ago) and the fabbster (bought recently).
The second print was an easy-to-print model on a difficult to print Lego block. Also came out rather nicely.
Assembly
Procedure
Assembly of the current model requires some soldering skills as in most other 3D printing kits. Assembling the structure seems to be very easy. Assembly seems to take about 5 to 12 hours depending on your DYI skills. The next version will be easier to assemble according to Guillaume Feliksdal, its creator.
Since we didn't do any assembly, we can't provide any help. The assembly manual seems to be detailed enough.
Fully assembled
For now, Felix doesn't offer fully assembled models, but may do so in the future. However, I exceptionally managed to order a fully assembled and tested version. The printer fell off a truck or something and arrived broken. Of course, a fully assembled printer is more fragile, but it was IMHO well packaged in a sturdy box and the Post Office admitted mishandling.
The repaired version arrived via UPS and with different packaging and it worked like a charm out of the box. No calibration was needed, only the software had to installed and configured.
Tips
Heating up
- Heat first both printbed and hotend
- Fan on (100%)
- Before printing, it's a good idea to extrude some 40mm of filament at 200mm/s. If that doesn't work (not yet tested), then reverse extrude at high speed (1000mm/s), cut the filament and reinsert.
Skeinforge settings
Skeinforge is the recommended slicer program. Although it requires some waiting, it seems to produce better results than Slic3r. However, so far we didn't test. In out experience, it also turns our that some slicers can do some things better than others. In addition, Slic3r seems to be much easier to understand. Your choice. - Daniel K. Schneider 19:02, 18 June 2012 (CEST)
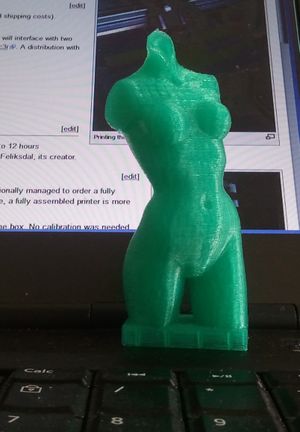
If you use the included skeinforge distribution, the default settings are ok for first prints. The print to the right was a small version of Pink Panther Woman by Pedro Januário (thingiverse) on top of a Lego. The bottom of the Lego piece is difficult to print and it came out better than with my other 3D printers. The woman on top is fairly easy to print, but some printers have trouble with the neck and the chest...
Default skeinforge settings could be made a bit fatter for some objects like DUPLO blocks.
- Menu Slicer->Skeinforge configuration
In Skeinforge:
- Craft
- Carve
- Set the extrusion width bigger than 0.38mm
For now, see
- Skeinforge for RapMan (outdated, not appropriate for the Felix, but you get the idea ....)
- The official Skeinforge wiki


