Computerized embroidery for identity building (fablearn2020): Difference between revisions
m (→Resources) |
|||
| Line 25: | Line 25: | ||
== Somewhat modified contents of the submitted paper == | == Somewhat modified contents of the submitted paper == | ||
{| align="center | {| align="center" | ||
|- | |- | ||
| style="border:1pt solid #ffffff;padding:0.0694in;" | Daniel K. Schneider | | style="border:1pt solid #ffffff;padding:0.0694in;" | Daniel K. Schneider | ||
Revision as of 14:09, 9 October 2020
Topics and resources for the demo session
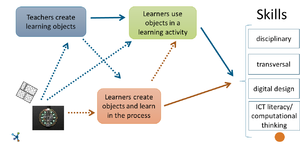
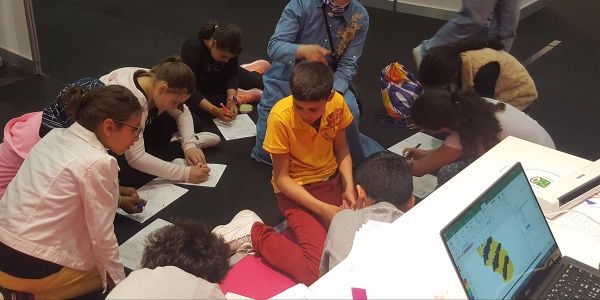
Initially this demo was submitted as technical workshop, i.e. we planned to engage participants in learning machine embroidery, create a design related to "identity", reflect on future activities and discuss these. Our larger interest the use of making in education as shown in the picture to the right.
Resources
- Machine embroidery (this wiki)
- Computerized embroidery (Concept)
- InkStitch tutorials (free embroidery platform, based on Inkscape)
- Stitch Era tutorials (Fairly cheap, yet powerful commercial software)
- fr:CFAO (in french) Our making portal. Includes activities related to machine embroidery.
- fr:STIC:STIC IV (2017)/Projets (in french). A making class focused on embroidery. Includes some work related to identity.
- Inkscape and Ink/Stitch
- Inkscape Project home page
- InkStitch Project home page
- inkscape - inkstitch (Facebook group, 1.6Kmembers, french)
- InkScape to Ink/Stitch Enthusiast Group (Facebook)
- Stitch Era
- Stitch Era e-commerce website. For a trial, we recommend SEU Standard for 1 month ($24).
Somewhat modified contents of the submitted paper
| Daniel K. Schneider
University of Geneva— FPSE / TECFA Switzerland |
Lydie Boufflers
University of Geneva— FPSE / TECFA Switzerland |
Kalliopi Benetos
University of Geneva— FPSE / TECFA Switzerland https://tecfa.unige.ch/perso/benetos kalliopi.benetos@unige.ch |
Abstract
This demo aims to introduce computerized embroidery and its use in education and social activism, with an emphasis on expression of identity and identity building. The demo will familiarize participants with the computerized embroidery workflow and with basic design and fabrication principles. To some participants, we will offer the possibility to create a simple stitchable embroidery patch design using the open-source Ink/Stitch or the commercial Stitch Era software. Through these activities, we would like to discuss how computational embroidery can be a medium for working on personal or social identity (including maker identity). We can also discuss computerized embroidery as a computational making medium for acquiring digital skills (vector graphics, design, etc.) and/or broaching social subjects like communication or interculturality. Exchanges will encourage attendees to begin thinking about their own pedagogical or societal scenarios of use.
Tools, Skills and Materials
• Tools➝ Embroidery machine • Tools➝ Vector Drawing software Inkscape and the extension Ink/Stitch • Materials➝ Embroidery tissues and threads • Skills➝ Vector drawing
Keywords
Machine embroidery; computerized embroidery; embroidery software, identity building; computational making.
Demo Description
Description of the Project
Computerized embroidery, like any other making technology, allows learning (i) digital skills like programming [1] or vector drawing, (ii) disciplinary knowledge and societal issues, (iii) planning, cooperation, metacognitive skills [2] and (iv) design skills [3]. It can also be an interesting tool for craftivism [10]. Chu et al. [11] define the maker mindset as a combination of self-efficacy, motivation and interest. Self-efficacy is described as an identity process: “Bandura’s social cognitive theory of self-efficacy suggests that the child who thinks: “I CAN (am able to) Make technology things” may progress to thinking “I CAN BE (have a possibility to be) a Maker,” and ultimately to “I AM (identify myself as and want to be identified as) a Maker”. O’Donovan and Smith [12] present a maker identity model that only partially takes form in observed existing spaces and suggest relating makerspace capabilities to a wider social and cultural context. Beyond the process of becoming a maker that is encouraged in the social context of makerspaces, making allows one to express and reflect upon other social identities. Forehand [15] explores the criticality of feminine craft. “With digital technology emerging as a point of power and creativity within the profession, traditionally feminine crafts can be seized as tools to reimagine women's identities, fostering cultures of digital craft and developing future opportunities that can differently position women's relationship to labor and ingenuity.” In a related domain, Katz-Buonincontro & Foster [13] argue that “avatar drawing reveals significant portraits of students’ racial and academic identity.” Amit Zoran [14] associates creative style - that has been the subject of many studies - with identity. “By creative style, I mean the formal variations in artwork or design that transmit information about personal and social identity. This is a variation on Wiessner's definition of style as a formal variation in material culture that transmits information about personal and social identity.” Zoran also argues that personal style as personal identity requires imperfection. Bajra [5] reports a successful intercultural exchange through an embroidery activity.
In this demo, we shall demonstrate technical aspects of computerized embroidery. We shall explain basic embroidery elements, the design and fabrication workflow, how to create patches, how to use embroidery software [17][19], how an embroidery machine works and how to create machine files. At the same time, we would like to discuss creating embroidery as a means to express and develop identities.
Target Audience and Discussion Topics
The demo is of interest to anyone interested in either the topic of computerized embroidery or identity expression/building through making. No prior knowledge is required, although experience in drawing software is an asset. The general objectives are to discuss machine embroidery basics and opportunities for its use in education and communication. We can answer questions about:
- Machine embroidery principles (workflow, stitch types, material constraints),
- Creating embroidery designs with Ink/Stitch or Stitch Era and its difficulties,
- Creating machine files and using an embroidery machine,
- Expressing personal or some role-related identity through embroidery.
- Using computerized embroidery in education
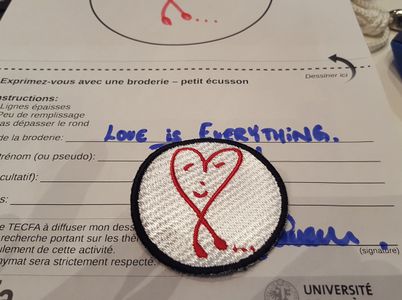
We will help some participants to create a patch that they later can fabricate, e.g. in a FabLab. We will donate a pre-cut patch tissue in the right size.
Material preparation prerequisite
Participants who would like to create their own embroidery patch can bring a laptop and install the following software:
- Inkscape 1x ([1]), an existing recent 0.94x version is also OK
- Ink/Stitch extension for embroidery (https://inkstitch.org/docs/install/)
Installation is fairly easy for Windows and Linux users. MacIntosh users must install XQuartz (for Inkscape 0.94) and may encounter permission problems (for Inkscape 1.x). Please carefully read the instructions on the Ink/Stitch web site.
Participants are encouraged to use simple clipart in SVG format, e.g. from https://thenounproject.com/ or https://publicdomainvectors.org/
Principles Of Computerized Embroidery
In this section, we shortly summarize some technical concepts and procedures. To learn more, please consult our online tutorials in English (https://edutechwiki.unige.ch/en/Machine_embroidery). There are four basic elements to making an embroidery: lines, satin columns, fills and programmable stitches. Lines and fills can be created easily. So-called satin stitches or programmable stitches are more difficult.
Embroidery workflow
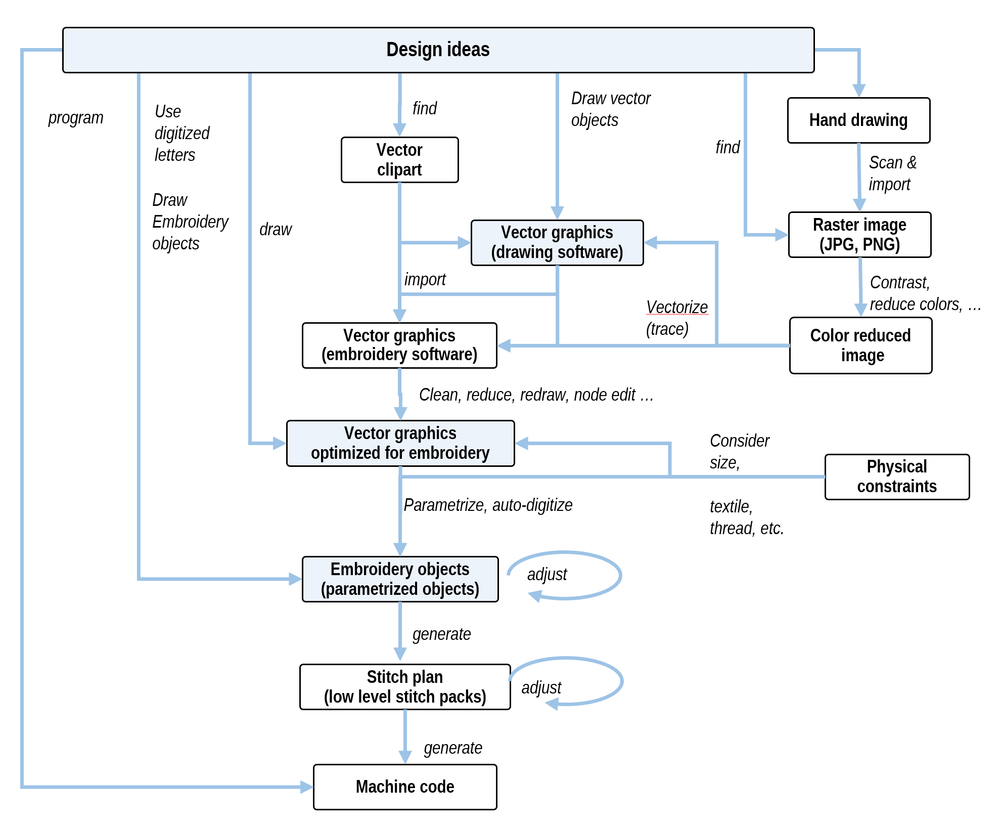
The figure below summarizes various embroidery workflows. Designers can either start from vector or raster graphics or directly create so-called embroidery objects with embroidery software. The latter are a kind of vector graphics that include parameters defining how the embroidery should be rendered. The process of passing from a drawing to an embroidery object is called digitizing. Lettering is usually done with specially-designed embroidery objects, ready for optimal digitizing. Finally, embroidery objects as well as other graphic objects can be programed. E.g. the Turtlestitch environment (http://turtlestitch.org) [16] allows children to design embroidery with turtle graphics. From embroidery objects the embroidery software can generate stitch plans that are then translated into various proprietary machine code.
Basic Use of Ink/Stitch Software
Ink/Stitch [18] is an Inkscape extension available at https://inkstitch.org/. It annotates SVG path objects with embroidery information that will allow generation of SVG “stitch plans” that are finally translated to machine code. Below we describe a few operations that interested participants will be able to observe and to do (if they install Ink/Stitch on their laptops beforehand).
Warmup:
- Draw a closed object, using a drawing tool. Set a stroke width and transform the object to an SVG path object: Path -> Object to Path
- Adapt / parametrize the object (see below for details): Extensions -> Ink/Stitch -> Params
- Simulate or print (optional): Extensions -> Ink/Stitch -> Simulate or Extensions -> Ink/Stitch -> Print
- Create the stitch file: file -> Save a copy, select your embroidery machine format
Creating fills:
- Use any filled object and remove the stroke. Translate objects to SVG paths when needed.
- Select this object and parametrize: Extensions -> Ink/Stitch -> Params, then set the angle (direction of stitched lines)
- Define an underlay in Ink/Stitch (tick the box in the underlay tab)
Creating lines:
- Create and modify various types of lines (dotted, dashed) (Object->Fill and Stroke… then select Stroke style tab -> Dashes)
- Select this object and parametrize (e.g. multiply the stitches)
Creating satin columns:
Creating satin stitches is more difficult and we suggest following a tutorial [9][17][18]. Below we explain how to transform a stroke into a satin line.# Draw a line without overlaps that has a good width (3 to 6 mm) for satin stitches, e.g., draw a freehand line (F6), smooth it (CTRL-L), then adapt its thickness (Object->Fill and Stroke, Stroke style tab)
- Select this object (verify that it has not fills) and use Extensions->Ink/Stitch-> Satin tools -> Convert line to Satin.
- Parameterize as satin column: Extensions->Embroidery->Params
- Select the Satin Column tab and tick custom satin column. Use the other tabs to add an underlay.
Creating letters:* Extensions->Ink/Stitch->Lettering. Pick an appropriate size.
While Ink/Stitch includes the functionality to create quality embroidery, it does not have the power of advanced commercial embroidery programs. On request, we also can demonstrate the use of the affordable high-end Stitch Era prosumer software and explain differences [19].
Creating Patches
Creating embroidery patches is a good way to learn basic embroidery principles and convey messages through embroidery. A typical example are skill badges used in the maker community. Since creating the borders is difficult, we developed a series of patch templates for Ink/Stitch (https://edutechwiki.unige.ch/en/InkStitch_-_embroidery_patch) and for Stitch Era.
Participants in an event can either pick vector clip art from the Noun Project or draw by hand. A simple hand drawing can be scanned, digitized and embroidered in about 30 minutes. The “pre-cut” method is explained in https://edutechwiki.unige.ch/en/Embroidery_patch
Conclusion
Results and Benefits
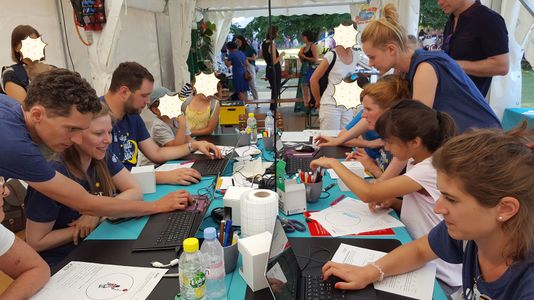
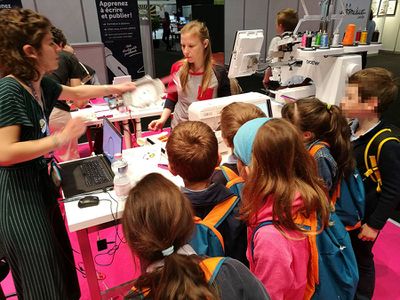
Digital embroidery is not very present in educational makerspaces despite its artistic flavor [4] that attracts different populations. It deserves a more prominent place: it is reliable, low risk, produces little waste and encourages upcycling. It does not convey gender stereotypes associated with engineering. Embroidery has a positive connotation. In our outreach events, e.g., large book fair, a science fair and a health forum (See Fig. 2) over 600 patches were designed by participants and we observed that many participants addressed social issues.
Figure 1: Pictures from outreach events (Geneva book fair and “Nuit de la Science”, 2018)
Lessons Learned
In one outreach event we administered a questionnaire to 78 participants (M_age=18.10, SD_age=14.18, 47% F) to measure participants’ interest and perceived difficulty [6]. Interest was high (on a scale of 1 to 7, M=6.91, SD=0.29). A pre/post test showed a stable perception of the difficulty of drawing (easy) and digitizing (neutral). The difficulty of using the machine was reevaluated from neutral to easy.
Broader Value and Relevance to the Conference Theme
Computerized embroidery is an interesting communication medium with an artistic flavor. It is a good entry point to develop digital-, soft- and design skills while producing usable objects. Embroidery also has high potential for upcycling, as it lends itself well to repairing holes in cloth and customizing existing apparel. Creating embroidery can be a way to express resistance and to acquire resilience.= REQUIREMENTS =
Space for an A0 landscape poster. A table with enough space for three people to sit in front. WIFI. If possible, electric plugs.= BIOS =
Daniel K. Schneider is associate professor of educational technology at TECFA, Faculty of Psychology and Educational Sciences, University of Geneva. He teaches “making” in an EdTech master since 1992. He taught computerized embroidery in a master degree classes and in two 3-hour workshops [8] [9]. He co-authored two conference papers [5, 6] on the topic of machine embroidery in education and presented a poster on embroidery to develop digital skills [7]. Lydie Boufflers is a doctoral student at TECFA. She wrote an MA thesis on designing a training course to create teaching tools with a laser cutter. DigiFabWiki (in French) is a result of her master thesis and is the co-author of a paper on the topic of machine embroidery in education [6]. Kalliopi Benetos is a lecturer at TECFA. She teaches visual communication and instructional design. She coordinates an extension program on e-learning and is interested in developing and studying technology-mediated environments to support design thinking, deeper learning, and epistemic change.= REFERENCES =
