Adafruit Sensors
Introduction
In this article,we propose an overview of the Adafruit Circuit Playground Express (CPX) built-in sensors. This aim of this page is to show you how to leverage them in MakeCode. So, if you are not familiar with MakeCode, we advise to have a look on MakeCode page in this wiki.
The CPX built-on sensors available are :
- Buttons
- Capacitive touch
- Light sensor
- Accelerometer
- Microphone
- Switch button
- Thermometer
- Infrared Transceiver
Coding sensors in MakeCode
In MakeCode, there are two means to read the code : through events or by reading live data.
- Events: code runs when an event is detected. For example, the
OnShakeevent runs code when a certain type of shaking is detected by the accelerometer. - Live data: live reading of the sensor data without a particular event taking place. For example,
Rotationgets a immediate reading from the accelerometer.
You will find below the 2 style of programming with sensors : through events (on left of the picture below) and through live data (on right on the picture below).
Sensors
Below, you will find a small presentation each builtin sensors in the CPX.
Buttons

On the CPX, there are 2 buttons : Button A or Button B. The two buttons could be coded together Button A + B.
- Event
- the
OnEventblock allows to respond to action (click, long click and other events. - Live data
- the button can be read in live by using the input
IsPressedthat is to say the code check if the button is pressed. You can also used the inputWasPressedin situations in which the program have a risk to busy when the user clicked. In this case, the code check if the button was clicked earlier.
Example : The click on button A is used to play a sound. The state of button A is checked in a forever loop to switch between red (if button A is pressed) and green (if nothing happens).
Capacitive touch
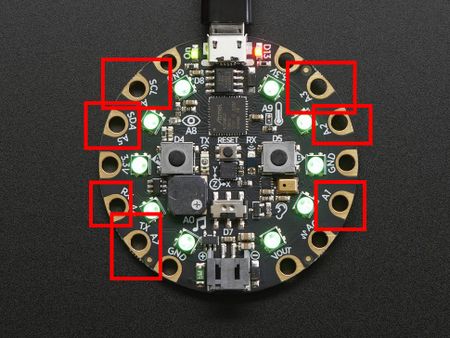
On the CPX, there are 7 capacitive pins (A1, A2, A3, A4, A5, A6 and A7). They can be used as buttons (like buttons A or B).
- Event
- The pins can be used as touch inputs, the code use them like buttons. Instead of saying
Button AorButton Bas the input source, use a pin name likeA1. - Live data
- you can read the live button status using input
IsPressedorWasPressed.
Example : An event on pin A4 is used to show pixels animation and the state of pin A7 is checked in a forever loop to switch between blue or red on the neopixels.
Light sensor
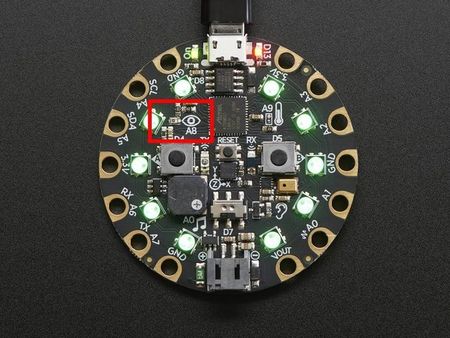
On the CPX, you have 1 light sensor which allows to run code when the brithgness change.
- Event
- By using the
on lightcondition, the sensor allows to run code. - Live data
- The
light levelreturns the light intensity : from 0 (no light) to 255 (max light).
Example :
Using the on light event to run a sparkle animation.
Accelerometer
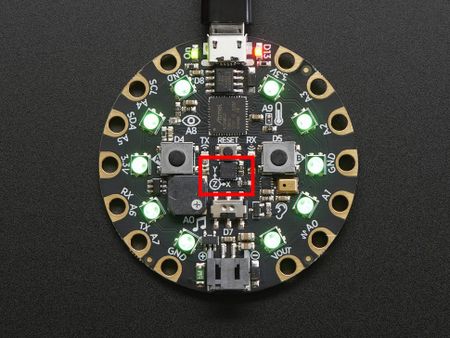
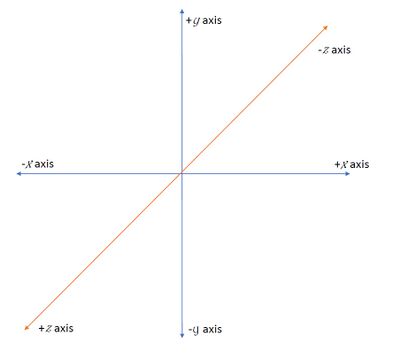
The CPX has one accelerometer that runs code when acceleration happens on axes X (left to right), Y (bottom to top), Z (aligned with the gravity). Please see the picture below.
 |
 |
- Events
- The input
on Gestureenable to program adafruit to run a code folowing a certain event such shake, freefall or orientation events.
- Live data
- an
accelerationinput can return the acceleration value (in milli-g, e.g 1/1000 of a g) according to direction (on x, y or z axis) or the combined force in all directions.
Example : Using a shake to play a sound (event). A forever loop can display the accelerometer reading (live data).
Microphone
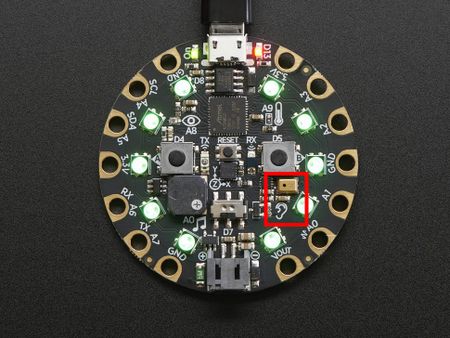
The CPX has one microphone that runs code when a sound happens.
- Events
- The
on loud soundevent detect a peak in the sound level, e.g a hand clapping. You can change the lound treshold by using the set sound to sound level (e.g https://learn.adafruit.com/make-it-sense/makecode-3).
- Live data
- The sounf level block return the sound intensity from silent (0) to 255 (very loud).
Example : An sound variation can play a music; a forever loop can continuously display the sound level.
Switch button
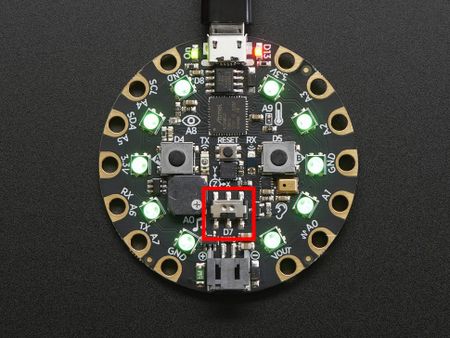
The CPX has one switch button which have 2 positions : left or right. This button can be very useful to create some on/off programs.
- Event
- The
on switch movedinput enable to run code when the switch button is moved to the left position or to the right position.
- Live data
- The
switch rightblock (in input) indicates if the switch is on the right position.
Example : events can be play different animations if the switch button is on the left or on the right (event). A forever loop can play an animation if the switch is on the right position and no animation if the switch is on the left (live data).
Thermometer
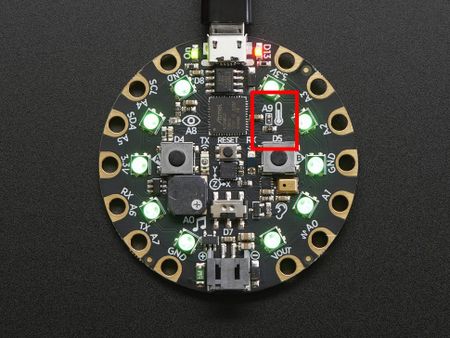
The CPX has a thermometer that can track the ambient temperature (in Celcius or Fahrenheit degrees).
- Events
- The event
on temperature (condition changed)runs code when temperature changes from hot to cold or from cold to hot.
- Live data
- The
temperature blockreturn the current temperature by checking how hot its computer chips are.
Exmample : If the temperature change over 15°C, a sound is playing. A forever loop can graphs the current temperature using the LEDs over 20°C.
Infrared transceiver
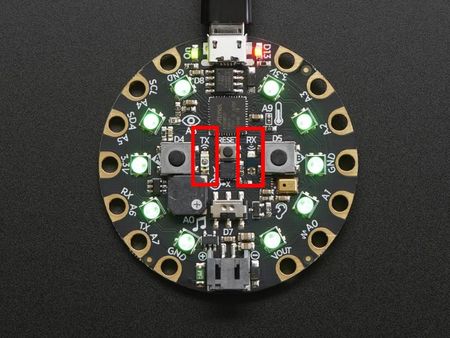
The CPX have an onboard infrared transceiver (i.e transmitter and receiver) which allow to communicate data between CPXs.
- Events
- An event happens when the
On infrared receivedreceive number.
Example : A RVB (i.e number) color can be sent over IR to turn on the neopixel remotely.
Links
- At Adafruit
Aknowledgement
Pictures as well as some text was reproduced from the Adafruit circuit playground express documentation. Some pictures are available under a CC BY-NC-SA license. Others are copyright AdaFruit and "all rights reserved" and reproduced with permission. Before you reuse any picture from this website, make sure to look at the license information.
For more information about using Adafruit, see https://learn.adafruit.com.
