Screen capture tutorial
<pageby nominor="false" comments="false"/> This is a short screen capture tutorial.
Grabing static pictures of applications
Grabbing static screenshots involves usually 2-3 steps:
- Prepare the state of the application you want to capture
- Either grab the whole desktop, a window or some random rectancle
- Crop the image if needed (i.e. select/save a part)
- Reduce the image size and save in other formats if needed.
Preparing the application
Since your screendumps may wind up in a wiki or presentation slides, i.e. in low resolution environments you have to minimize the area you want to capture:
- You may just show parts of the application (e.g. remove the window bars after capture)
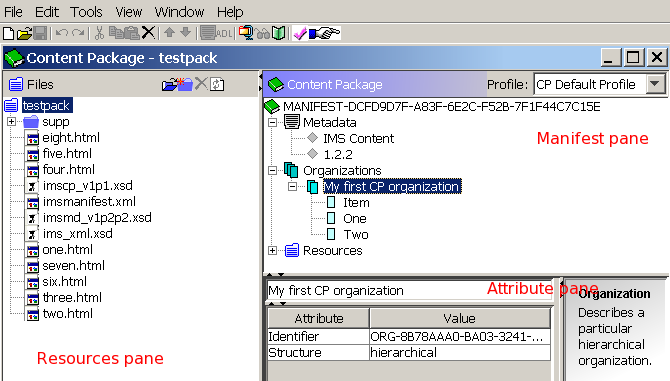
- More importantly, you should diminish the window size as much as possible (If you have decent resolution (like 1900x1200) you probably should try to fit the application into a quarter of the screen (but no wider than 1000px as a rule of thumb). The reader should be able to see all the menus, commands contents you want him to see. E.g. here is an example of a screen dump of the reload editor. The foot print of this picture is low and you still can what I wanted to show (670 × 381 pixel, file size: 24 KB)
Capturing with the screen capture tool
There are several kinds of tools:
- Small and usually free screen capturing utilities, e.g. MwSnap and ScreenHunter for Windows.
- Capturing tools embedded in image manipulation (or other) programs, e.g. The GIMP
To capture a screen there are usually three methods
- Capture the whole screen
- Capture a single application window
- Capture a rectangular area (you must click on a corner and then drag the mouse)
- Capture a fixed rectangular area (you define its size beforehand)
Capturing with the print Screen Method
"Print Screen" means to make a copy of the whole screen:
- On Windows XP
Hit the Print Screen key (sometimes labeled "Prnt Scrn") which you usually can find somewhere in the top right of your keyboard. On some other keyboards (I have swiss-french ones), you may have to hit shift-prnt scrn".
This operation will put the screen capture into the clip board. Therefore after pressin the key you won't see anything, so simply paste it into an imaging program with either one of the two methods:
- Acquire from Paste
- In Gimp: "File->Acquire->Paste as New
- Paste into an open document, e.g. ctrl-v (but you may loose information depending on what editing software you are working with)
The print screen method seems to produce best results, since it seems to have less problems capturing some tricky multi-paned windows like the Adobe CS3 desktops for which all my screen capture tools didn't word (some tabs did not show).
- On Ubuntu (Linux)
- Hit the Print Screen key to capture the whole screen (also works on double monitor twin-view setup).
- Alternatively, hit ALT-Print Screen to capture the window over which your mouse pointer sits.
This tool will produce *.png image and a preview/popup menu will allow to save it somewhere. Btw this applications is also available under Applications->Accessories->Take Screenshot.
Reducing image size
(Disclaimer: I am not much of an image expert).
Frequently, screen capuring programs save per default in the lossless png format. PNG is efficient for graphics, but heavy if you have included bitmaps. You may set png to a maximal compression rate (9), but the difference gained may not be very important.
- Screendumps that include bitmaps (include things like desktop background)
If you save screendumps that contain bitmaps, you should save in *.jpg. A lossful compression quality of 70 should be ok.
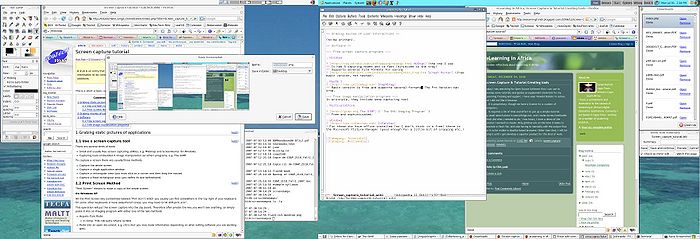
Here is a 700px-wide thumbnail of Daniel K. Schneider's desktop I made when I started writing this article. Click on it to get a bigger version:

- From left to right: GIMP, Firefox, the capture popup, a terminal, Xemacs (Wiki mode) and Firefox again ....
- I use Ubuntu as my desktop OS and as you can see I got some nice screen real-estate (3500px wide, which is essential for writing wiki articles at my age).
Here are the sizes of some bimap files I made for my desktop and that should be self-explaining:
The original 3500x1200 pixels screen capture:
1621618  desktop-dks.png
 596814  desktop-dks.jpg
1600991  desktop-dks-max-compression.png
Reduced versions (you can inspect the 1760x600 jpg version I used above). As you can see the quality of this imported 181K file is just barely good enough for reading text.
 181255  desktop-dks-1760x600.jpg
 625596  desktop-dks-1760x600.png
 304380  desktop-dks-1000x341.png
- Screendumps that include text or graphics only
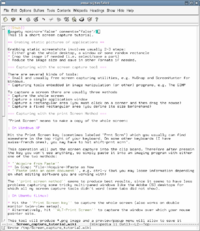
In this case, PNG gives better results than JPG, even if compressed at quality of 70%. E.g. here is comparison from taking a picture of a text editing window.
170233  screenshot-emacs.jpg
 45217  screenshot-emacs.png
Screendumps for MediaWikis
You should learn image syntax, e.g. read the Wikipedia Extended image syntax article.
Images that are not essential for the understanding of a text, should be served as thumbnails. E.g.
- To display a thumbnail with a line break (text does not float around):
[[image:desktop-dks-1760x600.jpg|thumb|700px|none|~~~'s Linux Desktop]]
- To display a thumbnail on the right with text floating around
[[image:screenshot-emacs.png|thumb|200px|right|PNG Screendump of an text application ]]
- Summary
- Make your application as small as possible on the screen before you capture it.
- Try out several image reduction ratios. Your imaging tool may have a preview mode, so you don't need to safe various versions. In this case, set the view to a 100% in order to get an idea what the end user will have to look at.
- Try out several image formats if you are not sure whether to choose from png or jpg.
- If you want to teach functionalities of an application, try not to include bitmaps if file size is an issue.
Grabing movies of user interactions
(to be written).
Software
Free screen capture programs
- Windows
- MwSnap (the one I use
- It has 5 capuring modes and is fast (minimizes to the tray)
- Supports several file formats for saving
- Screen Hunter (free basic version, not tested).
- MacOS X
- SnapNDrag
- Basic version is free and supports several formats. The Pro Version can crop.
Free image manipulation programs
In principle, they include some capturing tool
- Multi-platform
- The GIMP (The GNU Imaging Program)
- Free and sophisticated.
- Windows
- IrfanView
- For those who have office installed (so I don't think it's free) there is the Microsoft Picture Manager (good enough for a little bit of cropping etc.)

