Stitch Era - digitizing a portrait photograph: Difference between revisions
m (→Modify shapes) |
m (→Add drawings) |
||
| Line 195: | Line 195: | ||
The moustache is connected with the beard. To smooth and fill holes it is easier with two objects. Select the object and then draw a split line. | The moustache is connected with the beard. To smooth and fill holes it is easier with two objects. Select the object and then draw a split line. | ||
[[File:stitch-era-17-DKS-12.png|thumb|800px|none]] | |||
== Add drawings == | == Add drawings == | ||
| Line 203: | Line 205: | ||
Once you are done, copy paste to the other design file. | Once you are done, copy paste to the other design file. | ||
[[File:stitch-era-17-DKS-13.png|thumb|800px|none]] | |||
Revision as of 13:46, 29 September 2017
Introduction
This beginner's tutorial for the Stitch Era embroidery software expands on Stitch Era - creating embroidery from raster images and Stitch Era - digitizing complex bitmap images
- Tutorial home page
- Stitch Era embroidery software
- Learning goals
- Be able to import vector graphics or bitmap files
- Be able to vectorize a bitmap file, i.e. turn it into a vector graphic
- Be able to digitize a vector graphic
- Prerequisites
- Stitch Era embroidery software (in particular be able to create a new design).
- Related pages
- none
- Materials
- You can reuse the pictures. In the wiki, click on picture to make it larger, then click again and save it.
- Quality and level
- This text should technical people get going with Stitch Era. I use it for an optional master degree course in educational technology.
- Last major update
- September 2011. Since then some features e.g. file import was improved. Also the menu organization did change somewhat. We will try to fix this in some near future - Daniel K. Schneider (talk) 15:59, 17 August 2017 (CEST)
- Next steps
- Stitch Era - adjusting stitch sections explains how to change parameters embroidery sections, e.g. stitch density, fill patterns, etc. after and auto-digitizing procedure.
- Stitch Era - creating embroidery from raster images. Create embroidery from simple and relatively clean raster images (e.g. *.png or *.jpg files)
- Stitch Era - vector graphics. You don't necessarily need to learn how to draw vector graphics that you then can convert to embroidery (stitch sections). However, you will be able to speed up your work and you also could reuse principles (e.g. Bezier drawing) for manipulating stitch sections as well as in other multi-media programs.
Digitizing images is very difficult. Digitzing portrait images is a bit easier that digitizing landscapes. The basic principle is:
- Reduce the size of the picture to the size of the picture you want to stich or less, e.g. 1000px (equivalent of 10cm in Stitch Era)
- Modify contrast, saturation and luminosity so that the person's feature stand out best.
- Reduce to 16 to 20 colors, then union the colors
- Vectorize with some hole filling and smoothing values
- Remove holes from vector objects and union little vectors
Reduce the picture size
Before importing to Stitch Era, reduce the picture to a reasonable size, e.g. 1000px width using any picture manipulation tool. When importing a picture, Stitch Era will scale 100px will to 1cm in Stitch Era. I.e. a picture of 1500 x 1000px will become an embroidery of 15 x 10 cm, unless you scale or crop it within Stitch Era. Please note that 100:1 is not the standard conversion rate between cm and pixels on a low resolution screen.
We shall start with picture of myself since I do not want to be sued by angry people not liking their embroidery version....
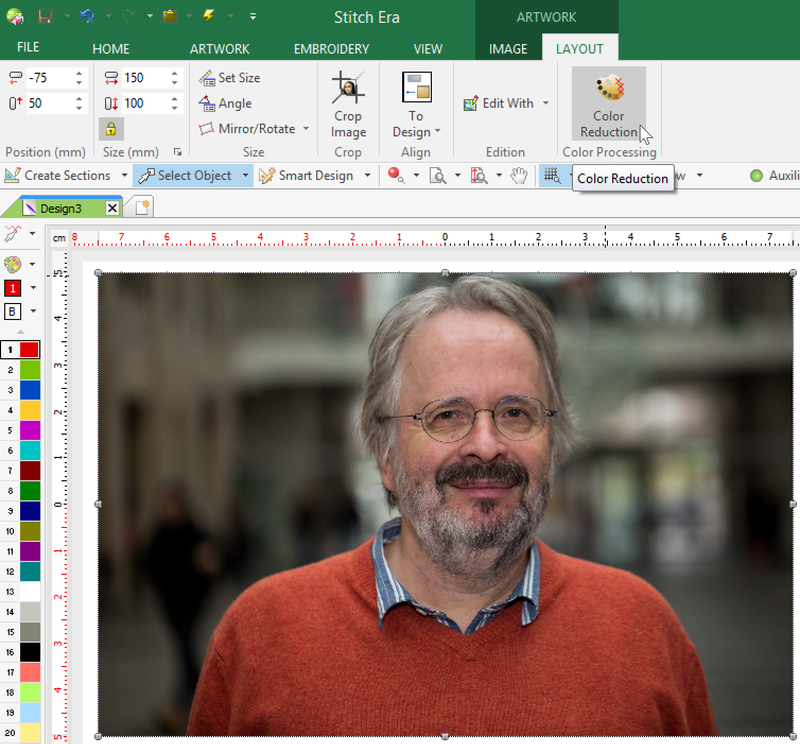
Import the picture to Stitch Era (ARTWORK -> Open Image). As you can see in the screenshot below it will be adjusted to a size of 15cm x 10cm.
Reduce colors and remove small areas
"Enhance" Picture
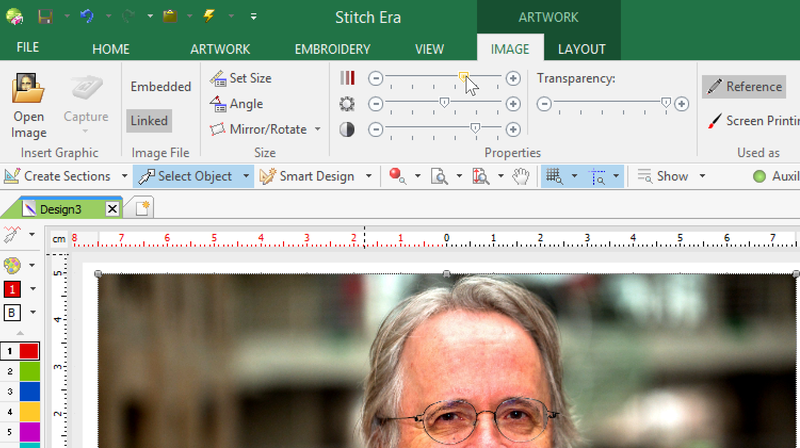
In a first step we suggest bringing out colors a bit. Increase both saturation and contrast a bit. This (optional) operation will hopefully make it easier to distinguish between certain features. To do so, select the picture in the workspace, then click on the IMAGE tab.
First round of color reduction and hole filling
Now we will engage in a first round to reduce colors. Select the picture, then open the LAYOUT tab. As you can see in the first screenshot (above), to the right there is a color reduction tool. Open it now. We will attempt two things:
- Remove very small areas
- Reduce colors without loosing important features.
Small area filters
- A small areas filter of 20 took too much of the facial features (e.g. beard) away
- 10 is probably a good compromise. The glasses are almost gone, but there is not much we can do about this, i.e. in any case we will have to redraw these. If we do not reduce small areas, vectorizing and dealing with thousands of little vectors will be a nightmare.
Colors
- We want to keep the blue shirt and for that we have to keep 20 colors
Save the file, then save the file as new copy.
Vectorize
The vectorizer tool let us doign three thing in that order
- reduce colors and remove holes
- merge colors
- vectorize according to three parameters
Merge colors
In this step we will again reduce colors and remove small areas. However, instead of letting the machine reducing colors we will merge colors.
Click on the picture and open the Artwork/IMAGE tab. In the ribbon menu to the right click on Convert to Vector. In the Vectorizer tool that is now open, click on Filter (we already did reduced colors and remove holes). We now will attempt to reduce the 20 colors in the palette. Since there is no undo in this tool, you may have to restart more than once.
- Set reduction to 256 colors (we only have 20, but the tool does not allow to set 20).
- Set the transparent color to nothing.
Now click on the Filter icon and you will see the "cleaned" result.
Now combine as many colors as you can. CTRL-click on at least two colors, then click on the Combine icon.
- I "Bundled" all red and brown colors
- all dark grey
- all middle grey
- all light grey
- all beige
- etc.
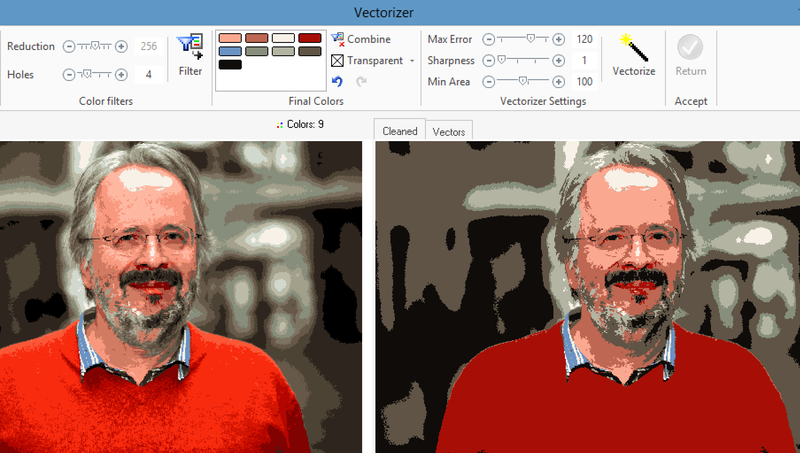
The following screen shot shows 9 colors left and much larger uniform areas.
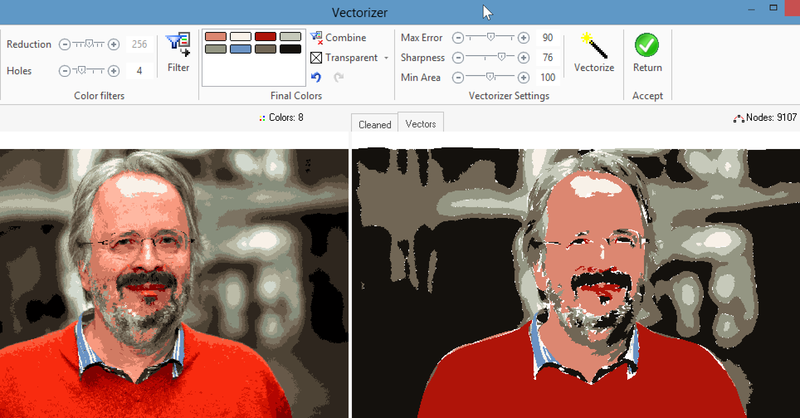
As you shall see below, we finally, after a first vectorising attempt, decided to adopt an eight color solution.
Vectorize
Now will have to vectorize which is also fairly tricky.
There are three parameters you could set. According to the manual (page 3-13):
Max Errordefines the curvature degree that the trace will have. It increases or
reduces the precision the vector curve will have with regard to the original bitmap. Decreasing (reduction) is better because the generated vector object will be simpler, but in some case, information may be lost. I.e. in our case, we did increase.
Sharpness: Higher values will decrease the number of nodes of created vector objects. Same as above, more is easier to work with, but may distort the image too much.
- Both max error and shaprness controls define the curvature degree that the vector will have. High values of these
controls results in rounded outlines. If these items have small values, the trace of the vector- based figures will adjust to the outlines of the bitmap image.
Min Areaeliminates the small surfaces, according to the value specified in the sliding control.
It is useful to exclude the smaller elements from the vectorization and has a similar effect as remove holes in prior steps. The difference is that these areas will remain empty.
Try the default values first and click on the Vectorize icon. This so-called tracing process will take a longer time (and a very long time if you did not reduce colors and holes as explained above). You can see the result in a Vector tab that is now open.
The following screen shot shows a result with max error = 150, sharpness = 10 and Min Area = 100. The result has over 25000 nodes which is quite a lot. Some of these can be taken away later by removing holes from vector objects. If you get over 10000 nodes like here, we suggest trying a solution with less max error, higher sharpness and bigger min areas.
The following solution will be easier to digitized. I only has 8 colors and about 9000 nodes.
Once you are happy with the result, click on RETUREN
Save the file, then save the file as new copy.
Vector cleaning and manipulation
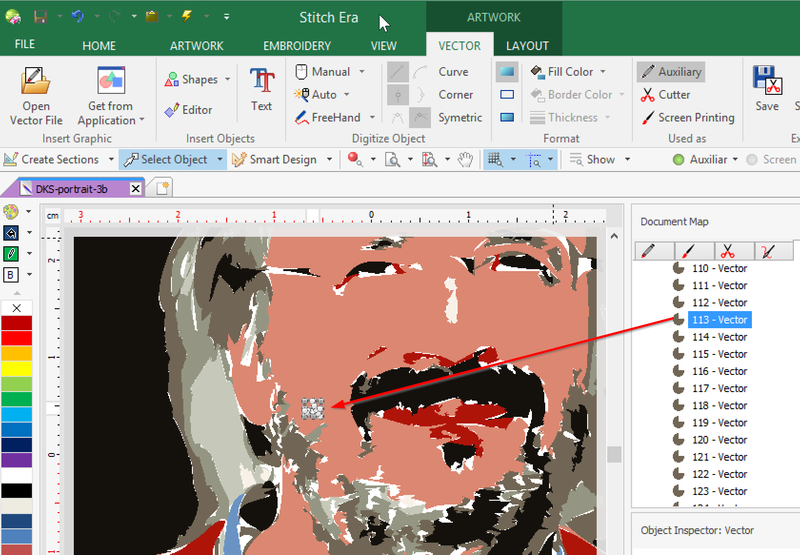
Once back in the workspace you now can inspect and manipulate the vectors. Open the document map. When you click on an object in the screen the vector in the document section and the other way round will be selected.
The pullover came out quite nicely, but are some tiny little vectors at the bottom that we do not need and that could be removed. Also the face includes some areas that could be removed and then filled with the surrounding color.
Remove small areas
There are three methods to remove holes
- Kill the object (then edit vector points of the surrounding object)
- Merge the object with a larger surrounding one
- Kill the object, then use the "Remove holes" function.
Once you tried to remove some of the holes you also could decide to restart vectorizing. If you see several hundred s or thousands of vector objects in the Document manager consider restarting and using low max error, higher sharpness and higher min area.
(1) You now could start deleting most little objects if you plan to create a fairly smooth embroidery. The best way way to do this, is to go through the whole liste of 164 vectors and hit delete. This option will leave some tiny empty areas that you could fill later.
Another option is to merge vectors you want to remove with the larger surrounding one. Let's now remove the white area from my front by merging.
- Select the white area and write down the vector number (20)
- Select the pink area of the face (1)
- Now CTRL-select vector 20 again.
Now can do this with other similar areas. Learn how to use the zooming controls, in particular the SHIFT-F6 button.
(3) Remove holes with Remove Holes in the LAYOUT tab
- Delete all the small areas within a larger area first, then remove the hole.
- WARNING: Before hitting on close holes, maximize the selected area (SHIFT-F6) and make sure that you will not remove features that you would like to keep. The remove holes function will not kill the small areas, they will stay and be digitized unless you remove them !
Trim shapes
Trimming shapes means reducing the complexity of vectors, i.e. something that in principle you might have achieved before. The different is that now you can do this for individual vectors.
You can try trimming all the vectors, but the program is likely to crash:
- Save the file
- Select ALL (CTRL-A)
- LAYOUT menu -> Combine Vectors -> Trim Shaps
Therefore rather try to optimize certain areas only. E.g. select the two large pink areas and then click on combine Vectors -> Trim Shapes several times.
Modify shapes
As explained in the Stitch Era - vector graphics, one can manipulate vector shapes by deleting or adding points, but dragging points, and by dragging (pink) curve control points.
Alternatively, kill the shape, e.g. eyes and eybrows and draw them.
to be continued - Daniel K. Schneider (talk) 19:48, 27 September 2017 (CEST) -----
Split objects for easier manipulation
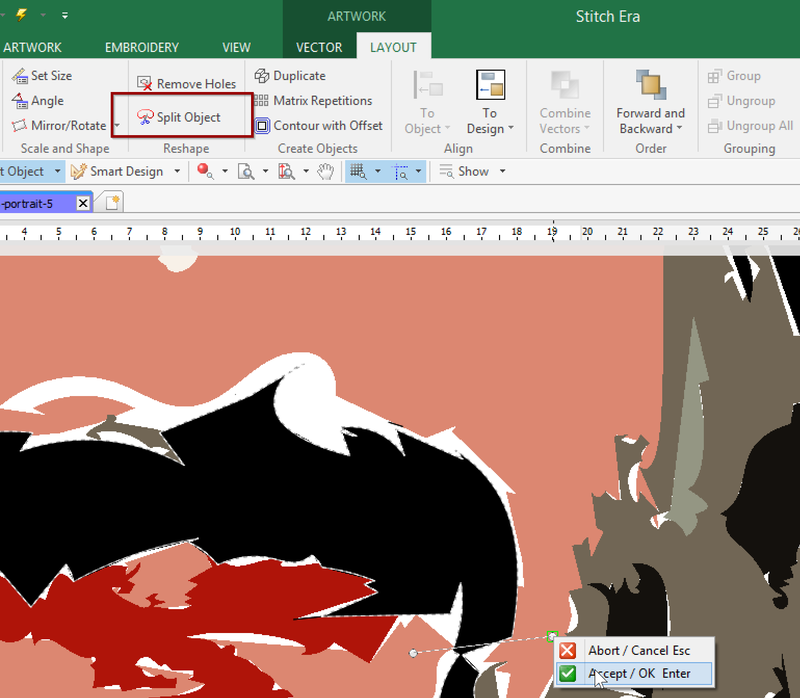
The moustache is connected with the beard. To smooth and fill holes it is easier with two objects. Select the object and then draw a split line.
Add drawings
Some items have been lost during vectorizing, e.g. the glasses. I suggest redrawing these. Open a new design file and import the picture again (or else use an early version that you saved). The lock the picture in the Document map (right click menu).
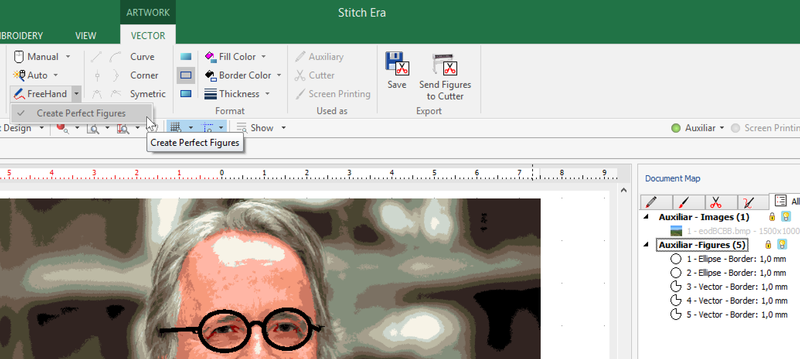
To rebuild the glasses I used to ellipses from the Shapes menu and I drew 3 lines with the Free Hand tool using the Draw perfect objects option.
Once you are done, copy paste to the other design file.

