Brother PR1050X
Introduction
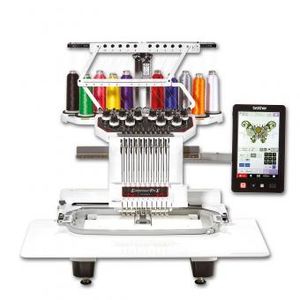
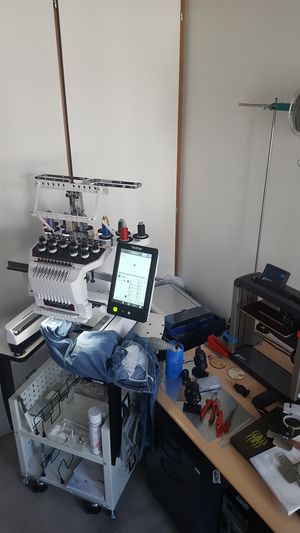
The Brother PR1050X is a high-end consumer and professional entry level embroidery machine and we (TECFA) bought one in August 2017 in order to introduce our educational technology students to computerized embroidery and to organize outreach events.
In Switzerland, list price is 12'000 CHF, in Germany 11'000 Euros. Street prices can be less and even lesser for education. We got ours from Nähfox. Since there wasn't any reseller in Geneva or nearby and the one in St-Gallen (my home town and Switzerland's textile and embroidery capital) offered a really nice price and good service we decided to bear with the 8 hour drive forth and back from Geneva...
See also:
Specifications
- The machine can stitch up to 10 different colors with one needle at the time
- Size: 48 x 48 x 60cm ?
- Size of the box: ?
- Weight: 44 kg (60 kg in the box ?)
- Size of a table (add-on): 70 - 100 cm height, 49 cm length, 80 cm width
Connectivity
- USB host cable
- USB media slot
- SD card slot
Thread colors
- Default colors
- Each needle bar can be assigned a color through either the control panel or software (the latter is called manual color sequence).
- Thread colors in a design can be sorted at the control panel (this may mess up order of printing of course)
- Several manufacturers/makes color schemes are builtin. E.g. Madeira Poly, Sulky, R-A Poly.
Formats
The Machine can not directly stitch from design files like EMB or ART.
PES
- The PES format is the most important native machine instruction format for both small and semi-professional Brother embroidery machines. Designs can be somewhat modified.
- Several version of PES seem to exist. Newer versions may not work on older machines
- PES is the default format to export from your embroidery software.
PEN
- A Brother format that only works on some machines that can stitch "Disney" designs. Some machines can be registered to decrypt.
PEC
- An older Baby Lock/Brother/Deco format. Avoid.
PHC
- Older Brother format. Avoid.
DST
- DST is a Tajima data file and it does not include color information (therefore avoid for this). However it includes cuts for jumpstitches of the same color (therefore use it). See p. 227 or the Brother Manual.
Hoops
The machine comes with several frames for each of which several hoops can be attached. By default you will get four standard frames that will attach on both sides. These are not suitable for repairing ellbow holes (one of my favorites) or stitching into a shirt or jeans pocket. Get the compact set for that. In addition, we recommend buying the long frame for arms/legs.
In addition to the for standard frames and hoop sets you can acquire, below are a few.
- Border frame
- Cap frame
- Clamp frames (for shoes)
- Cylinder frames (legs and sleeves)
- Jumbo frame (requires turning)
- Quilt frame
- Small size frame kit (recommended)
- Sleeve frame (recommended)
Standard
You cannot stitch up the edges. Roughly speaking you can stitch the inner size minus 2cm vertically and minus 4cm horizontally.
| Name | Embroidery size (width x height) | Physical Size inside (width x height) | Frame holder | Remarks |
|---|---|---|---|---|
| PRPH360 - Extra-large | 36.0 x 20.0cm | 39.5 x 22.0cm | A | Use the table |
| PRH180 - Large | 18.0 x 13.0 cm | 23.0 x 15.0 cm | A | none |
| PRH100 - Medium | 10.0 x 10.0 cm | 14.0 x 12.0 cm | A | |
| PRH60 - Small | 6.0 x 4.0 cm | 8 x 6.0 cm | A |
It is recommended to use the table (see the picture at the beginning) in when you use the extra-large hoop and/or a large tissue.
Compact frame set
These frames are attached with a single arm to the small E frame, i.e. they will stick out and are well suited for stitching inside sleeves and legs or pockets that are not too narrow. Make sure to understand that you cannot stitch up to the edges, e.g. frame 50 can only do 50 x 50mm and not 60 by 60 for example !
| Name | Embroidery size (width x height) | Physical Size inside (width x height) | Frame holder | Remarks |
|---|---|---|---|---|
| Frame 70 (horizontal/landscape oval) | 7.0 x 4.1 cm | 9.0 x 5.5 cm | E | For small designs on anything that has enough space (e.g. trouser legs) |
| Frame 50 (square) | 5.0 x 5.0 cm | 6.8 x 6.8 cm | E | Good form embroidery on (larger) jeans pockets and larger gloves |
| Frame 55 ("round" oval) | 4.4 x 3.8 cm | 6.0 x 5.0 cm | E | |
| Frame V (vertical/portrait oval) | 3.3 x 7.5 cm | 5.0 x 9 cm | E | Good for embroidery on gloves and shirt pockets. Not sure that 7.5cm is correct. |
Sleeve frame
The sleeve frame is attached on both sides. This means that the sleeves should not to too narrow. More information once we get ours ....
| Name | Embroidery size (width x height) | Physical Size inside (width x height) | Frame holder | Remarks |
|---|---|---|---|---|
| PRHSL200 Sleeve frame (vertical oval) | 7.0 x 20.0 cm | B |
Regular maintenance
Oiling the hook
This should be done each time, i.e. when you turn the machine on. There are two methods:
- Manual
- Open the hook cover
- Remove the bobbin case
- Turn the handwheel until the the hook appears to the right
- Add a drop of oil onto the hook
- Turn the handwheel several times (this makes sure that the oil gets better distributed)
- Insert the bobbin
- Close cover
- Assisted
- Touch the maintenance icon, then the oil button
- As above, remove bobbin and apply oil
- Touch "OK" after that
- Insert bobbin
- Close cover
Cleaning the hook and bobbin case
To be done, each time a new bobbin is inserted. (Manual, p. 286)
Clean the hook
- Open the hook cover and remove the bobbin case
- Use the included cleaning brush to remove any lint and dust.
- Put back bobbin (click) and close cover.
Clean the bobbin case
- Remove the bobbin from the case
- Now use a thick sheet of paper (e.g. a clean business card) to remove debris from the tension-adjusting spring
- Use the brush to remove debris from the case.
- Insert bobbin into the case, put back the case and close the cover.
Oiling the needle bars
Should be done every 40-50 hours of operation (for each needle, i.e. 10 times), pages 288-89 and 63 of the operations manual.
- Remove the bobbin underneath (else you could create a mess while turing)
- Select one needle bar at a time. To do so:
- Select maintenance icon (second to the right)
- Touch the key for the needle bar you want to oil (from 1 to 10)
- Click OK
- Turn the wheel counterclock wise to bring the needle to its lowest position
- Apply a drop oil as high as possible on the needle bar, in any case, above the felt washer.
Repeat for each needle. After that, it probably is a good idea to stitch a little something that is not important, in case you spilled too much oil.
Cleaning around the needle plate
About once per month.
- Turn of the machine
- Remove the needle place (remove two screws)
- remove the spacer
- Use the brush to clean from the moving knife, the fixed knife, etc.
- Put the spacer back.
Cleaning the thread paths of the upper threads
Periodically meaning ???
See p. 287 of the operations manual.
Firmware upgrades
Download and explanations:
As of Aug 2018, the last update was from 09/20/2017 (1.21)
The Touch Screen Interface
Below we shall mention a few tips. For normal operations, consult the fine manual.
Embroidery Settings
(chapter 4 of the manual) Color settings (p 133, 143)
- On page 5 of the settings screen, set manual color sequence to
on
Machine Settings
The settings screen includes seven screens. There is not much to change for starters ...
Add a stop before a color
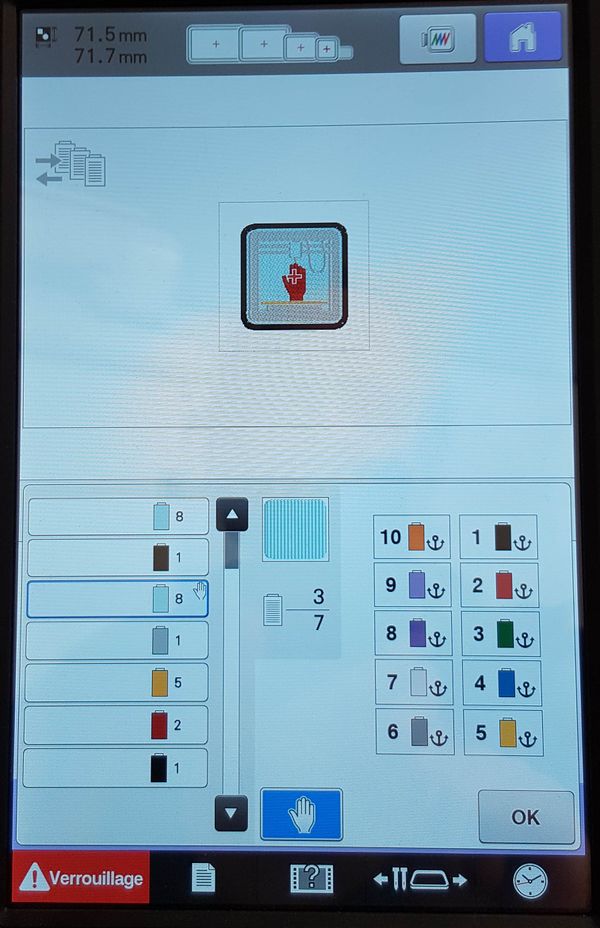
When creating appliqués or embroidery patches, you should stop the machine when needed, e.g. for patches after stitching the border outline.
Use the following method to add Pause locations before a thread color is used: Select the "several pages symbol" (top left symbol in the picture) in the embroidery setting screen, i.e. the second screen you get when you load a design (after adjustments) and before you associate threads with colors. You then can select colors and click on the "hand" symbol. Import: The stop occurs before the color starts stitching the chosen thread. E.g. the picture shows a situation where we want the machine to stop after stitching a (black) line. We therefore select the (light blue) thread section that will be stitched next.
Tuning
Firstly, always check (1) if you oiled parts as explained above and (2) more importantly if the machine is correctly threaded. It is very "easy" to add an extra turn here and there ....
Too much white (bobbin color) on top
If this happens for all threads, it is probably best to tighten the screw of the bobbin.
If it is a single thread, then loosen the upper tension (after checking if it is correctly threaded)
Filament is breaking
Tension can be too tight or you got bad quality filament.
Links
Official
- Manuals and Drivers
- YouTube
- How to operate PR series, 36 videos from the official BrotherSewingEuope channel. Maintenance videos are towards the bottom:
- Manuals in French


