Stitch Era - creating embroidery patches
Introduction
This embroidery patch tutorial describes how to create embroidery patches with the Stitch Era software.
Embroidery patches are also called cloth badges since they are attached to cloth with glue or by sewing.
A typical embroidery patch has the following properties
- It is stitched on some solid fabric (or special plastic)
- It usually covers the whole surface (or uses a specialized fabric that provides a nice looking background)
- It is relatively small, i.e. 3cm to 8cm
- It can have various shapes, e.g. astronaut patches are round.
The difficulty consists in getting the borders right. Some professionals would use a serger (overlocking machine), but we don't have that. According to Debbie Colgrove (03/21/17), A serger trims the seam and encloses the seam allowance or edge of the fabric, inside a thread casing, all in one step. The width and density of the stitching are two of the many variables available on a serger. The options are not the same on all sergers. As with almost anything you purchase, the more you spend, the more options you will have.
Example - a 3D printing badge with the trim-in place method
This study will show how to transform an icon from the noun project into a very large badge, i.e. a rounded square of about 9x9cm. We also will explain how to deal with some technical difficulties when importing vector graphics from the noun project. This method is interesting if you plan to do a little one-time project, else jump this section and read how to use the pre-cut method below.
It is better to started with badges that are not round, since you won't have to deal with pull/push compensation.
Digitizing an icon

Let us start with a 3D printed hand from the noun-project.
Before importing it to Stitch Era we made some adjustment to the SVG in Inksacpe
- Adjust size to 8cm by 8cm using Inkscape.
- Adapt document size to drawing size plus 1mm (File -> Document Properties)
- Save as optimized SVG
- Save as simple SVG
Import to stitch Era, adjust size (again) and ungroup
- Importing to Stitch Era was OK, but the size was wrong
- Artwork Tab -> Layout. Set the size to 60 or 80 depending on how large you want your badge to be.
- Artwork Tab -> Layout. Ungroup all
We now have three vector objects, i.e. the printer, the hand and a platform. We changed colors for each one.

Since a back is supposed to be stitched fully, we now will add a background. The simplest way to do this, is to create a contour and then fill it:
- Select all or just the printer object
- Artwork Tab -> Layout. Click on
Contour with Offset - Select Custom and keep the defaults (outer offset)

- Kill the superfluous objects created inside the printer (2 red vector lines)
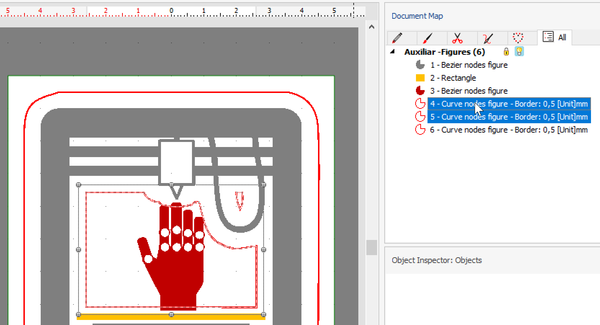
Now transform the red rounded rectangle into a light blue filled rectangle with a fat border.
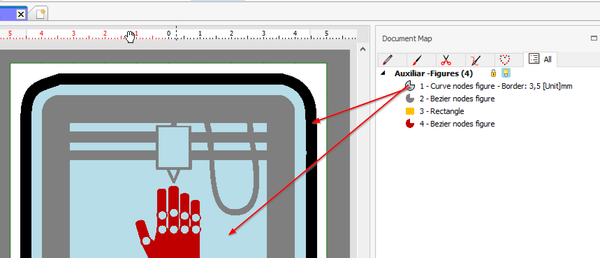
- Move this new object on top: Either drag it to the top in the object manager, or use the Artwork -> Layout Tab -> Forward & Backward menu
You now can digitize using "Art to Stitch" as explained in several beginners tutorials, e.g. Stitch Era - creating embroidery from vector images
- Select All
- Select Embroidery Tab
- Art-to-Stitch (intelligent) using default values
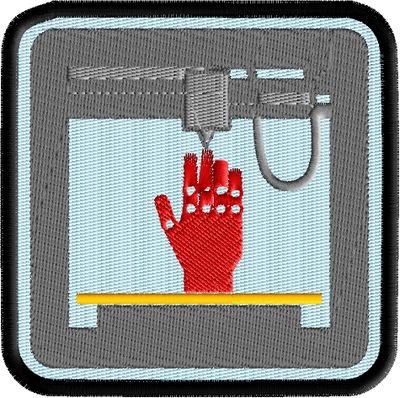
The simulated result looks like this, i.e. the 3D printer is not correctly rendered and the red hand would need some adjustment at the stitch level. The result is usable, but we would like to have something that is slightly better.
Dealing with SVG paths that Stitch Era cannot handle properly
Unfortunately Stitch Era cannot deal with SVG path that have holes inside, i.e. the printer will appear differently than planned.
- We tried "Trim shapes" and "Simplify to not effect".
We now have two choices
- either accept the result (i.e. a more massive 3D printer with most holes filled)
- or else either exporting the printer shape, and re-importing it as PNG image or start from the original SVG (export the printer shape from Inkscape) and then vectorize the raster image.
We just exported the "printer" shape as *.emf, transformed it with the "paint" program (any program can do) to PNG. We then imported the PNG image and then vectorized it as explained in the Stitch Era - creating embroidery from raster images. This took no more than 2 minutes.

We also decided to remove the holes from the hand (Artwork -> Layout -> Remove holes) and to smooth it.
- Select the printer and the hand and use Artwork -> Layout -> Combine Vectors -> Trim Shapes (do it 2-3 times)
The final vector shapes are below:

Now the question is whether we want to work with two layers, i.e. fully stitch the blue background and the rest on top or whether we just want to fill in the empty spaces with the background. Since patches are supposed to be rather stiff we can go for a a two layer version.
Since we only have four objects and since we want to digitize these objects in different ways, we will do one by one.
- Select the background
- Select Embroidery tab
- Art to Stich (Area only), Select
Fill areas and Borderlinessince we do need a fat separate zig-zag stitch for the border.
Next, use the same procedure for the other three objects, but
- Art to Stitch (Area only), select
Fill areas
The result looks like this:

Adding a tack down and a cut line
Depending on how we plan to create the patch, we need a tack down line that will help attaching the cloth to the stabilizer and a cut line that does the same but will also be used for cutting (see later). In addition, you also can add a placement line, but this is also something that your embroidery machine could do.
To do this we will again use the "contour" function:
- Untick the green "Embroidery" button and tick "Auxiliar" if not visible.
- Click on the blue background vector
- Add two contour lines (a) one that is 0.5mm off the black border and (b) one that is a bit more inside. To do so, use "Custom", "Inner offset" and set the offset to 0.5mm and the other to 3.5mm.

- Check if the lines are in position (I had to fix one mistake, i.e. a drag a control point)
- Adapt the colors, e.g. Use black for the cut line.
- Finally, digitize the two lines, i.e. select the two, Embroidery tab, Art-to-stitch (line only)
Compensate for pull and push, in particular if you use a simply woven or otherwise unstable tissue.
If you use patterns with horizontal stitches, then you must enlarge in the horizontal direction and diminish in the vertical direction. Here is how: select the rectangle and use the controls or better the interface in the ribbon bar (Menu Path -> Layout tab), boxes on top left.
- Pull top and bottom a little bit towards the inside, i.e. make the object a bit less tall
- Pull left and right a little bit towards the outside, i.e. make the object a bit wider
- Recenter the rectangle
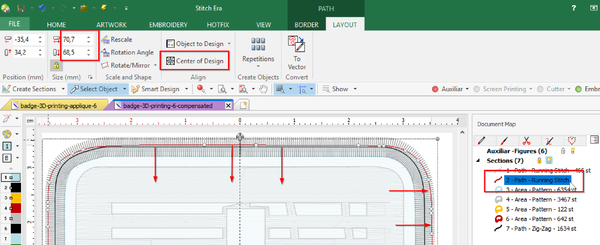
That being said, we find it difficult to find the good position in a first try. You may have to create a prototype, then adjust. E.g. using a strong twill tissue I found that I had to put the cut line close to the border, but still a bit inside on top/bottom.
(Optional) Using appliqué fills
Alternatively to manually adding a cut line and a border, one also could decide to use the Applique fill type for the background. It allows defining placement stitches (useful if you plan to cut out the textile and then glue it inside), and both a running tackdown and a zigzag tackdown.
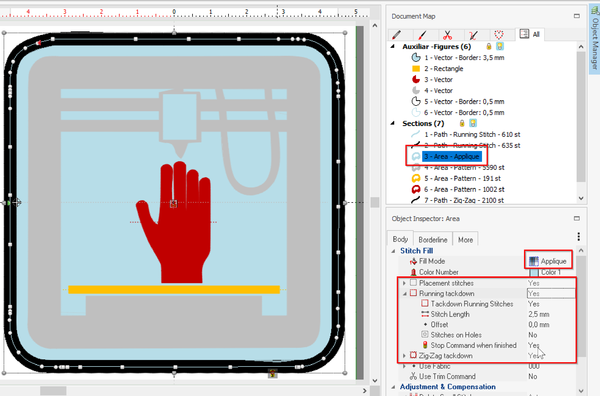
Notice: Above, we used the "menu" display in the object inspector (one can change using the little "3 dots" pull-down menu). Functionality is the same.
Final adjustment of the embroidery file
Reorder the stitch objects
- The tackdown and cut lines must come first
Move the border object to the end
- In the object manager drag it down.
Add pull compensation to the background (else the border will not overlap)
- E.g. 1.5mm on each side

Densify the black border (6 stitches/mm)
- Select the border objects and in the object manager (or on top) change density to 6
Add machine stop commands (if your machine can deal with them)
- one after the cut line (object #2)
- (optional) one after the last design object, i.e. before the border is being stitched, e.g. the red hand

This is not guaranteed to work for real. You may have to manually stop a multi-needle machine, before it starts the following color. Alternatively, you also can explore using different file formats, e.g. Tajima on a Brother machine (as opposed to PES). Also, some configurations can be made in Stitch Era with respect to machine file formats generated.
Workaround used in our Brother PR1050X. The interface allowing allows to add Pause locations before a color is used. Read Add a stop before a color
Fabrics
Firstly, use a fabric that has roughly the same color as your background or as your border color.
Ideally the fabric should be both thick and stable.
- Ideally, buy specialized non-woven twill for badges (in french: tissu pour écussons), e.g. Twilly from Gunold
- If you want to save time and distorsion, we recommend using a fabric that looks like embroidery. This way you do not need to stitch a background, e.g. Step from Gunold. If you do so, you should plan the interaction with the fabric direction. For example, if you plan to use horizontal patterns, position the fabric's direction vertically, or the other way round. Alternatively, use a thick underlay. In any case, we suggest using a high density, e.g. 6/mm.
- fleece, e.g. cut out a piece from a discarded old fleece jacket
- some types of felt also works, make sure that it is stable, i.e. not elastic (in french: feutrine pour écussons)
- else, use tightly woven napkins, jeans tissue
In order to add some stiffness, you can embroidery a first layer as background. However, you then have to manage other issues, e.g. a strong pull/push effect. If you need to work with an elastic tissue, we rather recommend gluing some cut-away stabilizer to the back, i.e. create a fabric with two layers that you will then position on top of a hooped washable or tear-away fabric as explained below.
Stitching with the trim in place method
Steps that use the "trim in place" method, outlined in the embroidery patch article.
- Select a hoop size that leaves some space for cutting (e.g. a 10x10cm hoop for a 7x7cm design)
- If you can, instruct your machine to stop after printing the cutting line, i.e. before starting to embroider the next part. Read this
- Insert a double layer of stabilizer in the hoop. If you got all dimensions right, you can use either a water soluble or an auto-adhesive tear-away stabilizer (sticky end upwards). Mark one end with a felt pen (on our Brother you can insert a hoop in two ways)

- Optional: Embroider an outline first (your embroidery machine should be able to do that). You must stitch an outline first if you plan to use a precisely pre-cut fabric (as in appliqués), but we don't do this here. Remove the hoop from the machine to put the fabric in place.
- If you don't have auto-adhesive stabilizer, glue a piece of fabric on top of the outline using specialized "wash away" textile spray. Make sure that it is larger than the outline.

- Stitch the tack down and the cutting line and have the machine stop before doing the next parts. After that, remove the hoop from the machine (and make sure to remember which way you put it in)

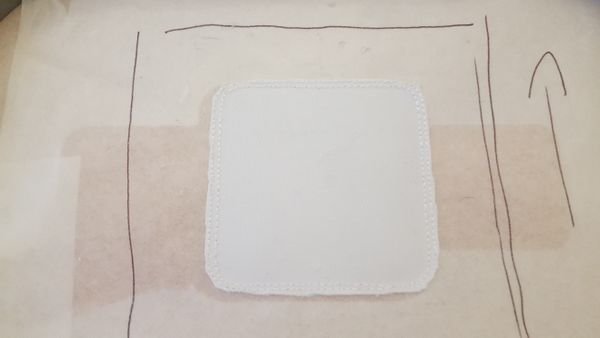
- Cut the fabric precisely along the cutting line, and put the hoop back (in the right direction).
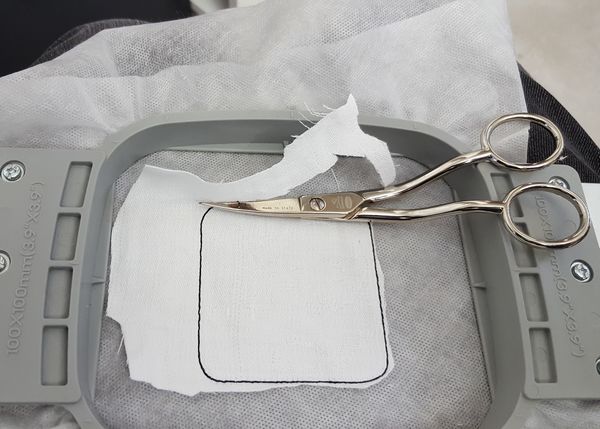
- Stitch the rest, the border should come last
- Unhoop and tear away the stabilizer. Wash it if it was a soluble one. Alternatively, only remove the stitched patch, then glue a piece of stabilizer on top for re-use.
- If you want a prettier bottom, you could iron a piece of glue-on cut-away stabilizer to it. Use the patch as model and then cut it out nicely before ironing. A more sophisticated method is to glue it with a permanent glue before stitching the border, ironing a piece of fabric in the hoop seems to be too dangerous for the hoop.
Using a solvable stabilizer and ordinary fabric
Below a first attempt. It actually is more regular than it may seem on the picture. It's just a bit warped from washing out the stabilizer and should be ironed a bit. However, you can see some white tissue sticking out on top and bottom. This is why I suggest moving the cut line a bit (see above).
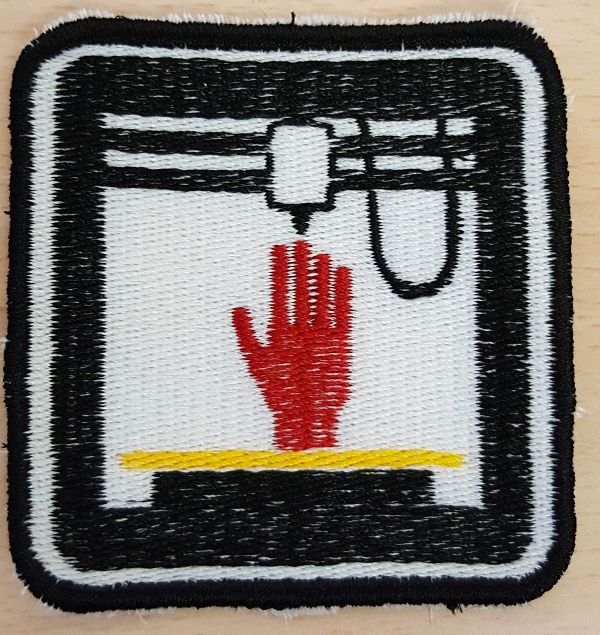
Using a tear-way adhesive stabilizer and specialized fabric
In second and third attempts, we successfully used the following strategies (pictures will follow)
- A specialized fabric for creating batches
- Use of a auto-adhesive tear-away stabilizer.
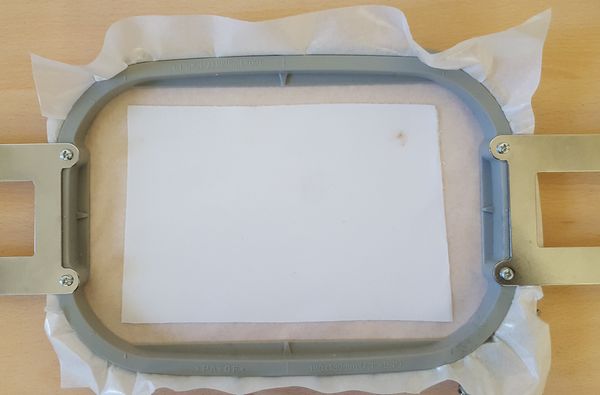
Cutting lines are adjusted as explained above. It is really important to to spend some effort on this
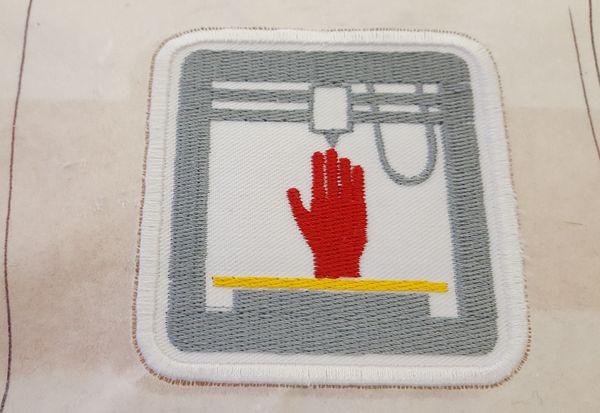

We also compared the initial solution to a patch with background removed. Patches without background are easier to make and therefore led to better results. In addition, special embroidery fabric like "STEP" - as shown in the next section - looks like embroidery.
Of course, one also could improve the background version. We would have to compensate the pull effect and densify stitches for the red hand.
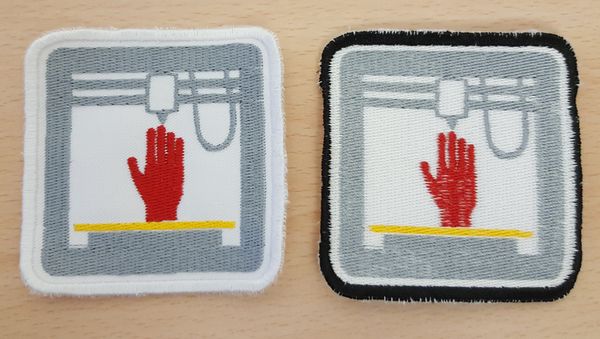
To do / try out
- Use thick felt fabric
- Use trim in place (reversed). Stitch almost everything, then cut the fabric, then stitch the border line.
- Use a different color for the printer (I was too lazy to insert a dark grey)
Example study - a simple logo with the pre-cut method
This example shows how we created an embroidery version of our new logo. Since embroidering small text nicely is fairly difficult we chose to work with the simple logo first.
 |
 |
 |
The vectors graphics
Th original vector graphics were made with Illustrator. Importing the design from the *.AI (Illustrator) version was simple. We imported, resized and re-positioned the drawing
- Select a hoop: Home tab -> Hoops -> Embroidery Hoop
- Artwork tab -> Open Vector File
- Select All
- Artwork tab -> Layout Tab: Horizontal Size set to 110 (mm)
- Artwork tab -> Layout -> To Design -> Center at Origin
In a next step we added a cut-out line.
- Artwork Tab -> Shapes -> Rounded rectangle
- Set the size of the cutout line to 125 x 60 mm. You also can make it tiny bit bigger (this is our first try and think a tiny bit smaller is better ... for now).
- Optional: Add a tack down line, e.g. in the middle of the border zigzag. This is recommended if you don't trust your hooping skills and/or if the patch does not stick well to the stabilizer and/or if you zigzag line doesn't contain an underline stitch (by default it does)
In a next step we added a "border frame" (border zig-zag line).
- Artwork Tab -> Shapes -> Rounded rectangle
- Set the size of the frame to 123 x 58 mm and a thickness of 2.5mm. The frame is a bit smaller than the cutout line because the size of the frame is measured by the middle of the stroke defining the frame, e.g. 123 means in reality 123mm + 1.25mm + 1.25mm = 125.5 mm width
The border frame will be stitched as a zig zag and the latter will only be stitched on the stabilizer but not as part of the embroidery.
Below is a screen capture of the final vector graphics (without a tackdown line)
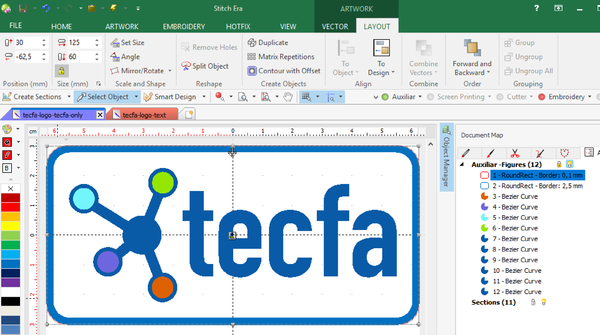
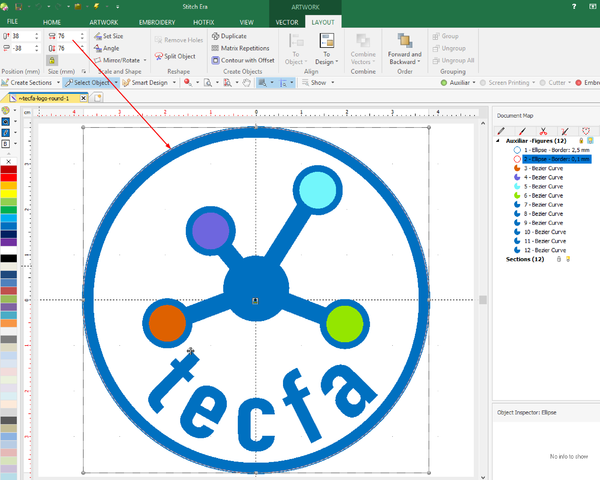
The next screen capture shows a round patch organized with the same logic. A cut-out line first, followed by a border zigzag.
|
Preparing the patch
The patch was cut out with a laser cutter. You also can use simple scissors and instead of cutting directly the fabric you could print a paper model. The advantage of using a laser cutter is that it will a high precision job and "melt" the borders.
In order to get the right size you can export a drawing to a Windows meta file (*.emf).
- Select the (red) cutting rectangle in the Document map (object manager)
- Artwork tab -> Vector -> Save (select *.emf)
Import the *.emf to Inkscape (or another good vector drawing program)
- Make sure that the size is correct and that the line follows conventions for the laser cutter. E.g. at TECFA, for the Trotec laser it could be a red hairline (RGB ff0000, 0.01mm). We had to adjust the size to 125mm (!!)
- Set document size to rectangle size plus 1mm on each size
- Send to the laser cutter. In settings, make sure to turn off the fan !! Else you might start a fire if the tissue gets dragged around and stuck. Use low cutting power (make a test first if you cut expensive embroidery fabric).
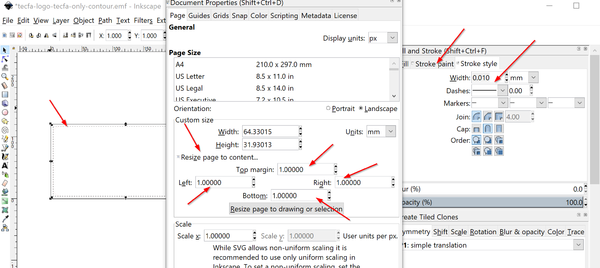
If you do not own a laser cutter or a good cutting plotter, print this on paper, cut it out and use it as a model to cut out the tissue. For example, put it on to top of the fabric, fix it with 2-3 needles, then cut.
The laser cut patches are below:
(to do)
Digitizing
Digitizing was easy for for the first two designs. We only added some overlap to the little round circles and changed stitch density to 6/mm, i.e. very dense.


Stitching
Insert some stabilizer into the hoop. If it is light-weight, use two layers
- Soluble can be washed away. Produces nicest borders. Requires a stable thick fabric. If you stitch on a fabric that needs extra stabilizing, e.g. elastic felt, then cut out a patch from a cut-away stabilizer (as described above) and glue it to the back of it. E.g. On top the cut-out patch fabric, then a cut-out stabilizer, then the hooped soluble stabilizer.
- Self-adhesive is easier to manipulate and you can stitch several patches just by adding another layer of stabilizer (cut a large rectangle and put it on top). Bits of stabilizer around the border may be visible after tearing the batch out from the hoop. If you plan to glue the patch, you may have to remove part of it from the patch after stitching since it doesn't stick too well.
- Cut-away is tighter. However, you will have to cut it and you may damage the border.
Stitch the cut-away line first. In a multi-needle machine like the Brother PR 1050 you can instruct the machine to stop before the second color.
Draw an arrow on the stabilizer so that you can remember the direction. Remove the hoop and put the patch within the cut-away lines (use some glue if necessary)
Insert the hoop (in the right direction) and stitch the rest (border zig-zag first)
[To do: Add a picture of the cut-away line stitched onto the stabiliser]
Results
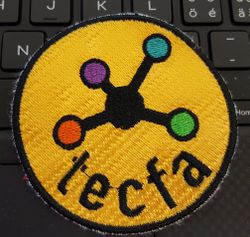
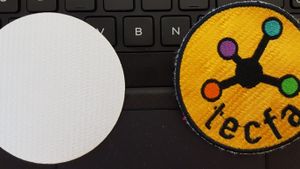
Below is a first result.
- We used STEP fabric (turned diagonally, horizontal position might be better). As you can see, this special embroidery fabric does look like embroidery. The patch was done in 9 minutes and it is only very slightly distorted (as opposed to patches with a stitched background)
- Letters should be a bit fatter
- Colors should be different (we just used the threaded ones in the machine, background yellow might be replaced by white)
- The Patch needs some ironing.
 |
 |
 |
Templates
Laser cutting models
If you want to cut textile patches with a laser cutter or a vinyl cutter, you can grab 62mm and 80mm circles and multiple 62mms from Embroidery patch.
Stitch Era 62mm model "Nuit de la science 2018"
- Get it from http://tecfa.unige.ch/guides/embroid/ndls18/
See also:
Trouble shooting
In the meantime we stitched several hundred different patches, e.g. at the Geneva book fair.

To make things happen with the pre-cut method, pay attention to the following:
- Make sure that all you needles are straight. Torn needles will create imperfect circles
- Do not design extra dense motifs, since the pull effect will be too high
- Use two layers of backing, if you use the sticky tear-away Filmoplast or similar
- Verify that the placement circle and the border zigzag is still aligned
- Make sure that the pre-cut patch fits the size of the embroidery, as explained above.