Hooping and stabilizing in computerized embroidery
Introduction
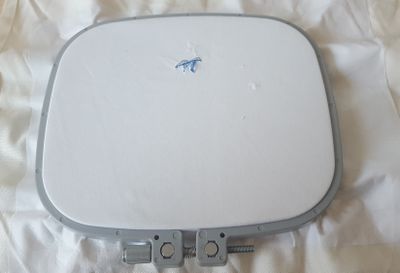
Hooping
Correct hooping together with appropriate backing (stabilizing are important factors for creating embroidery that will stay flat (more or less) and look like on the computer screen. On the software side you also have to take material constraints into consideration, e.g. add pull and push compensation or adapt densities or even the whole design.
There are two basic ways of hooping.
(1) Attach a stabilizer (also called backing) to the back of the fabric and hoop both together
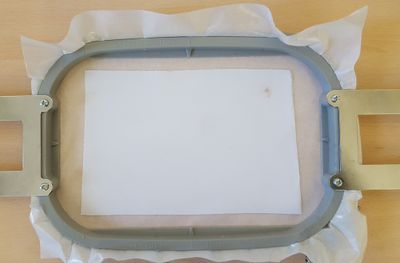
(2) Hoop only the stabilizer and just put the fabric on top, e.g. using fixation glue or an auto-adhesive stabilizer. The latter method is used for creating embroidery patches, but can also be used in some "normal" situations, e.g. for delicate fabrics such as silk.
It is important to hoop tightly. The easiest method is to tighten the hoop with just enough space left for the fabric plus the stabilizer to be squeezed in.
- put one of the hoop parts on a flat surface
- put the fabric on top
- press down the second part.
If this does not work, then you can try pulling corners. To do so you may have to loosen the screw.
Testing the tension
A well hooped fabric must be tight.
The snow plow test
Glide your finger on the hooped tissue. It should not create "waves"....
The drum test
Tap on the hooped textile. If it sounds like a drum you are fine. This applies to non-elastic tissues without using a stabilizer and elastic tissues that you stabilized (as you should in any case)
Use of stabilizers
There are several types of stabilizers, e.g.
- Water soluble: Used for freestanding lace (FSL) and also as topping for some fabrics, e.g. towels
- Self-adhesive tear away: Used for heavy fabrics (but also lighter and softer ones with less good results since it is not very strong, but it is the most easy to use)
- Tear away: Medium-heavy woven fabrics and sturdy fabrics. This has to be ironed or glued to the fabric depending on the brand.
- Polyester mesh cut away: Used for T-shirts and similar
- Cut-away: pullovers and such
The Brother PR1050X Operation manual (p. 254) recommends fabric/stabilizer combinations of which we reproduce some modified excerpts:
| Fabric/Garment | No. of Backing Pieces | No. of Topping Pieces | Comments |
|---|---|---|---|
| Denim | 1 tear-away | None | Lower speed if problems |
| Terry cloth (bath towels) | 1 tear-away | 1 water soluble | Increase density and avoid small lettering. |
| Fine woven shirts | 1 tear-away | None | For high-density or highly detailed designs use two pieces of lightweight backing |
| Golf shirt | 1 cut-away | Optional | |
| Corduroy | 1 tear-away | 1 water-soluble | Use denser stitcher or denser/more understiches. |
| Lingerie or silk | 1 or 2 lightweight tear-away | Optional | Reduce sewing speed |
| Knitting (sweater) | 1 cut-away or adhesive tear-away | 1 water-soluble | Use tightly woven organza or curtain fabric in a matching color if knits have holes. |
| Sweatshirt | 1 cut-away or adhesive tear-away | Optional | Two layers for detailed designs |
| T-shirt | 1 light-weight cut-away or adhesive tear-away | Optional | Avoid stitch-heavy designs and make them low tension. |
| Fleece jacket | 1 Cut-away or 1 heavy tear away | water soluble | Details depend on how stretchy it is. Use more light weight if the fleece is light. |
As general rule:
- Any fabric needs a stabilizer. If you are lazy use at least the auto-adhesive one.
- Very small lettering needs topping on most fabrics.
- Fine fabrics should use cut-away stabilizers. These are nicer to wear and some offer extra stability.
Special tips
Experience reports with stabilizers
The french sister wiki includes some tips with respect to specific products.
Stitching socks with a consumer machine
Broder sur des chaussettes
Ideally, you should have access to a machine with a small arm (e.g. like our Brother PR1050X). This way, embroidering on a sock will be very simple. We can also wedge a sock in a small frame 5x5cm of a machine with a big free arm like our Elna 8300. (solution already less elegant). Most modern consumer embroidery machines do not have a free arm or it is too big for a sock. Sometimes small frames that come as standard are missing.
Here we explain how to embroider on a sock with a large frame, so with any machine.'
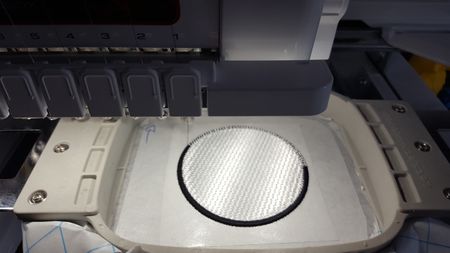
1) Hoop a strong stabilizer, preferably polyester. Tighten well (but without breaking the frame).
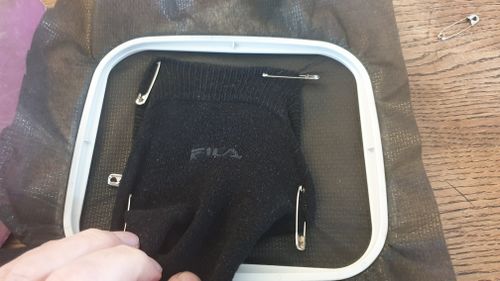
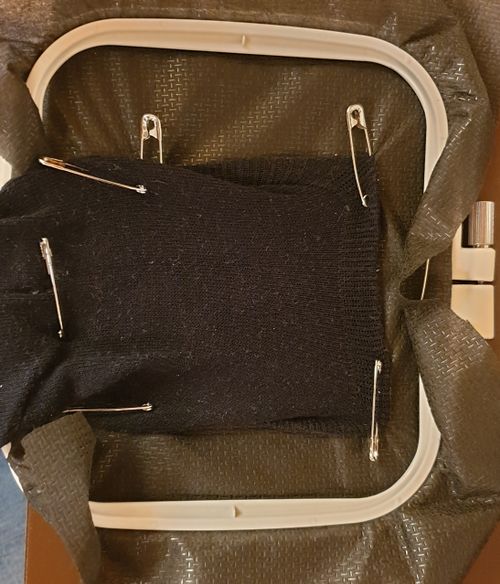
2) Optional: If your frame is thin or broken, it is advisable to fix the stabilizer with pins (c.f. the pictures below where you can see that the stabilizer has been attached at the top and bottom).
3) Attach the top of the sock
- Start by fixing the 2 corners of the side you want to embroider, so the top/front.
- Then fix the 2 opposite corners as in the following image, otherwise the embroidery will fold.
- In both cases, pull the sock slightly, but not too much!
4) Pull the surface to be embroidered (i.e. the top) down and fix.
- It is important that the fabric to be embroidered is flat and that nothing gets stuck underneath (otherwise you won't be able to fit in your sock). Pinch the fabric about halfway between the bottom (c.f. point 3) and the top and pull well!
- Attach this pulled and embroidered surface. You need at least three pins: One at the bottom, one on the left and one on the right. The following picture already shows a pin on the left and on the right. On the left you can see a pin that was used in step 3.
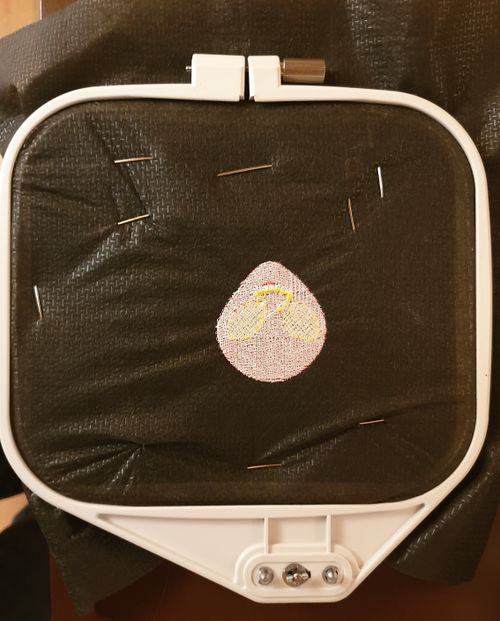
Below is a decent hooping result (our second attempt). We can see the surface to be embroidered.
5) Stitch ....
Advice:
- Obviously it is difficult to do precision embroidery. So you have to either work with airy designs or overlap embroidery surfaces to avoid gaps. Also avoid too tight satin (2mm is a minimum).
- Do not exceed a surface of 5x4cm for an adult sock.
Résults:
Links
Hooping tutorials
- Embroidery Hooping Tip, May 20, 2016, WeAllSew. Good example on how to create patches in an efficient way.
- Embroidery Basics: Marking and Hooping Your Project
- Embroidery Basics 2: “Hooping” Without a Hoop
- How to Hoop (Madeira)
Selecting stabilizers
- Choosing Stabilizer - Tutorials, Urban Threads: Unique and Awesome
- Making sense of stabilizers (2008). Introduces some types of stabilizers.
- Embroidery Stabilizer Guide
- Taking the Headache out of Embroidery Stabilizers (Wilcom, retrieved June 2018).
