InkStitch - satin columns
Creating Satin Column
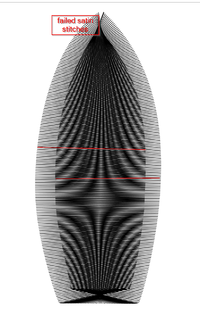
By default, Ink/Stitch translates strokes to either lines or simple perpendicular zig-zag stitches. The simple zigzag model works works relatively fine for straight lines or circles, but it cannot handle corners as in the little rocket drawing that we will now digitized. In addition, ZigZag stitches do not look as nice as the more parallel satin stitches.
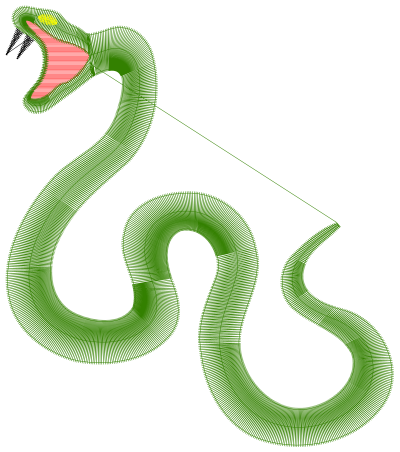
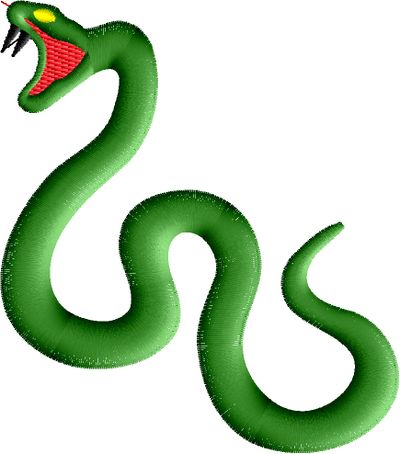
Satin columns as opposed to satin lines can have irregular borders. A typical example would be the trunk of a tree, a leg of a horse or a snake that ate a professor.
Creating satin columns requires some extra work that we shall explain now.
Example explained with a snake and an ellipsoid donut
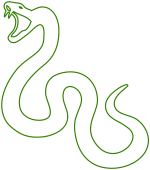
Let's create a simple snake:
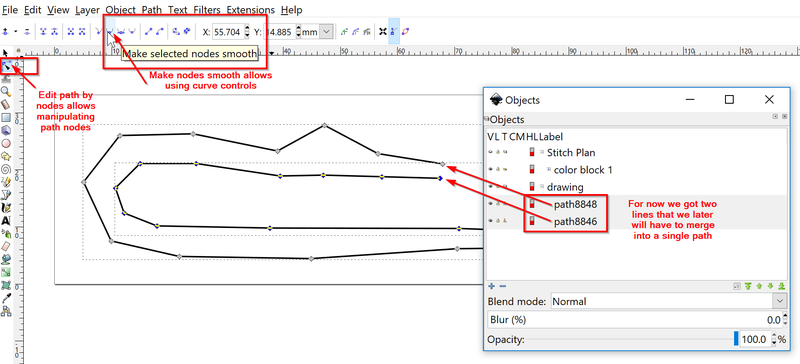
(1) Draw two lines with the bezier tool.
- For starters you can just do this by clicking using the Bezier drawing tool (SHIFT-F6)
- Draw both in the same direction
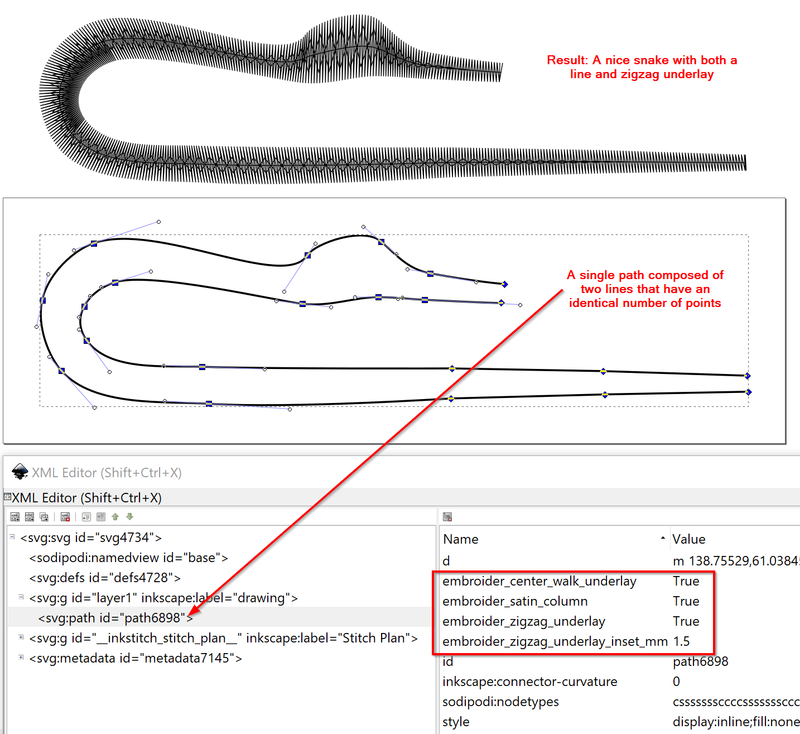
We got something like this:
For exercising, you can download the original SVG (click on the picture until you get the SVG, then save as.
(2) Make sure that each path has the same number of points. If not:
- Click on the Edit Path tool (drawing tools panel next to the selection tool) or hit
F2 - Select two nodes, then click on "Insert New Nodes into selected segments" to add a new node
Alternatively (and easier), just add direction lines (rungs) as explained further below.
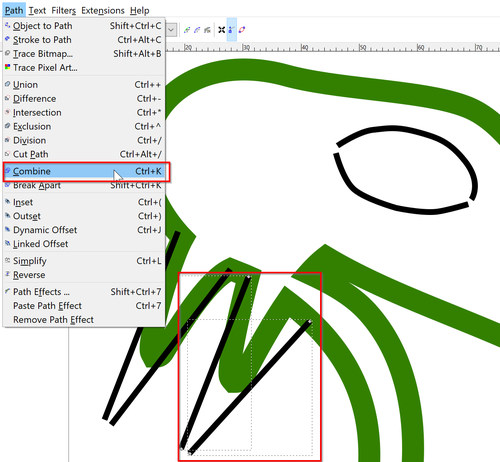
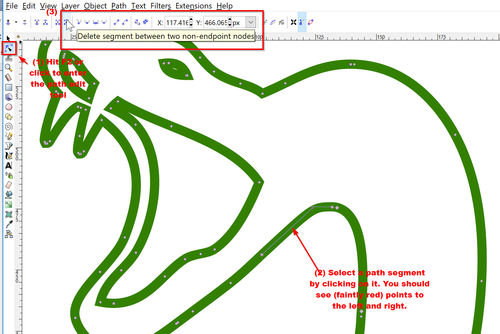
(3) Combine these into a single path:
- Select both lines
- Menu Path -> Combine or CTRL-K
SVG file for download (click on the picture until you see the *.svg, then "save page as":
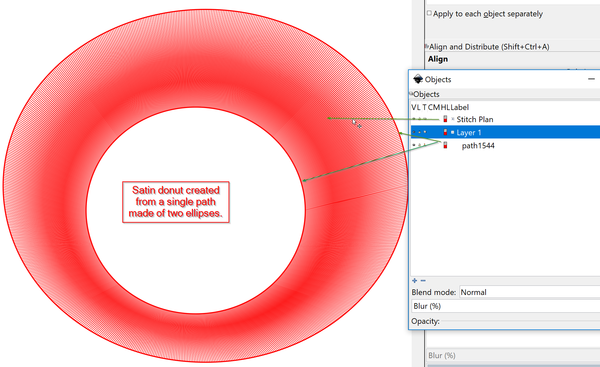
Ellipse example
The two lines of the path do not need to be open. E.g. two embedded ellipses with the same amount of points for each line also works.
Rocket example
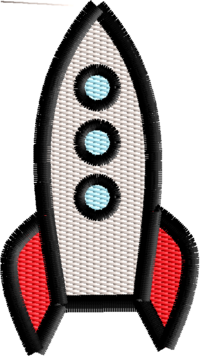
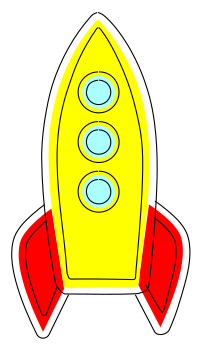
Let's compare a rocket stitched quickly with one that uses proper satin stitches. We will start from a little [Rocket Ship from OpenClipArt. There are several other variants of this, e.g. rocket icon by pitr that we used here.
Cleaning the SVG file
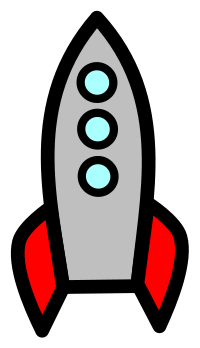 Source: Rocket Ship as Clip Art (SVG file), needing cleanup |
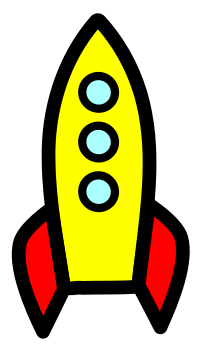
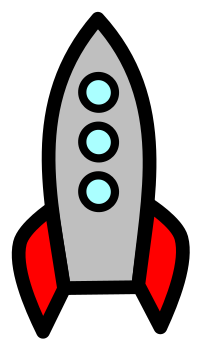 Source: Rocket Ship as Clip Art, but cleaned up (SVG file) |
The drawing is fairly straight forward. In order to process this with Ink/Stick
- Ungroup everything
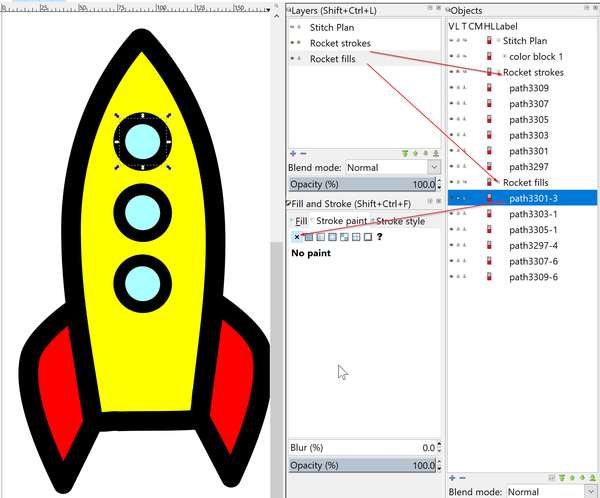
- Create a new layer, called Rocket strokes
- Put all elements in this layer.
- Open the XML Editor, click on each element and kill about 6 useless elements that sit underneath the windows. The resulting SVG only should have six objects.
- The wings overlap with the body of the rocket, but let's keep this for the moment.
It now (at least for the 1.7x version we discuss here) is important to follow all the steps on the SVG before you configure the embroidery params. Else you may have contradictory instructions in your objects. If the embroidery process fails with an error message, try removing all embroidery parameters in the XML Editor. Create a copy of you SVG file and save it. Personally, I just "write the file as" before each major operation. This way, I can easily restart from a prior version .....
Now you could digitized as shown above. However if you want nice satin stitches then you should remove all the fills and transform the fat strokes into double lines.
Let's separate fills and strokes first. We will do this in the following way:
- Select all
- Copy and paste in place. Edit->Copy then Menu Edit-Paste in Place. We now have 12 objects instead of 6.
- Move all the new objects to a new layer called Rocket fills (select these six in the Objects tool (Menu Object->Objects), then use the layers menu to move them)
- Lock the layer called Rocket fills.
- Remove all fills from the objects that sit in Layer Rocket strokes
- Now lock this Rocket strokes layer and kill the strokes from the objects that sit in the Rocket fills layer.
The resulting object structure should look like this:
This now can be directly stitched as shown in the picture above. However, you can notice the rather ugly satin stitches.
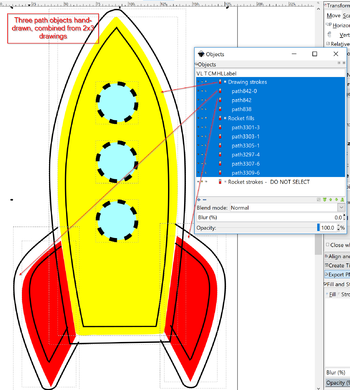
Creating satin stitches with manual drawings
As you should recall from the "snake" example above, satin stitches are made from two lines that have the same amount of points. There are several ways to achieve this from an existing drawing. In any of these cases, you will have to do some "point surgery". Also, the result can fail. If you do not feel comfortable with using or learning more advanced path editing, you could just make some hand drawings. We suggest the following procedure:
- Lock the fills layer but keep it visible
- Create a new layer
- Draw the lines as explained in the "snake example above". Use (at least provisionally) a different color to the drawings.
The result looks OK, but I didn't take time to make minor adjustments since I spent too much time on the attempt described below).
Transforming strokes into two sub-path lines for satin stitches
Now let us go through the more complicated procedure of transforming existing graphic elements (SVG path) into a paths that can be stitched as satin path. Remember:
- A path must have two sub-path, each with the same number of nodes that should be roughly aligned
- Each sub-path must go into the same direction (see explanations later)
- Closed shapes must be broken, since InkScape does not allow to define a start node.
See also this video: https://inkstitch.org/tutorials/lex-neva-video-tutorial-1/
Before you start
- Hide the "Fills" layer and maybe lock it. I.e. you only should see the strokes !
- Unlock the "Strokes" layer if it was locked
Simplify the drawing and reduce overlaps
Simplify the drawing
remove all extra points that are not needed (but you can do this later). InkScape can help with that (hit CTRL-L, but not too many times!)
Remove larger overlaps
In a next step, we will have to clip the part of the wings that overlap with the body of the fuse. An easy way to do it is to use subtraction again.
- Hide the fill areas
- Copy/paste in place the rocket body. The easiest way to do so is the open the "Objects panel" (Menu Object->Objects), select the body, and then duplicate.
- Select the left wing and then the body (hold down the SHIFT key).
- Menu: Path -> Difference
- Repeat that operation for the right wing, i.e. firstly duplicate the body then subtract it.
Transform stroke paths to path with two lines
In order to get two strokes (lines) instead of a single fat stroke, we can translate a path to a path with both fill and strokes. An other alternative would be to use insets and outsets. Anyhow, one general procedure is the following
- Select all strokes: CTRL-A (the fills should be hidden)
- Menu Path -> Stroke to Path
Now make the strokes very small and remove the fill.
- Select all (CTRL-A)
- Menu Object -> Fill and Stroke
- Remove fills
- Set Stroke to 1px
Repair the wings
- Unfortunately the wings did not fully overlap with the body, and there is some junk to remove. You must strive the obtain two single lines for each wing as shown in the picture below.
- Drag out both wings.
- Select the Edit path tool
- Kill superfluous nodes
- Kill segments at the end of both wings
- (Maybe) transform the sharp corners into a round symmetric node.
Clean up the rocket body
- Now make sure that you got the same amount of nodes in the outer and the inner line. To do so, we suggest rather killing nodes than adding new nodes. When you try to embroidery a path that has two subpath of different node length, InkStitch will complain and tell you which node to fix. Remember that for later.
- Align outer and inner nodes (roughly)
- Also make sure that no node sits on top of another one. You can find out by moving each node and then - if OK - put it back in position by hitting CTRL-Z
- Make the inner top a bit less sharp (make it a symmetrical node)
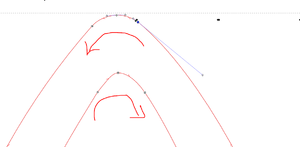
If you try to embroider now, you will get a very bad results, since inner and outer path go into an opposite direction.
Fix path directions
Problem: For InkStitch to work correctly, the two sub-path must point in the same direction. In our case they were not.
- To see directions, set
Show path direction direction on outlinein Edit -> Preferences -> Tools -> Node - Reverse for example the following the outer line:
Menu: Path -> Reverse
In our example, each path had a wrong subpath, e.g. the inner path went clockwise and the outer path counter-clock wise.
Fix the start point
Problem: The zizag of the satin stitch does now work but it is badly oriented now.
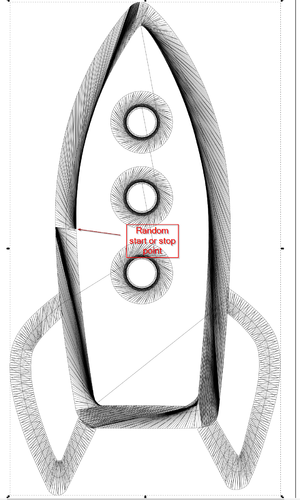
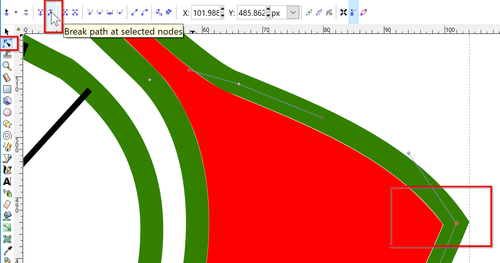
- Closed paths do not have a start point and you cannot define one. As a result Inkstitch will associate "random" points, i.e. will start using the first node found in the path definition (we believe). To fix that, we will create a break in the closed path of the hull and the three windows.
- Use the Edit Path tool to select two nodes, one for each subpath, then break the path (see the figure below)
Let us parameterize separately the stroke and the fill layers.
- Hide and lock one layer before you work on the other.
- In the Embroidery -> Param popup, have all the path in the stroke layer use satin stitches if you did not do so already. Also, we suggest adding at least a center underlay since this will stabilize the tissue a bit.
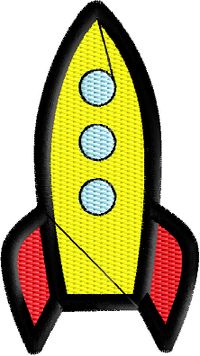
The result looks like this::
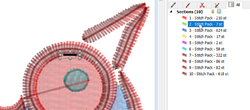
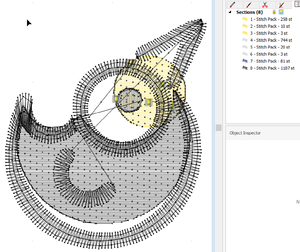
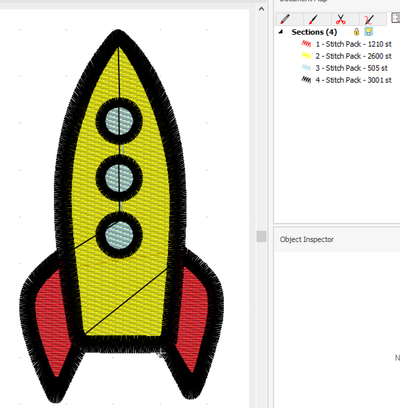 Stitch simulation (as seen in the Stitch Era software) |
Summary
Creating satin stitches from existing drawings seems to be a bit difficult. There might a way to do it more quickly, but we did not manage to find so far. So in some cases, we recommend re-drawing by hand two lines defining satin stitches. In fact all depends on your respective node editing or drawing skills. Personally I am better at editing than at drawing.
Creating fills and lines from dotted strokes does work well and doesn't require any special preparation.
Trim stitches do not seem to work in every case, but that is not a major issue. Anyhow, most people using InkStitch probably do not have multi-needle machines and prefer to cut away thread as opposed to re-threading.
Adding direction lines (rungs)
The most important reason for adding rungs is simply that it deals with the uneven number of points problems. In other words if two lines are connected with rungs, they do not need to have the same number of points !
Good positioning of points on each of the two lines could help getting the stitch directions right. However, there are situations where you need to add so-called direction lines ("rungs" in InkStitch terminology) to influence direction of the satin column stitches:
- Some tricky corner areas
- Complicated drawings where moving points is both difficult and time consuming
- Special situations where you want the stitch directions to be weird.
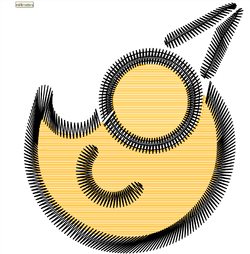
The directions of the zigzag lines in the following example are not exactly nice.
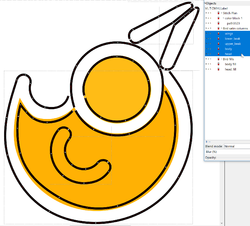
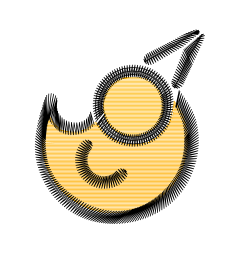 Round bird model (SVG File). Source Liv Iko (Noun project) |
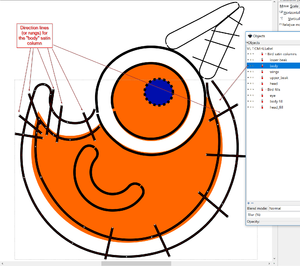
In order to tell InkStitch how to orient satin stitches you now can add "rungs" (or direction lines) into each stitchable path. There are two methods: a quick one and the one I used before I have been told about the fast one by the the creator of this program.
Quick adding of rungs
- Make sure the existing satin column path (with the two subpaths) is selected with the Node Editor tool.
- Press P or select the Pencil tool.
- Hold
Shift. - Click once at the start of the rung.
- Click a second time at the end of the rung.
Slow method for adding rungs (not holding the SHIFT key)
- Draw the direction lines for a given path using either the Bezier tool (click+click+right-click) or the freehand lines tool (click+click)
- Select the path for which we made the rungs + all the direction lines. Then hit CTRL-K (Menu: Path->Combine)
- Check if the Embroidery Parameters are still OK (Menu Extensions -> Embroidery - Params
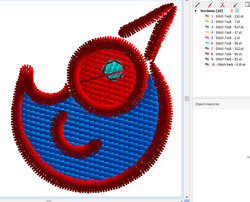
We also fixed the departure point for the head and added an eye. The result is below and already looks much better. However, we found that the *.PES version had a mistake, so we create ad *.DST. Our Brother can stitch that too. The bug has been fixed since version 1.8.1 (see the simulation below)
If you like this bird, you can modify it. However, if you publish it, please acknowledge the original design. (Liv Iko). Also, you should be aware that this design is really small (less than 3cm), stitching it properly may be a bit difficult.
Snake example
Let us demonstrate the procedure again with another example.
- Download Snake from Albert Sonico. (Again either cite the author or become a member of the Noun Project)
- If you got the public version, remove the text
Ultimately we would like to achieve the following embroidery
- The black body stitched with satin stitches
- Red mouth
- Yellow eye
- White teeth
Adapt the drawing
- Open the file in Inkscape
- Open the XML editor.
This object has two path: a black snake, a snake outline.
Remove the outline
- Select the snake and ungroup (CTRL-SHIFT-G)
- Kill the outline path ("path4"). Yes kill the outline not the body, since it is not really an outline made from simple strokes.
- Add a stroke
- Remove the fill
- Ajust document size
This first transformed file is to the right.
Break apart the snake
- Select the snake outline and Path -> Break apart
Draw bigger eyes and teeth
Bigger eyes
- Select the eye and kill it. Now draw a bigger eye
- Draw a line for the upper part of the eye
- Duplicate and rotate this new part
- Select the two and Menu Path->Combine or
CTRL-K
Alternatively you could have left the eye and made it bigger, cutting points to the left and right, etc.
Kill the nose
- Select and DEL
Create new teeth
- Draw new teeth with four strokes.
- Combine two and two with CTRL-K
Adapt the snake head
Remove the old teeth
- Edit path tool (F2)
- Select all teeth node (you can get most with rectangle selection) and kill (hit DEL)
Remove the body from the head with surgery
- Hit
F2(Edit path tool) - Select two segments before the head and kill them
- Break apart the snake again (to separate head and body)
Fill the mouth with red
- Use the paint bucket to create a red inside of the mouth
- Remove the stroke and keep the fill (in red)
Complete the head and the body
- Cut the mouth outline (in green) to the right: Break path at selected nodes
- Now merge this new line with the outer head outline: select the two and combine the (CTRL-K)
Now do the same for the body
- Cut the tail tip
- Merge the two lines as a single path.
Optimize bit
- Select both head and body
- Make the strokes a bit smaller, i.e. 5mm
- Hit CTRL-L
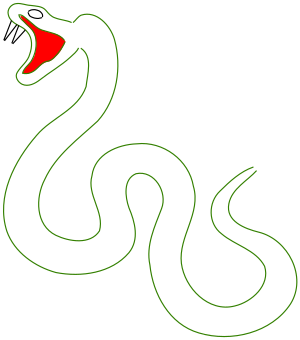
The intermediate result is below:
Add satin stitches
Adjust the drawing for embroidery
Configure Inkscape
- Set display units to mm (if not already done so)
- I also suggest removing any scaling in the document properties
Adapt size
Decide how big the embroidery should be. Since we do satin stitches here, the drawing should shrink. Else the design will be fragile and we would have to create double columns.
- CTRL-A
- Set height to 100mm in the menu bar
- Adjust stroke with, again to something that you still can see well, e.g. 0.5 mm
- Put drawing in position 0 / 0
- Adjust document size to drawing size + 1mm on each side.
save the file as optimized SVG
This may not be needed, but after all these transformations it is better to clean up a bit:
- File -> Save as
- In the "Save as type" pull-down menu, select Optimized SVG
- Close Inkscape and open the file again.
.... this is good voodoo.
(Optional) Try to create satin stitches for the body
- Reverse the path of one of the two segments (likely this is needed, see above)
- Select the body
- Open Extensions -> Embroidery -> Params
- Select the satin column tab and tick the checkbox.
- Also add underlays of your choice (at the very least a center-walk underlay)
- Optionally, add a TRIM after.
The result will be expected, i.e. an error message
- error: satin column: object path826 has two paths with an unequal number of points (27 and 29)
Now you have two options:
- (1) You could add or delete nodes in one sub-path to make them equal
- (2) You just can add rungs as described above. We will just do that.
Fix colors, sizes, direction lines and parametrize
- Make the eyes yellow
- Make sure that the mouth is bigger than the surrounding lines of the head. The head's satin stitches should eat into the fill pattern of the mouth.
- Firstly make sure that all sub-path run in a parallel direction. Read above how to see directions and how to fix them.
- Select all "satin" paths or one by one and parametrize.
- Make sure that each one has some kind of underlay.
Add rungs to both body and head
- Place rungs like in the SVG pictures below
- Make sure that rungs and lines look like railway.
- Also pay attention to the fact that rung cannnot overlap three lines. It can overlap four lines, i.e.
Result
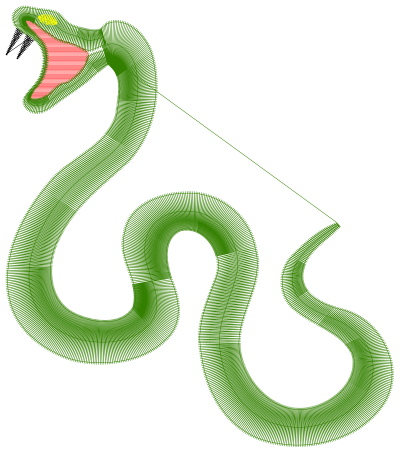
The result looks OK but we did not yet stitch it. The satin stitches are definitely too long for standard use. Also something was wrong with the head V4. V5 looks a bit better ....
Copyright modification
Contents of this page including pictures and SVG files are also available under the GNU Free Documentation License and the Attribution 4.0 International (CC BY 4.0) license.
The Inkstitch project can use any element (text fragments, SVG files, pictures) for the project's official docs without giving attribution (just copy and paste).
