InkStitch - stitch files from hand drawings
Creating an embroidery file from hand drawings
Creating embroidery files from photos, paintings or hand drawings can be very difficult and time consuming. In this place we will explain how to create stitch files from Simple drawings. A simple method was tested for hundreds of drawings made for patches using the Stitch Era commercial software, e.g. at the Salon du livre 2018. After color reduction (with the free Gimp software), vector tracing with (Inkscape) works fairly nicely and easily if the original drawing is simple.
Create a drawing
- use large felt pens
- use few colors
- use contrasted colors (e.g. red, blue, green, black)
- do not produce large fills (that is more related to the issue of creating something that is easier to stitch)
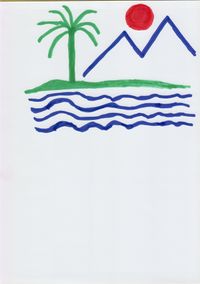
To the right is an acceptable example (I am not talking about the quality of the drawing).
Scan, crop and reduce colors
Many software allow reducing colors. We explain how to use Gimp, a powerful free image manipulation software. It's a complex tool that requires time-to-learn. However, the manipulations we demonstrate below, are not too difficult.
Step 1 - Scan
- Scan the picture in *.jpg format
Step 2 - Crop
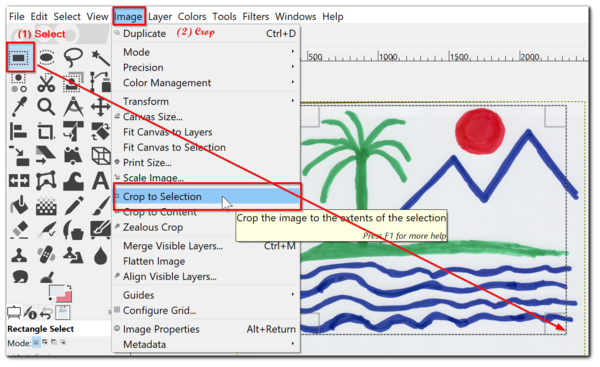
Crop the picture. You do not need to pay a lot of attention to the size of the margins. However you must decide whether you want the whole picture or just part of it. Below we decided to crop some of the drawing to make it more rectangular.
- Open the picture in Gimp
- Drag the mouse to select a rectangle. By default, the rectangle selection tool is already selected. You can pull/push borders of the rectangle (move the cursor real close), before you click on "Crop to Selection"
- Save the file
Step 3 - Reduce colors
As explained in the Gimp online manual, color reduction is really simple (unless you require smooth transitions between colors, which embroidery does not)
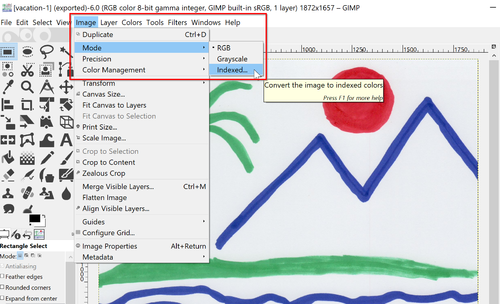
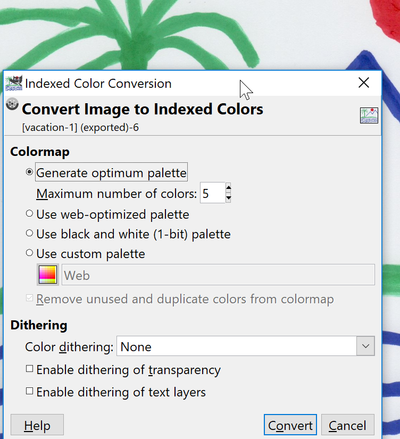
Open the color reduction tool and reduce the colors with the following conversion parameters:
- Set
Maximum number of colorsto the number of colors you can count in your drawing, plus one for the background - Do not use any dithering options.
- Click on
Convertand check the result (see after the figure)
If you can see all your drawings in the approximately right colors, then move on, else:
- Undo (hit Ctrl-Z)
- Add an extra color
- Repeat this, until you see all your drawings in a different color.
Step 4 - Adjust colors (optional)
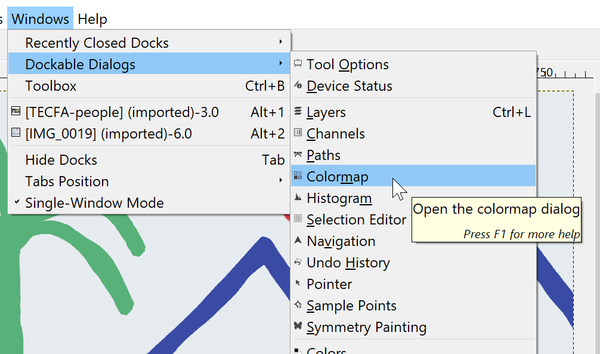
Open the colormap tool:
Windows -> Dockable dialogs -> Colormap
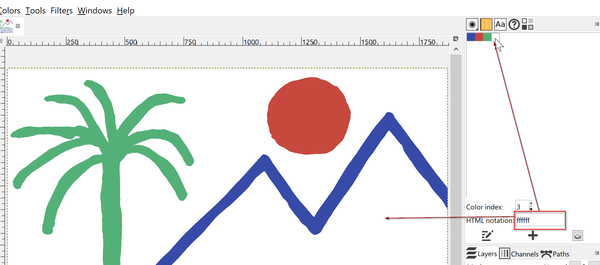
You now could change the colors or also merge two colors, e.g. by assigning the same color code to two or more indexed colors. You also should make the background full white (#ffffff), unless you want to stitch it.
Step 5 - Remove background (optional)
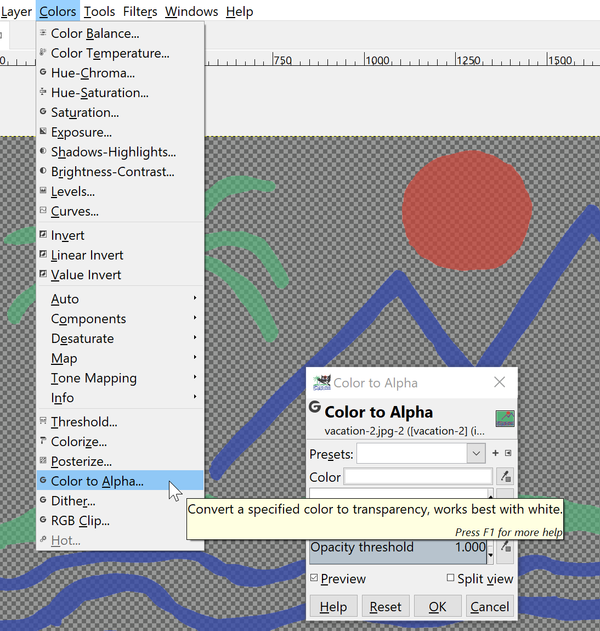
You can make the background color transparent (unless some of the drawing uses the same color).
- In the prior step 4, make sure that the background is white (#ffffff).
- Add a channel for the alpha layer:
Layer -> Transparency -> Add Alpha Channel colors -> Colors to Alpha ...
Save the file.
Step 5 - Export
In order to trace the raster file we need a format that Inkscape can read and that keeps the transparent background
- Export the file to a PNG file
Trace the raster file with InkScape
Now you have to translate the color-reduced raster file to SVG vector graphics. If your drawing is simple, this is not too complicated. If not, it can take hours ...
To vectorize a raster image - i.e. translate "dots" to drawings - do the following. However, depending on your drawing you may have to adapt the options a bit.
- Open the picture in InkScape, i.e. import the reduced color *.png picture you created with GIMP (File -> Open)
- Select the picture (click on it)
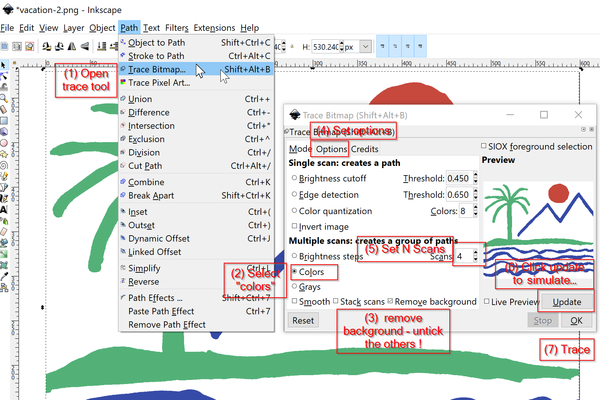
- Open the tracing tool (Menu path -> Trace Bitmap)
- Tick
colorsunder Multiple scans .... - Set smoothing options (in our case, this did not make any difference, but in some other cases it can)
- Select the number of paths you want (normally N is the number of colors you got). If you add more scans, e.g. 8 for 4 colors, it will produce traces for the strokes for example. Start with N = you colors + the background, then click on Update. If the preview is OK, then trace.
- Click OK to trace. The result will be put in an SVG group. This means that you on can trace several times. Each time, a new group is created.
Normally, for embroidery, use aggressive smoothing options (however, this doesn't have an interesting effect in our case.):
After tracing, the picture is still there, you can consider killing it or leaving it as hidden layer. Now check the result
- Hide the picture layer
- Open the path group
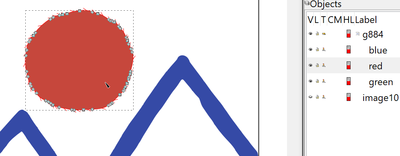
- For each path give it meaningful name, e.g. the color.
Kill extra paths you do not need (e.g. outlines created if you use extra scans). Also make sure to delete alternative versions since you likely will get mixed up.
As you can see, despite aggressive smoothing options, the tracing procedure did not really smooth much. To smooth the path, you now can use the normal smoothing tool
- If you feel lucky: Select All (CTRL-A)
- CTRL-L or Path->Simplify
Now save the file in SVG format, as *.svg
Prepare for embroidery
If not already done so, adjust the size of your embroidery.
- Set the measures in the main menu bar from px to mm or whatever you like
- Lock dimensions in the menu bar
- CTRL-A (Select All)
- Type the new size
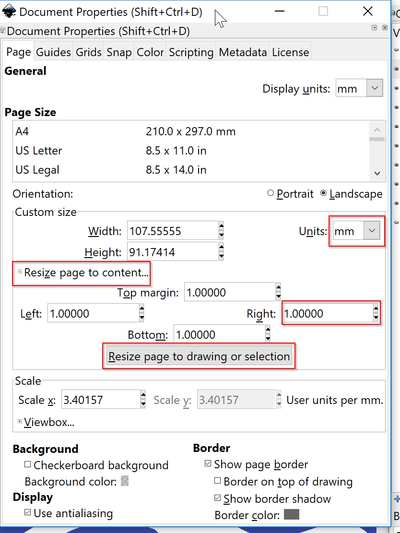
After resizing, adjust the document size (Menu File -> Document properties)
- Select ALL (CTRL-A)
- Select
Resize page to content - Add a small margin
Create a layer for the embroidery (optional)
- Create a new layer
- Move all the objects you want to stitch in there (using the Menu: Layers -> Move Selection to Layer)
Create single polygones:
- Since InkStitch wants to have connected path, you may have to break apart paths that are not, e.g. the blue one in our case. Also the green did have on little extra speckle somewhere.
- Menu
Path -> Break Apart(CTRL-SHIFT-K)
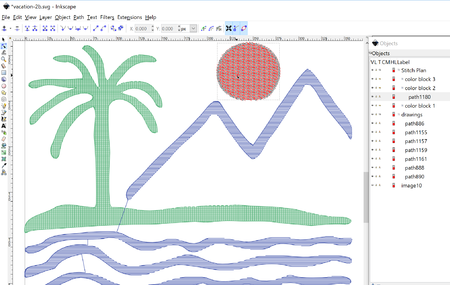
Now, most of this design should be embroidered with satin stitches. There are two ways of doing this:
- Modify the path as described before
- Add extra scans to the tracing (e.g. 8 instead of 4). By sorting through the produced path, you will find outlines
In both cases, there will be some work. Use direction lines (rungs) to segment paths.
Copyright modification
Contents of this page including pictures and SVG files are also available under the GNU Free Documentation License and the Attribution 4.0 International (CC BY 4.0) license.
The Inkstitch project can use any element (text fragments, SVG files, pictures) for the project's official docs without giving attribution (just copy and paste).
