Flash CS3 object transform tutorial
<pageby nominor="false" comments="false"/>
Overview
Flash has quite powerful object transformation tools. This article is part of some other Flash tutorials.
- Learning goals
- Learn about basic Flash 9 (CS3) object transformations with various tools.
- Prerequisites
- Flash CS3 desktop tutorial
- Flash drawing tutorial
- Moving on
- The Flash article has a list of other tutorials.
- Probably you'd like to animate shapes (Flash shape tweening tutorial)
- Quality
- This text should technical people get going and may not be good enough for self-learning beginners. It can be used as handout in a "hands-on" class. That is what Daniel K. Schneider made it for...
- Level
- It aims at beginners. More advanced features and tricks are not explained here.
- Executive summary - Drawing strategies for complex objects
- Draw/paint in merge mode (overpaint shapes), then transform to graphic object.
- Draw in object mode, then group or convert to symbol.
- Carve shapes with the eraser.
- Transform a simple shape with select tool, envelope transforms and sub-selection tool.
- Assemble objects (see Flash arranging objects tutorial), then any of the above.
- Executive summary - transform tools in the tools panel
- Use the Select tool to quickly distort an unselected object by moving the cursor close to it until it changes to curve shape, then drag.
- Use the Free Transform tool and its variants to make complex transforms of the envelope of a shape, e.g. learn how to use the envelope transform.
- The Subselection tool allows you drag squares (distortion points) and turn/drag circles (curve control handlers). I view it more as a "repair" and "find tuning" tool.
- With the Eraser you can "carve" out objects (like a woodcutter).
- Executive summary - transform tools in other places
- The menu Modify Transform can get you directly into the modes of one of these tools.
- The Transform panel (Window->Transform) lets do you the default free transforms by entering property values for size, rotate and skew.
- Finally, there are also transformation icons on the main toolbar (which is not shown by default, use Window->Toolbars->Main).
... a rather confusing amount of tools. Probably I forgot something ;)
The select tool
The select tool (arrow on top) strangely enough has two functions. These are entirely different and may lead to confusion.
- Select objects
- Distort objects
To distort objects the easy way, read on ...
Default behavior of the select tool
If you click on an object or if you select it with a selection box you see this:
- A hooked cross icon
- A white circle in the middle of the selected object (or selected objects)
You then can move it around, but that's not what we are interested in right now. The only important thing you may remember is the white dot and that when you see a cross, it means that you successfully selected the object. The dot represents the center, e.g the point where an object will snap to a motion guide line.
Let's make a banana
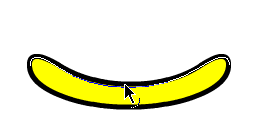
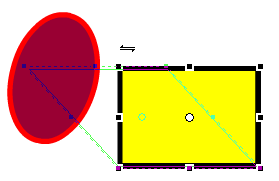
Ok, now let's distort an object. Let's start with an oval drawn in object mode. See the picture above or below.
- Make a rounded banana with the selection tool
- First, deselect everything (including the banana), e.g. click on the gray workspace area.
- Select the select tool.
- Then move it close to the stroke (outline).
- When the cursor turns into a curve, then hold down the mouse and drag
Here is a result, a nice banana:
- Make sharper ends
- Copy/paste the banana, if you like the old one. (select, ctrl-c, ctrl-v)
- Again, deselect everything
- Then hold down the ALT key and slowly search around the ends of the banana.
- If you see the angle icon, then drag. The angle icon won't show up everywhere, it's basically meant to drag around corners.
Result: two bananas of different shape:
You then can fine tune things with the subselection tool (see below).
The Free transform tool
Make sure that you understand drawing basics, i.e. have an idea what kinds of tools you got in the tools panel. If you don't go read the Flash drawing tutorial please.
Features of the free transform tool
The free transform tool allows you to several things
- By default: Scale, rotate, skew and distort
- Envelope transforms
- Distorts (but see the selection tool)
So again, its a multipurpose tool. You can define its different variants by selecting different mode in the options part of the tools panel (lower end). Read on ...
- The Transform panel
Instead of dragging around handles as explained below, you also may type in transformation values in the Transform panel. That's useful for technical drawings.
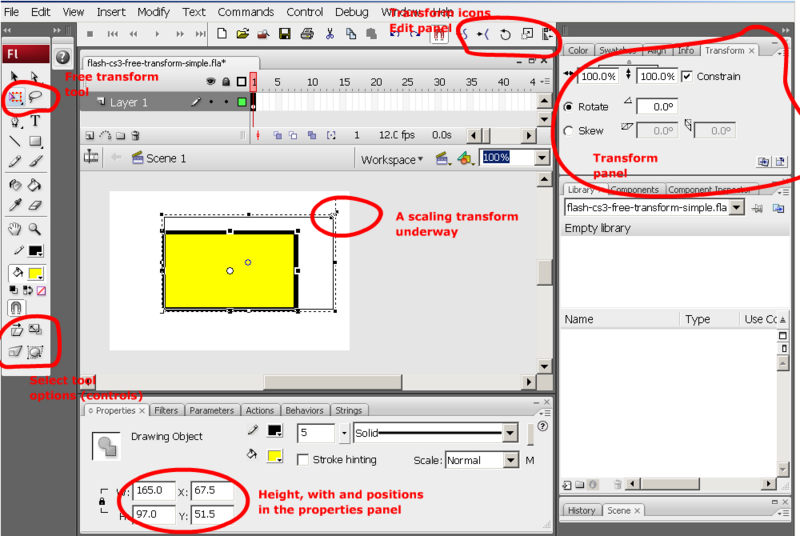
Get it with the Window->Transform menu. I usually have this docked next to the color panels (top right) as in the following screen capture. (If you don't know how to dock, please read the Flash CS3 desktop tutorial).
- A screenshot of tools related to the Free Transform tool
Simple transformations
By default the free transform tool let's you scale, rotate, skew.
- To select an object for transforms
- Select the Free Transform tool.
- Click on an object (or the other way round)
- The transformation controls
- You object will be in a rectangular box with a distortion control in each corner and one in the middle of each line.
- To scale in both directions (x and y)
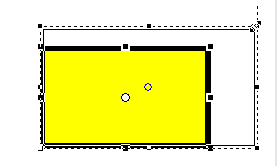
- Grab a corner and drag as in the screen dump below:
- If you want to scale a graphic and keep the proportions, hold down the SHIFT key.
- To scale into one direction (x or y)
- Drag one of the points in the middle
- To rotate an object
- Move your mouse outside near a corner. You will see a rotation icon.
- You then can turn around the object.
You also will see the changes in the transformation panel. Btw. you can move the rotation point (see next section).
- To skew an object
- Move your mouse over a stroke (line), but not over a distortion box
- You will see some vertical or horizontal double arrow (skew icon)
- Then drag ...
Rotations
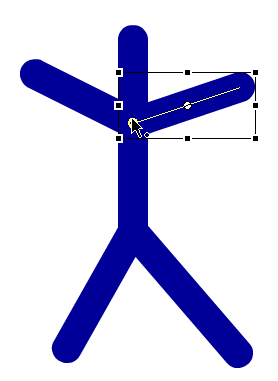
- By default an object will rotate around the white circle in the middle. But you can move this rotation point. Grab it with the mouse and move it where ever you want. Flash also gives some help. E.g. if the drawing is a line it will display and you can move the point to one end of it for example.
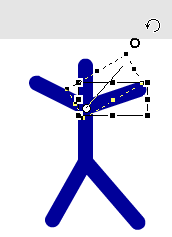
In the following screendump we have a picture of a sticky man and we'd like turn around his right arm. To do so:
- Click on the Free Transform tool (standard options as above)
- Then move the little dot in the right arm towards the "inner end" of the sticky man. The cursor should have a little circle next to it in this mode. See the screen shot below.
After that you can rotate around the arm around its new rotation point (as described in the previous section).
- Again, use the Free Transform tool (standard options)
Envelope transforms
Let's make a designer chair.
- Step 1 - Draw a rectangle
- Do it with the rectangle tool
- Step 2 - Go into envelope transform
- Select the object first, i.e. the rectangle
- Click on the Free Transform Tool
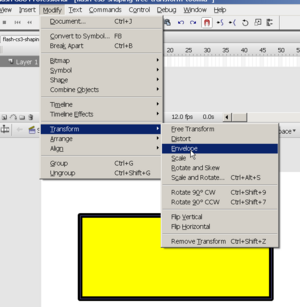
- Select the Envelope option (see screen capture below).
- Step 3 - Transform
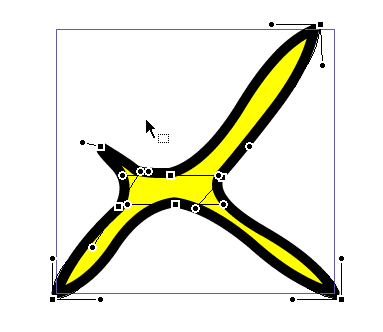
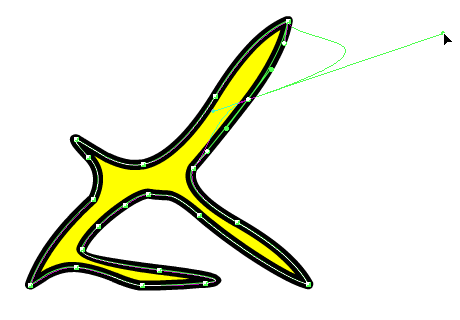
- Drag any little square. These are called distortion points.
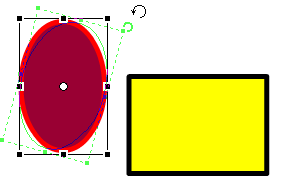
- Once you start transforming you also get curve control handles (the little circles). You can turn these in order to smoothen out curves. See the screendump just below. Or you can drag them to add new distortion (or combine both movements of course)
The Menu Modify->Transform gives you the choice of several kinds of transformations
- Select the object(s) to be transformed first
- Then select from several options
Basically it let's you all you can do with
- The Free Transform tool and its options
- The Subselection tool
The Subselection tool
This tool allows envelope transformations or rather fixing envelope transforms made with the Transform tool in envelope mode. Handles work like in the Envelope transform tool.
- Distortion points
The little squares are distortion points
- You can drag anywhere to change the shape of the object
- You also can drag them along the stroke before you drag them out
- You can delete these. Move the cursor over one of these and when the cursor changes shape, click first, then hit delete. This will simplify a stroke.
- Curve control handlers
The little dots are curve control handles with which you can adjust the curves in two ways:
- You can turn them to change the curve: smooth or sharpen.
- But you also can drag them to some place to distort the shape ....
- To get curve control handles click on a distortion point or move it.
If you can't see well what your are doing (I can't in 100% mode), zoom in like 200 or 400% ...
The Eraser tool
The eraser tool allows you to carve objects. In the options / controls in the tool panel, you can change the way the eraser works.
Erasing shapes (drawn in merge mode) and graphics objects (drawn in object mode) doesn't lead exactly to the same results. When you carve an object it remains an object. When you carve a (single) shape, it will divide into other shapes.
We shall not explain much here, better try it out ...
- Draw three nice fat ovals with a fat stroke. Two of them overlapping
- Then, select the eraser mode. This works like the paint tool
- Use Ctrl-Z to undo what you have done .... so you can try other options.
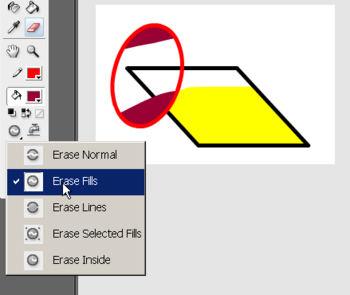
- Eraser modes
Here are the modes:
- Erase normal: Will erase as you paint
- Erase fill: Will only erase fills (paint)
- Erase lines: Will only erase strokes (lines, contours of objects)
- Erase selected fills: Will only erase fills that you have selected (hold down the SHIFT key to select several)
- Erase inside: Will erase fills inside an object if you start erasing inside the object.
In the following screen dump we used the 'erase fill option to take out fills from the oval and the rectangle.
- The faucet
- Will kill any shape on which you click. It makes a distinction though between the stroke and the fill of an object.
- Eraser shape
- You can select different sizes of circles and rectangles
- Use rectangles to carve off rectangles and circles to carve of round stuff.
Links
Sorry, now flash files for this (they would be fairly useless)
- Other tutorials
- None so far...
