InkStitch
Introduction
Ink/Stitch is an Inkscape extension for designing machine embroidery patterns. According to the extension page, “Select objects that you want to apply embroidery properties and using the extension, set the parameters for the desired object(s). Once all desired objects have embroidery properties, use the extension to generate the necessary stitch file.”
As far as we can tell without much testing (May 3 2018) this extension seems to be the first usable open source program that allows creating embroidery files within an open source drawing tool.
- Ink/Stitch allows creating stitch files from particular SVG drawings, i.e. so-called path. Any SVG object can be translated into a path object.
- SVG fills can translate to filled stitch areas, SVG strokes can translate to zigzag (simple satin) and lines. Finally, there is a mechanism to create satin columns from path that include two sub-path lines.
- SVG path objects can be parameterized for all of these four stitch types (filled areas, simple zigzags, complex satin zigzags, or lines). Various underlays can be configured, e.g. satin stitches can have three sorts (a center line, border lines or a zigzag).
Please, also consult the the official Ink/Stitch website and its manual.
Installation
This extension software was tested with Ubuntu 16x and Windows 10 on May 3 2018. We managed to produce embroidery files for both Linux and Windows.
- Download the latest release
- De-archive in the personal extension folder of Inkscape.
Under Ubuntu
- Extract files to
~/.config/inkscape/extensions
cd ~/.config/inkscape/extensions
tar zxf ~/Downloads/inkstitch-v1.0.0-Linux-x86_64.tar.gz
Under Win 10
- Unhide the AppData directory (go to c:\users\__your_home__\, e.g. c:\users\janet
- Unzip in c:\users\__you__\AppData\Roaming\inkscape\extensions
If this does not work, check where the extension folder is in Inkscape: Edit->Preferences->System
Once you installed the extension, restart Inkscape.
Basic use of InkStitch
You can try to following steps in order to test the extension and to learn about basic functionality.
Step 1 - draw an object
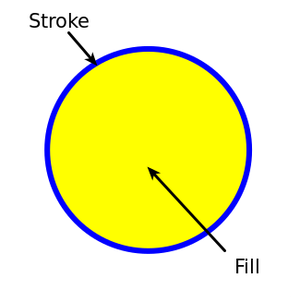
Create an object, e.g. a circle. You can use both fill and stroke. Below is an example and its SVG code.
The SVG code defining the object uses the SVG circle tag.
<circle
       style="opacity:1;fill:#ffff00;fill-opacity:1;stroke:#0000ff;stroke-width:5.92615652;stroke-miterlimit:4;stroke-dasharray:none;stroke-opacity:1"
       id="path4147"
       cx="123.99713"
       cy="650.45123"
       r="106.87944" />
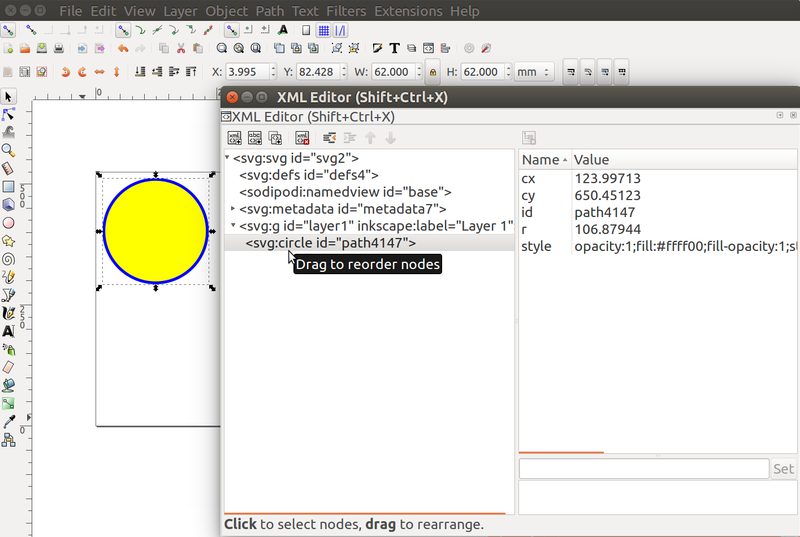
You can open the builtin XML tree editor if you want to check the code (CTRL-SHIFT-X)
Step 2 - convert to path
Transform all objects you want to stitch to paths:
- Select all object(s), e.g. hit CTRL+A
- Menu Path->Object to Path
An SVG Path includes both numbers representing positions and letters representing drawing and moving operations, including Bezier curves and Arcs. You do not need to understand how this works. Only make sure that all objects you plan to stitch are represented by a path. To check this, open the XML editor, then click on the object in the workspace. The XML code will be highlighted.
<path
  style="opacity:1;fill:#ffff00;fill-opacity:1;stroke:#0000ff;stroke-width:5.92615652;stroke-miterlimit:4;stroke-dasharray:none;stroke-opacity:1"
  d="M 230.87657,650.45123 A 106.87944,106.87944 0 0 1 123.99713,757.33067 106.87944,106.87944 0 0 1 17.117691,650.45123 106.87944,106.87944 0 0 1 123.99713,543.57179 106.87944,106.87944 0 0 1 230.87657,650.45123 Z"
  id="path4147" />
Objects that are not of "Path" type, are ignored.
Step 3 - Parametrize
Select at leas one object. In menu Extensions -> Embroider -> Select Params and play with them. There are actually quite a lot compared to other SVG to embroidery translators.
For now, we just suggest accepting the defaults. We shall explain parametrization in the next section.
Step 4 - Create the Embroidery file
You can either create a stitch file for a selection of objects or for all path objects. To create an embroidery file for the whole design:
- Click into some empty space (in order to deselect)
- Menu Extensions -> Embroider -> Embroidery
- Select the format of your machine. In case you are unhappy with the result, select a widely used format such as Tajima (DST) and then use a free translator to convert to your proprietary format.
- Type a directory name where you can find your files, e.g. c:\users\__you__\Desktop on windows or /home/schneide/schneide/embroidery/inkstitch under Linux. The file will remember this information.
You can skip the next step providing some technical details about how embroidery objects are represented in Inkscape.
Step 5 - Inspect in Inkscape
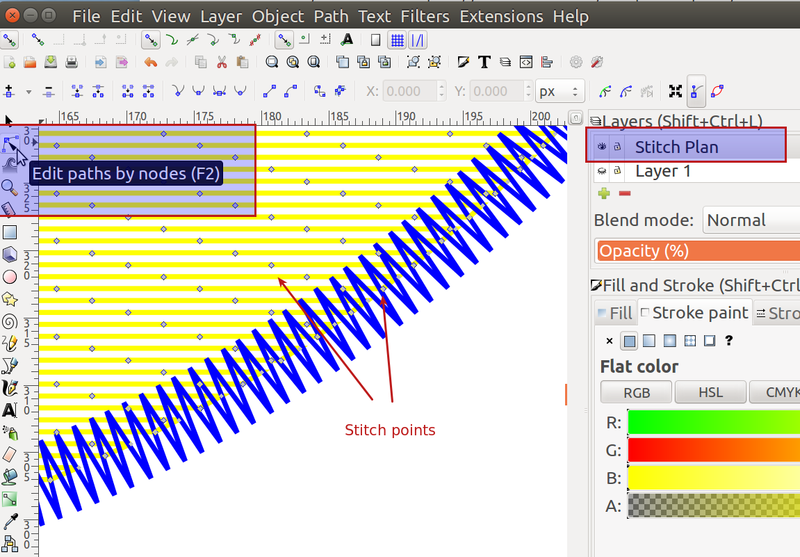
You now also will have a new layer that includes the Stitch Plan, i.e. the objects that have been exported as Stitch objects. You can check this to visualize the points that will be stitched. Alternatively you could use an embroidery viewer
In order to examine the Stitch points
- select the Stitch Plan layer and hide the others (this should be done automatically after using the Embroidery operation).
- Select the Edit Path tool in Inkscape
- Zoom in
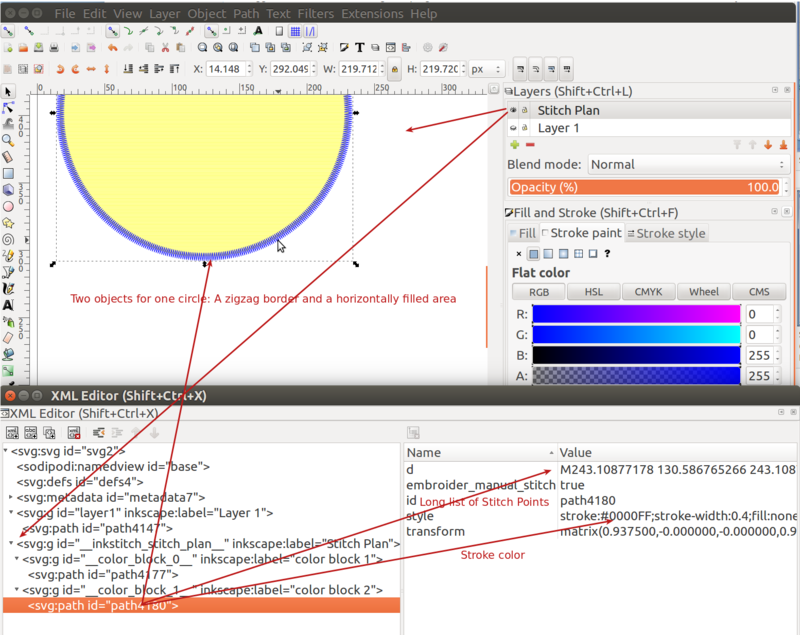
If you look at the SVG code, you can see that your path are now annotated with stitching information. In addition, the new stitch plan layer contains two huge path objects - one for the border and one for the fill - that define all the points to be stitched, plus the stroke color for both. Since the circle was split into two objects with strokes, there is of course no more fill.
Simple embroidery parametrization of SVG objects
InkStitch can produce three kinds of stitch packs from an SVG object
- An area from SVG path with
filldefined - Simple zigzag or lines from SVG objects with
strokedefined - Two objects (an area and a zigzag/line) from a path that has both fill and stroke
- Satin stitches from a path that includes two "polyline" subpaths
If we understood right:
- Fills can only translate to Areas
- Strokes translate to simple zigzag or simple lines
- Two strokes with the same amount of nodes can translate to satin columns
Paths with fills to embroidery areas
SVG fills are translated to areas filled with a simple linear pattern that can have an underlay.
In order to parametrize a fill:
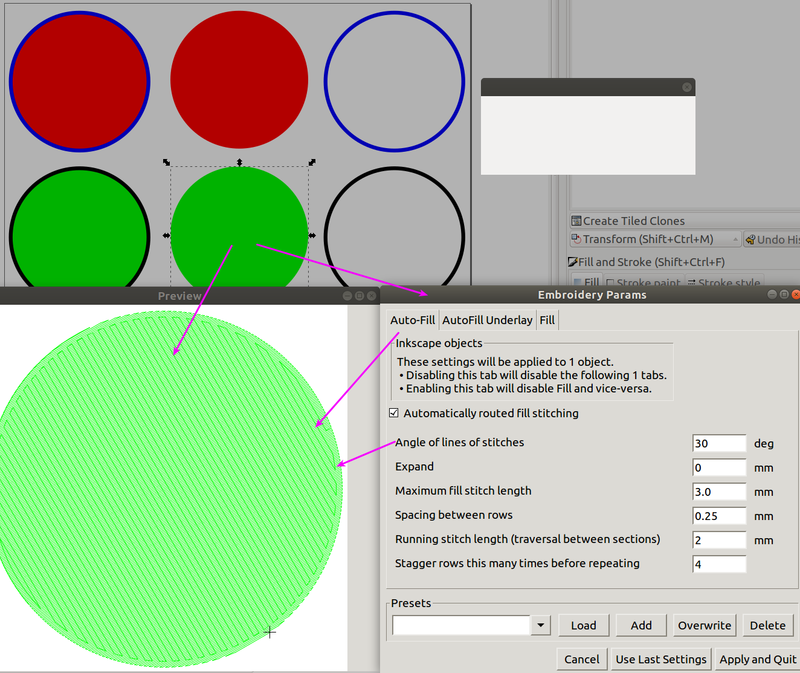
- Select an path object that has a fill and no stroke (e.g. something like the green or the red circle below)
- Open the parameter popup window: Menu Extensions -> Embroidery -> Params
You will see a little popup that say "Params working, please wait". Just move it out of the way and ignore it. Now look at the Embroidery Params popup window. It will have three tabs (see grey popup in the next screen capture).
- Auto-Fill: Try to change the fill angle. You can also can add STOP and Trim code if they are supported by the stitch file.
- AutoFill Underlay: Add an underlay, i.e. stitches that will be stitched underneath the pattern. This will add some stability and also a little 3D effect. Do not make it too dense.
- Fill: An alternative to auto fill
Paths with strokes to zigzag stitches
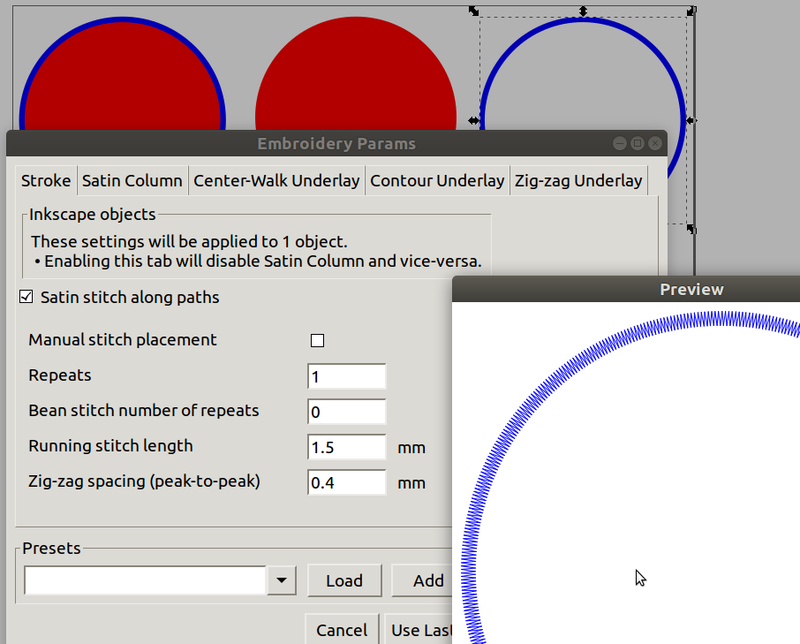
SVG strokes are translated to simple zigzag or satin stitches that can have an underlay. If you open again the Param popup (Menu Extensions -> Embroidery -> Params), you will see different tabs:
- Stroke (used by default)
- Satin Column
- Center-Walk Underlay
- Contour Underlay
- Zig-Zag Underlay
By default, there will be a simple Satin stitch (i.e. a zigzag) for a fat stroke, as shown in the following screenshot. Ignore the satin column, since InkStitch cannot translate simple strokes to satin columns.
- Small zigzags are difficult to stitch since they pull and distort the tissue a lot. If you can, go for line thickness between 2 and 3 mm. Otherwise, use less density.
Paths with fills and strokes
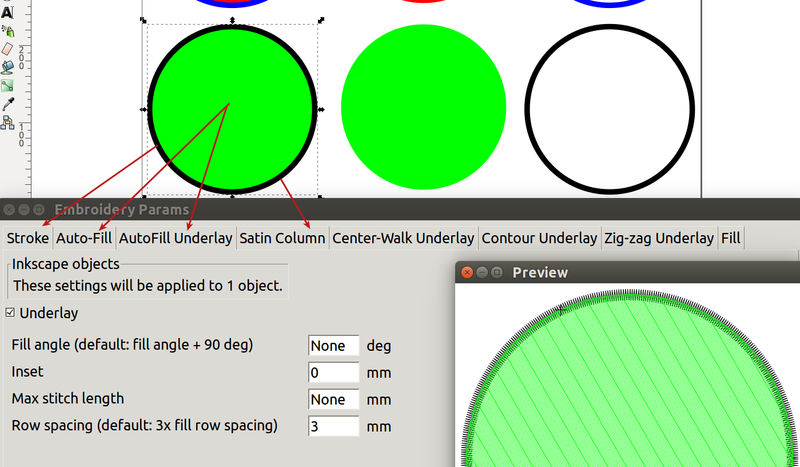
Objects that have both fill and stroke will allow parametrization of both, i.e. the param popup will present the combined tabs from the area and stroke parameters.
If we understand right, strokes of objects that allows have fills can only translate to simple zigzag, not satin stitches that create rounded corners. Workaround:
- Copy paste (in place) the object
- Remove the fill from one of these
- Remove the stroke from the other.
Summary
InkStitch provides good basic functionality for creating Stitch files with Inkscape.
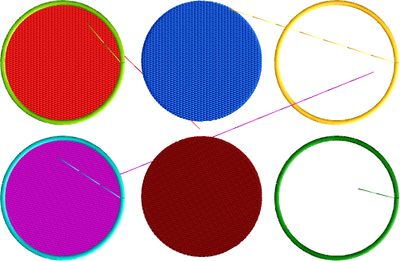
The stitch file in Tajima DST format was accepted by our multi-needle machine, but I did not stitch the design since it is not really interesting.
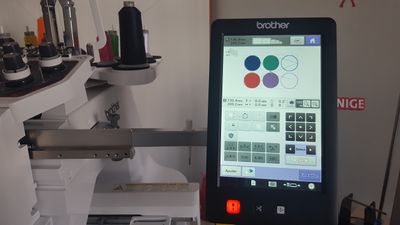 Stitch file accepted by our Brother PR1050X |
Remarks:
- Colors are wrong since the thread palette used in the viewer of Stitch Era and the embroidery machine are different from the default. Thread palettes are difficult to understand...
- There are some extra extra stitch sections that should not be stitched (the little lines).
In this section we just presented basic functionality. In particular, InkStitch allows creation of satin colums from more or less parallel lines and also simple lines.
Creating Satin Stitches
By default, Ink/Stitch translates strokes to either lines or simple perpendicular zig-zag stitches. The simple zigzag model works works relatively fine for straight lines or circles, but it cannot handle corners as in the little rocket drawing that we will now digitized. In addition, ZigZag stitches do not look as nice as the more parallel satin stitches.
Creating satin columns requires some extra work that we shall explain now.
Example explained with a snake and an ellipsoid donut
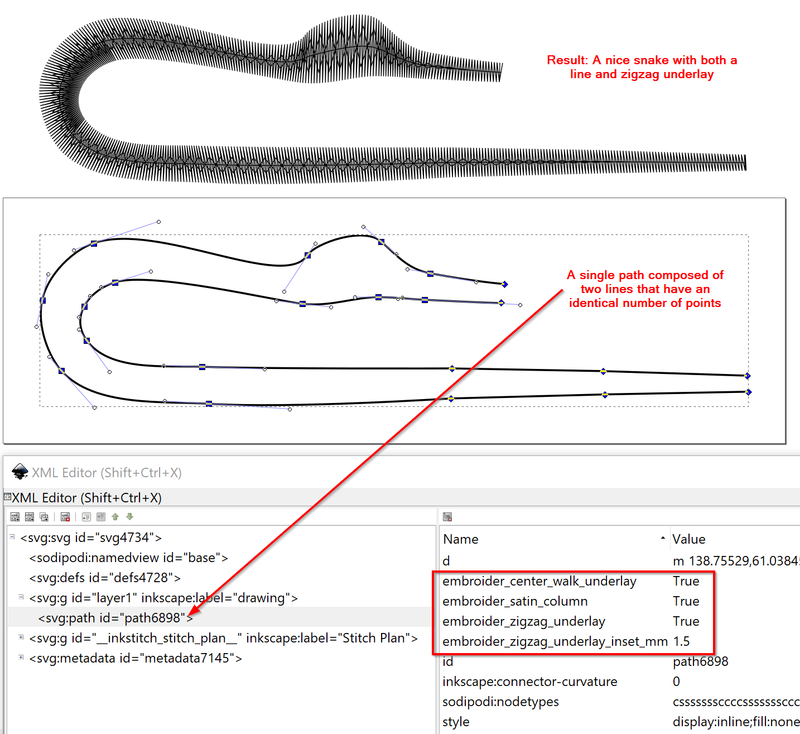
Let's create a simple snake:
(1) Draw two lines with the bezier tool.
- For starters you can just do this by clicking using the Bezier drawing tool (SHIFT-F6)
- Draw both in the same direction
We got something like this:
For exercising, you can download the original SVG (click on the picture until you get the SVG, then save as.
(2) Make sure that each path has the same number of points. If not:
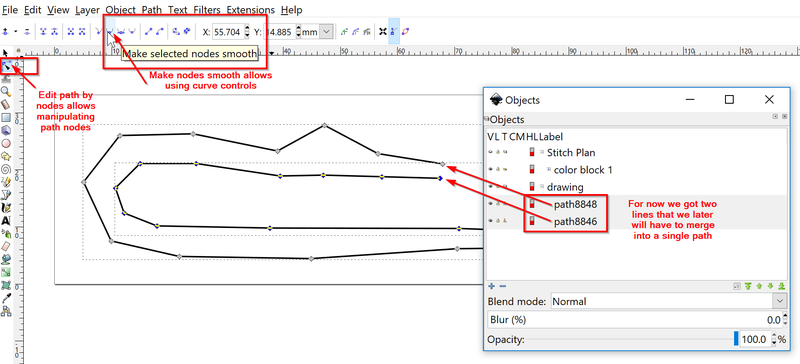
- Click on the Edit Path tool (drawing tools panel next to the selection tool) or hit
F2 - Select two nodes, then click on "Insert New Nodes into selected segments" to add a new node
(3) Combine these into a single path:
- Select both lines
- Menu Path -> Combine or CTRL-K
SVG file for download (click on the picture until you see the *.svg, then "save page as":
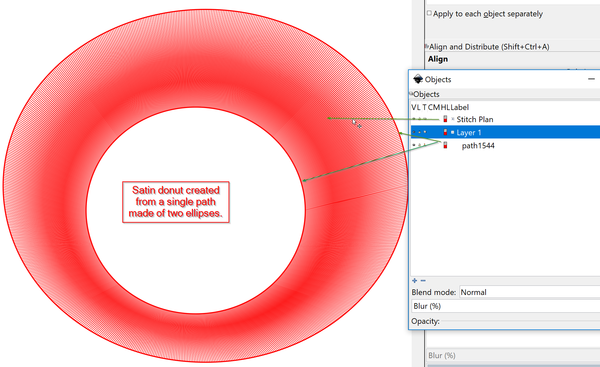
Ellipse example
The two lines of the path do not need to be open. E.g. two embedded ellipses with the same amount of points for each line also works.
Rocket example
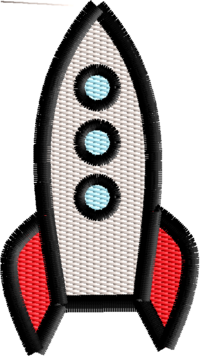
Let's compare a rocket stitched quickly with one that uses proper satin stitches. We will start from a little [Rocket Ship from OpenClipArt. There are several other variants of this, e.g. rocket icon by pitr that we used here.
Cleaning the SVG file
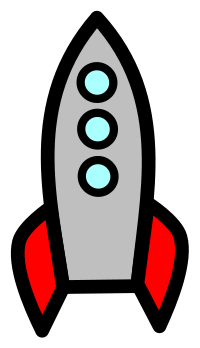 Source: [1] needing cleanup Rocket Ship as Clip Art] (SVG file) |
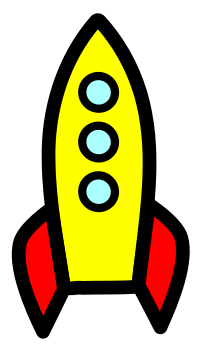
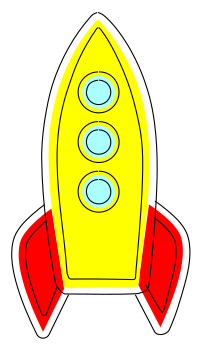
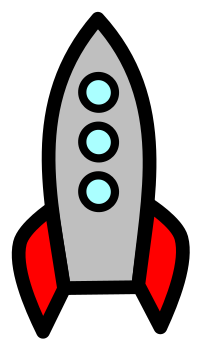 Source: Rocket Ship as Clip Art, but cleaned up |
The drawing is fairly straight forward. In order to process this with Ink/Stick
- Ungroup everything
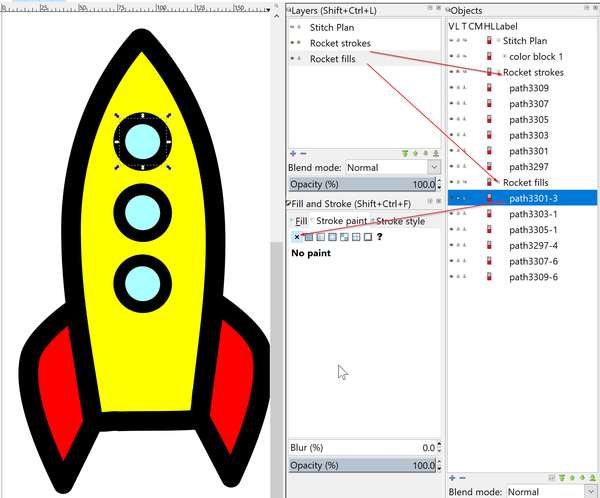
- Create a new layer, called Rocket strokes
- Put all elements in this layer.
- Open the XML Editor, click on each element and kill about 6 useless elements that sit underneath the windows. The resulting SVG only should have six objects.
- The wings overlap with the body of the rocket, but let's keep this for the moment.
It now (at least for the 1.7x version we discuss here) is important to follow all the steps on the SVG before you configure the embroidery params. Else you may have contradictory instructions in your objects. If the embroidery process fails with an error message, try removing all embroidery parameters in the XML Editor. Create a copy of you SVG file and save it. Personally, I just "write the file as" before each major operation. This way, I can easily restart from a prior version .....
Now you could digitized as shown above. However if you want nice satin stitches then you should remove all the fills and transform the fat strokes into double lines.
Let's separate fills and strokes first. We will do this in the following way:
- Select all
- Copy and paste in place. Edit->Copy then Menu Edit-Paste in Place. We now have 12 objects instead of 6.
- Move all the new objects to a new layer called Rocket fills (select these six in the Objects tool (Menu Object->Objects), then use the layers menu to move them)
- Lock the layer called Rocket fills.
- Remove all fills from the objects that sit in Layer Rocket strokes
- Now lock this Rocket strokes layer and kill the strokes from the objects that sit in the Rocket fills layer.
The resulting object structure should look like this:
This now can be directly stitched as shown in the picture above. However, you can notice the rather ugly satin stitches.
Creating satin stitches with hand drawings
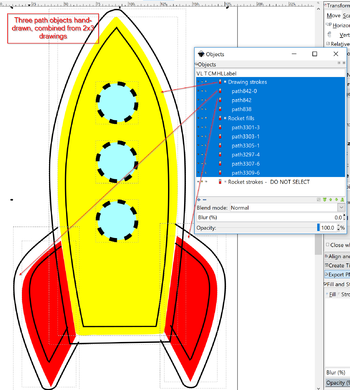
As you should recall from the "snake" example above, satin stitches are made from two lines that have the same amount of points. There are several ways to achieve this. In any of these cases, you will have to do some "point surgery". Also, the result can fail. Since we did not manage to get this done so far - i.e. the satin stitches are not well placed - we just made some hand drawings.
As a workaround, we suggest the following procedure:
- Lock the fills layer but keep it visible
- Create a new layer
- Draw the lines as explained in the "snake example above". Use (at least provisionally) a different color to the drawings.
The result looks OK (but I didn't take time to make minor ajustments since I spent too much time on the failed attempt described below
Transforming strokes into "satin path"
Now let us go through the more complicated procedure of transforming existing graphic elements (SVG path) into path that can be stitched as satin path. Remember:
- A path must have two subpath, each with the same number of nodes that should be roughly aligned
- Each subpath must go into the same direction (see explanations later)
- Closed shapes must be broken, since InkScape does not allow to define a start node.
See also this video: https://inkstitch.org/tutorials/lex-neva-video-tutorial-1/
Before you start
- Hide the "Fills" layer and maybe lock it. I.e. you only should see the strokes !
- Unlock the "Strokes" layer if it was locked
Simplify the drawing and reduce overlaps
- Simplify the drawing, i.e. remove all extra points that are not needed (but you can do this later).
In order to get two strokes (lines) instead of a single fat stroke, we can translate a path to a path with both fill and strokes. An other alternative would be to use insets and outsets. Anyhow:
- Select all strokes: CTRL-A (the fills should be hidden)
- Menu Path -> Stroke to Path
In a next step, we will have to clip the part of the wings that overlap with the body of the fuse. An easy way to do it is to use substraction again.
- Copy/paste in place the rocket body. The easiest way to do so is the open the "Objects panel" (Menu Object->Objects), select the body and the duplicate.
- Select the left wing and then the body (hold down the SHIFT key).
- Menu
- Repeat that operation for the right wing, i.e. firstly duplicated the body then subtract it.
Now make the strokes very small and remove the fill.
- Select all (CTRL-A)
- Menu Object -> Fill and Stroke
- Remove fills
- Set Stroke to 1px
Repair the wings.https://edutechwiki.unige.ch/en/Special:RecentChanges
- Unfortunately the wings did not fully overlap with the body, and there is some junk to remove. You must strive the obtain two single lines for each wing as shown in the picture to the right.
- Drag out both wings
- Select the Edit path tool
- Kill superfluous nodes
- Kill segments at the end of both wings
- (Maybe) make the sharp corners into a round symmetric node.
Clean up the rocket body
- Now make sure that you got the same amount of nodes in the outer and the innner line. To do so we suggest rather killing nodes than adding nodes. When you try to embroidery a path that has two subpath of different node length, InkStitch will complain and tell you which node to fix. Remember that for later.
- Align outer and inner nodes (roughly)
- Also make sure that no node sits on top of another one. You can find out by moving each node and then - if OK - put it back in position by hitting CTRL-Z
- Make the inner top a bit less sharp (make it a symmetrical node)
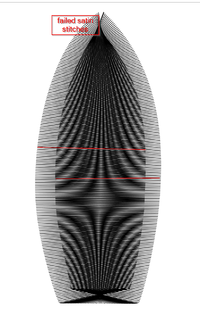
If you try to embroider now, you will get a very bad results:
Fix path directions
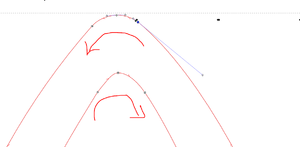
Problem: For InkStitch to work correctly, the two sub-path must point in the same direction. In our case they were not.
- To see directions, set
Show path direction direction on outlinein Edit -> Preferences -> Tools -> Node - Reverse for example the following the outer line:
Menu: Path -> Reverse
In our example, each path had a wrong subpath, e.g. the inner path went clockwise and the outer path counter-clock wise.
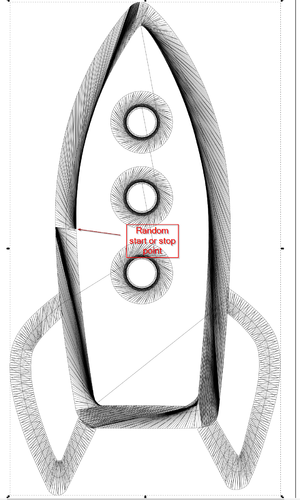
Fix the start point
Problem: The zizag of the satin stitch does now work but it is badly aligned now.
- For a close path there is no start point and you cannot define one. Instead we will break apart the closed path of the hull and the three windows.
- Use the Edit Path tool to select two nodes, one for each subpath, then break the path (see the figure below)
Let us parametrize separately the strokes and the fill layers.
- Hide and lock one before you work on the other.
- Make the stroke layer object satin stitches, if you did not do so already. Also, we suggest adding at least a center underlay
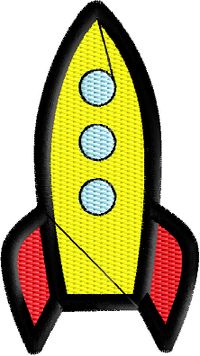
The result looks like this::
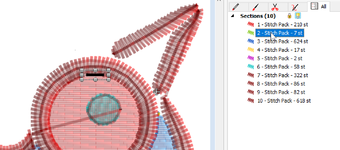
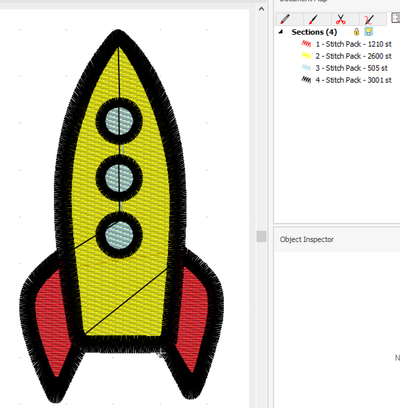 Stitch simulation (as seen in the Stitch Era software) |
Summary
Creating satin stitches from existing drawings seems to be difficult at best. There might a way to do it, but we did not manage to find so far. So for the moment, we recommend drawing the satin stitches by hand. This does work.
Creating fills and lines from dotted strokes does work well and doesn't require any special preparation.
Trim stitches do not seem to work in every case, but that is not a major issue. Anyhow, people using InkStitch do not have multi-needle machines and prefer to cut away thread as opposed to rethreading.
Adding direction lines
Good positioning of points on each of the two lines helps getting the stitch direction right. However, there are situations where you need to add so-called direction lines ("rungs" in InkStitch terminology) for satin columns:
- Some tricky corner areas
- Complicated drawings where moving points is both difficult and time consuming
- Special situations where you want the stitch directions to be weird.
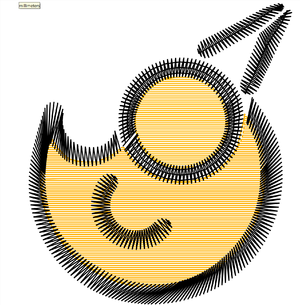
The direction of the zigzag lines in the following example are not exactly nice.
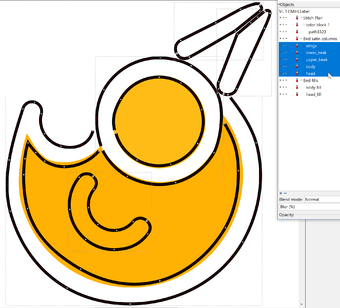
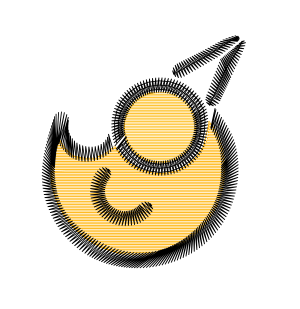 Round bird model (SVG File). Source Liv Iko (Noun project) |
In order to tell InkStitch how to orient satin stitches you now can add "rungs" (or direction lines) into each stitchable path. I do not really know how to do this efficiently, i.e. add the lines directly into the path. I used the following method:
- Draw the direction lines for a given path using either the Bezier tool (click+click+right-click) or the freehand lines tool (click+click)
- Select the path for which we made the rungs + all the direction liens. Then hit CTRL-K (Menu: Path->Combine)
- Check if the Embroidery Parameters are still ok (Menu Extensions -> Embroidery - Params
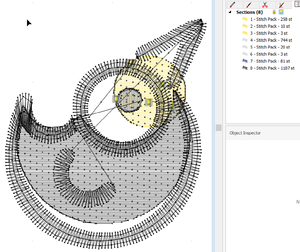
We also fixed the departure point for the head and add an eye. The result is below and already looks much better. However, we found that the *.PES version had a mistake, so we create ad *.DST. Our Brother can stitch that too.
If you like this bird, you can modify it. However, if you publish it, please acknowledge the original design. (Liv Iko). Also, you should be aware that this design is really small (less than 3cm), stitching it properly may be a bit difficult.
Tips
Downloading SVG files from this wiki
Most designs used in this tutorial (including the half baked and failed ones) are available as SVG files, but you will have to make a little effort to get them. Definitely, do not "save the image as". A MediaWiki (e.g. this wiki or Wikipedia) displays SVG files as reduced PNGs. In order to download the SVG:
- Click on the picture
- Click again on the picture when you see File:XXX.svg in the title. You now should just see a drawing in your browser
- Now, use the browser file menu: Save page as or hit CTRL-S in your browser
Inkscape version
From the author of InkStitch: “I highly recommend version 0.92 or greater, which has a really key feature: the Objects panel. This gives you a heirarchical list of objects in your SVG file, listed in their stacking order. This is really important because the stacking order dictates the order that the shapes will be sewn in.
Versions 0.92.2 and higher let you bind a key to new commands, “stack up” and “stack down”, which I assign to pageup and pagedown. These let you arbitrarily reorder objects in the SVG file, which lets you directly manipulate which order they stitch in. It works way better than the default “raise” and “lower” commands.”
Working with layers and stitch order
Objects are stitched according to foreground/background order. Last object in the list of objects in the objects panel will be stitched first since it is in the back.
You can change that order in several ways:
- In Inkscape 0.92 or higher, use the Objects panel (Menu Object -> Objects)
- Use PageUp/PageDown keys and verify in the objects panel (recommended).
- Move the position in the XML Editor
- Use layers. An Inkscape layer is just an SVG group (
g) with a special tag. So if you put an object in a layer it will have its position influenced by the layer's position.
If you import a drawing, e.g. from openclipart, you could:
- Create a new layer first (Menu: Layer -> Add Layer) or open the Layers panel (Menu: Layer -> layers)
- Select the Layer
- Copy/paste the picture from the SVG page (or import the SVG File)
- Ungroup all objects
- Maybe, arrange them in different layers according to stitch type and order
- Order (strokes and small area usually should be on top)
Printing a design
There are two options:
- Create an embroidery file, open with a free or commercial stitch file viewer, then print
- Use Menu: Extensions -> Embroidery -> Print. This functionality provides some information about the Stitch Packs, e.g. the number of stitches, color and trim/stop stitches.
Creating a patch
Creating patches is explained in the Embroidery patch article. Below is an untested example to be used preferably with the "precut" method.
Creating stitch lines
By default, InkStitch translates solid strokes bigger than 0.5pt to zigzag lines.
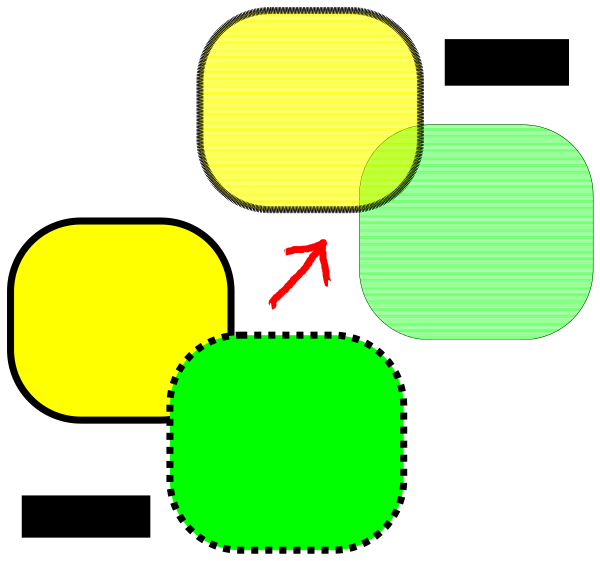
Since it is easier to see fatter lines, you also can make the stroke of the line dotted, i.e. not solid. It will translate to a simple stitch line as opposed to a zigzag. So, if you need a simple line, make it dotted as shown in the following picture. Bottom left shows the SVG drawing and upper right the Stitch plan.
Trouble
Error messages
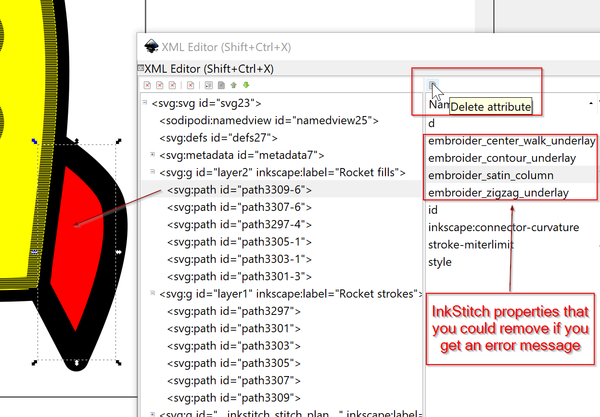
error: satin column: object pathXXXX has a fill (but should not)
This probably means that you got some "left over" properties in the object that you should remove.
- Open the XML Editor
- Remove all the InkStitch properties (in particular the satin one). Click on the "remove properties" button on top
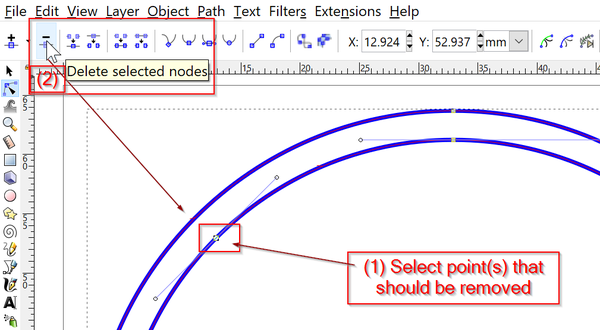
error: satin column: object path3XXX has two paths with an unequal number of points (x and y)
This means that you have extra nodes in a subpath defining a satin stitch line.
- Identify which line has an extra point, then remove it
- Click on the Edit Path by Nodes icon or hit F2
- Select the node(s) - also called points - that you want to remove.
- Kill it. This may require adjusting the Bezier controls of the adjacent points.
Notice: Points can be sneaky and hide under another one. In order to find these, you must move every node and if OK put it back in position with CTRL-Z.
error: satin column: One or more of the rungs doesn't intersect both rails.
Each rail should intersect both rungs once.
This means that your satin stitch drawings are not just made of two sub-path (lines) and/or that direction lines (rungs) are badly placed.
(.... to be completed)
Satin stitch param combination makes the script crash
As of May 2018 (InkStitch version 1.7.1 / Inkscape v. 0.91) some combinations of parameters can lead to a crash of the script, i.e. the embroidery will not be generated.
You will have to remove the InkStitch specific properties from the SVG code to fix that. This can be done for example by saving the file as simple SVG and then editing the source code. Otherwise, in InkScape, in the XML Editor (CRTL-SHIFT-X), there is a little "delete property" button on top of the property panel.
It is better to test the embroidery for each parameter change and save the file under a different version number if things go well. This way you only have to undo the last changes or copy/paste the older object that was still working.
Exemple error trace:
Traceback (most recent call last):
  File "embroider.py", line 108, in <module>
  File "inkscape-0.92.2/share/extensions/inkex.py", line 283, in affect
    errormsg(_("No matching node for expression: %s") % path)
  File "embroider.py", line 97, in effect

  File "inkstitch/extensions.py", line 195, in elements_to_patches
  File "inkstitch/elements/element.py", line 244, in embroider
  File "inkstitch/elements/satin_column.py", line 401, in to_patches
  File "inkstitch/elements/satin_column.py", line 370, in do_satin
  File "inkstitch/elements/satin_column.py", line 254, in walk_paths
  File "site-packages/backports/functools_lru_cache.py", line 113, in wrapper
  File "inkstitch/elements/satin_column.py", line 101, in flattened_beziers
  File "inkstitch/elements/satin_column.py", line 128, in flatten_beziers_with_rungs
  File "site-packages/shapely/ops.py", line 464, in split
ValueError: Splitting a LineString with a GeometryCollection is not supported
[9557] Failed to execute script embroider
Birds example
Let's create an embroidery from complex SVG paths.
Below are notes taken while I learn. I am aware that these are not good enough for beginners - Daniel K. Schneider (talk) 16:23, 4 May 2018 (CEST)
Get some artwork
- Get four birds from the noun project (become a member if you want to download and reuse objects without having to use them under their free CC license. I got 4 birds from the Bird collection by Liv Iko
- Pick the ones you like.
- Download as SVG !!
- If you are a non-member, remove the text with the CC license, i.e. edit each file in Inkscape, but make sure to cite the author properly if you publish your embroidery.
If you are unable to get this done, you can start from our own example, but do not publish it on any website without giving credit to Liv Iko.
Embroidery with area patters
After downloading some icons from the nouproject:
- File -> Import; Select the four SVG files
After arranging the four drawings, you could see something like this:

- If you do not download from the Noun Project, you can our example above. Make sure to click twice in order to get the SVG file until you see just the drawing, then "save the page as". Also, do not forget to credit the original author.
- Save the file, e.g. call it birds0.svg
Arrange position and size
- Arrange the designs, e.g., on a bottom line and also adjust the size so that the embroidery will fit into you hoop.
- Each of the birds is now a single SVG path. These are not yet suitable for a nice colorful embroidery. We will have to break them apart
- Save the file, e.g. call it birds1.svg
- Again, you could directly take the SVG file directly from this wiki.
Break path apart
- Select all
- Menu: Path -> Break Apart
You now should see four piles of black objects.

Again, you could download the SVG source
Colorize
The result are layered "path" objects composed of fills that you now should color a bit. For each object, including the large black backgrounds:
- Add a fill color
- Remove the stroke color
- The easiest way of doing this is to open the "Fill and Strokes" panel, then the XML Editor (Shift+Control+X)
- click on each path object of the XML editor and then define a fill color and remove the stroke color if there is one.
Simplify
Currently we have up to three layers, which is too much for stitching.
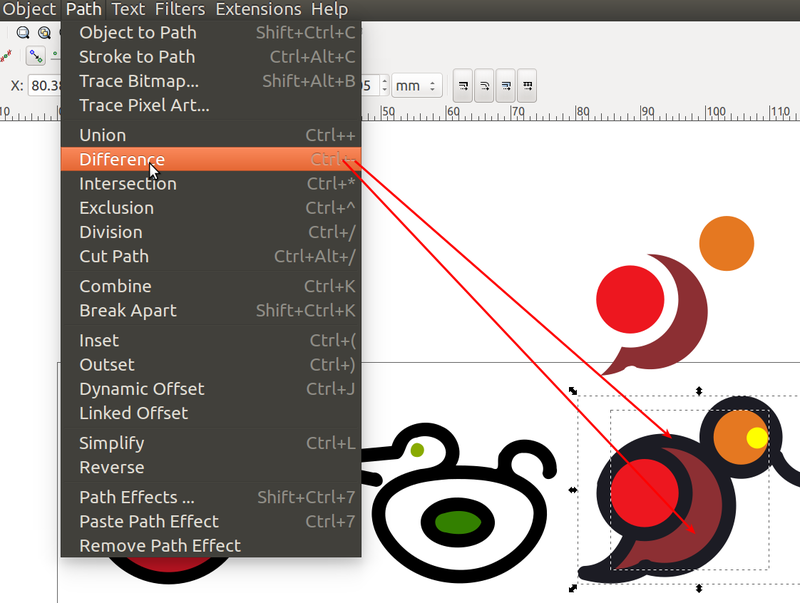
- We now use the difference operator to subtract an element from the element underneath.
- Copy a smaller area that sits on top of a larger area and move it outside the graphic
- Shift-select the larger (black) area and shift-select the area that sits on top
- Menu: Path->Difference or hit CTRL+-
- Now you should see a hole in the bigger black area. Move the the save smaller area in place. Increase its size a bit so that it overlaps.
You also may want to cleanup a bit. In Inkscape, click on File->Clean up document
Create two layers
This is not strictly needed, but you should take the reflex of creating layers into which you put different types of drawing objects.
- Create a new layer and call it Areas
- Select all colored areas and move into a new layer
- Rename the layer with the black "lines" in "Lines"
Parametrize
In your SVG drawings you only got so-called fills. The plugin will translate these into areas filled with linear motif. You can change the angle and the Stitch length for now.
- Hide the Layer called Lines
- Open Extensions->Embroidery->Params. This will now allow to parametrize the Stitch Areas
- Add STOP and TRIM if you got a multi-needle machine
- Change default values or just Apply and Quit (we did not change anything else here)
- Do the same for the Lines layer, show it and hide the Area layer
Create the embroidery
- Show all layers you plan to embroider, e.g. here we got "Lines" and "Areas"
- Menu extensions -> embroidery -> embroider
- Select the machine format. As of May 2018, the PES file is incorrect, use DST format which Brother also can stitch.

The simulated result now looks like this (DST gets the colors wrong, but that's not a real issue since most people do not have a sixteen needle machine with the good threads already installed).
As you can see there are also some extra objects that should not be stitched, but they won't hurt. The lines can be easily removed.
Create borders with satin stitches
In order to get satin stitches we need to have strokes. In principle the following should work, see the Rocket example above.
- Go back to an early version of the SVG file (after breaking apart)
- Select the object for which you need satin borders
- Make two copies
- Create an inset and outset: Menu Path -> Inset and Menu Path -> Outset
- Make the stroke smaller
- Remove the fill
- Make sure that each of the two object has the same number of points, remove the superfluous ones.
- Fix direction lines
- etc.
Links
- Ink/Stitch (home page, which includes several manual pages)
- Ink/Stitch Github directory
- Inkstitch Intro Video (Youtube)
