Creating websites with online services
This article or section is currently under construction
In principle, someone is working on it and there should be a better version in a not so distant future.
If you want to modify this page, please discuss it with the person working on it (see the "history")
Introduction
Kinds of online services
The simplest way for creating a little website is to use one or several online services. We may distinguish several kinds:
- Site builder tools provided by your web hosting service
- If you happen to own a hosted domain name, you may check this out. Web hosting can be free, but usually you will have to pay a yearly fee.
- Most web hosting services provide a web site (home pages) builder tool. E.g. our favorite local provider uses PHP SiteBuilder. There exist cheap offers from companies like GoDaddy or HostGator (about $5/month) or Yahoo. GeoCities was a popular free service bough by Yahoo, but it is now discontinued.
- Blogging tools
- Blogs have become probably the major form of simple on-line publishing. While some people install their own bloggingware with their hoster, many use an online service like Blogger.
- Web 2.0 web hosting/creation services
- Your website will be hosted on some distant cloud and usually all configuration/editing work is done through web. A good examples is the free service provided by Google Sites.
- Web 2.0 social networking portals
- Your website is also hosted on some distant cloud, all configuration and editing is done through the web. The main purpose of the website is to support a community, e.g. a class (yes teacher use this) or a local hard rock fan community. The best known service is Ning.
Example services
Below we present some services. There exist many other alternatives.
Blogger / Blogspot
“Blogger (formerly Blogspot until 2006) is a blog publishing system. It was created by Pyra Labs, which was bought by Google in 2003. The service itself is located at www.blogger.com, and blogs that do not publish to their own websites are hosted by Google at subdomains of blogspot.com.” (Wikipedia, retrieved 19:25, 13 August 2009 (UTC)).
Features
- Examples
- Empty example used for demos: http://danielkschneider.blogspot.com/
- Others: Blogger is one of the top 10 or 20 websites. Explore Blogs of Note (from the blogger team).
The procedure aug 2009
- Installation
- Create a Google account (you may do this later)
- Go to http://blogger.com/
- Click on "Create a blog"
- Define a blog title
- Define the URL part (no blank spaces nor special characters)
- Choose from a template (you can change it later)
At this point you can start customizing or adding contents
- To find the settings of your blog
- From the Dashboard (blogs management), you should click on "View Blog".
- If you can see your blog, click on "customize" (top right) to enter the configuration page.
- Settings configuration
Click on the Settings tab. There exist a number of options (most are easy to understand and harmless).
- It is important to define who can comment (select the comments tab). It's a good idea to be restrictive, else you will get [[[spam]]med.
- You can define a custom domain (but that requires work with your domain name registrar or buying a domain name through google)
- You can add users that are allowed to edit (they also must have a google account)
- Layout configuration
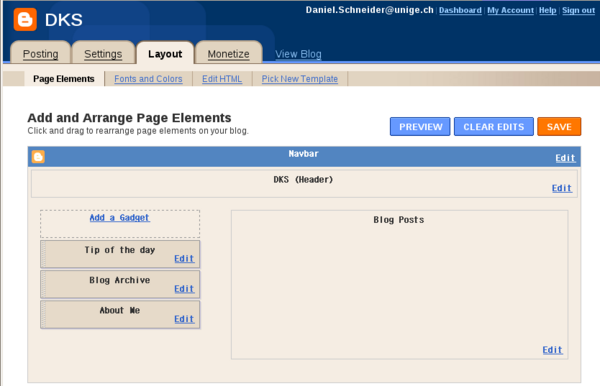
Click on the Layout tab and play around with the various edit links. You first can try to change the page elements:
- the navigation bar
- configure the display of blog entries in the "Blog Posts" area.
- Add widgets (the ones provided by google or your own, e.g. there is a "basic widget" that will allow to insert HTML code. You can move placeholders up and down.
You then can change fonts and colors, or pick a new template before you do this. Advanced users can click on "Edit" HTML to define a new template, before you start playing with HTML code, read Can I edit the HTML of my blog's layout?
- Other information
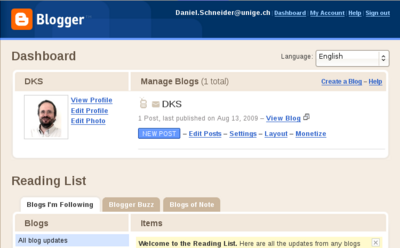
With the same google account, you can manage several blogs. To do so click on the "Dashboard" link. You also may use it to read news from a blog roll (your favorite blogs).
Support and documentation
- Blogger help (Entry page for the official documentation)
- The official blogger buzz
- Blogger (service) (Short Wikipedia overview article)
Google sites
“Google Sites is an online application that makes creating a team web site as easy as editing a document. With Google Sites, people can quickly gather a variety of information in one place -- including videos, calendars, presentations, attachments, and text -- and easily share it for viewing or editing with a small group, their entire organization, or the world.” (What is Google Sites?, retrieved 19:25, 13 August 2009 (UTC)).
Example (for demo purposes): danielkschneider
Features
- Select and configure a theme
- Create a page hierarchy. Create a page and then tell where it goes.
- Each subpage can be of a given type, e.g. WebPage, File Cabinet, Dashboard (widget inclusion), List)
- You may manage permissions
- Custom templates that you can edit
- Instead of using the web interface, you can publish to blogger with a variety of tools, e.g. MS Office 2007.
The procedure aug 2009
It is best to go through the official help, in particular the "Getting started" and "working with ..." sections. Below, we will just summarize a few essential operations. Please, also note that the Interface can change at any time, i.e. our screen dumps may be outdated.
Requirements:
- This service is free
- You need a google account (if you don't have one, you will have a chance to create one)
- Creation of a web site
- Go to http://sites.google.com/
- If you don't already have a Google, you can sign up now.
- Then, create a new site. You will have to
- enter a site name and a site URL and optional site description
- Choose a theme
- Accept or change viewing permission
- Start creating pages
You then should see something like this:
You may create other web sites. To do so, click on the "My sites" link (top right). But let's now look at page creation
- Editing a page
To edit a page, click on the Edit page button. In your first page (i.e. the default home page) you can edit two areas: the title area and a text area. Besides entering text you also can insert special contents like pictures, google applications and other widgets using the "Insert menu". There is an "undo" feature. After your modification click on "Save" (twice).
- Creating pages
Now you should play around with the various page types Google sites offers. Each page type offers slightly different features and a different default page layout.
- Click on the Create page button (top right)
- You then can select from 5 different page models as the screenshot below shows:
- Web page
- Dashboard: to display a collection of widgets
- Announcements: a sort of mini blogging application
- File Cabinet: a page that you may use to index files for download, e.g. a PDF file
- List: A page to create lists, e.g. links
- Enter a name for the page
- Specify where in the page hierarchy it should be inserted (you may change this later)
Note: If you trouble finding the editing/administration interface, enter the http://sites.google.com/ URL and start again (you may have been logged out for one or another reason).
- Configuring the web site
- To reconfigure the web site, e.g. change its theming template, select "manage site" from the "More actions" pulldown menu to the right.
- In the same pulldown menu, you also will find a "site preview" button that will show the page as a viewer will see it.
- To move the current page to another place in the page hierarchy: use "move" (again in the "More actions" menu)
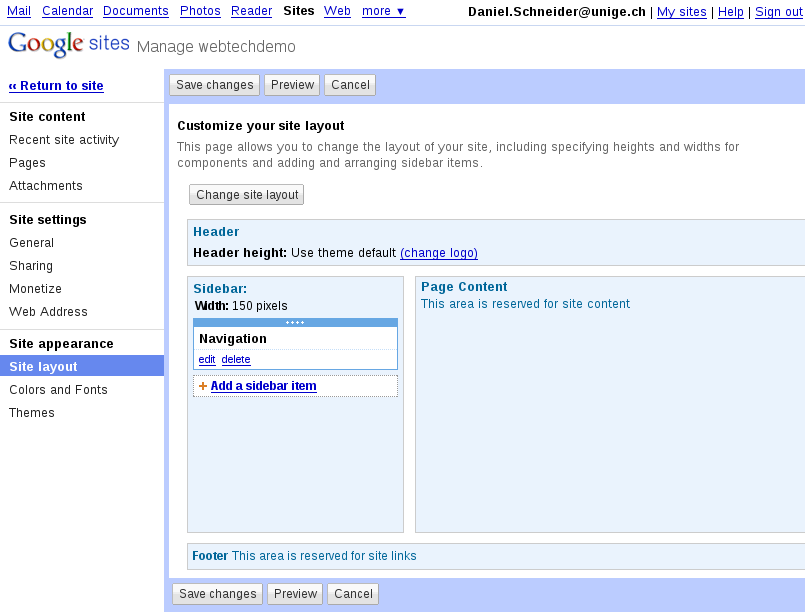
The "Manage site" page allows you for example
- to change the layout and to add items to the navigation panel (that sits on the left by default)
- to change the theme
- to redirect traffic from a site you own.
- to change access permissions
Support and documentation
- http://sites.google.com/support/
- http://www.google.com/sites/help/intl/en/overview.html (video and examples)
- ... also: don't forget to hit the "help" button (top right)
Ning social networking
“Ning is the social platform for interests and passions online. [...] With over 1.3 million Ning social networks created and more than 30 million registered members, millions of people every day are coming together across Ning to explore and express their interests, discover new passions, and meet new people around shared pursuits.” (About Ning, retrieved Aug 2009.
The procedure aug 2009
- Sign up and site creation
- Go to http://ning.com/
- Click on "Join now" and fill in the form
- Then connect with your email and password
Alternatively, you also could start by filling in the form to create a social network and you will wind up first in the "join now" form.
- Your sign-in home page and profile
Once you sign in you will find an empty home page that lets you manage social networks, create networks, be aware of events, change your general profile, etc.
Since may be member of various social networks (including the ones you created yourself) you should add some minimal general profiling information about yourself through the Profile or the Settings button. You then can fine tune this information for each network
... Anyhow, you may do this later
- Create a social network
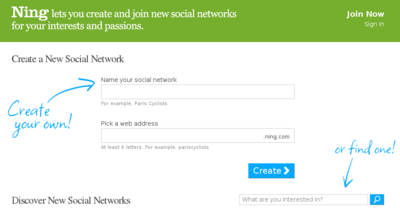
(1) You may create your own network from various places, e.g. from the ning.com home page, from your "home page" or from the "social networks page". Watch out for some Create your own social network button. You only need to enter two bits of information:
- The name of the social network
- A short name (without blanks) for the web address
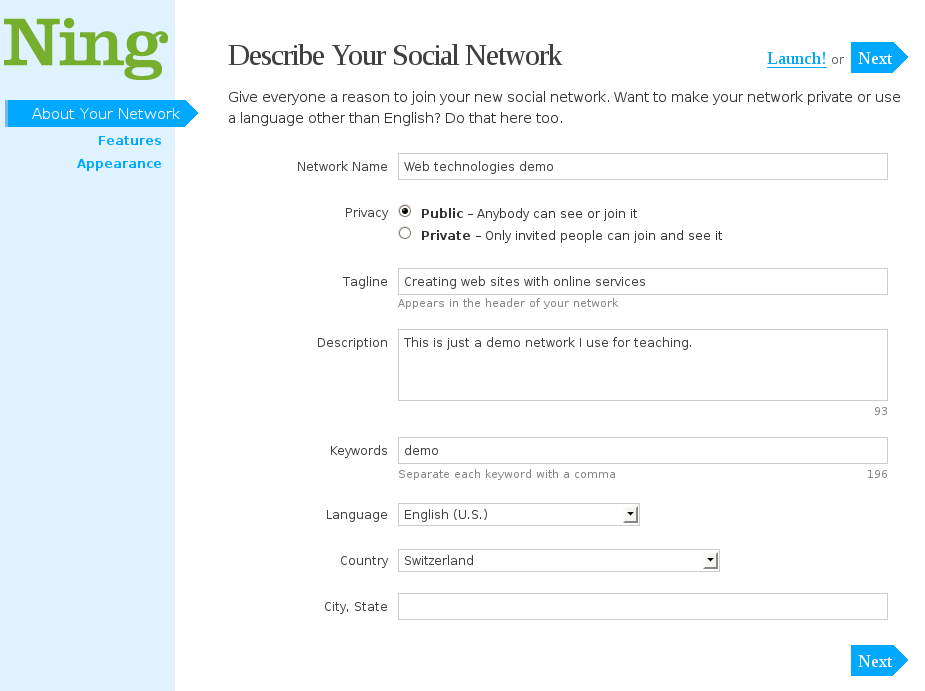
(2) Your next task is to describe the social network:
(3) You then can launch the site or configure some more stuff, i.e. the general layout including basic tools and the theme (called "appearance"). But you can do this later
- Hit the launch ! link
- Configuring the network
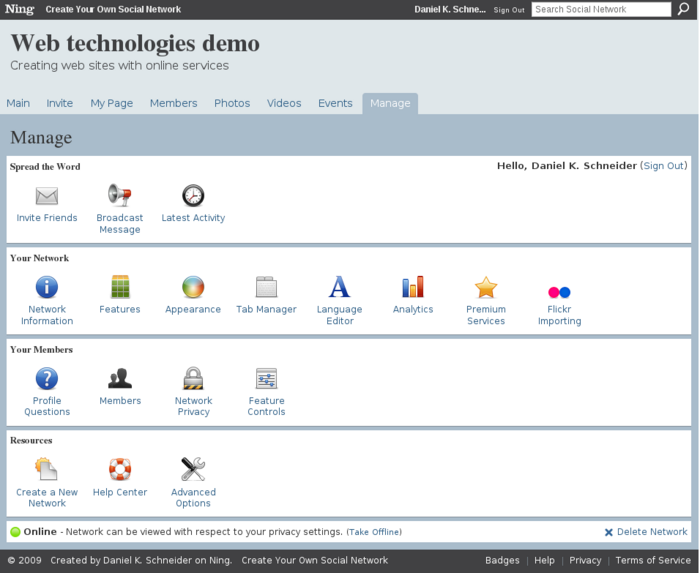
Basically, all the tools are available through the Manaage button. In particular, you may want to explore the "Appearance" and then the "Features" tool.
Examples and support
- Ning Creator stories (has a search box for social networks)
- Ning Blog
Netvibes webtop
“Founded by Tariq Krim in 2005, Netvibes pioneered the personalized homepage as alternative to traditional web portals. Netvibes lets individuals assemble their favorite widgets, websites, blogs, email accounts, social networks, search engines, instant messengers, photos, videos, podcasts, and everything else they enjoy on the web - all in one place.” (About Netvibes, retrieved Aug 2009.
The procedure aug 2009
- Go to http://netvibes.com
- Click on the "Sign up" button
- You then can create a public page (choose its URL) and fill it in ...
Links
Free webhosting and webcontents services
- Freewebspace.net has a Free webhosting database. Some of these services include a web page generator/site builder.
- Weblog software (A list from Wikipedia, see the section Developer-hosted platforms).
