InkStitch - QR code embroidery: Difference between revisions
Jump to navigation
Jump to search
mNo edit summary |
|||
| Line 45: | Line 45: | ||
Code produced by QR Code Monkey has the following structure | Code produced by QR Code Monkey has the following structure | ||
* A single group on top | * A single group on top | ||
* Nested groups with mostly SVG rectangles inside. Only the three big rectangles are path objects | * Nested groups with mostly SVG rectangles inside. Only the three big rectangles are path objects. | ||
You now will have to make a few changes in the SVG file. We will describe the steps below. | |||
[[File:qrcode-monkey-inkstitch-2.png|400px|none|thumb|Structure of a simple QRCode Monkey SVG file]] | [[File:qrcode-monkey-inkstitch-2.png|400px|none|thumb|Structure of a simple QRCode Monkey SVG file]] | ||
'''(1) Optimize SVG''' | |||
* First, save the file as optimized SVG (Menu File -> Save as ; Select "Optimized SVG). I noticed some strange code in the SVG and when I tried to ungroup the first time, Inkscape hung. | |||
* Reopen the file (?) | |||
'''(2) Ungroup all''' | |||
* Select all | |||
* Ungroup (CTRL-SHIFT-G) at least '''three times'''. If Inkscape hangs, try | |||
* Create a layer (Menu Layer -> Add Layer) | |||
* Move all the objects into this layer (Select All, Menu Layer->Move Selected to Layer) | |||
'''(3) Transform all objects to SVG paths''' | |||
* Select all objects and transform to path (Menu Path -> Object to Path). '''This can take a while''' | |||
'''(3) Fill the objects with a color''' | |||
* Select All | |||
* Remove stroke | |||
* Define a fill | |||
'''(3) Remove three extra rectangles that are not needed''' | |||
* The three big rectangles are made of three rectangles, one of which defined the white space. Just kill it. | |||
[[File:qrcode-monkey-inkstitch-3.png|400px|none|thumb|Kill three extra rectangles]] | |||
{| | |||
|[[File:inkstitch-qrcode-400px-simple.svg|200px|none|thumb|Initial SVG]] | |||
|[[File:inkstitch-qrcode-400px-simple-3.svg|200px|none|thumb|Reorganized SVG]] | |||
|[[File:inkstitch-qrcode-400px-simple-4.svg|200px|none|thumb|Reorganized SVG with fills]] | |||
|} | |||
Revision as of 11:29, 16 June 2018
Introduction
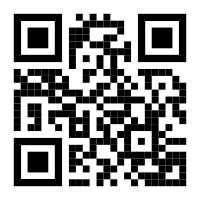
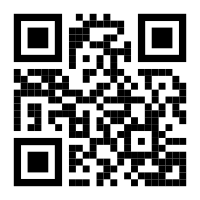
Stitching low resolution QR codes (and similar) is fairly easy, i.e. feasible if you do not plan to pack too much information into a code.
Creating a simple InkStitch QR code
(draft)
Create the QR code
There are many online and offline tools to create QR Codes
We will use the free qrcode-monkey service. I allows:
- creating qr codes in various resolutions
- addding a picture
- exporting in SVG !
The following screenshot shows the four steps required to produce a QR code image using default styles.
- Enter the contents of tag, i.e. the URL in our case
- Set the resolution. Make it low because the resolution of embroidery is not very good.
- Click "Create QR Code"
- Click SVG to export.
Create SVG embroidery
Code produced by QR Code Monkey has the following structure
- A single group on top
- Nested groups with mostly SVG rectangles inside. Only the three big rectangles are path objects.
You now will have to make a few changes in the SVG file. We will describe the steps below.
(1) Optimize SVG
- First, save the file as optimized SVG (Menu File -> Save as ; Select "Optimized SVG). I noticed some strange code in the SVG and when I tried to ungroup the first time, Inkscape hung.
- Reopen the file (?)
(2) Ungroup all
- Select all
- Ungroup (CTRL-SHIFT-G) at least three times. If Inkscape hangs, try
- Create a layer (Menu Layer -> Add Layer)
- Move all the objects into this layer (Select All, Menu Layer->Move Selected to Layer)
(3) Transform all objects to SVG paths
- Select all objects and transform to path (Menu Path -> Object to Path). This can take a while
(3) Fill the objects with a color
- Select All
- Remove stroke
- Define a fill
(3) Remove three extra rectangles that are not needed
- The three big rectangles are made of three rectangles, one of which defined the white space. Just kill it.


