Stitch Era - photo-stitching: Difference between revisions
| Line 80: | Line 80: | ||
== Photostitching areas == | == Photostitching areas == | ||
(this section needs to be updated from Stitch Era 11) | (this section needs to be updated from Stitch Era 11 or just be killed .....) | ||
Instead of creating a single photo-stitch for a picture you also could photo-stitch individual areas. I don't know if the tool was meant for that, but you can do it anyhow. Of course you may combine photo-stitch with other digitizing. E.g. you could photo-stitch a background and then do the rest "normally". | Instead of creating a single photo-stitch for a picture you also could photo-stitch individual areas. I don't know if the tool was meant for that, but you can do it anyhow. Of course you may combine photo-stitch with other digitizing. E.g. you could photo-stitch a background and then do the rest "normally". | ||
| Line 110: | Line 110: | ||
'''Result''' (first attempt - no contrast adjusted) | '''Result''' (first attempt - no contrast adjusted) | ||
[[image:tecfa-logo-photo-stitch-4.jpg|thumb|400px|none]] | [[image:tecfa-logo-photo-stitch-4.jpg|thumb|400px|none]] | ||
== Links == | == Links == | ||
* [https://www.advanced-embroidery-designs.com/projects/guide_photostitch_lesson3.html Lesson 3 Multi-Color Photo Stitch Designs], retrieved oct 2017. | * [https://www.advanced-embroidery-designs.com/projects/guide_photostitch_lesson3.html Lesson 3 Multi-Color Photo Stitch Designs], retrieved oct 2017. | ||
Latest revision as of 19:32, 4 October 2017
Introduction
This beginner's tutorial for the Stitch Era embroidery software tries to explain how to create embroidery from photos through a method called photo-stitching.
Not to be confounded with Image stitching where a series of photos is stitched together to form a panorama picture.
- Tutorial home page
- Stitch Era embroidery software
- Learning goals
- Be able to select and prepare a photo-stitchable image
- Translate a picture
- Prerequisites
- Stitch Era embroidery software (in particular be able to create a new design).
- Stitch Era - creating embroidery from raster images
- Related pages
- none
- Materials
- You can reuse the pictures. In the wiki, click on picture to make it larger, then click again and save it.
- Quality and level
- Rough draft !
- Last major update
- Oct 2017.
Selecting a good picture
This procedure only works with a certain type of pictures
- The picture should have good contrasts. Ideally, colors of image sections should be solid and therefore it's a good idea to reduce colors.
- Its size should be between 10cm (1000px width) and 16cm (1600px width). Smaller will not work (there should be at least 5 pixels / mm) and bigger will run out of memory.
- The foreground (i.e. the object and its features to be identified in an embroidery) should well stand out.
Procedure for creating a medaillon
Enhance contrasts
- In a first step, try to enhance contrasts. In particular make sure that the foreground stands out as well as distinctive features of the foreground
- I suggest playing with contrast, saturation and brightness
- then reduce colors.
Create a digitized area
Select the picture, then enter photo stitching
- Select the picture
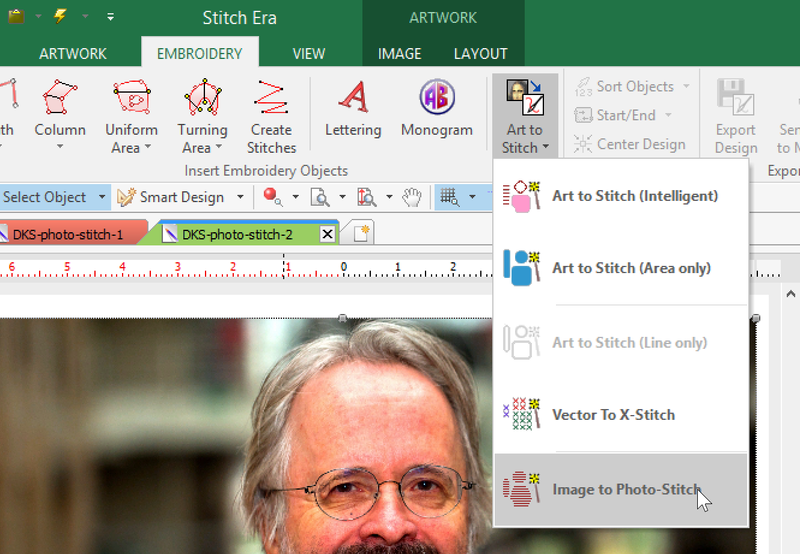
- EMBROIDERY tab, select Art to Stitch -> Image to Photo-Stitch
Select an area
As soon as you land in the "Area" tab you must select an area of the picture that will be stitched. You can choose to select a single area or several. Not selecting an area will not work. If you want to try digitizing a whole picture, just draw a rectangle from the Shape tool.
By default you will be able to select an area from the picture (click, click, click, .... and right-click accept). Alternatively, use a simple form in the Shapes menu to select an area, e.g. an oval, the click on Confirm and Edit
Before hitting confirm and Edit, you also could change parameters, but we suggest doing this later since you may need several attempts anyhow.
Play with the photo stitch parameters
Either in the ribbon panel on top or in the object manager, you now can play with all sorts of parameters. Before doing, so, untick Auxiliar on top right, so that you can better see the stitches. Hit F9 if you turned off automatic stitch generation.
Several parameters can be adjusted (hit F9 after each change if necessary)
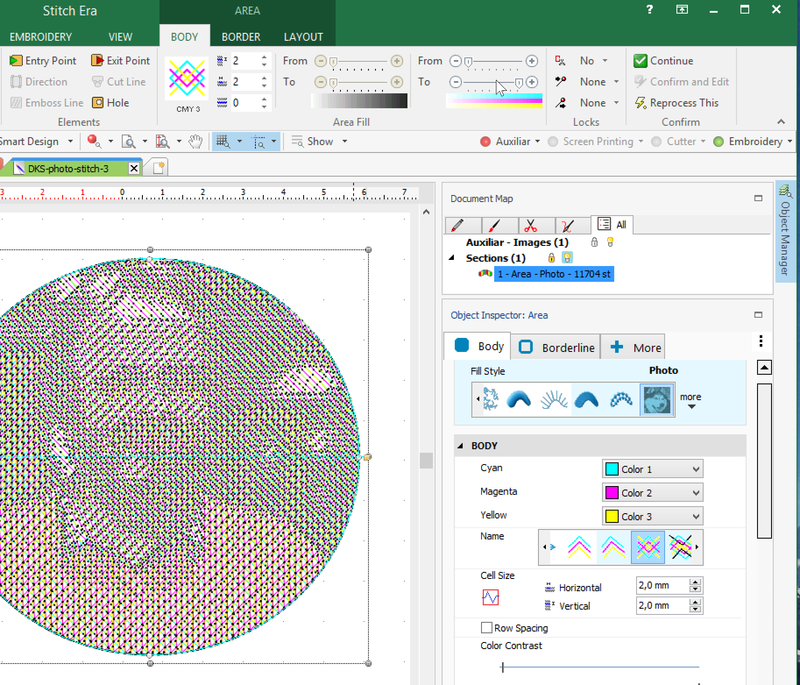
- Body pattern: You can choose between several color (Cyan-Magenta-Yellow-(Black) or white and black combinations. You even could exchange these base colors by others.
- Stitch "cell" size, Both horizontal and vertical length can be adjusted. By default 2mm are used. In addition you could adjust the "line spacing" (row) size. It should not be too large (default is 0mm, i.e. there will be no empty space.
- Color contrast: Defines how color bands will be translated to stitches. I do not really understand how this works.
- Black Contrast (for either B/W por CMYK models): Black color will be added in the range of "darkness" defined by "From" to "To", i.e. the area between the two sliders.
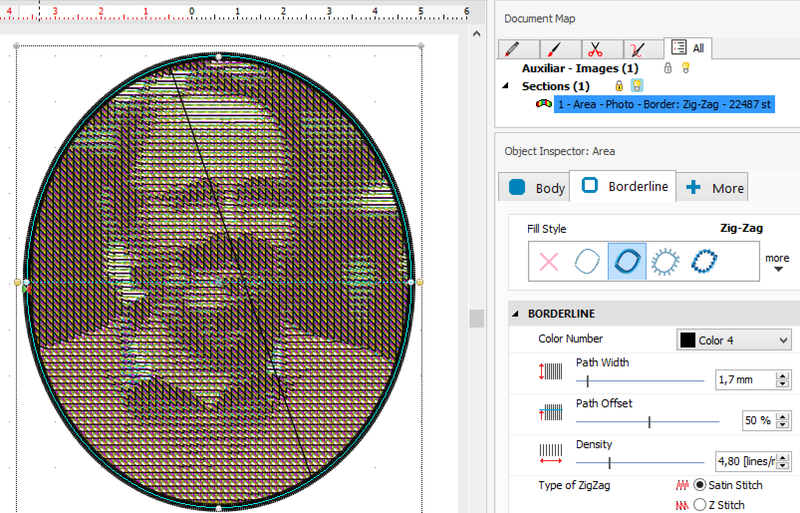
In addition, you could change other parameters, e.g. add a border line.
Photostitching areas
(this section needs to be updated from Stitch Era 11 or just be killed .....)
Instead of creating a single photo-stitch for a picture you also could photo-stitch individual areas. I don't know if the tool was meant for that, but you can do it anyhow. Of course you may combine photo-stitch with other digitizing. E.g. you could photo-stitch a background and then do the rest "normally".
Import the picture and open the photo-stitch tool as explained above and (optionally define some settings:
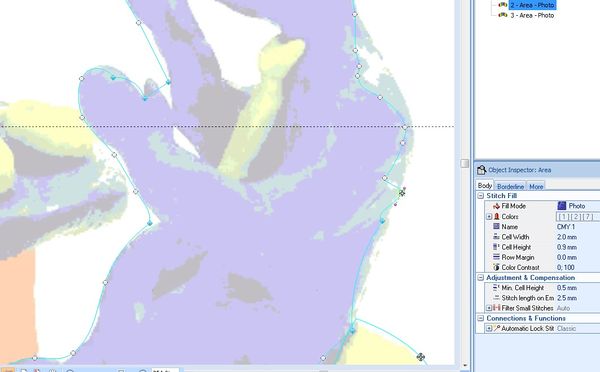
- In the very left of the Area fill tab you can select the color model, i.e. various variants of black and white, C-M-Y, or C-M-Y-black. In our example, we used Cyan, Magenta and Yellow, more precisely CMY 1. "1" stands for the order of printing, i.e. yellow last and cyan first. Stitch Era will then use different amounts of C-M-Y thread for each digitized section.
- To the right of the same tab you can adjust color contrast:
- Move both From and To a bit to the right. I would try 30 and 50 for starters. If you don't do this, all your sections might sort of look yellow for CMY-1. You can later tune each section that you created, either through the ribbon panel or the object inspector.
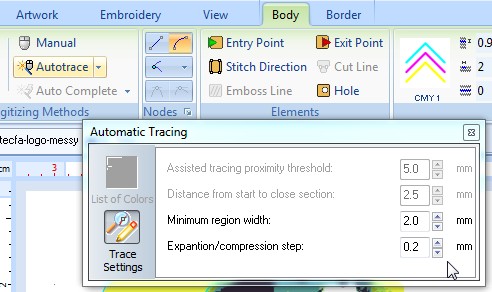
You now could manually trace areas to be stitched and also manually define entry points, exit points and stitch direction. However, we chose to work with autotrace, a procedure that also will insert the necessary entry and exit points.
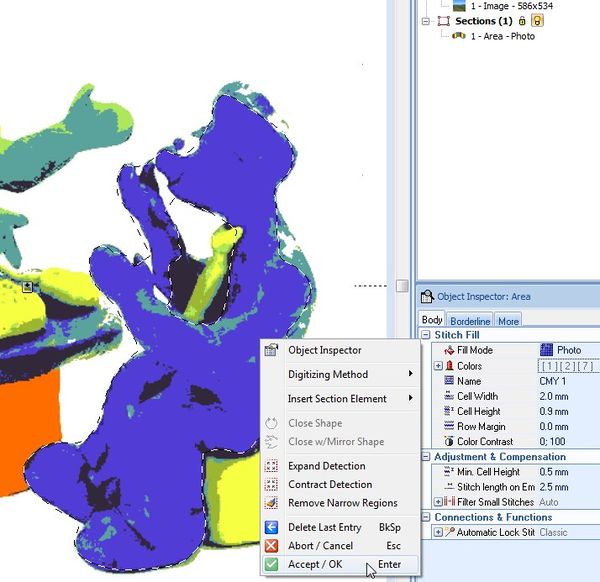
- Click on the Autotrace button (to left). This will only work with pictures that have reduced colors.
- Click on some area with a given color
- Right-click. You have several options, in particular: Accept, Abort or expand. Expand will widen the selected image.
You can change the increment in the Autotrace pull-down menu. E.g. for such a small picture, we set this to 1mm.
As with all stitch sections, you can adjust these. So do not worry if you are unable to select what you consider to be an area. Just modify, delete, insert and adjust nodes like you learned before.
Of course, you now also could change the fill mode to another photo-stitch mode or even make it a normal area fill. We suggest to make the following changes:
- Adjust color contrasts
- Maybe (not tested) change thread colors for some areas, i.e. use another photo stitch fill type.
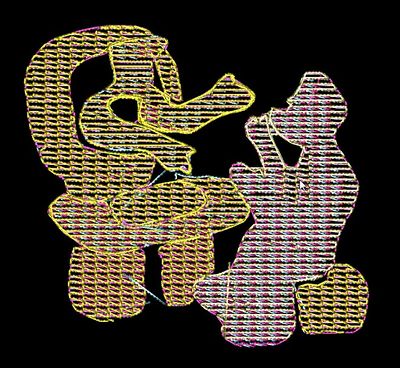
Result (first attempt - no contrast adjusted)
Links
- Lesson 3 Multi-Color Photo Stitch Designs, retrieved oct 2017.
