InkStitch - QR code embroidery: Difference between revisions
mNo edit summary |
mNo edit summary |
||
| (15 intermediate revisions by the same user not shown) | |||
| Line 1: | Line 1: | ||
{{syllabus | {{syllabus | ||
|is_part_of_syllabus= | |is_part_of_syllabus=Machine embroidery | ||
|is_part_of_module=InkStitch | |is_part_of_module=InkStitch | ||
|do_not_show_sub_page=No | |do_not_show_sub_page=No | ||
|page_previous=InkStitch - embroidery patch | |page_previous=InkStitch - embroidery patch | ||
|page_next= | |page_next=InkStitch - lettering | ||
|status=draft | |status=draft | ||
|last_modification=2018/06/05 | |last_modification=2018/06/05 | ||
|objective=Create | |objective=Create QR codes in SVG format | ||
Adapt the SVG for stitching | |||
|difficulty=intermediate | |difficulty=intermediate | ||
| | |prerequisite=Inkscape,InkStitch - basic use | ||
|see_also=Computerized embroidery | |see_also=Computerized embroidery | ||
|cat_syllabus=InkStitch | |cat_syllabus=InkStitch | ||
}} | }} | ||
== Introduction == | == Introduction == | ||
| Line 35: | Line 32: | ||
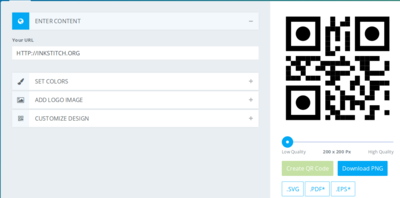
The following screenshot shows the four steps required to produce a QR code image using default styles. | The following screenshot shows the four steps required to produce a QR code image using default styles. | ||
# Enter the contents of tag, i.e. the URL in our case | # Enter the contents of tag, i.e. the URL in our case. It is '''very recommended''' to put the URL in upper case (not yet done below). This will create a much simpler QR tag, i.e. much easier to stitch ! | ||
# Set the resolution. | # Set the resolution. You can make it low to have an approximately "good" size. E.g. 400px is about 8cm. Resolution quality (amount of information) will not be affected). | ||
# Click "Create QR Code" | # Click "Create QR Code" | ||
# Click SVG to export. | # Click SVG to export. | ||
[[File:qrcode-monkey-inkstitch-1.png|400px|none|thumb|Create a default-styled low resolution QR code]] | |||
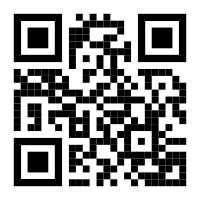
The following picture shows a lower case URL: https://inkstitch.org | |||
[[File:qrcode-monkey-inkstitch-1.png|400px|none|thumb|Create a default-styled low resolution QR code with lower case URL]] | |||
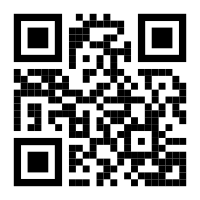
The next one a UPPER case URL: HTTP://INKSTITCH.ORG. We also use circles instead of squares in the eyes | |||
[[File:qrcode-monkey-inkstitch-1b.png|400px|none|thumb|Create a low resolution QR code with UPPER case URL]] | |||
=== Create SVG embroidery === | === Create SVG embroidery === | ||
| Line 74: | Line 76: | ||
[[File:qrcode-monkey-inkstitch-3.png|400px|none|thumb|Kill three extra rectangles]] | [[File:qrcode-monkey-inkstitch-3.png|400px|none|thumb|Kill three extra rectangles]] | ||
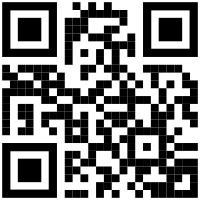
For your information, below are snapshots of the SVG in various stages. | |||
{| | {| | ||
|[[File:inkstitch-qrcode-400px-simple.svg|200px|none|thumb|Initial SVG]] | |[[File:inkstitch-qrcode-400px-simple.svg|200px|none|thumb|Initial SVG]] | ||
| Line 82: | Line 85: | ||
=== Result === | === Result === | ||
( | This QR tag is rather big (10.5cm). It is possible to reduce this by 50%. Below we created a 9cm version. Owners of multi-needle machines should consider using the TRIM version. If you want to stop to work on a multi-needle machine, you may have to export to DST. It is just needed after the first positioning circle so that you can place the patch into the hoop. | ||
{| | |||
|[[File:inkstitch-qrcode-9cm-simple-5.svg|200px|none|thumb|Ink/Stitch QR code, stitchable SVG]] | |||
|[[File:inkstitch-qrcode-9cm-simple-5.jpg|200px|none|thumb|Simulation]] | |||
|[[File:inkstitch-qrcode-9cm-simple-trims-5.svg|200px|none|thumb|Ink/Stitch QR code, stitchable SVG with trims]] | |||
|[[File:inkstitch-qrcode-9cm-simple-trims-5.jpg|200px|none|thumb|Simulation with trims (DST File)]] | |||
|} | |||
== Creating patches with QR codes == | |||
(soon) | |||
== Other examples == | |||
In the past, our students did stitch smaller QR tags without problems. But they did add some pull compensation. The [https://edutechwiki.unige.ch/fr/STIC:STIC_IV_(2017)/Break_the_ice_with_embroidery Break the Ice With embroidery] project (in french) produced the following. | |||
<gallery widths=320px heights=320px> | |||
Image:Breaktheice-broderies-recto.jpg|Patch côté animaux | |||
Image:Breaktheice-broderies-verso.jpg|Patch côté QR codes | |||
</gallery> | |||
== Copyright modification == | |||
Contents of this page including pictures and SVG files are also available under the [http://en.wikipedia.org/wiki/Wikipedia:Text_of_the_GNU_Free_Documentation_License GNU Free Documentation License] and the [https://creativecommons.org/licenses/by/4.0/ Attribution 4.0 International (CC BY 4.0)] license. | |||
The [https://github.com/lexelby/inkstitch/i Inkstitch project] can use any element (text fragments, SVG files, pictures) for the project's official docs without giving attribution (just copy and paste). | |||
Latest revision as of 21:05, 26 June 2018
Introduction
Stitching low resolution QR codes (and similar) is fairly easy, i.e. feasible if you do not plan to pack too much information into a code.
Creating a simple InkStitch QR code
(draft)
Create the QR code
There are many online and offline tools to create QR Codes
We will use the free qrcode-monkey service. I allows:
- creating qr codes in various resolutions
- addding a picture
- exporting in SVG !
The following screenshot shows the four steps required to produce a QR code image using default styles.
- Enter the contents of tag, i.e. the URL in our case. It is very recommended to put the URL in upper case (not yet done below). This will create a much simpler QR tag, i.e. much easier to stitch !
- Set the resolution. You can make it low to have an approximately "good" size. E.g. 400px is about 8cm. Resolution quality (amount of information) will not be affected).
- Click "Create QR Code"
- Click SVG to export.
The following picture shows a lower case URL: https://inkstitch.org
The next one a UPPER case URL: HTTP://INKSTITCH.ORG. We also use circles instead of squares in the eyes
Create SVG embroidery
Code produced by QR Code Monkey has the following structure
- A single group on top
- Nested groups with mostly SVG rectangles inside. Only the three big rectangles are path objects.
You now will have to make a few changes in the SVG file. We will describe the steps below.
(1) Optimize SVG
- First, save the file as optimized SVG (Menu File -> Save as ; Select "Optimized SVG). I noticed some strange code in the SVG and when I tried to ungroup the first time, Inkscape hung.
- Reopen the file (?)
(2) Ungroup all
- Select all
- Ungroup (CTRL-SHIFT-G) at least three times. If Inkscape hangs, try
- Create a layer (Menu Layer -> Add Layer)
- Move all the objects into this layer (Select All, Menu Layer->Move Selected to Layer)
(3) Transform all objects to SVG paths
- Select all objects and transform to path (Menu Path -> Object to Path). This can take a while
(3) Fill the objects with a color
- Select All
- Remove stroke
- Define a fill
(3) Remove three extra rectangles that are not needed
- The three big rectangles are made of three rectangles, one of which defined the white space. Just kill it.
For your information, below are snapshots of the SVG in various stages.
Result
This QR tag is rather big (10.5cm). It is possible to reduce this by 50%. Below we created a 9cm version. Owners of multi-needle machines should consider using the TRIM version. If you want to stop to work on a multi-needle machine, you may have to export to DST. It is just needed after the first positioning circle so that you can place the patch into the hoop.
Creating patches with QR codes
(soon)
Other examples
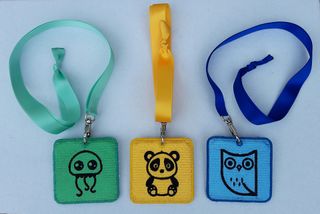
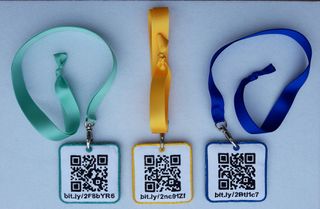
In the past, our students did stitch smaller QR tags without problems. But they did add some pull compensation. The Break the Ice With embroidery project (in french) produced the following.
Copyright modification
Contents of this page including pictures and SVG files are also available under the GNU Free Documentation License and the Attribution 4.0 International (CC BY 4.0) license.
The Inkstitch project can use any element (text fragments, SVG files, pictures) for the project's official docs without giving attribution (just copy and paste).

