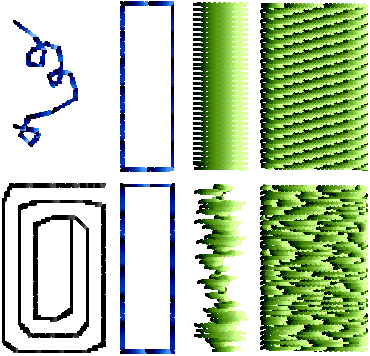
Data visualization with machine embroidery: Difference between revisions
mNo edit summary |
m (→Links) |
||
| (10 intermediate revisions by the same user not shown) | |||
| Line 4: | Line 4: | ||
|do_not_show_sub_page=No | |do_not_show_sub_page=No | ||
|page_previous=InkStitch - data visualization | |page_previous=InkStitch - data visualization | ||
|status=draft | |status=draft | ||
|objective= | |objective=Understand basic machine embroidery principles, | ||
|difficulty= | Understand design and stitch workflow, | ||
Use basic Ink/Stitch functionality | |||
|difficulty=intermediate | |||
|prerequisite=Inkscape | |||
}} | }} | ||
'''Materials for a 90 min. crash course''' targeting a technical audience. | |||
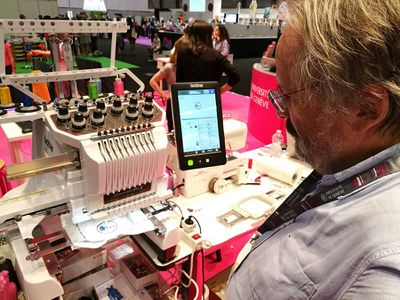
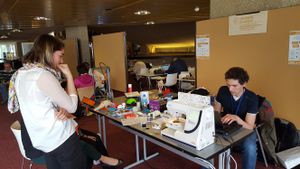
[[file:Brother-salonlivre2018.jpg|right|400px|thumb|PR1050X and me @ Geneva book fair 2018]] | [[file:Brother-salonlivre2018.jpg|right|400px|thumb|PR1050X and me @ Geneva book fair 2018]] | ||
== Introduction == | == Introduction == | ||
This page was prepared by Daniel K. Schneider for a 75 min workshop at the [https://www.dagstuhl.de/18441 Dagstuhl Seminar 18441 on DataPhysicalization] October 28 – November 2 2018. This technical workshop introduced participants to principles of computerized embroidery and we | This page was prepared by Daniel K. Schneider for a 75 min workshop at the [https://www.dagstuhl.de/18441 Dagstuhl Seminar 18441 on DataPhysicalization] October 28 – November 2 2018. This technical workshop introduced participants to principles of computerized embroidery and we discussed its potential for data physicalization. At the end of the workshop, most participants created a (very simple) data visualization that could be stitched with any low or high-end embroidery machine. We also found out that installing InkScape on a Mac is a fairly difficult task. We may reuse this page for other crash courses. | ||
Preparation: | Preparation: | ||
* Participants should install beforehand (1) [https://inkscape.org/en/release/0.92.3/ Inkscape] (an open source drawing program) and (2) the [https://inkstitch.org/docs/install/ the InkStitch Extension]. Installation prior | * Participants should install beforehand (1) [https://inkscape.org/en/release/0.92.3/ Inkscape] (an open source drawing program) and (2) the [https://inkstitch.org/docs/install/ the InkStitch Extension]. Installation prior workshops is particularly recommended for Mac users, since [https://inkscape.org/en/release/0.92.2/mac-os-x/107/dmg/dl/ the installation is a bit more difficult]. | ||
Program summary: | Program summary: | ||
| Line 181: | Line 183: | ||
{| | {| | ||
|- | |- | ||
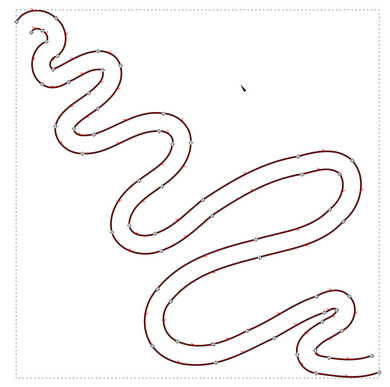
|[[File:inkstitch-satin-intro-5.svg | |[[File:inkstitch-satin-intro-5.svg|thumb|300px|none|A simple stroke (before)]] | ||
|[[File:inkstitch-satin-intro-5b.svg | |[[File:inkstitch-satin-intro-5b.svg|thumb|300px|none|A simple satin column]] | ||
|} | |} | ||
| Line 239: | Line 241: | ||
== Links == | == Links == | ||
* [[InkStitch - data visualization]] Our own explorations in data visualization through embroidery. As of 2024, the task would be much easier than in 2018 when this article was written. | |||
* [https://edutechwiki.unige.ch/en/Machine_embroidery Machine embroidery] (Tutorials made by DKS and his students). | * [https://edutechwiki.unige.ch/en/Machine_embroidery Machine embroidery] (Tutorials made by DKS and his students). | ||
| Line 245: | Line 249: | ||
* [http://Inkstitch.org Ink/Stitch] Project home page | * [http://Inkstitch.org Ink/Stitch] Project home page | ||
* He, T., Isenberg, P., & Isenberg, T. (2023). Data Embroidery with Black-and-White Textures. arXiv preprint arXiv:2309.02864. https://www.researchgate.net/publication/373714923_Data_Embroidery_with_Black-and-White_Textures/fulltext/64f93dc205a98c1b63f7d6ba/Data-Embroidery-with-Black-and-White-Textures.pdf | |||
[[category:Physicalization]] | |||
Latest revision as of 21:43, 13 June 2024
Materials for a 90 min. crash course targeting a technical audience.
Introduction
This page was prepared by Daniel K. Schneider for a 75 min workshop at the Dagstuhl Seminar 18441 on DataPhysicalization October 28 – November 2 2018. This technical workshop introduced participants to principles of computerized embroidery and we discussed its potential for data physicalization. At the end of the workshop, most participants created a (very simple) data visualization that could be stitched with any low or high-end embroidery machine. We also found out that installing InkScape on a Mac is a fairly difficult task. We may reuse this page for other crash courses.
Preparation:
- Participants should install beforehand (1) Inkscape (an open source drawing program) and (2) the the InkStitch Extension. Installation prior workshops is particularly recommended for Mac users, since the installation is a bit more difficult.
Program summary:
- Workflow(s) of computerized embroidery (10 min)
- Typology of embroidery stitch types (5min)
- Physical constraints (resolution, layers, tissue, size, etc.) (5 min)
- Hands-on: Using InkStitch (a free extension to the free Inscape program) (40 min)
- Hands-on: Generating, importing and adopting appropriate SVG graphics (30 min)
Motivation for using embroidery in education
(5m)
Affordances (for me)
- Medium to teach: programming (Brady, 2017), vector drawing, mathematics, art, environmental issues, etc. (STEAM)
- "Doing" stimulates problem solving, planning, cooperation, and develops metacognitive skills (Blikstein, 2013).
- There is a demand for design thinking, design skills (Barlex, 2011).
- Teachers (maybe) can create or adapt constructionist learning objects (Zuckerman, 2006, Schneider et al, 2017).
- It motivates because it leads to a product (Kostakis, 2015)
- It is an expressive medium for conveying ideas (e.g. data physicalisation)
Practical reasons
- Machine embroidery is working technology (since the 19th century)
- It does not pollute much
- People like it and seem to like learning it. Data from a science faire outreach event:
- N=78 (M_age=18.10, SD_age=14.18, 47 F).
- On a 7-point scale, mean interest of embroidery activity = 6,91 SD=0.29.
My experience so far
- One class with the topic of "embroidery for change" (list of student-projects)
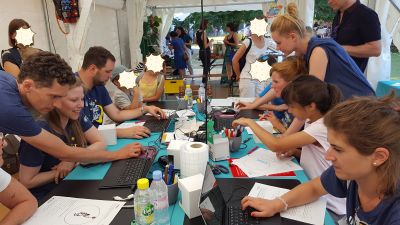
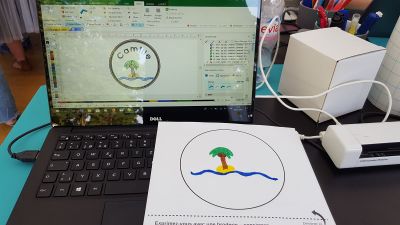
- Several outreach events (> 500 of participant-drawn badges made). In one, data collected on expected and experienced difficulty, plus interest.
- Online manuals created
- Two extended abstracts on embroidery in education directory with slides/papers
Prior to the workshop / downloads
- Participants should install beforehand:
- Inkscape (an open source drawing program)
- the InkStitch Extension. Warning. Make very sure to unzip the InkStitch archive into the extensions folder. Inkscape->Edit->Preferences->System will tell you where it is on your machine.
Installation prior to the workshop is particularly recommended for Mac users, since the installation of Inkscape is a bit more difficult, i.e. you may have to install X. Make very sure to read the instructions at the bottom of this download page after you confirmed downloading InkScape. Do not install it, before you installed XQuartz (an X Windows implementation for the Mac).
Workflow(s) of computerized embroidery
(10 min)
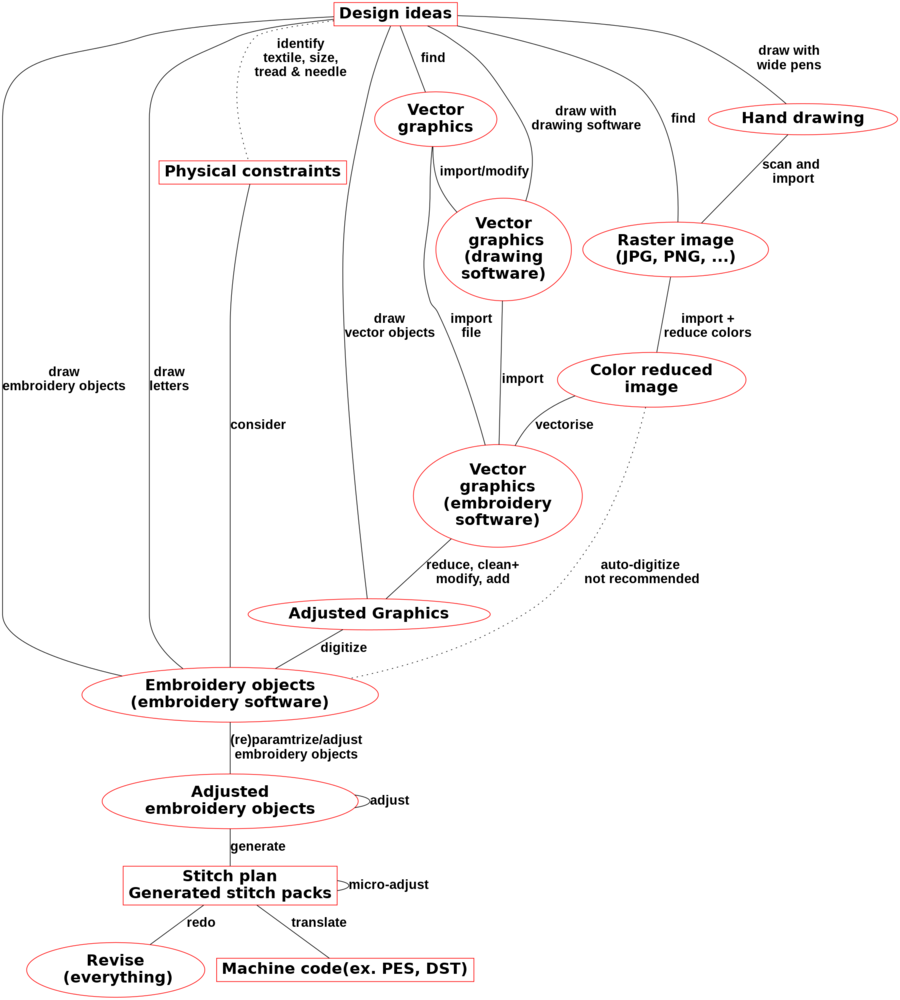
A typical "workflow" for creating an embroidery includes the following steps.
- Create a drawing (by hand or with a drawing software) or download an image
- Import the drawing into an embroidery software
- Convert to editable vector drawing format, if the drawing is in raster format
- Adapt the drawing to the constraints of the embroidery (eliminate the fine details, reduce the colors)
- Transform the drawing into "embroidery objects". An embroidery object defines an area for which embroidery stitches will be generated, according to various parameters
- Adjust / re-adjust these embroidery objects (embroidery types, stitch density, patterns, embroidery order, etc.)
- Convert to executable format for a machine brand (.pes, .art, .jef, .dst etc.)
- Stabilize and hoop the fabric.
- Stitch the design (load it into a machine)
Typology of embroidery stitch types
(5min)
We could distinguish five main stitch types:
- Manual stitches, mostly used to fix some automatically generated stitches
- Running stitches, mostly used for stitching lines or outlines
- Satin stitches are used to stitch wider lines and so-called columns (narrow areas). Typically, a dense zigzag stitch is used.
- Fill stitches, based on a regular pattern are used to fill in larger areas, i.e. polygons that may have holes
- Programmable or specialty stitches can define any sort of imaginable filling strategy, e.g. cross-stitches, radial stitches, little stars...
In addition there some auxiliary stitches:
- Jump stitches (i.e. no stitches), to get from one point to another. Those can be manually cut away once the machine has embroidered the pattern.
- Lock stitches should be used at the end of all elements (in particular columns and fills)
Embroidery machines and physical constraints (resolution, layers, tissue, size, etc.)
(5 min)
- A tissue is fixed within a frame that moves in X/Y direction while a needle goes up and down (same needle mechanism as a sewing machine)
- Size of embroidery is limited to size of embroidery frames, e.g. 14.0 x 20.0 cm on a smaller machine. Semi-professional machines can do more, e.g. 36.0 x 20.0cm, but large embroidery is very time-consuming and tricky.
- Smallest resolution is about 1/4 mm, i.e. a typical sating stitch or fill pattern uses 4-5 threads / mm.
- Tiny letters are ugly
- Most fabrics need to be stabilized during embroidery
- T-shirts and other elastic tissues are difficult (need a permanent stabilizer)
- You should not stitch more than three layers. Even two layers is too much most of the times.
- You cannot fill large surfaces. Use some programmable stitch for that.
Hands-on: Using InkStitch (a free extension to the free Inscape program)
(40 min)
Basic use
(1) Draw an object, e.g. a circle
(2) Keep either stroke or path (not both).
Menu Object -> Fill and Stroke. Look at the tabs (fill, stroke paint, stroke type)!- If you need both fill and stroke, duplicate the object and keep the fill of one and the stroke of the other
(3) Transform the object to an SVG path object (InkStitch only can deal with <path d=..../>
Menu Path -> Object to Path
(4) Adapt / parametrize the object (see below for details)
Extensions -> Ink/Stitch -> English -> Params
(5) Simulate, print or create a stitch file
- Simulation: Menu
Extensions -> Ink/Stitch -> English -> Simulate
- PDF file with visualisation: Menu
Extensions -> Ink/Stitch -> English -> Print
- Create a stitch file: Menu
Extensions -> Ink/Stitch -> English -> Embroidery. Alternatively, you also can usemenu file -> Save a copy - Tip: after using the embroidery command, you will have to unhide drawing layers. In the same way, do not create an InkStitch file from the Stitch Plan
Create running stitches
- Use or draw a line
- Make it dotted (
Object->Fill and stroke; Stroke style tab -> Dashes) - Select this object and parametrize (e.g. multiply the stitches)
Create fills
- Use any fill area (again: we suggest removing the stroke). Make sure to translate to path.
- Select this object and parametrize:
Extensions -> Ink/Stitch -> English -> Params. - Set angle (direction of stitched lines)¨
- Define an underlay (tick the box in the tab)
Satin stitch principles
Satin stitches are the "essence " of embroidery. Unfortunately a little bit more difficult to do.
- Default zigzag stitch for fat strokes is ugly. Avoid using it.
A satin column is defined by:
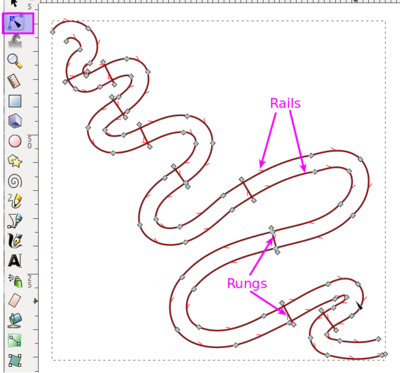
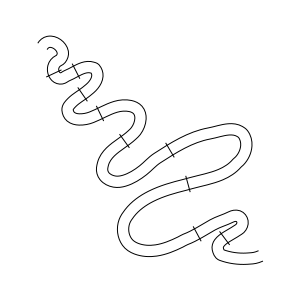
- A single SVG path, also called rail
- Containing two sub-path lines that go in the same direction
- The two sub-paths must have either an identical number of nodes or rungs
Getting such a path can be a bit difficult, in particular if you start from a polygon contour. In these cases, convert the stroke to path, remove the fill, adjust stroke size, cut the lines, and reverse the direction of one of the rails. So let's do something simpler, i.e. create a satin stitch from a line.
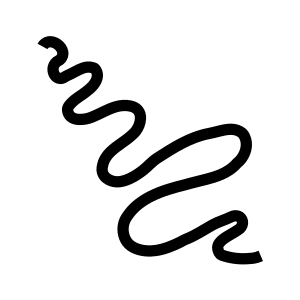
Create a satin stitch from a line
- Draw a line that has a good width for satin stitches, e.g. between 2 and 6mm. Also, the line cannot have overlaps. E.g.
Draw freehand line(F6) Icon in the toolbar to the left- Smooth it: CTRL-L
- Adapt thickness (Fill and Stroke, Stroke style tab)
- Select this object (verify that it is a stroke and not a shape with stroke and fills)
- Use the
Extensions->Ink/Stitch->English->Convert line to Satincommand.
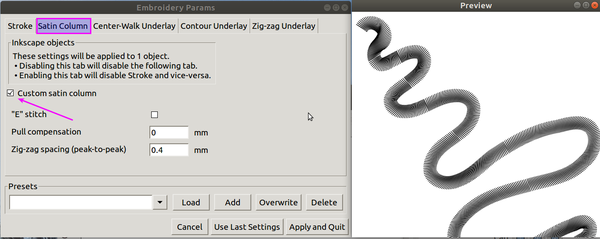
- Parameterize as satin column: Extensions->Embroidery->Params
- Select the Satin Column tab
- Tick
Custom satin column
- If you are not happy with the stitch directions, add some extra rungs:
Edit path tool(F2), hold SHIFT key and draw lines that intersect both rails. With the free hand tool: SHFIT click + SHIFT click
Tip:
- The old object will be destroyed.
- We suggest making a copy of it and putting it in a separate "Artwork" layer.
Create other forms of satin stitches
Just make sure to have a single path with two long lines that
- do not cross over themselves
- do go in the same direction
- have rungs
Tip: Use Path->Combine to combine two lines into a single path,
Examples can be found here
- https://edutechwiki.unige.ch/en/InkStitch_-_satin_columns
- https://edutechwiki.unige.ch/en/InkStitch_-_from_satin_columns_to_fills_with_satin_borders
Example code
Hands-on: Generating, importing and adopting appropriate SVG graphics
(30 min)
There are three major resources for SVG graphics
- http://openclipart.org (make sure to select simple graphics and that will "flatten" imported objects
- https://thenounproject.com/ (icons)
- Visualization programs that can export to SVG, e.g. highcharts, that I used to explore (simple, ugly) data visualizations.
Before importing, understand that:
- Embroidery resolution is low
- You cannot stitch more than 2 layers
- Ink/Stitch cannot handle weird geometry (non polygons like a figure 8)
Some operations that can help:
Menu Object -> Break apart- Various subtractive geometry operations, e.g.
Path -> Difference
Highchart examples:
- https://edutechwiki.unige.ch/en/InkStitch_-_data_visualization
- https://codepen.io/danielkschneider/pen/NBQjGg
- https://codepen.io/danielkschneider/pen/bxeOqp
- https://codepen.io/danielkschneider/pen/qMBrKx
- ... etc. Rather take examples from the EduTechWiki page
Links
- InkStitch - data visualization Our own explorations in data visualization through embroidery. As of 2024, the task would be much easier than in 2018 when this article was written.
- Machine embroidery (Tutorials made by DKS and his students).
- French version: Guide tutoriels de broderie machine (but as of oct 2018, InkStitch is not documented. It will be)
- Ink/Stitch Project home page
- He, T., Isenberg, P., & Isenberg, T. (2023). Data Embroidery with Black-and-White Textures. arXiv preprint arXiv:2309.02864. https://www.researchgate.net/publication/373714923_Data_Embroidery_with_Black-and-White_Textures/fulltext/64f93dc205a98c1b63f7d6ba/Data-Embroidery-with-Black-and-White-Textures.pdf
