Flash CS3 embedded movie clip tutorial

This tutorial is outdated. It was made for (older) CS3
New version: Flash embedded movie clip tutorialOverview
- Learning goals
- Learn about how to create embedded movie clips
- Learn how to start/stop these clips with ActionScript assignments)
- Learn how to use movie clips multiple times
- Prerequisites
- Flash drawing tutorial
- Flash motion tweening tutorial
- Flash component button tutorial
- Some ActionScript, e.g. ActionScript 3 interactive objects tutorial to understand the examples towards the end.
- Moving on
- More Interactivity, e.g. Flash drag and drop tutorial
- The Flash tutorials index has a list of other tutorials.
- Level and target population
- It aims at beginning Flash designers. Embedded movie clips are used in various other tutorials, but here we explain it a bit more systematically.
- Quality
- This text should technical people get going and may not be good enough for self-learning beginners. It can be used as handout in a "hands-on" class. That is what Daniel K. Schneider made it for...
Movie clips are Flash animations. In a *.fla file you can have several kinds of embedded movie clips behaving in a similar way.
- Movie symbols (and instances). That's the main topic of of this tutorial.
- Movie clips (and instances) that were imported as *.swf files. Not really recommended.
- Compiled movie clips imported through the *.swc format
The goal of having such embedded animations is to create animations of "moving/changing" objects that are independent of the flow of the main timeline. You may have seen such embedded animations in other tutorials, e.g. in the Flash motion tweening tutorial. The new thing is that you should learn how to play/stop and make visible/invisible these clips.
Creation and manipulation of embedded movie clips
Creation of an embedded movie clip
Let's now look a how to create flash movie clips within flash files.
To create a new movie clip within a flash animation file do the following:
- Menu Insert->New Symbol
- Select Movie Clip and give a good name
Alternatively you also can transform an existing graphic into a movie clip symbol
- Draw an object on the stage
- right-click->Create Movie Symbol. Select Movie Clip
Finally you also change the nature of symbols. E.g. to transform a graphic symbol into a movie clip:
- Right-click on the symbol in the library, select "symbol properties" and change it.
The reference and center points
- Each movie clip has a Registration point, i.e. it defines what the x and y coordinates mean for a given object (e.g. upper left or middle). This registration point is defined by the little cross (+ sign). You can define the registration point when you create the new movie symbol. Click on a different square next to "Registration" if you don't to use the default (either upper left or your previous choice). See the screen capture below:
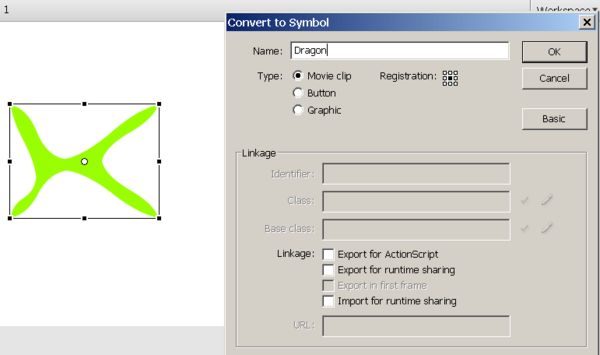
Anyhow, you later can change this reference point by moving the drawing to another place in symbol edit mode. By default a registration point is in the upper left corner. I personally like to have in the middle for objects that I will use in animations.
The white circle you can see in the middle of a movie clip is called the Center Point and has a similar function. It defines where the object will be attached to a motion guide or around which point it will rotate for example. You can move it to a different place with the Free Transform Tool.
Editing a movie clip
There are two ways to edit a movie clip:
(1) In "stand-alone" view, i.e. you only will see the components of the movie clip. Double click on the movie symbol's icon (not it's name) in the library. You now can edit, e.g. a add a motion animation or change its drawings.
(2) Edit with the scene as background. If you put an instance of the movie clip on the stage and then double-click on this instance, you can edit the same movie clip symbol, but you will see the objects of the stage while you edit. This is quite handy if you plan to create some motion animation. Below is a screen dump of a situation where we edit a movie clip symbol after double-clicking on an instance of it that sits on the stage. The scene itself is somewhat visible (picture and buttons).
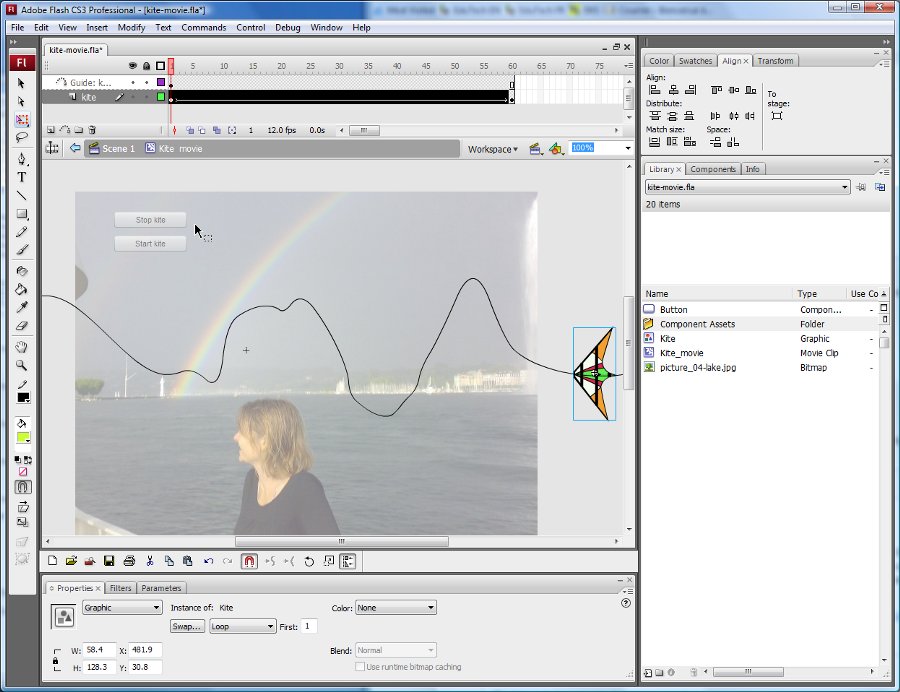
By editing a movie symbol you basically can do the all the stuff you have learnt about creating flash movies in previous tutorials, e.g. in the Flash motion tweening tutorial. In other words, movie clips have their own timeline as you can see in the above picture. There is a motion tween for the "Kite" drawing and a Motion guide layer. The whole thing is called the "Kite_movie" movie clip.
Do not forget to go back to the scene once you are done, e.g. by double-clicking on the "scene" in the edit bar (on top of the stage) or by clicking on the little "back arrow". When you edit a movie clip you are in symbol edit mode and you should not for example add navigation buttons that concern the whole scene. Make sure that you are aware at which level you edit and where to place objects !
Using a swf file as movie clip
Your whole *.fla also is a movie clip that you could in principle import to other Flash animations.
This is a copy/paste of the Reuse frame-by-frame animations as movies section in the frame-by-frame animation tutorial.
Firstly, have a look at the result, i.e. a flashing hello and little rocket with a pulsating engine. Both were made originally in separate *.fla files and then compiled (saved) to
The *.fla, *.swf and *.html files flash-cs3-rocket-hello.* as well as the imported movie clips can be found here: http://tecfa.unige.ch/guides/flash/ex/frame-by-frame-intro/
- Step 1 - Import *.swf files into the library of a new Flash file
- Create a new flash file (File->New)
- Then, import flash movies you made: File->Import->Import to library. In our example, get:
- flash-cs3-rocket.swf file
- flash-cs3-shaking-hello.swf file
You now have a nice rocket and a flashing hello in your library:
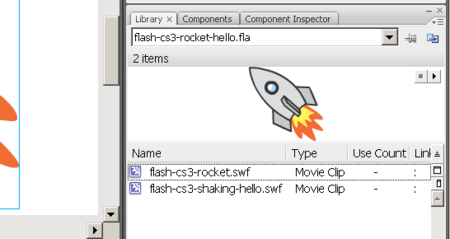
- Step 2 - Drag the symbols (movies) to the stage
- Drag the item in the library onto the stage
- Use the Free Transform tool to resize it or to rotate it (see the Flash object transform tutorial if you don't know how.
- Hold down the SHIFT key when you resize it from a corner !
Here is the result with a picture
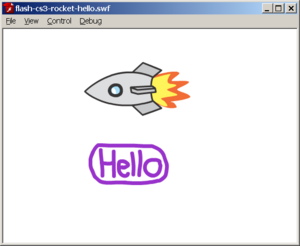
Of course, you then also could use imported movie clips within motion animations, e.g. as in this Flying rocket. Source code is flash-cs3-rocket-moving.fla
Important notice: Importing *.swf files will only work with very simple animations ! Instead of importing directly the *.swf you rather should consider the next strategy, i.e. use embedded movie clips.
Using a movie clip - principle
If you don't know how to create so-called component buttons, you should also read the Flash component button tutorial first.
See also the Flash video component tutorial for an example that uses several movie clips
If there is no instance of the movie clip on the stage, drag a movie from the library to the stage and then immediately give it an instance name. Remember that instance names must be symbols, e.g. movie_books, not something like movie of books. Use a letter, followed by other letters, numbers or the "_" sign only.
Let's assume that the instance name of a clip is movie_books. You now can use ActionScript code to do various things. For example:
- Playing a movie clip
movie_books.play();
- Stopping a movie clip
movie_books.stop();
- Making it visible or invisible
movie_books.visible=false;
movie_books.visible=true;
Tip: Movie clips start playing as soon as they are found in the current frame. E.g. if you put them in frame one, they will play forever until the main timeline moves to another frame. If this is not desired, stop the movie as you may recall from other tutorials.
- Edit the movie clip in symbol edit mode (double click)
- Add a layer called "script"
- Add this ActionScript method in frame 1.
stop();
Creating an embedded movie clip from a non-embedded animation
Let's assume that you have an interesting animation in fla file that you rather would use as a embedded movie clip.
- Step 1 - Create a new movie clip symbol
(see above)
- Let's assume that the file is called clips.fla
- Menu Insert->New Symbol
- Select Movie Clip and give a good name
You now should see a blank stage be in symbol edit mode. Hold that.
- Step 2
You can either copy full layers or just selected frames.
Copying layers
- Open the fla file with the main timeline animation.
- SHIFT-Click on each layer you want to copy
- Right-click and "Copy layers"
- Go back to your clips.fla file and right-click on layer 1 and "Paste Layers"
Copying frames (more difficult)
- Open the fla file with the timeline-based animation. Let's assume the file is called anim.fla
- Select all frames in the layers you want: Click on the first frame in the first layer, then shift-click on the last frame in the last layer you want.
- Right-click somewhere in the timeline and select Copy frames
- Now go back to your open clips.fla file (you still should be in symbol edit mode, if you are not, double-click on the new symbol in the library).
- Click in frame 1 of layer 1 of the newly created movie clip symbol
- Then Right-click and Paste frames.
Voilà, you now have an embedded movie clip. Go back to the scene.
Using a *.fla file as external library
Once you have a library of embedded movie clips you could create a library for later reuse.
- Step 1 - Create a new *.fla file
- Copy paste interesting movie clips and graphics (whatever) in the library of this fla file
- Then save the file
- Step 2 - import a *.fla file as external library
Menu File->Import->Open external library
- Step 3 - repeat
- Each time you create something of interest that you often plan to use, open the fla file file and copy/paste again.
Flying kite example
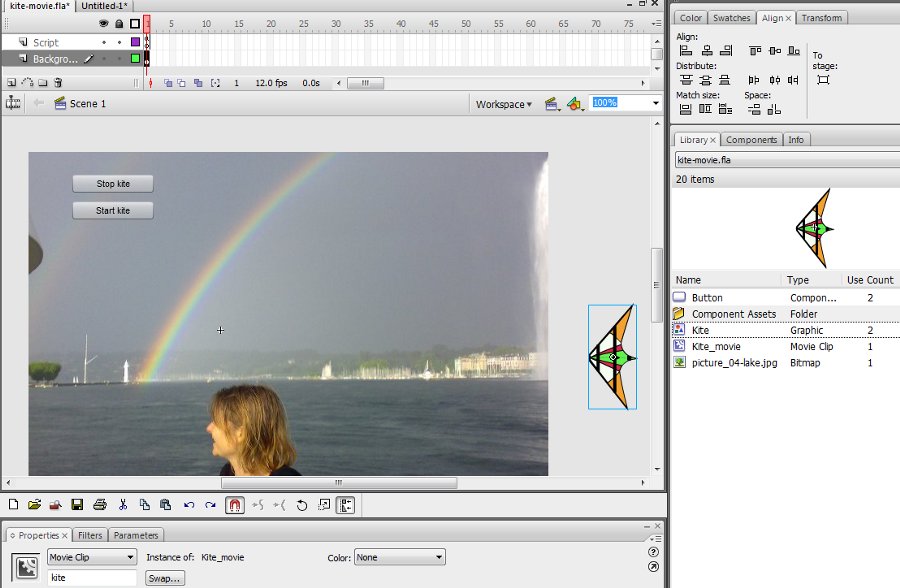
This example shows how to play and stop an embedded movie clip with a component button. Look at the flying kite application to get an idea. See also the picture above in the previous section.
- Step 1 - Create the movie clip
- Create a movie clip object as explained above
- Menu Insert->New Symbol
- Select Movie Clip and call it kite_movie
- Step 2 - Drag it to the scene and name it
- From the library drag it to the scene
- In the properties panel, select "parameters" and call it kite
You should see something like in the following screen capture:
- Step 3 - Create a guided motion tween for the movie clip
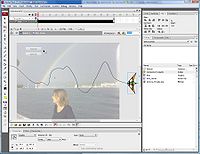
- Double click on the instance
- Then proceed as explained in the Flash motion tweening tutorial
- I.e. drag a graphic onto the stage (here we use the "Kite" graphic)
- Create a motion tween (here we use 60 frames)
- Then add a motion guide layer with a drawing
Really make sure that you exactly know at which level you edit. Look at the edit bar. It should read "kite movie".
- Step 4 - Add buttons and ActionScript code to launch / stop the animation
- Go back to the scene (e.g. click on "Scene 1" in the edit bar)
- We use two component buttons (as explained in the Flash component button tutorial)
- Each of this button has an instance name: stop_button and start_button
- Step 5 - Add the ActionScript code
- At start we tell the movie clip to stop with the instruction
kite.stop();. Else the kit will automatically start flying. - The start_button will launch the start_kite function when the user clicks on it. This function then will execute "kite.play()".
- The stop_button is programmed in the same way. Read the Flash component button tutorial if you need some more detailed explanation about the use of buttons.
kite.stop();

start_button.addEventListener(MouseEvent.CLICK,start_kite);
stop_button.addEventListener(MouseEvent.CLICK,stop_kite);

function start_kite(event:MouseEvent) {
	kite.play();
}

function stop_kite(event:MouseEvent) {
	kite.stop();
}
- Get the fla.* code and play
- kite-movie.html
- Source: kite-movie.fla
- Directory: http://tecfa.unige.ch/guides/flash/ex/embedded-movie-clips/
Exercise: Add another movie clip animation. E.g. a flying pulsating alien.
A Flash application with several movie clip animations
You can look at this example. It's a solution of a final exam of a beginner's Flash course.
This application has 5 frames. The frames hold an entry/title page and 4 other pages with animations. Each "what's going on here ??" button in the other 4 pages will launch a movie clip.
- Exercise
If you feel that you need a more substantial exercise:
- Start with the final-exam-coap2110-2007.fla file and make it look like the solution (example presented above)
- This fla *.file already includes all the artwork, the navigation buttons (that need repairing) and a script for each frame (that needs completion).
Multi-use of a movie clip for animations
Let's image that you want a sky-full of more or less the same animations. One solution is copy/paste/modify movie clips or movie clip instances. In some situations it is easier to do this with a little bit of ActionScript coding.
Flying kites example
This examples shows how to use an embedded action script movie multiple times. We want some kites flying over the same picture from right to left.
To make it bit more interesting, we randomly change for each kite:
- the position, i.e. it could be flying lower or higher
- the size of movie clip, it could change from 50 to a 100% of its original size
- the color of the movie clip, i.e. the alpha value can vary from 80 to 100%.
Have a look at the flying kites example now. If you prefer you can call it "flying bats".
- Step 1 - Create a movie clip with a motion animation
- Make sure that the animation starts a lot to the right and extends a lot to the left of the picture (since we will resize the movie clip and it become as small as half the original size).
- The movie clip in this example is called "Kite_movie", i.e. we just build on top of our previous example.
- Step 2 - Export for ActionScript
- Right click on the movie clip symbol in the library and select linkage
- Click the Export for ActionScript box
- Click on ok
- ActionScript now can "see" a movie clip defined in the library. By default, it ignores everything that sits in your library.
- Step 3 - The ActionScript code
To create new instances of a Movie clip with ActionScript and to add these to the scene, we have to do two things.
(1) Create an instance like this
kite1 = new Kite_movie();
kite2 = new Kite_movie(); // have a second one
Normally, one also could position these kites now, but see below.
kite1.x = 200;
kite1.y = 250;
.....
(2) Then add it to the scene like this
addChild(kite1);
addChild(kite2);
To play a movie clip, you can launch it with the "play" method:
kite1.play();
kite2.play();
However, in our case we have to write some more complex code, since we want to generate lots of kites. Instead of dragging kites on the stage and then name the instance of each kite, we create kite instances with ActionScript and put these into an array.
var kites:Array = new Array();
An array is variable with lots of drawers and within each we will store a kite instance. So, in order to store a kite movie clip we just go:
kites[i] = new Kite_movie();
After that we then can modify its properties a bit, e.g. change the size and the position of the movie clip.
kites[i].scaleX = Math.random() * 0.5 + 0.5;//min = 50% max = 100%
kites[i].scaleY = kites[i].scaleX;
kites[i].x = 400;
kites[i].y = Math.random() * (this.height - 240) - 100;
kites[i].alpha = Math.random() * 0.8 + 0.2;
Finally we want our kites to appear one after each other and for this we use the setInterval function. It will call the addKite function, i.e. the kite movie clip factory, after each 500 milliseconds.
setInterval(addKite,500);
The addKite function will create new kite movies, modify them, add them to stage and launch them. But it only will do it 10 times. We have a counter that will increase:
i++;
And then the test will check if i is still smaller than 10 before doing anything:
if (i<10) {
- The complete ActionScript code
var i = 0;
var kites:Array = new Array();
setInterval(addKite,500); //calls addKite every 0.5 seconds.

function addKite() {
	if (i<10) {
		kites[i] = new Kite_movie();
		kites[i].scaleX = Math.random() * 0.5 + 0.5;//min = 50% max = 100%
		kites[i].scaleY = kites[i].scaleX; // same size
		kites[i].x = 400; // movie clips start outside right hand
		kites[i].y = Math.random() * (this.height - 240) - 100;
		kites[i].alpha = Math.random() * 0.8 + 0.2;//random number between 60 and 100% alpha
		addChild(kites[i]);
		kites[i].play();
		i++;
	}
}
- Get the fla.* code and play
- kites.html
- Source: kites.fla
- Directory: http://tecfa.unige.ch/guides/flash/ex/embedded-movie-clips/
Exercise: Make a snowflakes animation that goes from top to bottom
Notice: This program is not really elegant. E.g. the addKite function will be called every 0.5 seconds. Instead we could have used a timer that creates our N kites and then stops. But this would have required more programming...
Controlling the main time line from an embedded clip
Sometimes you need to control the main timeline from inside an embedded clip. E.g. you may want move the user to another frame as a result of some interaction. To do so you will have to tell the script inside a clip that you refer to an object or a method that is directly attached to the main timeline. Use something like:
MovieClip(root).yourbutton.visible=true;
MovieClip(root).gotoAndPlay("activity_1");
MovieClip(root) in front of a property or a method basically tells Flash to go and look in the main time line instead of the current embedded clip.
In more technical terms you'll have to cast the root property into a movie clip. “.root is of type DisplayObject, and .parent is of type DisplayObjectContainer. Neither of those have multiple frames, so that’s why timeline control methods won’t work on them. All you need to do is cast root or parent to MovieClip (a subclass of both of those classes)”. (AS3: Main Timeline Control From Inside a Movie Clip, retrieved June 2007
.... this is vital "know how" for developing games and interactive educational applications where the main time line is usually just used to define various sub games/activities or maybe different states.
