CR-7 3D printer
Introduction

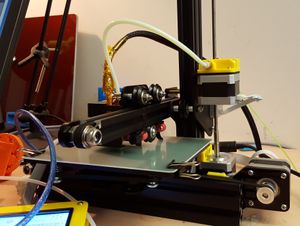
The CR-7 is a low cost 3D printer made by Creality 3D with a Ormerod Design. We got ours from EastMachinery, a Chinese online retailer. There are several offers for the same machine and I believe that we took this one. It took about a week to arrive in Switzerland and we got everything in the packaging list. Instructions were found in an included mini-SD card inserted into a USB adapter. The manuals are in English (mostly annotated pictures) and there are also videos and assembly animations. The model is also sold on Aliexpress, e.g. here.
There are several vendors that offer Ormerod models, but its inventors inventor's shop is closed (as of March 2016). However, other makes from other brands exits. For example, a more expensive version is the Bukito Portable and an other cheap one is the Freaks3D.
Specifications
- 15cm x 13cm build platform
- No heated bed, a removable sheet of plastic (what kind ? ) is included
- The extruder is a "Bowden type", it the motor is removed from the hotend.
Assembly and configuration

Assembly
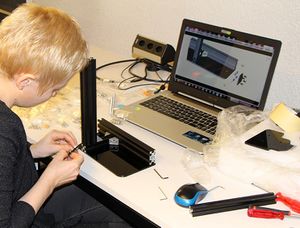
Most of the assembly was done by 2 inexperienced students during a 3D printing hack day at University of Geneva. On another day, I then tightened the assembly and adjusted a few angles. Two month later, a student calibrated the printbed. Overall, it took us 3 month to get this printer a bit going. I didn't have time and it wasn't a priority. I ordered this model out of simple curiosity: can a 250 Euro (+transport fees) printer work ? I believe that assembly and commissioning could be done in a day by an experienced maker. - Daniel K. Schneider (talk) 17:10, 3 March 2016 (CET)
Overall, compared to some other printers, assembly is fairly easy. Attention should be paid that every nut and bolt should grip and moving parts should move smoothly along the rails.
Thing to watch out for
- Make very sure that the frames are well attached and in correct angles
- Fans should blow inside (label should face inside)
- Find a better way to attach the belts (see below)
- When testing the motors make sure to be near the electric cord. You can damage the Z-axis by putting too much pressure on it.
Software installation
- A driver needs to be installed (same as for the Felix printers), i.e. on Windows for the FT232 serial to USB chip.
- The printer can be used with repetierhost and the setup is easy, i.e. define a new printer, then copy the various settings.
Slider configuration
- The nozzle seems to be an 0.4mm, so probably an extrusion width of 0.5mm could be appropriate.
Fixes
I designed (quickly) some clamps for the belts. I really didn't trust the simple plastic "gardening" clamps.
You can get them from:
- Other fixes that would require time
- A stronger extruder grip (I for now just added some washers)
- A fan to blow on the platform for cooling down PLA.
First impressions

I did the first prints with a semi-transparent PLA that is about three years old (kept in the open, i.e. outside a sealed plastic bag). This first print (a little duck) worked more or less, some layers are missing at the bottom and near the top and the head didn't come out well
The second print (cat on Lego) was ripped off the print bed, the third one (Cat on Lego) was printed on glue and had to be aborted because too many layers were missing. The cylinders underneath were ugly. Printing them slowlier, strengthening the extruder spring and using a better plastic should solve the problem.
I don't know yet if I can recommend the printer. I does print, however the absence of a heated print bed, the bowden-like extruder and the absence of a fan blowing on the bed makes this a more difficult printer to use than our much more expensive Felix Pro 1 3D printer. If someone needs a hackable cheap machine that uses standard electronics, this is certainly a good buy.
I need some time to find the right slicer settings and maybe Iwill document this later. Same for printing with other plastics, in particular ones that do not require a heated bed or a fan.
- Daniel K. Schneider (talk) 20:45, 2 March 2016 (CET)
Recommendations
Slicer settings
There are some slicer settings in the included manuals
Otherwise, since the CR-7 is very similar to Bukobot you also can be inspired there.
Other tips
- Print contours slowly
- Use glue (e.g. Pritt Power Stick) to make objects stick
- The spring on top of the extruder is very weak. IMHO there is not enough grip, so I added 4 washers between the spring and the yellow plastic (2 on each side)