InkStitch - hotfix
Principles of hotfix

Hotfix or (hotfix stones) are decorations like rhinestones, rhinestuds, nailheads, etc. that can be glued on textiles or other materials by heating them with a soldering iron, an smoothing iron or a heat press.
This article will explain how to create circular rhinestones designs with the help of InkScape and optionally Ink/Stitch.
Rhinestones are usually round flatback crystals. They have a faceted face on one side and a flatback on the opposite side with a reflective sheet of glue backing. The cheaper stones are made of acryl. At the bottom (between the stone and the glue) there is a reflective metal, e.g., aluminum, silver, or lead. The highest quality and most expensive stones are Swarovski Crystals. Affordable good quality stones are made for example by DMC in Korea.

Sizes of round flatback hotfix stones
Round rhinestones come in many different sizes.
- The most popular sizes are 4mm (16ss), 3mm (10ss) and 7mm (34ss).
- Small 3mm SS10 stones can be used fill areas or "detailed" line-based designs, but they are somewhat difficult to use.
- SS16 stones can be used like SS10's. They even allow fairly well filled lettering or other detailed forms and manipulating these is not too much of a pain. Recommended for novices as well as amateurs..
- Working with smaller ones than SS10 (3mm, e.g. SS6 (2mm) is difficult, therefore avoid !
- SS20 (4.6 to 4.8mm depending on the make) or bigger are easy to use, e.g. for large lettering or larger fills. However, you may have to adapt shapes.
Methods to work with rhinestones
We distinguish four methods:
- Method 1: Glue stones individually with a hotfix applicator on the tissue, i.e. some kind of soldering iron with and end that fits on top of a rhinestone (cheap). For positioning you could use a thin template.
- Cut out the template with a laser cutter or a cutting plotter. Glue a sheet of something (e.g. thick paper) underneath. Then fill the template with rhinestones by pouring a pile on the template and then using a brush. The stones will turn and stumble into the holes with the flatback down. You then transfer the stones to a textile using a sticky transfer sheet. Make sure to buy a rhinestone transfer sheet since the glue needs to be sticky and the sheet must be heat resistant. Thickness of template should be 0.5mm for smaller stones, but it can be higher for larger stones (e.g. SS16 and SS24). Then use a heat press, e.g. 30 seconds for 160 - 200 degrees tfor glueing.
- Method 3: Is similar to method 2. Instead of creating a template with a bottom, just glue the template with temporary glue to the textile (or make it stick otherwise), then fill, then put it in the heat press for 20 seconds at 200 degrees. Make sure that the template is not too thick. This method is recommended for small designs.
- Method 4: Buy an expensive stone setting machine that can place hotstones on a transfer sheet. Then put the transferred sheet on top of the textile into a heat press.
See the Hotfix stone for more details.
Principles of rhinestone template creation
Unless you got a stone setting machine or a lot of time to loose, you will have to create cutout templates that allow positing the stones. You can create these cutout templates with either a vinyl cutter or a laser cutter. Cutout patterns define where the cutters will create holes for the rhinestones.

We recommend using 0.5mm cardboard for SS10 and SS16 stones and 1mm cardboard for bigger ones. SS16 stones also can used with a 1mm cardboard, but filling the holes will be a bit more difficult. Cardboard can be found in arts, office or do-it-yourself shops. You also can try cardboard envelopes, photo mounting boards, etc.
For vinyl cutters, you can buy so-called template sheets, e.g. the "Rhinestone sheet set" from Brother that will also include transfer sheets. Some products allow for easier brushing, e.g. the "Magic Flock - Adhesive Rhinestone Template Material". Magic Flock is perfect for a cutting plotter but will emit toxic gases in a laser cutter ! "Sticky Flock" is another product (maybe identical). We recommend looking at products made for specific cutters and read the instructions with respect to the choice of knives etc.
Hole size
The size of the holes should a larger than the size of the stones. We recommend adding about 1mm. This is something you will have to try out. Depending on how your cutter works and the real size of the stones, some adjustments may be needed.
- SS10 (2.8 to 3mm): use 4mm
- SS16 (3.8 to 4mm): use 5mm
- SS20 (4.6 to 4.8mm): use 4.8mm
Using a template
You can either:
- Glue or tape (if possible) the template on top of the tissue, then fill it. If you tissue is flexible, do it on the heat press.
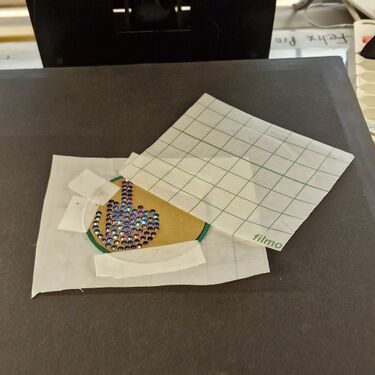
- Fill the template first, then use a transfer paper to move the stones on top of the textile. In this case, make sure that the template is sealed at the bottom (else the stones will fall through at some point when you brush them)
Filling a template
- Drop a large pile of stones on top of the template
- Use a foam to move back and forth the pile of stones until all (or most) of the holes are filled. The stones will turn and move and once the flat back is within a hole they should remain there.
- Use tweezers to fill in the rest.
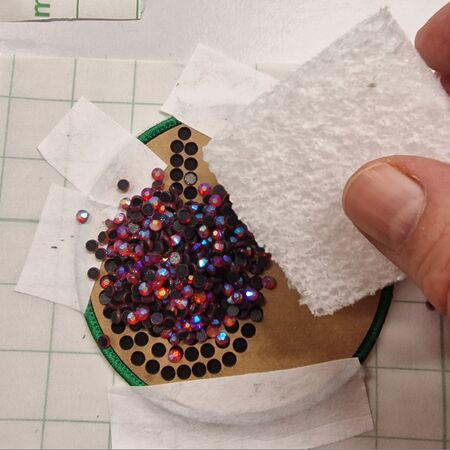
Hotfix-template-3.jpg Brushing stones into the holes. The template is taped to an embroidery patch.
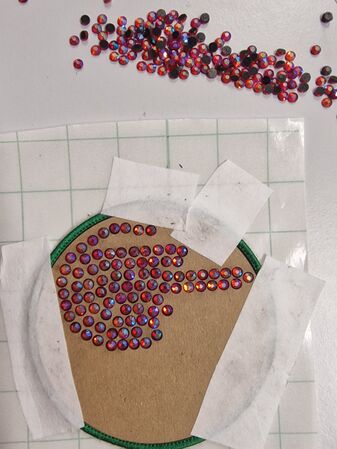
Hotfix-template-2.jpg Brushed stones into the holes. Ready to go in the heat press


Hotfixing
If you use the transfer method, put the textile into the heatpress then do the transfer. Otherwise, carefully move the textile with the filled template.
Hotfix-heatpress-1.jpg In the heatpress
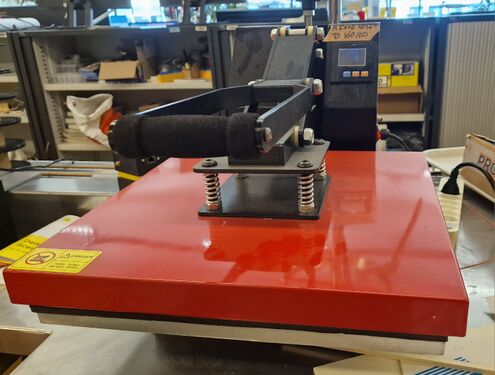
Hotfix-heatpress-2.jpg Heating at 200 degrees


Methods for creating rhinestone templates
We distinguish four main methods for creating templates with inkScape. All fourlead to acceptable designs.
- to create regular distributions, in particular dense ones, use Tiled clones and difference
- To create line-based designs use distribute along path and optionally Ink/Stitch
- To create contour fills or hatch fills, use Ink/Stitch stitch plans and distribute along path
Manual fill
This very basic method can be used for very small fills.
- Draw a circle, e.g. 4mm. Make sure to get the size right, because later scaling with precision will be more difficult.
- Copy/paste the circle and place the circles manually within polygones or along lines
- A quick combined method is to use the tiling method below, create a copy, select a subset, move in place, and delete the ones that do not fit.
Using tiled clones and difference
Step 1: Create a tile of circles
- Create a circle, e.g. 4mm for a 3mm SS16 stone
- Create a large tile of these circles
- (en)
Edit -> Clone -> Create tiled clones - (fr)
Edition -> Cloner -> Créer un pavage de clones - You can change translations in order to create dense designs.
- (en)
Step 2: Subtract tile from polygones
- Combine all the clones (
CTRL-K) - Add a polygon (contour only). In addition, make a copy to be used as outline in embroidery.
- Move the polygon below the tile of circles in the stack,
- Select polygon and tiles
Path -> DifferencePath -> Break a part(CTRL-SHIFT-K)- Remove circles or fragments of circles that you do no want. Copy/Paste and/or move circles.
This method is interesting for creating regular "tatami-like" patterns that can be very dense.


Filling a line with distribute along path
In order to fill a line or a a narrow regular column you can add holes like "perls on a string". Do so use the InkScape "Distribute along path" functionality.
- Draw a circle (e.g. 4mm) and put it on top of the stack somewhere
- (fr:)
Menu Extensions -> Générer à partir du chemin -> Distribuer suivant un chemin - (en:)
Menu Extensions -> Generate from path -> Distribute along path - Select both the line and the circle, configure distances, e.g. 0.25 and go. You may have to move the result. We found that the sizes are ok, but not the global position.
- Move misplaced holes (if there are) and save.
Tip: If you want to fill a small column with one string of stones, use Ink/Stitch's Ink/Stitch -> Tools:Stroke -> Fill to Stroke

Repurpose Ink/Stitch stitch plans and distribute along path
In order to fill a surface, you first will have to generate lines upon which the circles will be positioned. We could use a hatch fill for example, but in the example below we chose to profit from Ink/Stitch's filling algorithms.
Step 1: Create a stitch plan that defines the lines for positioning the circles
- Select the polygon that defines a an area with a hotfix fill.
- Parametrize a contour fill without underlay and without underpath
- Define wide spacing, e.g. at least 4.4mm for 4mm stones
- Change entry and exit points if needed
The next screenshot shows how to create an appropriate contour fill with Ink/Stitch

Below is an example using the french interface.

Step 2: Create a stich plan for the hotfix fills and copy it
- Select just this object and create a stitch plan, copy the stitch plan to another layer,
- Fix the stitch plan, e.g. remove an underpath or adjust distances if needed, smooth first (ctrl-L).

Step 3: Create the fill pattern
- Draw a circle (e.g. 4mm) and put it on top of the stack somewhere
- Menu (fr)
Extensions -> Générer à partir du chemin -> Distribuer suivant un chemin - (en:)
Menu Extensions -> Generate from path -> Distribute along path - Select both the stitch plan and the circle, configure distances, e.g. 0.2 and go. You may have to move the result.
- Move misplaced holes
- You can make sure that minimal distances exists in the Align and Distribute panel, Use
Remove overlapsat the bottom of the panel.
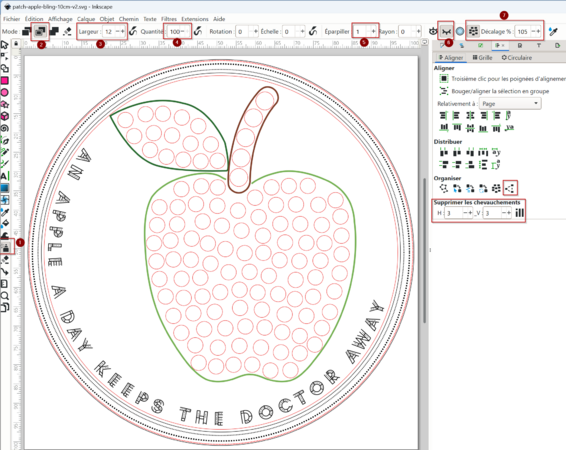
The following screen shot show a pure hotfix design. I recommend stitching a bean stitch for some contours.

Below is an example using a hatch fill made from a tatami embroidery fill (in french)

Step 4: Export
- Hide all the layers, except the generated holes
- Save a copy of the file

- Send the file to the cutter
- If the file includes embroidery, now hide the cutouts, unhide embroidery objects and save the embroidery machine file.
Other examples
Below is another example of contour fill. This time the contour of the apple polygon is done with a line fill.

Yet another contour fill example. As you can see areas toward the middle always would need some tinkering.

Fill hotfix area with the spray
This method is fairly efficient for medium sized objects but you can not achieve densely packed regular patterns
- Create and select a circle
- Remove the fill of the objects you plan to fill with hotfix and keep the stroke. If you plan to stich with a beanstitch, set stroke width to 0.4.
- Then with a steady hand spray the circles using the following parameters (they may need some adjustments)
Spray clones(fr: pulvériser des clones de la selection initiale)Width(fr: largeur): a bit wider than the circle, e.g. for 4mm use 12Quantity(fr: Quantité) : 100Spread(fr: Eparpiller): 1Apply on transparent zones(fr: Appliquer sur les zones transparentes): checkedNo overlap of colors(fr pas de cheveauchement entre couleurs): Checked. (You many turn this off if do not mind touching the borders of underlying objectsNo overlap- distance = 110 (this can be off if the overlap of colors is on).
The spray is a bit sluggish, if it stops spraying, make sure that you are not spraying on top of something, and restart spraying. Below is a spray fill. You can see that it is very irregular.

Once you are done apraying, you can, if you like, optimise distributions. Select all clones in one fill and open the Object -> align and distribute ... panel and equalize with the rearrange and remove overlaps tools as shown in the next screenshot.
- Select one area (without the border, i.e. only the circles)
- In the
Organisation(fr: Organiser), click onSpread(fr: éparpiller). You can do this several times. Alternatively use another algorithm or adjust by hand. - Then at the bottom, define minimal distances: E.g. H=2 and V=2 (click on the little icon to the right)
- Move misaligned circles, add new circles by hand if needed.
- Repeat various steps, i.e. spread, remove overlap, manual move, insertion, deletion.

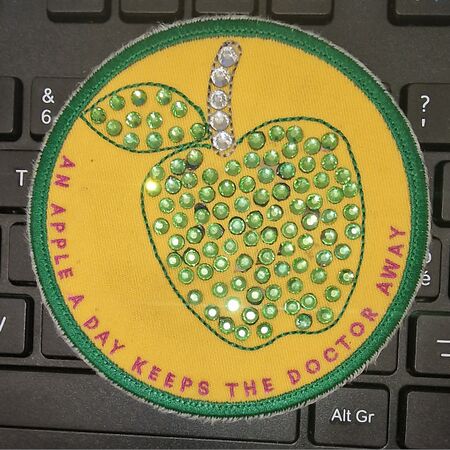
Below is another example, rendered in the heat press.
Using the spray to fill an object with cercles - french interface
Result of a hotstone spray fill (version 1 with some mistakes)

The spray method is relatively simple and fast if dense and/or regular fills are not wanted.
Methods that do not work
Using fill patterns
- Draw a circle, e.g. 4mm. Make sure to get the size right, because later scaling with precision will be more difficult.
- Create a fill pattern from this circle
Object -> Pattern -> Objects to patternObjet -> Motif -> Objets en motif(fr.)- The result will show as fill pattern in the fill panel
- Fill a polygon with the pattern
Object -> Fill and Stroke ... -> Fill; Select the pattern icon(fr) Objet -> Fond et Contour ... -> Fond(fr.) ; Sélectionnez l'icone "motif"
- In the Fill and Stroke panel adjust the distances, e.g. 20% = 0.8mm in our case.
That type of pattern can be cut with a machine that accepts bitmap input. For a typical laser cutter, the file must be exported as high resolution PNG image, then vectorize with center lines.
Pattern along path
This strategy profits from the idea that Ink/Stitch does create lines of stitches for its fills and that these lines can be used to distributed circles to position the stones..
- Select a fill
- Parametrize a tatami or other type of fill without underlay and without underpath
- Define wide spacing, e.g. 5 mm for SS10 (3mm stones), change entry or exit point if needed
- Select just this object and create a stitch plan, copy the stitch plan to another layer, fix if needed
- Draw a circle and copy it (CTRL-C)
- Path -> Path Effects...., select Pattern along Path
- (fr: Chemin -> Effets de chemin ...., choisir motif suivant un chemin
- Pattern source = link (icon to the right) (fr:) Source du motif = Lier chemin contenu dans le presse papiers
- Pattern copies = repeated (fr:) Copies du motif = répété.
- Spacing = 1 (fr: Espacement) = 1)
The result is not brilliant, the circles are distorted, even when lines are smoothed.