Animate CC 2018 - Interactive animated web sites
This article or section is currently under construction
In principle, someone is working on it and there should be a better version in a not so distant future.
If you want to modify this page, please discuss it with the person working on it (see the "history")
(a first version will be completed until April 25 2018).
Introduction
This is a quickly made tutorial about creating a simple menu-based HTML5 Canevas web site with Adobe Animate CC.
The Animate CC environment
As of 2018, Adobe uses the same kind of user environment across most of its products. The Interface of Animate CC did not change much since Flash CS4, i.e. users familiar with Flash Professional versions of the last 10 years will not feel lost.
After launching the software:
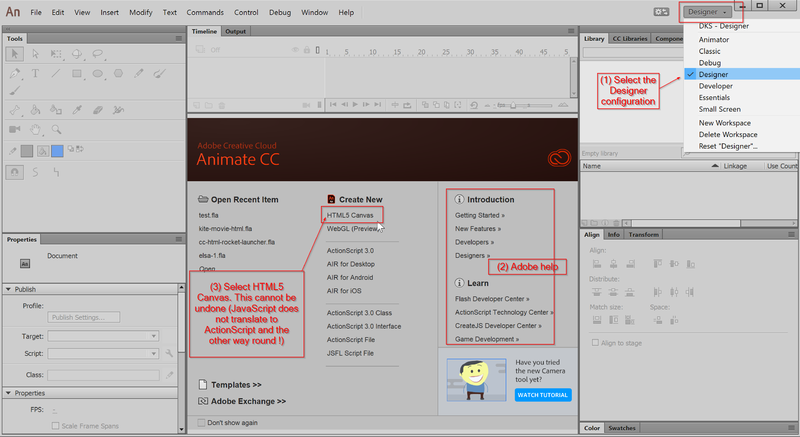
- We suggest putting the interface into
Designerlayout. You can change that later though and even create your own favorite configuration. - Make sure to select
HTML 5 Canvas. If you don't you will have to exit Animate CC and start over again.
after launching the software.
Most important elements
Animate CC will create code for HTML5 Canvas, i.e. will not create code that interacts with the rest of the HTML page. Think of it as "Flash" made with JavaScript code. The "application" we will create will sit inside an HTML page. Depending on its purpose you will have to make it big enough. By default the canvas is set to 550 x 400. We rather suggest using at least 800x600 pixels for creating interactive animations. You can make the size responsive, e.g. have it adapt to the size of a small HTML page. In the Publish settings -> Basic, see Make responsive
