Modular castle kit - Lego compatible
Introduction
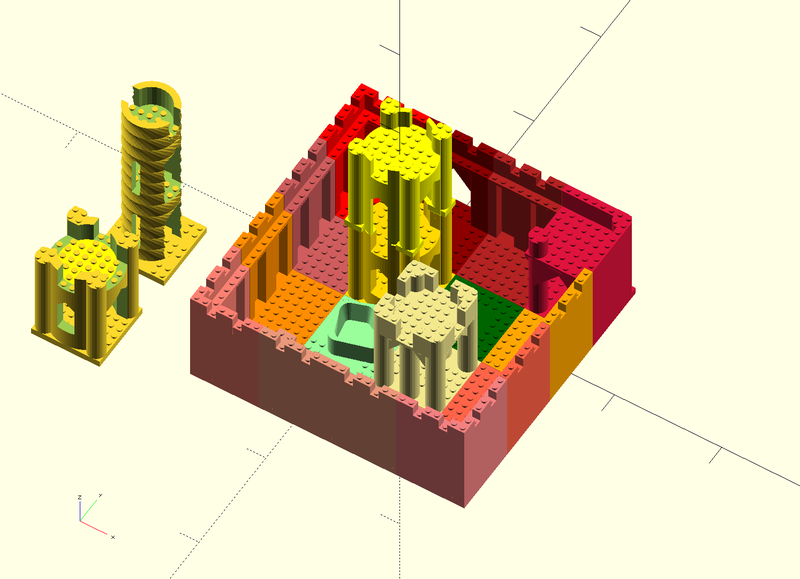
Modular castle kit - Lego-compatible is a an extension to doblo factory to create various playmobile-like Duplo- and Lego-compatible structures. Note: Doblos are neither Legos nor Duplos but are somewhat compatible. You can print just one, several or all components and then play at castle construction, mixing in your own Lego. You can hook together modules like in the picture used to advertise this thing (use simple Lego bricks as connectors) or you can create much wilder "mix with any Lego" structures or you could create a village with different buildings. Some modules are designed to be stacked on top of each other.
Example file:
There are three types of components:
- with easy to print base plate,
- with Lego-compatible base plate (stackable)
- lighter" stackable versions (better vertical fit, faster print)
I printed most, but not all of the modules. However, I then also made some minor changes to most of the printed ones and there still may be a few minor glitches. Please examine a thing before you print it.
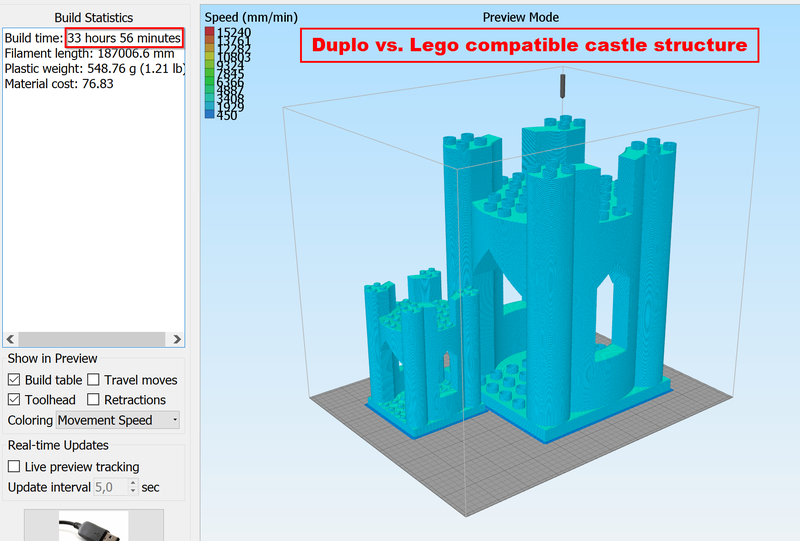
You can either print Lego or Duplo compatibles. The Duplo-compatibles structures take about six times as much to print as you can imagine easily if you look the the following picture
Use
As of version 2.4 of DobloFactory (sept 2019), castle structures are included in the castle-kit subdirectory.
To generate a castle structure
- open file
castle-kit/castle_generation.scad - Verify the parameters: SCALE, LATTICE_TYPE and SHAVE
- uncomment the model you want.
Calibration
Filament 3D printers always have trouble printing lego-compatibles. The result depends on several factors, e.g.
- Model dimensions
- Slicer mistakes and "help"
- Slicer settings
- Printer characteristics
Typically, walls are larger than they should be (in particular if you use Cura who by default makes walls way to fat). In addition the blocks are to wide. This is due to FDM printing logic.
Test:
- Comment the module that is currently being used
- uncomment line
// color ("orange") calibration(); - Print it, making sure that your slicer does not attempt to fatten any walls.
Adjust either code or slicer settings or both:
- You may have to cheat and parametrize doblo factory with wrong dimensions. Copy file
lib/doblo-params.scad, edit and include it indoblo-factory.scadin place of the existing doblo-params* file. - Make very sure that your slicer does not attempt to create fatter walls
- Consider using the SHAVE parameter that can shave some microns from a perfectly good initial model
Most important slicer and printer settings
- 0.25mm layers (else print time becomes really high) or larger
- 20 to 25% infill (less with a stronger plastic)
- Plastic a bit warmer than usual (this could help avoiding print aborts of long prints)
- No support, but using a brim (skirt on the outside only) is a good idea. PLA also can warp.
- Speed: Between 15 and 25% for the first layer, medium to high speed for other layers
To speed things up (< day for a piece):
- 0.3mm layers and 4500 mm/min (75 mm/sec) with a 0.35mm nozzle
- 0.4mm layers with a bigger 0.5mm nozzle, doing just 2x walls (not tested so far, but I did that 9 years ago and the results were fine, castles do not mind having a bit of texture !).
- 0.7 layers with a 0.7 nozzle works fine for Duplo compatibles. However, you will have to cope with the printer complaining about filament flow and/or problems related to the nozzle bumping into obstacles (turn off the fan when printing flat surfaces)
Height warning
- Duplo-compatible towers may be taller than your printer can handle. Make sure to check first (the best way is enter the right information about your printer in your slicer).
- Typical tower height for duplo-compatibles is about 20cm
Time warning
- Duplo-compatible towers take more than 36 hours to print with 2.5mm layers.
- A lego-compatible tower about 6 to 8 hours
Remarks
This page includes links to STL files that are displayed with the experimental Extension:StlHandler:
Make sure that the first layer sticks well, in particular when printing Lego-compatible bases (nibbles underneath). A few things to to:
- Make your first layer 125-150% or something that is equivalent. Most platforms are uneven (0.05mm waves do have an impact) and you will have to compensate for that.
- Add glue to the platform (e.g. Pritt extra strong) or hairspray
- Add 10 degs or more to standard printing temperature, e.g. PLA at 205
- Move the print head closer to the platform, e.g. for my self-calibrating printer I add this to the end of the start code: G1 Z-.05 F3000 or sometimes G1 Z-.1 F3000. On a non calibrating printer, place two sheets of paper on the bed and make sure that the print head can move the upper sheet in every position, but without scratching.
- You could use a raft for the modules that have 2x2 Lego feet, but removing these is a pain...
Speed:
- Go very slowly for the first layer (about 15% of your normal speed).
- Go slowly for the second layer (if your slicer allows)
- Medium speed for the rest, e.g. 50mm/s or faster
Shells and layers:
- 3 shells. However your slicer should allow smaller walls for the Lego walls and nibbles underneath. E.g. you got to tick
Print thin wallsin Cura. Some slicers, e.g. Simplify3D does a fairly good job, with others, e.g. Cura, you will have to fight.... - 4 top layers (3 also can do)
- 3 or 4 bottom layers.
Rafts and support
- In principle, you do not need any form of support structure. Getting non-solvable plastic sticks out of Lego bases is too much of a pain... All important angles are steep enough and don't require wasting plastic inside of the towers.
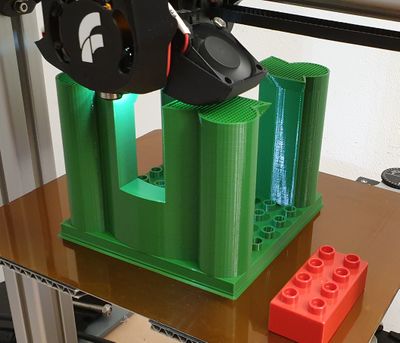
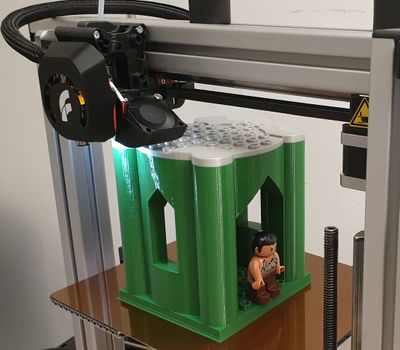
- However, we recommend printing the wizard tower on Lego feet with a raft (see one of the attached pictures). Also, make sure that Z dimension of your printer can handle these small and long towers.
Tune your settings with the included standard 4x2 calibration brick.
One lego-compatible tower takes about 6 hours to print with these settings. I do not recommend printing with lower resolution because wait will be longer. If you print modules with a base plate, you can easily print 4 lego-compatible towers at the same time, in about a day. A duplo compatible tower takes over a day to print.
Final advice
- Avoid printing with warping plastic (e.g. ABS) or PLA that has lots of paint inside (it may warp and not stick)
- If you print pieces with Lego feet or bases, you really must make sure that the first layer sticks well. Best strategies are (a) calibrating the platform (b) 150 layer thickness (c) less than 10mm/s. After the third layer you can go much faster.
- Beginners could start printing towers that have flat bottoms.
History
I am not much of a 3D modeler and do not spend much time on it. My design goal was to create something that helps kid's imagination and constructive mind and that is (fairly) easy to print. The first version (http://www.thingiverse.com/thing:2106) was created in 2012 using a first version of the Doblo Factory code. I used this library to create several other things, e.g. the thesis project management kit published as (thing:33001)
In 2012/13, Daniel M. Taub refactored the Doblo code (great work) and added some extra functionality. In 2013/2015 I made some minor modifications to it, but I never got the hang of github :(
In 2018, I finally decided improving a bit both Doblo Factory and this Lego kit since I noticed that it is still popular....
Download
- V1.x: http://www.thingiverse.com/thing:31284
- V2: https://www.thingiverse.com/thing:2141175 (very likely outdated and blocked as of October 2019, probably because I made some careless use of the word "Lego")
- V2.x: http://tecfa.unige.ch/guides/3dprinting/doblo-factory/ (take the most recent version)


