David Laserscanner: Difference between revisions
m (Created page with '{{Stub}} == Introduction == [http://www.david-laserscanner.com/ David Laserscanner system] is a low cost solution for 3D scanning. The starter kit comes with a webcam, a laser, …') |
mNo edit summary |
||
| Line 3: | Line 3: | ||
[http://www.david-laserscanner.com/ David Laserscanner system] is a low cost solution for 3D scanning. The starter kit comes with a webcam, a laser, calibrated panels and scanning, aligning and fusion software. If you are short on cash, you also can have it for less, e.g. do the calibration panels yourself, get a cheaper laser and reuse a webcam you already got. | [http://www.david-laserscanner.com/ David Laserscanner system] is a low cost solution for 3D scanning. The starter kit comes with a webcam, a laser, calibrated panels and scanning, aligning and fusion software. If you are short on cash, you also can have it for less, e.g. do the calibration panels yourself, get a cheaper laser and reuse a webcam you already got. | ||
Disclaimer: These are just my first notes playing with the system - [[User:Daniel K. Schneider|Daniel K. Schneider]] 17:32, 9 December 2009 (UTC). | |||
== Outline of the procedure == | == Outline of the procedure == | ||
| Line 61: | Line 63: | ||
* Left mouse button: shift left/right plus shift up/down (orthogonal translation with respect to orbit point) | * Left mouse button: shift left/right plus shift up/down (orthogonal translation with respect to orbit point) | ||
* Right mouse button: rotation around x,y,z with respect to orbit center point. | * Right mouse button: rotation around x,y,z with respect to orbit center point. | ||
** up/down: rotation around x | ** roughly up/down: rotation around x and left/right: rotation around y | ||
* Scroll button: scene comes forward/back | * Scroll button: scene comes forward/back | ||
| Line 74: | Line 75: | ||
=== Other keys === | === Other keys === | ||
A: Auto adjust camera | A: Auto adjust camera | ||
C: | C: Coordinate system on/off | ||
E: Show edges on/off | |||
L: Lightning on/off | L: Lightning on/off | ||
S: | N: Normals on/off | ||
T: | P: Polygons on/off | ||
S: Shading mode on/off | |||
T: Texture on/off | |||
Space: White circle (partition) on/off | |||
[[category:3D]] | [[category:3D]] | ||
[[category:hardware]] | [[category:hardware]] | ||
Revision as of 18:32, 9 December 2009
Introduction
David Laserscanner system is a low cost solution for 3D scanning. The starter kit comes with a webcam, a laser, calibrated panels and scanning, aligning and fusion software. If you are short on cash, you also can have it for less, e.g. do the calibration panels yourself, get a cheaper laser and reuse a webcam you already got.
Disclaimer: These are just my first notes playing with the system - Daniel K. Schneider 17:32, 9 December 2009 (UTC).
Outline of the procedure
Roughly speaking this scanning method works in the following way (all with the same software)
(1) Calibrate a webcamera against a 90 degrees angle of two "walls" with black dots. This is very easy once you got the knack of it. Camera picture should nicely show the black dots and you'll have to remove other black stuff with the eraser (e.g. the plastic panel holders).
(2) Scan the object in a position (I think one has to avoid frontal views of rectangular objects)
- Put the object in position
- Project a laser line up and down the object
- Take a snapshot of the object for the texture
- Interpolate (to smooth out and fill in holes)
- Save
(3) Then repeat these steps with other positions (since you only get a scan of what the camera can see). You need at least 3 other positions. Make sure that some areas do overlap.
(4) Go to 3D Shape Fusion screen (next button)
(4a) Load all the scans you want and for each, Remove all unwanted stuff with the polygon selection tool + delete, in particular geometry not belonging to the object or elements that the camera can't see well (these are taken by other scans in principle...)
E.g. in my case I put the plush lion on a piece of Lego and then had to remove it. Like this:
(4b) Put all scans in position either manually by moving and rotating the scans or by clicking on various points on two scans and then defining a rotation.
First results:
You might get something like this if you are unexperienced and do it quickly:
(5) Merge scans / Fuse triangle match: The fusion will smooth the aligned objects and also fill in holes, e.g. even an unscanned bottom.
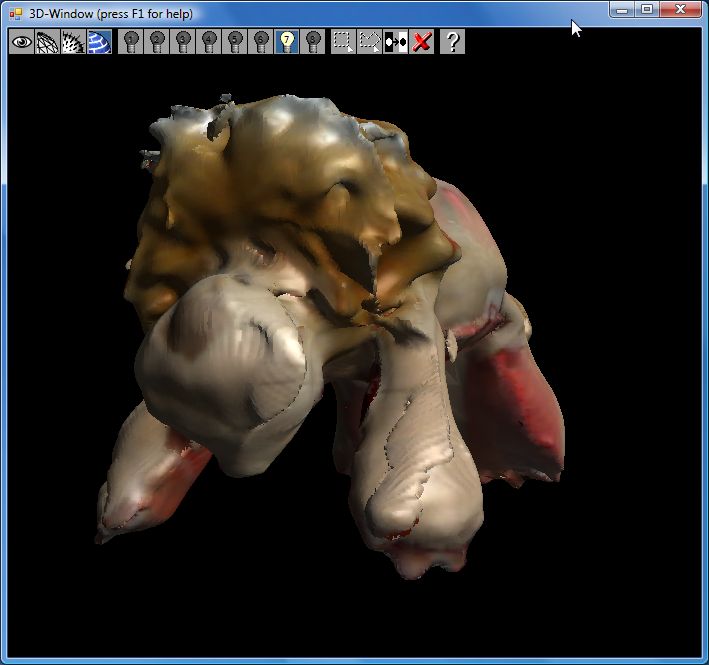
Here is the absolutely hilarious result. Mary Shelley would have been proud of it :)
Note: The "blood" you can see is the result of putting the plush lion on some Lego bricks for easier scanning. The various irregularities can be explained by the fact that in each of the 8 positions the lion adopted another form. Probably a better idea to start scanning a solid object.
This system seems to work best with objects without much brilliance. E.g. I had trouble scanning a plant and a bronze piece of art. Scanning a sort of "round" object is also much easier. E.g. I had sort of decent results scanning a Franz Listz plastic torso. But results depend also a lot on the lighting conditions and the tuning of the webcam:
- Camera must have luminosity off (totally dark, only the laser beam should be visible).
- all automatic settings must be off
- the room should be quite dark.
Tips for tool control (3D Shape Fusion window)
(else hit F1)
Object selection and orbit center point definition
- Left mouse click - select/deselect object (any surface hit)
- Right mouse click - select orbit center point (this is crucial, for starters I suggest selecting the middle of the geometry if you feel lost).
Translation and rotation
- Left mouse button: shift left/right plus shift up/down (orthogonal translation with respect to orbit point)
- Right mouse button: rotation around x,y,z with respect to orbit center point.
- roughly up/down: rotation around x and left/right: rotation around y
- Scroll button: scene comes forward/back
- Left mouse button outside white circle - shift forward/backward towards orbit center point
- Right mouse outside circle: rotation around z (orbit point)
Translation and roation of a single object
- holding down the CTRL button will let you allow to control a single object. Therefore click on an object and then hold down the CTRL button to manipulate just the object (with either left or the right mouse drag as explained above)
Other keys
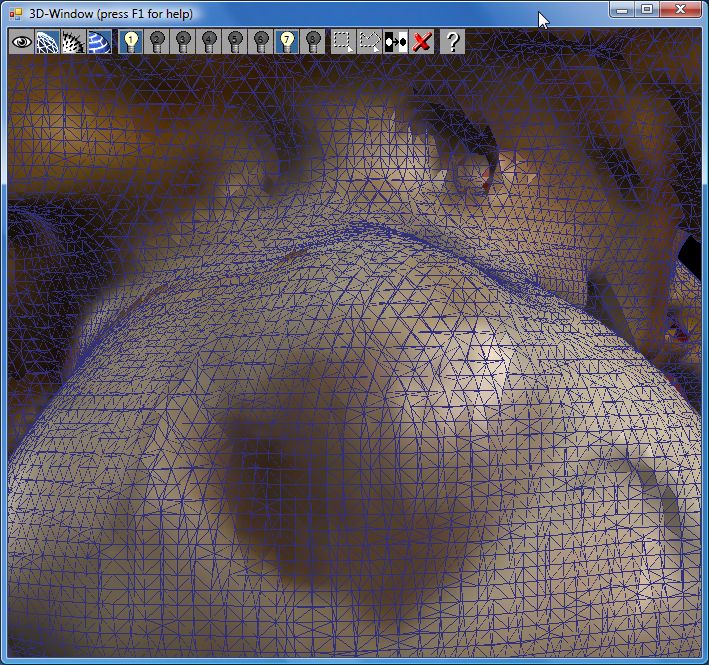
A: Auto adjust camera C: Coordinate system on/off E: Show edges on/off L: Lightning on/off N: Normals on/off P: Polygons on/off S: Shading mode on/off T: Texture on/off Space: White circle (partition) on/off


