Help:COAP-3180/hw2: Difference between revisions
m (mysql) |
mNo edit summary |
||
| Line 93: | Line 93: | ||
To add a new database | To add a new database | ||
* Fill in the '''create new database''' field with a database name and hit return | * Fill in the '''create new database''' field with a database name and hit return | ||
[[image:phpmyadmin-create-database.png|frame|none|Create a new database]] | [[image:phpmyadmin-create-database.png|frame|800px|none|Create a new database]] | ||
To add a new users: | To add a new users: | ||
| Line 99: | Line 99: | ||
* Click on privileges | * Click on privileges | ||
* Click on "add new user" | * Click on "add new user" | ||
[[image:phpmyadmin-add-user.png|frame|none|Create a new database]] | [[image:phpmyadmin-add-user.png|frame|none|800px|Create a new database]] | ||
To give this user full rights on a new database: | To give this user full rights on a new database: | ||
| Line 105: | Line 105: | ||
* Click on privileges | * Click on privileges | ||
* Then edit priviledges of your new user | * Then edit priviledges of your new user | ||
[[image:phpmyadmin-add-user-privilege.png|frame|none|Create a new database]] | * Check most boxes (adminstration is not needed) | ||
[[image:phpmyadmin-add-user-privilege.png|frame|800px|none|Create a new database]] | |||
Revision as of 21:13, 4 November 2007
Homework 2 - COAP 3180 Fall 2 2007
Summary
Continue the activity started in the classroom, i.e.
- Configure a portal in a WAMP setting
- Start configuring the Joomla portalware
Purpose: Gain some familiarity with portalware, (W)AMP software, installation procedures and documentation reading.
Note: You will have to turn in a first version of this homework next Monday (week 3). We then will discuss what you should add to this mini-project.
Homework tasks
- Think about a web application implemented with a content management system
- Examples: A portal for an association or an institution
- Select an server environment to work with, i.e. choose between:
- WOS on a memory stick. Easiest to install. Runs from any directory, including a memory stick
- A WAMP of your choice on your personal laptop. We suggest to download and install WampServer. You get some extra functionality compared to WOS, but it will not run on a memory stick. You will have to bring your laptop to class !
- Installation with a web hosting service. Best solution if you plan to profit from this course to start working on a web application that you actually might use.
- Write down functionalities you'd like to have
- Implement the ones that you can manage. Try to consult as much documentation as you can.
- Configure the start page of the portal and add 2-3 users.
- We will discuss the result during our next meeting and then discuss how to add some more features to your portal
Tip: Examine a few portals on the web in your domain of interest in order to get some better ideas for your project.
Dates
- This homework is due at start of the week 3 Monday lesson
- The instructor will ask you to present the purpose of your portal and to discuss its current state
- Part II of this homework will then require you to add some extra information / modules
Evaluation
- Task completion (all required elements are present)
- Quality of your configuration.
- Note: I will evaluate after part II of this homework
Tip: Quality is essentially related to the idea that your applications are useful to a given range of users.
Tips about the LAMP/WAMP environment
These tips are not complete. The purpose of this homework is to encourage you to explore the world of LAMP/WAMP portalware installation and configuration. That includes learning how to deal with documentation and on-line help
WOS installation
The instructor will provide you with 2 versions of a WOS distribution. All you need to do is to unzip one of these.
Medium distribution
wos-dist.zip - 28 MB
- includes several web applications
- May take up to an hour to unzip on a memory stick
- Unzipped Size: about 182 MB (!) on a stick and 123 MB on a hard disk
Small distribution
wos-joomla.zip - 17MB
- only includes the Joomla portal and the MySQL database server administration tool (phpmyadmin)
- Unzips in about 20 minutes depending on your model
- Unzipped Size: about 105MB on a memory stick and 77 MB on hard disk
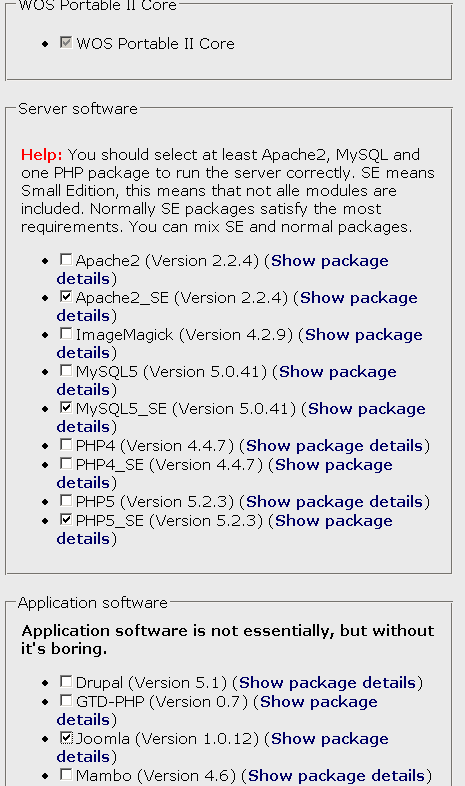
You also can "mix" your own if you wish to try. Go to: http://www.chsoftware.net/en/useware/wos/wos.htm?action=download
Make sur that you get:
- An Apache webserver
- A MySQL database server
- A PhP
- Joomla
- Phpmyadmin
You always can add additional packages from the wos mixer web site
IMPORTANT:
- Install the WOS mix first on your hard disk. Installing it on a memory stick may create write errors. You then can copy to a memory stick (this may take an hour or more, since memory sticks take a long time to copy a few thousands of little files).
- If you nstalled an application package (TYPO3, Joomla, WordPress etc.), the administration login always will be "admin" with the password "password"!
Here is a recent screendump of the WOS mixer:
Start/stop WOS
- Go to the WOS directory and double-click on the wos icon
- Look at your web site by opening the http://localhost/ URL
- To stop WOS, click the "END" button in the WOS window. Don't forget this, otherwise the WOS configuration may end up in a bad state.
MySQL administration
- To use Joomla with WOS there is nothing to do
- But you still should try to create a new database and a new user
- Typically, each portal you install needs a database and a user that has full access rights to this database.
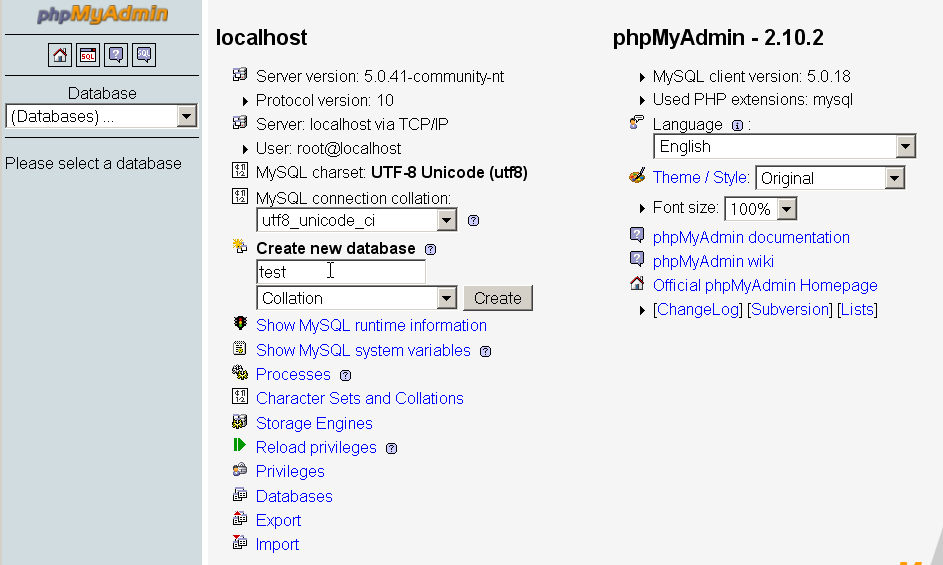
To add a new database
- Fill in the create new database field with a database name and hit return
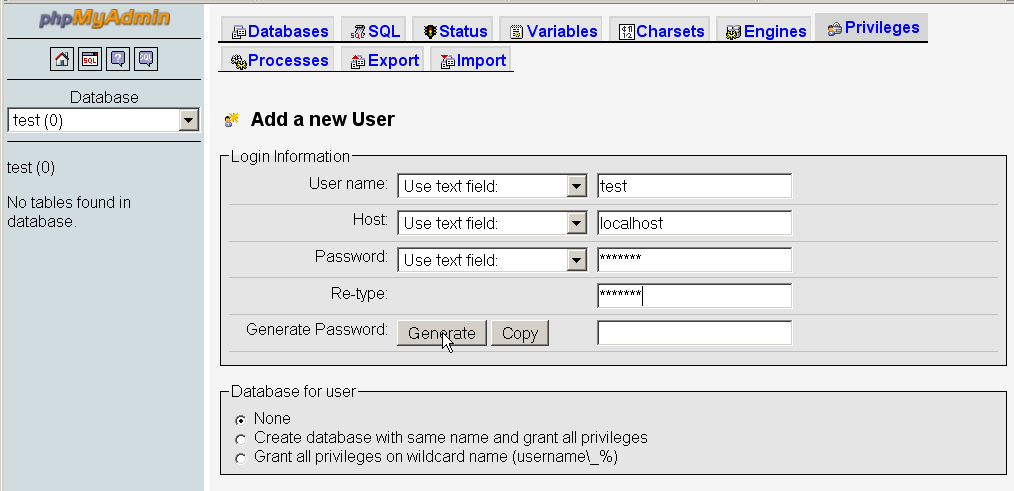
To add a new users:
- Click on the home button
- Click on privileges
- Click on "add new user"
To give this user full rights on a new database:
- Click on the home button
- Click on privileges
- Then edit priviledges of your new user
- Check most boxes (adminstration is not needed)
Installation with a provider or a WAMP system
(WOS users are not concerned by this)
When installing it for the first time, Joomla! will ask for the following information:
- The name of your MySQL database - (this may be pre-set on some hosted server set-ups)
- The name of the MySQL host - This is usually called "localhost" if you are installing on a PC or a local server
- A MySQL username - This may have been allocated by your server provider - a local MySQL installation generally has the default administrator username set as "root".
- A MySQL password - This may have been allocated by your server provider - a local MySQL installation generally has the default administrator password set to a blank field, unless this was manually changed during installation of the database server.
Then, read the installation manual (see below)
Help: the Joomla website includes various forms of help, e.g.
- Installation Manual (for those who wish to install Joomla with a hosting service).
- The big PDF Manual
Joomla configuration
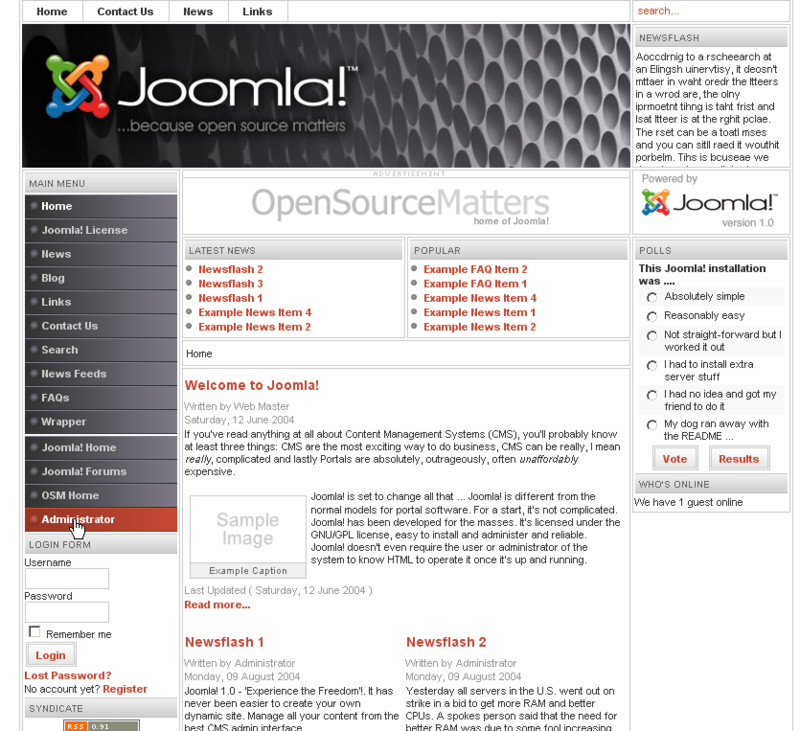
When you first start up Joomla 1.x, you will see something like this:
Click on the administrator menu button and log in. Default username and password in a WOS installation are admin and password.
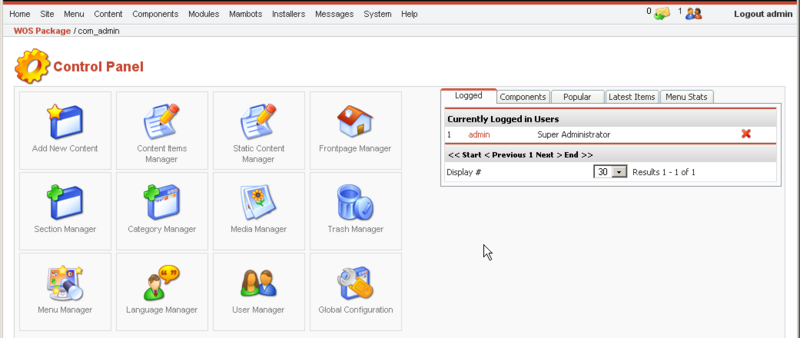
When you enter the administration tool, you can configure the portal through menus. The most important items are available through the control panel
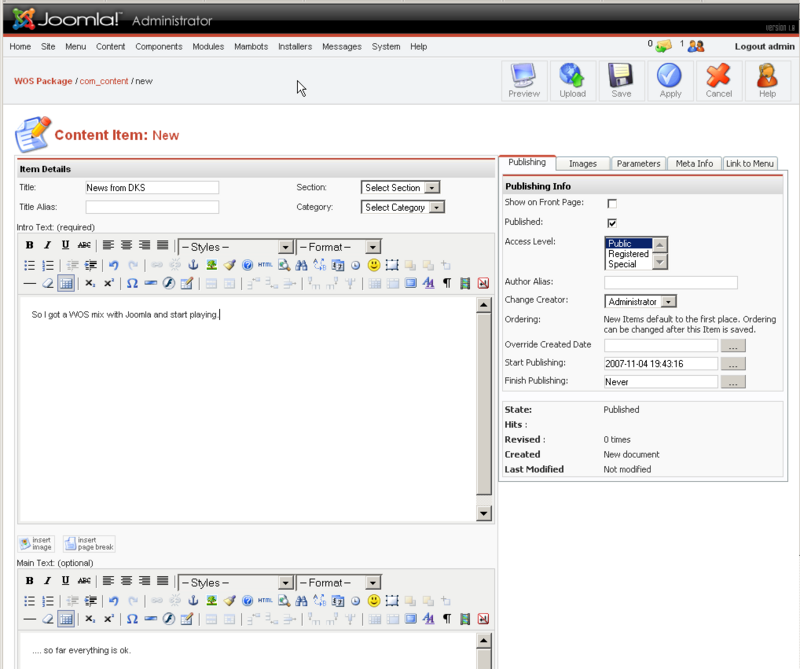
You then can for example add contents. On the top right you have a help button that will provide some contextual help. If you want to save changes hit the Apply button.
After you added some contents, you then can place it with the Content Iterms Manager that will appear. This window also allows you to publish/unpublish articles.
You now should add 2-3 users and try to understand user roles. Use another browser (i.e. IE if your normal browser is Firefox) to play with the other user at the same time.
Final tips
- Make a backup copy of all the files to your harddisk !
Links
- Main links in this wiki
- Examples
