Adobe Flash Builder: Difference between revisions
m (Text replacement - "<pageby nominor="false" comments="false"/>" to "<!-- <pageby nominor="false" comments="false"/> -->") |
|||
| Line 1: | Line 1: | ||
{{Incomplete}} | {{Incomplete}} | ||
<pageby nominor="false" comments="false"/> | <!-- <pageby nominor="false" comments="false"/> --> | ||
This page is part of the [[Flex tutorials]]. | This page is part of the [[Flex tutorials]]. | ||
Latest revision as of 18:38, 22 August 2016
This page is part of the Flex tutorials.
Introduction
Update: This product is now called Flash Builder. As of April 2010 the current version is Flash Builder 4
Adobe Flex Builder is an Integrated Development Environment (IDE) for developing flex/actionscript/flash applications.
See also:
- Adobe Flex (for a short presentation of the Flex development framework)
- MXML (for a short introduction to MXML, the Flex XML language)
- ActionScript 3 tutorials (entry point for pure AS tutorials),
- Flash ActionScript 3 overview (the Flash AS equivalent)
- Flex tutorials list for more flex-related tutorials.
The various freely available online documentation for Flex Builder is very good (much better than for the CS3 tool I believe). Therefore we won't (for the moment) make this a real tutorial.
Using Flex Builder 3
- Step 1 - Create a new Project.
Like most IDEs you can't just edit a little file, but you need to define a new project: File->New; Flex project.
- We called our project "testing"
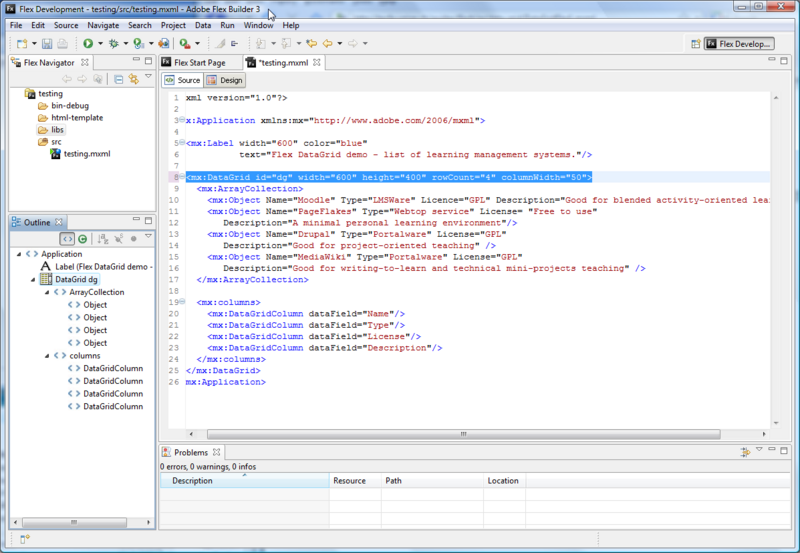
- Step 2 alternative A - Add some *.mxml code.
Just copy and paste some code. E.g. get some code from the Flex datagrid component tutorial.
You should see something like this, i.e. the MXML code in "source mode".
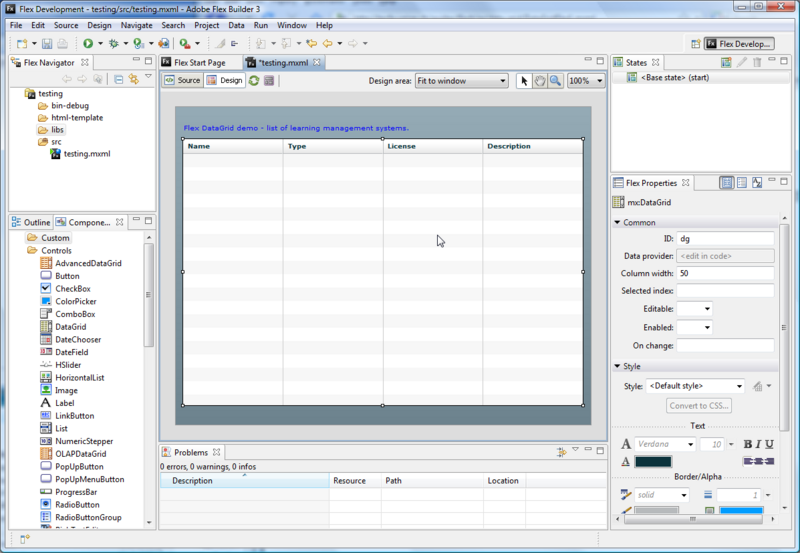
- Step 2 alternative B - Drag a component to the stage
Click on the Design TAB and drag the component to the stage (.e.g. a label on top and a datagrid below) You should see a components selector to the left and something like in the picture below (after editing the code in "source mode").
- As you can see, Flex has more components than Flash 3 / AS3
- Step 3 - Run / Compile
- Click on the green arrow or use the "run" menu
Of course it's more complicated than that, but these 3 steps summarize the procedure :)
Structure an application in the Flex builder
Flex builder allows to create a project structure according to your needs and to edit both MXML and AS files. I also communicates with the Flex (MXML) compiler that generates the *.swf and *.html.
Diagrams error (with plantuml command): /bin/bash: line 1: plantuml: command not found
An application project includes typically three kinds of files (as in the figure above): source code, multimedia assets and libraries. These will go into the src directory structure. When you create a new project, Flex builder will create the following directories (this setup can be changed somewhat):
- - Flex_project_name (generated by the builder when you create a new project)
- - bin-debug (contains the files created by the MXML compiler)
- - html-template (the template used to generate the final html file, you can change this.)
- - libs (this folder contains .swc files, i.e. code libraries)
- - src (this folder will include your source code)
- - Flex_project_name.mxml (default main application file
- - A directory structure for the rest of your project files that you should plan yourself.
Links
Documentation
- Flex Builder
- Using Adobe Flex Builder 3 (HTML LiveDocs) - PDF version (233 pages).
- Flex
- Adobe Flex 3 Help. See Adobe Flex and Flash and AS3 links - documentation for more links
- Explore Adobe's Flex DevNet for other tutorials.
Software
- Flex Builder
- You can test drive it for 30 days (download)
- Educators and students can get a serial number for free use by filling in a form
- Alternatives
- Flashdevelop. Free and open source tool that provides syntax support and an interface with the Flex compilers.
- Tutorials
- Flex Part 01: Structure by T. Scot Clausing on January 15, 2008 (Explains how to set up a MVC Directory structure, you also may look at all his Flex-related postings.

