Stitch Era - interface features for working with a design: Difference between revisions
m (using an external editor) |
m (using an external editor) |
||
| Line 3: | Line 3: | ||
{{under construction}} | {{under construction}} | ||
== | == Introduction == | ||
Stitch Era has a fairly complex interface. The purpose of this piece is to introduce some features and tricks that you will need for many different tasks. We will not explain how to draw and manipulate vectors, stitch sections, etc. but introduce some tools that will help understanding what you have got on your screen. | |||
== Zooming == | |||
When working with vectors and embroidery objects you sometimes have to zoom in a lot. | When working with vectors and embroidery objects you sometimes have to zoom in a lot. | ||
| Line 22: | Line 22: | ||
F6 / CTRL-F6 are the only two shortcuts I know by heart for now. I really use it all the time... | F6 / CTRL-F6 are the only two shortcuts I know by heart for now. I really use it all the time... | ||
== Hiding and locking objects == | |||
We mentioned this before, but often you have to turn on/off either view of vector objects or view of stitch objects. If both are on, you may get confused. As rule: Always turn of vector object view when you edit stitch sections ! | We mentioned this before, but often you have to turn on/off either view of vector objects or view of stitch objects. If both are on, you may get confused. As rule: Always turn of vector object view when you edit stitch sections ! | ||
| Line 36: | Line 36: | ||
'''Warning''': Before you freak out if at some point you can't see vectors or embroidery stitch sections or parts ... have a look at these tools. They will tell what should show/not show and what is locked/unlocked ! | '''Warning''': Before you freak out if at some point you can't see vectors or embroidery stitch sections or parts ... have a look at these tools. They will tell what should show/not show and what is locked/unlocked ! | ||
== Rendering of stitch sections == | |||
You can look at stitches in two fundamentally different ways. | You can look at stitches in two fundamentally different ways. | ||
* Normal view, i.e. some sort representation that shows stitches as dots and lines | * Normal view, i.e. some sort representation that shows stitches as dots and lines | ||
* 3D view, a kind of simulation that shows how the printed object would look. This simulation is not very good, but nevertheless helpful. | * 3D view, a kind of simulation that shows how the printed object would look. This simulation is not very good, but nevertheless helpful. | ||
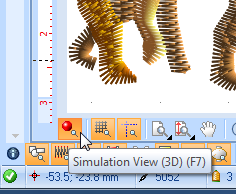
To turn 3D view on/off, use the little red ball in the lower left or hit '''F7'' | |||
[[image:stitch-era-simulation-view-button.png|frame|none|3D view on/off button]] | |||
Revision as of 15:43, 16 June 2011
This article or section is currently under construction
In principle, someone is working on it and there should be a better version in a not so distant future.
If you want to modify this page, please discuss it with the person working on it (see the "history")
Introduction
Stitch Era has a fairly complex interface. The purpose of this piece is to introduce some features and tricks that you will need for many different tasks. We will not explain how to draw and manipulate vectors, stitch sections, etc. but introduce some tools that will help understanding what you have got on your screen.
Zooming
When working with vectors and embroidery objects you sometimes have to zoom in a lot.
- To zoom into the right spot,
- Click on the zoom area tool bottom or hit F6,
- then move the cursor over the center of area you plan to work with.
- then rotate the mouse wheel.
- Another zooming-in option is to use the pull-out menu of the same zoom area button and select the zoom level. Professional seem to work at 600%...
- To see the whole picture again: Click on the button next to it (Maximize Total) or hit CTRL-F6
- Finally, if zoomed, you need to see other parts of your design, you can use the hand to "drag" the workspace around (nothing will be changed in the drawings just your view of it ...)
F6 / CTRL-F6 are the only two shortcuts I know by heart for now. I really use it all the time...
Hiding and locking objects
We mentioned this before, but often you have to turn on/off either view of vector objects or view of stitch objects. If both are on, you may get confused. As rule: Always turn of vector object view when you edit stitch sections !
- Use the little buttons on top right to turn on (green) or off (red)
Now these buttons are also pull-down menus that give you additional hide/unhide and lock/unlock facilities.
You may for example hide stitch sections. This is very convenient when you work with objects that print on top of each other. See the screen capture below.
Warning: Before you freak out if at some point you can't see vectors or embroidery stitch sections or parts ... have a look at these tools. They will tell what should show/not show and what is locked/unlocked !
Rendering of stitch sections
You can look at stitches in two fundamentally different ways.
- Normal view, i.e. some sort representation that shows stitches as dots and lines
- 3D view, a kind of simulation that shows how the printed object would look. This simulation is not very good, but nevertheless helpful.
To turn 3D view on/off, use the little red ball in the lower left or hit 'F7


