InkStitch - stitch files from Noun Project icons
Using icons from the Noun Project
Let's create an embroidery from single complex SVG paths as they can be found on the noun project. This website has a huge amount of SVB icon collections that can be combined into nice embroidery.
Get some artwork
- Get four birds from the noun project (become a member if you want to download and reuse objects without having to use them under their free CC license. I got 4 birds from the Bird collection by Liv Iko
- Pick the ones you like.
- Download as SVG !!
- If you are a non-member, remove the text with the CC license, i.e. edit each file in Inkscape, but make sure to cite the author properly if you publish your embroidery.
If you are unable to get this done, you can start from our own example, but do not publish it on any website without giving credit to Liv Iko.
Embroidery with area fills - birds example
After downloading some icons from the noun project:
- File -> Import; Select the four SVG files
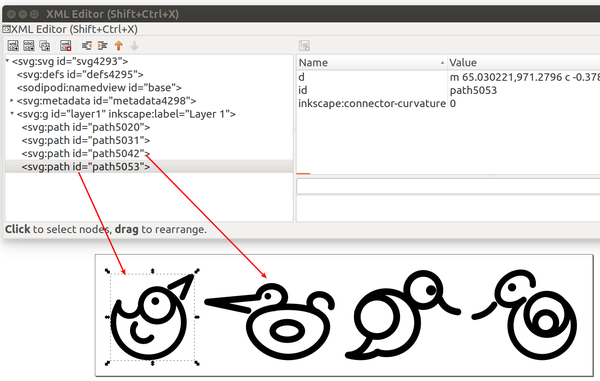
After arranging the four drawings, you could see something like this:

- If you do not download from the Noun Project, you can our example above. Make sure to click twice in order to get the SVG file until you see just the drawing, then "save the page as". Also, do not forget to credit the original author.
- Save the file, e.g. call it birds0.svg
Arrange position and size
- Arrange the designs, e.g., on a bottom line and also adjust the size so that the embroidery will fit into you hoop.
- Each of the birds is now a single SVG path. These are not yet suitable for a nice colorful embroidery. We will have to break them apart
- Save the file, e.g. call it birds1.svg
- Again, you could directly take the SVG file directly from this wiki.
Break path apart
- Select all
- Menu: Path -> Break Apart
You now should see four piles of black objects.

Again, you could download the SVG source
Colorize
The result are layered "path" objects composed of fills that you now should color a bit. For each object, including the large black backgrounds:
- Add a fill color
- Remove the stroke color
- The easiest way of doing this is to open the "Fill and Strokes" panel, then the XML Editor (Shift+Control+X)
- click on each path object of the XML editor and then define a fill color and remove the stroke color if there is one.
Simplify
Currently we have up to three layers, which is too much for stitching.
- We now use the difference operator to subtract an element from the element underneath.
- Copy a smaller area that sits on top of a larger area and move it outside the graphic
- Shift-select the larger (black) area and shift-select the area that sits on top
- Menu: Path->Difference or hit CTRL+-
- Now you should see a hole in the bigger black area. Move the the save smaller area in place. Increase its size a bit so that it overlaps.
You also may want to cleanup a bit. In Inkscape, click on File->Clean up document
Create two layers
This is not strictly needed, but you should take the reflex of creating layers into which you put different types of drawing objects.
- Create a new layer and call it Areas
- Select all colored areas and move into a new layer
- Rename the layer with the black "lines" in "Lines"
Parametrize
In your SVG drawings you only got so-called fills. The plugin will translate these into areas filled with linear motif. You can change the angle and the Stitch length for now.
- Hide the Layer called Lines
- Open Extensions->Embroidery->Params. This will now allow to parametrize the Stitch Areas
- Add STOP and TRIM if you got a multi-needle machine
- Augment stitch density a bit (e.g. 0.2mm per line / 5 lines per mm)
- Change other default values or just Apply and Quit (we did not change anything else here)
- Do the same for the Lines layer, show it and hide the Area layer
Create the embroidery
- Firstly verify that you do not use too many different colors (e.g. make sure that all the orange is the same)
- Put all the same colors next to each other if you have single thread machine (use the Objects tool for that)
- Stitch the larger objects first, i.e. move them down in the layer.
- Move the "lines" layer up. Lines usually are stitched last.
- Show all layers you plan to embroider, e.g. here we got "Lines" and "Areas"
- Menu extensions -> embroidery -> embroider
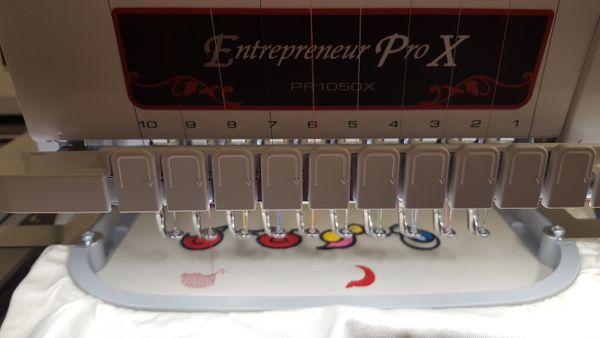
- Select the machine format. As of May 2018, the PES file was incorrect, we did use DST format which Brother also can stitch. In version 1.8.1 (May 28) this has been fixed.
The simulated result now looks like this (DST gets the colors wrong, but that's not a real issue since most people do not have a sixteen needle machine with the good threads already installed).
As you can see there are also some extra objects that should not be stitched, but they won't hurt. The lines can be easily removed.
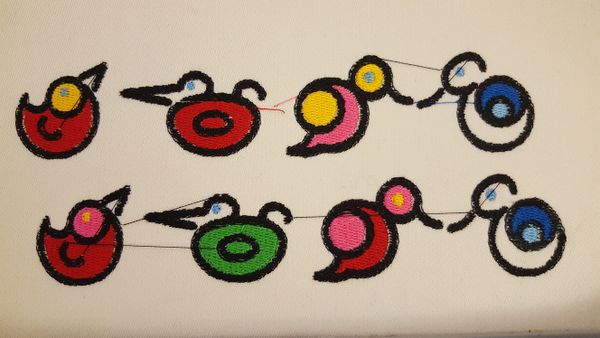
Stitched result
The stitched result is not optional and for two reasons
- The black borders are made with fill stitches (as opposed to satin stitches). We also should have used an underlay.
- We did use neither pull compensation nor overlap
- The tension on the black thread wasn't optimal or the is some dirt somewhere in the path or the needle needs to be replaced or cleaned ...
The second version (PES) uses an underlay for the fills.
Create borders with satin stitches
In order to get satin stitches we need to replace fat strokes by two lines. In principle the following should work, see the explanations in the InkStitch - satin columns tutorial.
- Go back to an early version of the SVG file (after breaking apart)
- Select the object for which you need satin borders
- Make two copies
- Create an inset and outset: Menu Path -> Inset and Menu Path -> Outset
- Make the stroke smaller
- Remove the fill
- Make sure that each of the two object has the same number of points, remove the superfluous ones.
- Fix direction lines
- etc.
Since this is design is not too original, we only did this with the first bird. The example is described in Adding direction lines. Feel free to improve your InkScape node editing skills by completing the other birds.
Finally, if you are interesting in combining fills with satin stitches, also have a look at the InkStitch - from satin columns to fills with satin borders tutorial or go through the next example
Fills with satin borders - love example
Before trying out this example, make sure to understand the procedures explained in InkStitch - satin columns. E.g. you should be able to:
- do some SVG node surgery (delete nodes, break path at nodes)
- add rungs.
Download, adjust and arrange objects
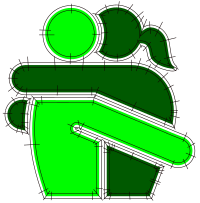
Let us stitch a love logo by Louis Prado
- Download the file as SVG. Remember that you must credit the author and duplicate the license if you are not a member of the Nounproject.
- Open in InkScap un ungroup
- Adjust the size (CTRL-A and set the size in the menu bar)
- Change color of fills
- Add stroke colors
- Create a layer called "love"
- Put all the objects there

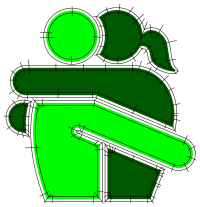
This file is now stitchable as is, i.e. would stitch normal zigzag borders as you can see in the SVG above.
Adding satin borders
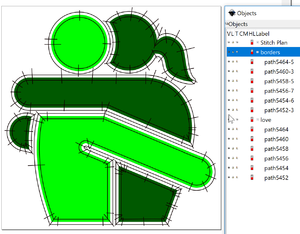
In order to get satin borders we duplicate all the objects, then remove the fill and translate the strokes to path
Copy/paste-in-place all the objects to a new layer
- Create a new layer and call it borders
- Select all the objects and copy
- Select this new borders layer
- Paste the copied objects in place (Menu Edit->Paste_In_Place or CTRL-ALT-V)
Create rails for satin stitches
- Hide the layer called love
- Select all the objects (and keep them selected for the next steps)
- Remove the fills
- (Optional) Change the size of the stroke, e.g. to 3mm (we just left it as is)
- Menu Path -> Stroke to Path. You now have new path objects that include just the former strokes
- Remove the fills
- Add a stroke (and make it small, e.g. 0.1mm)
Now you got rails for the satin stitches. Since the inner and outer paths of some objects will have different number of points you should either make them even or (better) add rungs. Otherwise you will get the following kind of error message error: satin column: object path5452-3 has two paths with an unequal number of points (34 and 29)
Select the woman's head and add rungs
- Click on the Edit nodes tool
- Hit P
- Hold SHIFT key and add rungs: click + click
Adjust directions
- Make sure that directions are shown (Menu Edit -> Preferences -> Tools -> Nodes; Tick "always show outline" and "show directions...".
- Click on either the inner or outer path
- Menu Path -> Reverse.
Make cuts so that each subpath starts in the same place.
- Lock for two nodes that are opposite from each other
- Select both (hold down the SHIFT key)
Break path at selected nodes
Test the embroidery
- Select the head
- Menu Extensions -> Ink/Stitch -> English -> Params
- Open the Satin column Tab and tick.
- Optionally, add some underlay.
Do this for all the border path objects. You must
- change direction lines for all (or most path) !
- Make points even (simplify first) or add rungs.
- Break the two sub paths so that they will start in the same place.
Expand fills
- open the fills layer
- Add some expansion (e.g. 0.5mm) or maybe pull the designs horizontally (I'd have to test print this)
Result
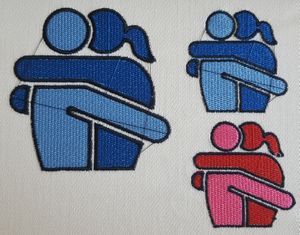
The stitched outcome looks OK for both the 8cm Version 4 (described above) and a quickly reduced to 5cm version 5. A first version 5 (upper right in the picture below) had too much expand, the fill is larger than the border. The second version (lower right, in red) is OK, except that I had to change the lower bobbin and forgot to properly backtrack. Also the tissue is not optimal for stitching. I use cheap woven napkins and a self-adhesive stabilizer.
Copyright modification
Contents of this page including pictures and SVG files are also available under the GNU Free Documentation License and the Attribution 4.0 International (CC BY 4.0) license.
The Inkstitch project can use any element (text fragments, SVG files, pictures) for the project's official docs without giving attribution (just copy and paste).
