InkStitch - manual stitches
Introduction
Most professional embroidery does at some point require some manual stitches, i.e. either embroidery objects ("stitch packs") that are not generated from parametrized design objects, or manual changes to generated "stitch packs".
Creating manual stitches
Creating manual stitches is easy, but requires adding lock stitches.
As explained in the official Manual Stitch page, the initial procedure is simple:
- Create a path. Line style or width are irrelevant.
- Open Extensions > Ink/Stitch > Params.
- Enable Manual stitch placement. The other settings will not have any effect in manual stitch mode.
Stitches are defined by the nodes that define a line. If you drawing has curve controls, these will not have any effect.
If your nodes are too far or too close, you will get stitches that are either too far or too close. A good way to visualize distances is to use the Grid
Edit -> Preferences -> Grids. Grid units = mm, set distances to 1 x 1 mm for example- turning the grid on (Menu
View-> Page Grid
Tip: To turn a smooth form, e.g. the spiral in Inkscape into a series of small connected lines, do the following
- convert the shape to a path if necessary (Path -> Object to Path)
Extensions -> Modify Path -> Flatten Beziers. E.g. select a distance of 2. We used that setting to convert the spiral in the figure below.
You may have to remove, add or move some points using the node editor (F2)

Important tip: The example show here does not have any lock stitches. You will have to add them if you don't want your embroidery to fall apart quickly.
Using generated stitches as design element
A more often used strategy is to generate a stitch plan defining all the stitches of your embroidery. In principle, InkStitch will create one stitchable object for design objects grouped together by color blocks. Let us call these objects stitchable objects. These objects can be edited since they are just composed of a long line defined by nodes. So far, we think that the best method of doing this is the following:
Step 1: Generate a stitchable object
- Create a design in InkScape
- e.g. create an InkScape Spiral, make it dotted ("Dotted spiral" in the figure below)
- Parametrize in Ink/Stitch
- e.g. in this example, we parametrize the spiral as a simple line (not that we have choice ...)
- Select just this object, then generate the Stitch Plan using
Extensions -> Ink/Stitch -> Embroider....
The result, a single path, will be placed in the Stitch Plan Layer, inside a color block group.
Step 2: Copy and edit the stitchable object
- The generated object in the Stitch plan layer, e.g. path1523 is a defined as manual path (like above), except that it also contains lock stitches in the beginning and at the end.
- Move this object into your embroidery layer ("Generated spiral" in the fig. below).
- Now edit the object, i.e. hit F2 and move, delete, add nodes. In the case shown in the figure below, we just moved nodes at the end and in the beginning. Make sure that when you move lock stitches (several stitches that go back and forth) together, this is a little bit tricky ....

Fixing generated stitches
The principle is the same as above, except that we do not copy stitch packs. Let us assume that you are perfectly happy with your design objects, but not with the generated stitches. In that case, we suggest generating the whole stitch packs and edit these in place, i.e. in the Stitch Plan directory.
The following example shows a modified small eye in the lower left. We displaced a underlay stitch and also elongated the eye a bit.
Important: In order to generate the modified embroidery file, keep the Stitch Plan unhidden and keep hidden the other layers (do not regenerate) ! You can produce a stitch either by clicking on embroidery... again, or through "Save as".
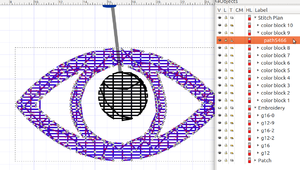
Œil, generated in the Stitch Plan
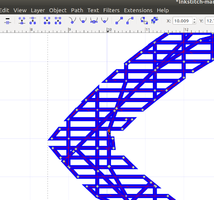
Eye, being modified (dragging an underlay segment)
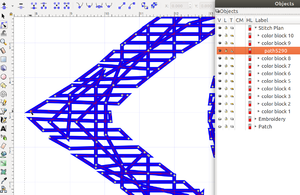
Œil, after modifications.


Simulation before
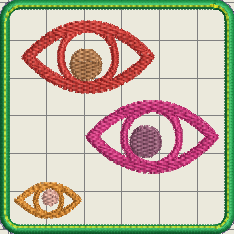
Simulation after (left corner of lower left small eye)

