Embroider on socks
The problem
In order to embroider on a sock, one has to make sure that the machine only stitches on one side of the sock.
This is a very easy task if your machine has a small free arm, like all professional and semi-professional machines do. Sometimes, small frames must be bought as an add-on, e.g. the "Compact Frame Set" with the "E" Frame holder for the PR1050X.


In this article we will present three methods. The first only requires safety pins, the 2nd "sock tool" method and the 3rd "sock frame" a 3D printer or a laser cutter. The "sock frame" method also requires measuring out a hoop and changing parameters of a 3D model.
Embroider a sock using safety pins
The safety pin method is fairly easy to achieve, but it takes some time. The basic principle is to pin a roughly 5cm x 5cm area to the stabilizer for embroidery and pull the tissue that would sit underneath away.
1) Hoop a strong stabilizer, preferably polyester. Tighten well (but without breaking the frame).
2) Optional: If your frame is thin or broken, it is advisable to fix the stabilizer with safety pins to the frame (c.f. the pictures below where you can see that the stabilizer has been attached at the top and bottom).
3) Attach the top of the sock like in the next picture below
- Start by fixing the 2 corners of the side you want to embroider, so the top/front of the sock.
- Then fix, the 2 opposite corners as in the following image.
- In both cases, pull the sock slightly, but not too much, otherwise the embroidery will fold.

4) Pull the surface to be embroidered in three directrions and fix with safety pins.
- It is important that the fabric to be embroidered is flat and that nothing gets stuck underneath (otherwise you won't be able to fit in your sock). Pinch the fabric about halfway between the bottom (c.f. point 3) and the top and pull well !
- To attach this pulled embroidery surface you need at least three pins: One at the bottom, one on the left and one on the right. The following picture already shows a pin on the left and on the right. On the left you can see the head of a pin that was used in step 3.

Below is a decent hooping result (our second attempt). We can see the surface to be embroidered. Underneath there is only the stabilizer.

5) Stitch ....
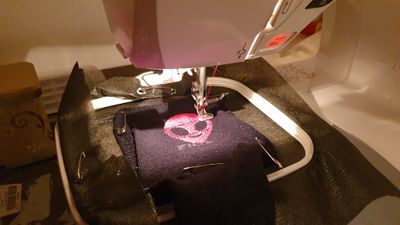
Alien in progress
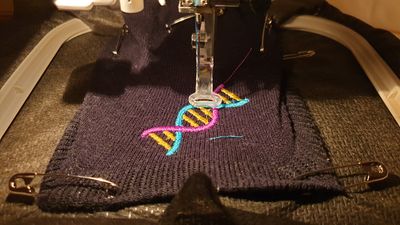
DNA in progress


Advice:
- Obviously it is difficult to do precision embroidery. So you have to either work with airy designs or overlap embroidery surfaces to avoid gaps. Also avoid too tight satin stitches (2mm is a minimum).
- Do not exceed a surface of 5x4cm for an adult sock.

Results:
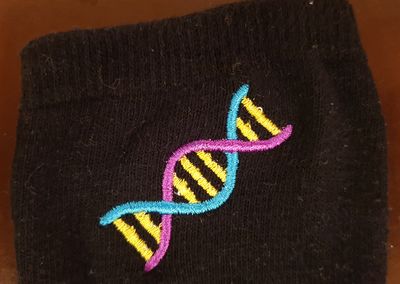
DNA embroidered on an elastic cotton sock

Alien embroidered on an elastic cotton sock


Embroider with the sock tool
The sock tool does basically the same thing as the safety pin method. It clears a 50 x 50 mm space for embroidery. Instead of pulling various bits of the sock with safety pins, you wrap the sock around the tool as we shall explain: